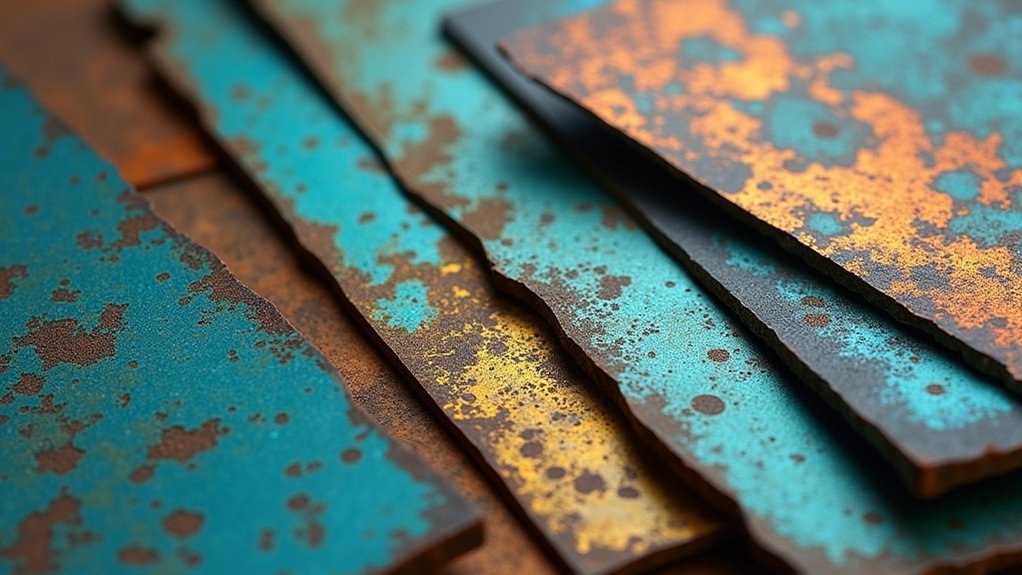
You can create stunning oxidized metal finishes using ten professional techniques that transform ordinary surfaces into artistic masterpieces. Start with liver of sulfur chemical patination for deep color development, or try heat-induced oxidation with torches for vibrant gradient effects. Ferric chloride etching produces dramatic textural surfaces, while electrolytic patination offers precise control through electrical current. Salt water immersion creates authentic weathered looks, and citric acid treatments provide subtle darkening. Multi-stage layering techniques reveal endless creative possibilities.
Chemical Patination Using Liver of Sulfur Solutions
When you’re ready to achieve rich, dark patinas on copper and sterling silver, liver of sulfur solutions offer one of the most reliable chemical patination methods available.
You’ll find liquid liver of sulfur provides better longevity than rock forms, making it ideal for consistent results.
Mix one capful with four cups of water to create your oxidizing solution, producing a characteristic yellow mixture. Soak your metal pieces for 2 to 2.5 minutes, watching as colors develop gradually.
Mix one capful with four cups of water, then soak metal pieces for 2 to 2.5 minutes while monitoring color development.
Hot water accelerates the reaction, helping you achieve uniform coverage more quickly.
Remember that copper darkens faster than sterling silver, so monitor progress carefully to reach your desired final appearance.
Immediately rinse with clear water to halt the oxidation process and preserve your finish.
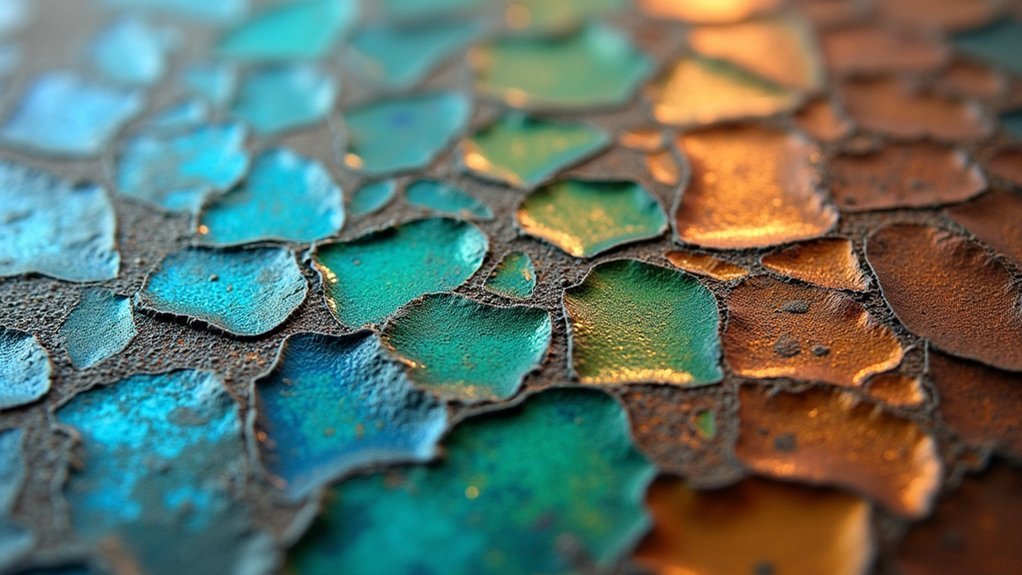
Heat-Induced Oxidation for Gradient Color Effects
If you’re looking to create stunning gradient color effects that shift seamlessly from brilliant blues to deep purples and rich browns, heat-induced oxidation offers an artistic approach that transforms ordinary metal surfaces into vibrant masterpieces.
This controlled oxidation technique relies on precise temperature and duration control to achieve spectacular results.
Here’s how you’ll master these oxidizing techniques:
- Select appropriate metals – Copper and titanium produce the most vibrant gradient color effects.
- Apply heat gradually – Use a torch or oven while carefully monitoring temperature progression.
- Control timing – Higher temperatures create intense hues and faster oxidation rates.
- Seal your work – Post-oxidation treatments with clear coats preserve colors and enhance durability.
You’ll need patience and practice to perfect this technique’s stunning visual impact.
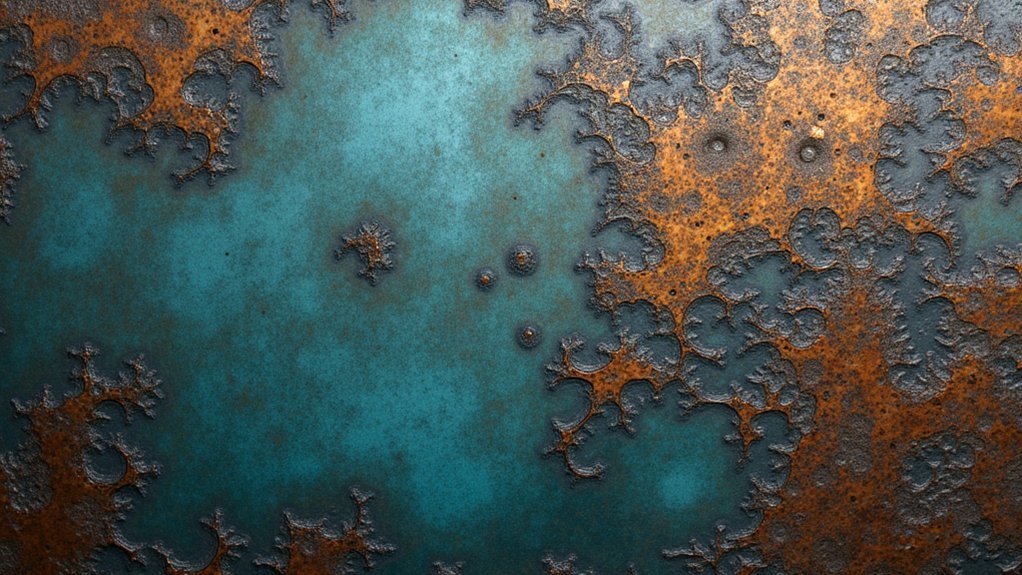
Ferric Chloride Etching for Deep Textural Finishes
While heat-induced oxidation creates beautiful color gradients through temperature control, ferric chloride etching takes a different approach by chemically removing metal to produce dramatic textural depth.
This powerful chemical process dissolves copper and brass surfaces, creating intricate patterns that you can’t achieve through traditional oxidizing methods.
You’ll need to immerse your metal in the ferric chloride solution for anywhere from minutes to hours, depending on your desired depth.
Always wear protective gear since this etching agent is highly corrosive.
After creating your deep textural finishes, you can enhance the results by applying patina or additional oxidizing treatments.
The solution’s reusable, but filter out metal particles between uses to maintain effectiveness for future projects.
Electrolytic Patination Through Controlled Current Application
Although traditional oxidation methods require patience and unpredictable timing, electrolytic patination puts you in complete control through precisely applied electrical current.
This controlled oxidation technique transforms copper, brass, and silver surfaces in minutes rather than hours.
Proper surface preparation guarantees ideal results, while electrical manipulation delivers your desired patina with remarkable consistency.
You’ll achieve precise control over color and texture by adjusting:
- Current intensity levels
- Voltage settings
- Exposure duration
- Electrolytic solution concentration
Always wear protective gear including gloves and goggles during the process.
Maintain adequate ventilation to avoid chemical fume exposure.
The predictable reactions of metals under electrical conditions make electrolytic patination invaluable for professional finishing work, delivering stunning aesthetic results every time.
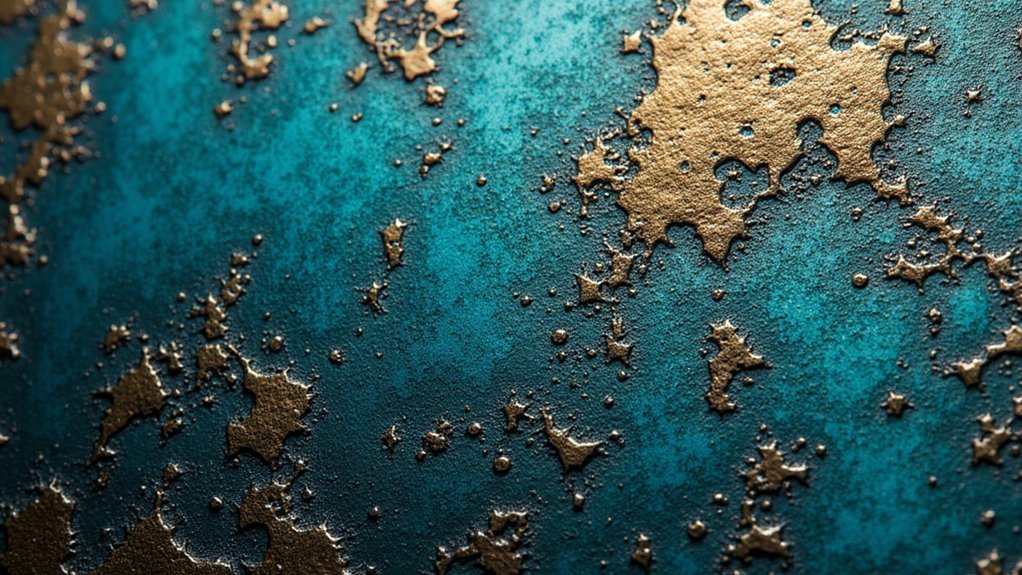
Salt Water Immersion Techniques for Authentic Weathering
When you’re seeking authentic weathered finishes that replicate decades of coastal exposure, salt water immersion delivers remarkable results in just 24-48 hours. This technique accelerates oxidation by submerging your metal piece in seawater or a table salt solution, promoting natural patina formation.
| Metal Type | Salt Concentration | Immersion Time | Expected Result | Post-Treatment |
|---|---|---|---|---|
| Copper | Medium (5-10%) | 24-36 hours | Rich green patina | Fresh water rinse |
| Bronze | High (10-15%) | 36-48 hours | Deep brown weathered finish | Thorough drying |
| Steel | Low (3-5%) | 12-24 hours | Rustic orange patina | Anti-corrosion spray |
| Brass | Medium (7-12%) | 24-48 hours | Mottled green-brown | Protective coating |
| Iron | Variable (5-12%) | 18-36 hours | Authentic rust patina | Stabilizing treatment |
Always rinse thoroughly with fresh water after immersion to prevent excessive corrosion and maintain finish stability.
Ammonia Vapor Chamber Oxidation Methods
You’ll need a non-reactive glass or plastic container to create your ammonia vapor chamber, ensuring the metal pieces don’t touch the liquid ammonia directly.
Control the vapor concentration by adjusting the amount of ammonia and the chamber’s seal tightness to achieve your desired oxidation depth.
Monitor the exposure time carefully, as the process can range from 30 minutes to several hours depending on how dark you want the finish.
Chamber Setup Requirements
Before you begin the ammonia vapor oxidation process, proper chamber setup forms the foundation for achieving consistent, high-quality patina development results.
Your chamber construction requires careful attention to these essential elements:
- Container Selection: Use a sealed container that accommodates both your metal piece and an open ammonia vessel, guaranteeing vapor circulation without direct contact.
- Ventilation Requirements: Work in well-ventilated areas or use fume hoods since ammonia fumes pose health risks.
- Environmental Controls: Maintain ideal temperature and humidity at 70°F (21°C) and 50% humidity levels for consistent reactions.
- Surface Preparation: Place metal pieces on a non-reactive surface like glass or plastic to prevent unwanted chemical interactions with container materials.
This foundation guarantees your oxidation process produces professional-quality results every time.
Vapor Exposure Controls
Once your chamber is properly configured, controlling vapor exposure becomes critical for achieving your desired oxidation results.
You’ll need to maintain ideal conditions by regulating both controlled temperature and humidity levels throughout the process. Monitor your ammonia vapor concentration carefully – too little won’t create adequate oxidation, while excessive exposure can produce uneven results.
Essential safety precautions include wearing protective gloves and goggles while checking progress.
Never open the chamber without proper ventilation, as ammonia fumes are hazardous when inhaled.
Exposure time varies markedly based on your desired finish depth. Light patina develops within hours, while deeper oxidation requires several days.
Check periodically to verify you’re achieving uniform patina across all metal surfaces, adjusting conditions as needed.
Brush-On Patina Solutions for Precise Control
When working with metal surfaces that demand intricate detail and artistic precision, brush-on patina solutions offer unmatched control over your finishing process.
These versatile solutions enable precise application through multiple tools and techniques, giving you complete creative freedom.
To maximize your results with brush-on patina solutions:
- Surface Preparation – Verify your metal is clean and free from oils or contaminants for ideal adhesion.
- Tool Selection – Choose between brushes, sponges, or cloths based on your desired texture.
- Drying Considerations – Allow 30 minutes to several hours depending on environmental conditions.
- Layering Techniques – Experiment with multiple coats to create unique visual effects and complex color blending.
This methodical approach transforms ordinary metal into extraordinary artistic pieces.
Torch Flame Oxidation for Artistic Color Variations
Fire becomes your artistic brush when using torch flame oxidation to create stunning color variations on metal surfaces.
You’ll achieve consistent results by starting with a clean metal surface, as contaminants cause unpredictable patterns. Your propane or butane torch provides precise control over the oxidation process, letting you craft intricate designs and gradients.
Temperature and distance are essential factors you must master. Lower temperatures produce yellows and blues, while higher heat generates purples and reds. You can manipulate these variables to achieve your desired aesthetic effects.
Always wear protective gear and work in well-ventilated areas when using torch flame oxidation. The open flame and potential fumes pose serious safety risks.
With proper precautions and technique, you’ll transform ordinary metal into vibrant artistic pieces.
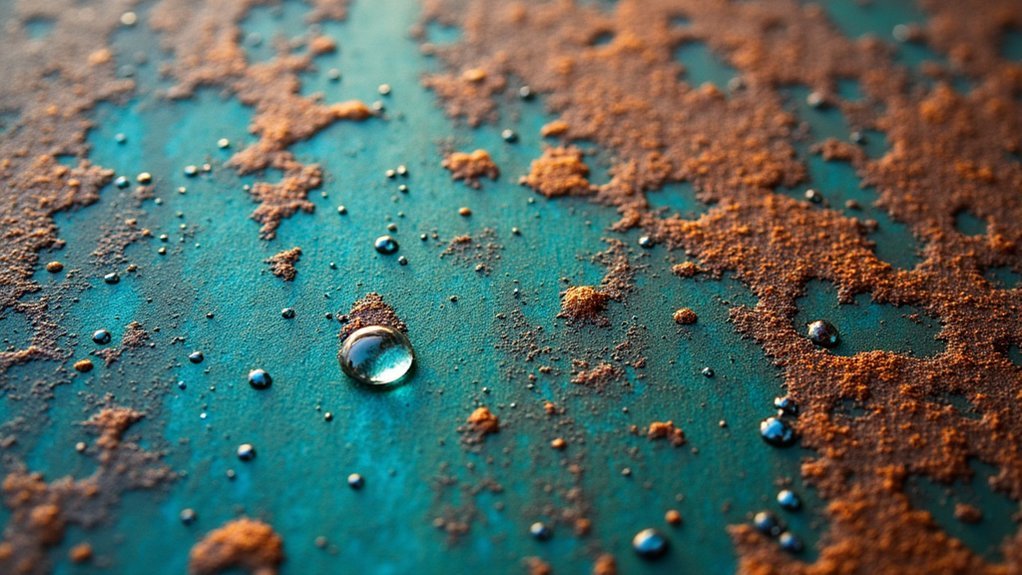
Citric Acid Treatment for Subtle Surface Darkening
While torch flames create dramatic color transformations, citric acid offers you a gentler approach to metal oxidation with beautifully controlled results.
This technique excels at achieving subtle surface darkening on copper and brass by enhancing their natural patina through mild oxidation.
Here’s your step-by-step process:
- Prepare the solution – Mix 1-2 tablespoons of citric acid per cup of warm water
- Immerse your metal – Submerge pieces for 5-15 minutes, checking regularly
- Rinse thoroughly – Use clean water to halt the oxidation process immediately
- Protect the surface – Apply clear sealant or wax to maintain your desired appearance
You’ll love how this method gives you precise control over darkening levels while preventing over-oxidation that damages your work.
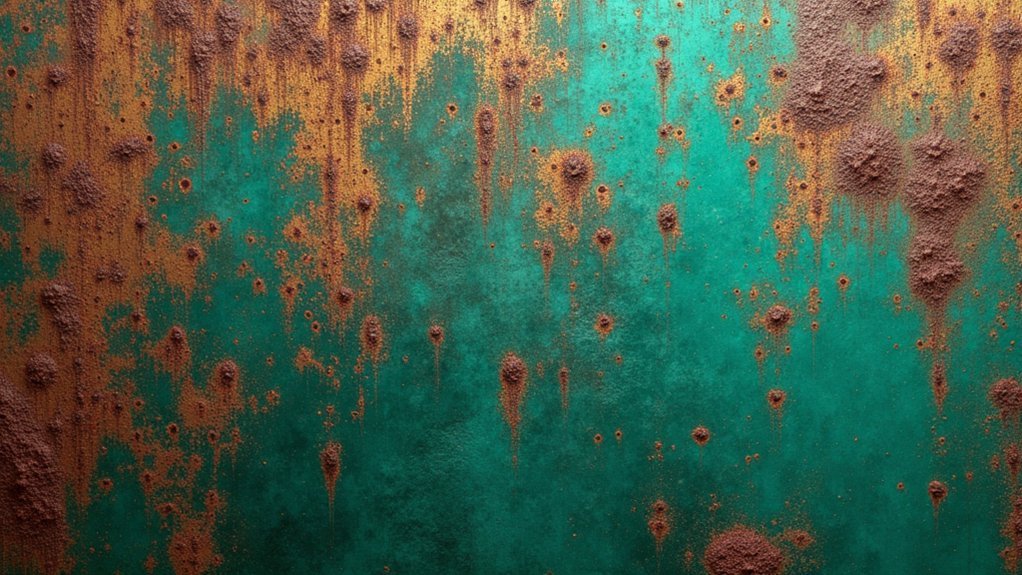
Multi-Stage Layering Techniques for Complex Patinas
Once you’ve mastered single-treatment oxidation methods, multi-stage layering opens up a world of complex patina possibilities that rival nature’s most stunning metal transformations. Multi-stage layering techniques involve applying successive coats of different oxidizing agents, creating depth and unique aesthetic appeal impossible with single applications.
| Layer | Oxidizing Agent | Drying Time |
|---|---|---|
| Base | Copper sulfate | 2-4 hours |
| Middle | Ferric chloride | 1-3 hours |
| Top | Salt solution | 30-60 minutes |
You’ll achieve consistent results by maintaining proper drying times between applications. Environmental factors like humidity and temperature directly affect your patina’s development, so control these conditions carefully. Experiment with timing—applying solutions while previous coats remain wet creates integrated effects, while fully dried layers produce distinct color separation.
Frequently Asked Questions
How to Tell if a Metal Is Oxidized?
You’ll notice color changes, rough textures, or patina formation on the surface. Perform a scratch test to reveal different colors beneath. Look for flaking, peeling, or matte finishes that indicate oxide layer development.
What Are the Different Types of Metal Finishing?
You can choose from anodizing for aluminum corrosion resistance, electroplating for metal layer deposits, powder coating for durable dry finishes, oxidation for protective layers, and brushing or polishing for textured surfaces.
How Does a Metal Part Look Like if It Gets Oxidized?
You’ll notice oxidized metal develops distinctive color changes – copper turns deep blue-green while silver becomes dark gray or black. The surface texture varies from smooth, polished finishes to rough, rugged patinas.
Can Oxidized Metal Be Restored?
You can restore oxidized metal by removing the existing oxide layer through abrasive polishing or chemical treatments, then reapplying oxidizing agents to recreate the patina effect you’re seeking.
In Summary
You’ve now got nine powerful oxidation techniques at your disposal to transform ordinary metal into stunning artistic pieces. Don’t limit yourself to just one method—experiment with combining techniques for truly unique results. Remember, each metal responds differently, so you’ll need to adjust timing and chemical concentrations accordingly. Start with small test pieces before committing to larger projects, and always prioritize safety when working with chemicals and heat.


Leave a Reply