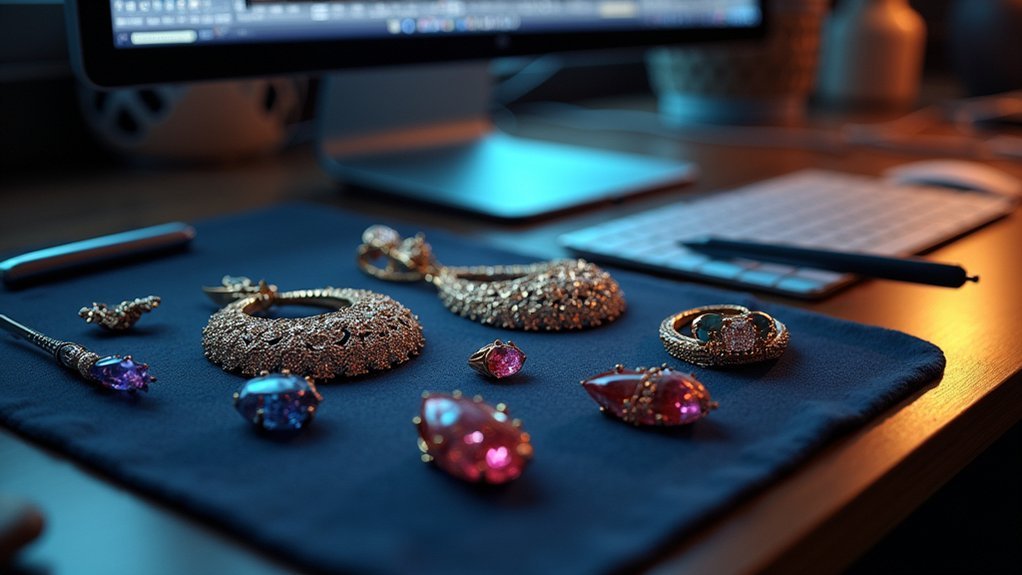
You’ll need professional 3D CAD software like Rhino or 3Design, plus a high-performance computer with dedicated graphics and 16GB RAM minimum. Start with parametric modeling to create precise ring structures, then master gemstone setting techniques for prongs and bezels. Scale your models 7-10% larger to compensate for metal shrinkage during casting. Always create prototypes to test fit and structural integrity before final production. Continue exploring these advanced techniques to transform your creative concepts into stunning jewelry pieces.
Understanding 3D CAD Software for Jewelry Design
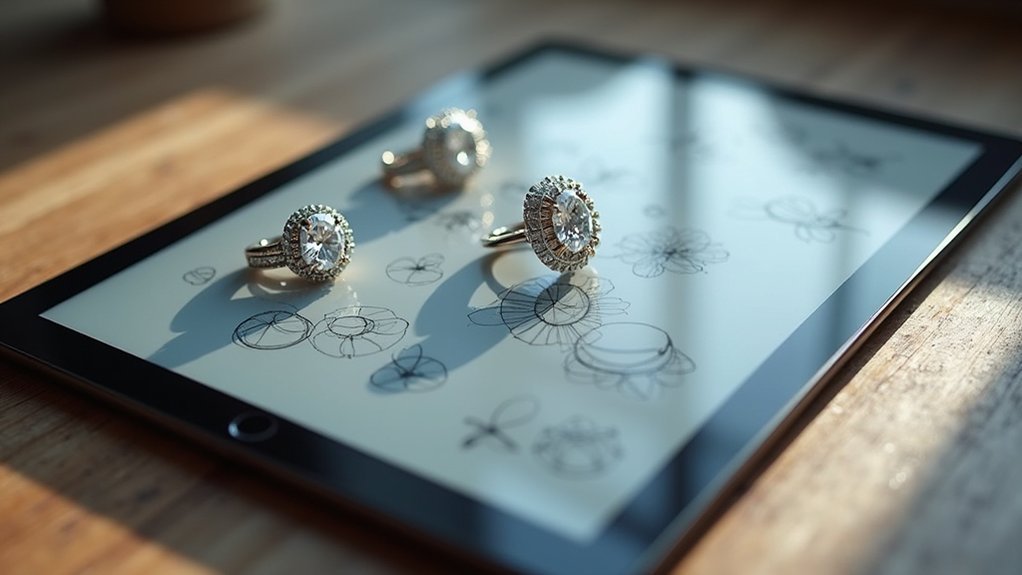
When you’re ready to transform your jewelry concepts into precise digital models, 3D CAD software becomes your most powerful design tool. This technology enables you to create intricate designs with exact dimensional control that traditional methods simply can’t match.
Your CAD journey starts with 2D sketches that evolve into thorough 3D visualizations. Popular software options like 3Design, Jewelry CAD Dream, and Rhino offer specialized features including parametric modeling, advanced texturing, and automatic gemstone insertion capabilities.
Modern CAD software transforms simple 2D sketches into sophisticated 3D jewelry models with parametric precision and automated gemstone placement capabilities.
You’ll greatly reduce both production time and costs through minimized material waste and rapid prototyping via 3D printing.
The most effective jewelry design software should provide intuitive sculpting tools and complex geometrical design capabilities, streamlining your entire creative process from concept to final digital model.
Essential Tools and Equipment for Custom Jewelry Creation
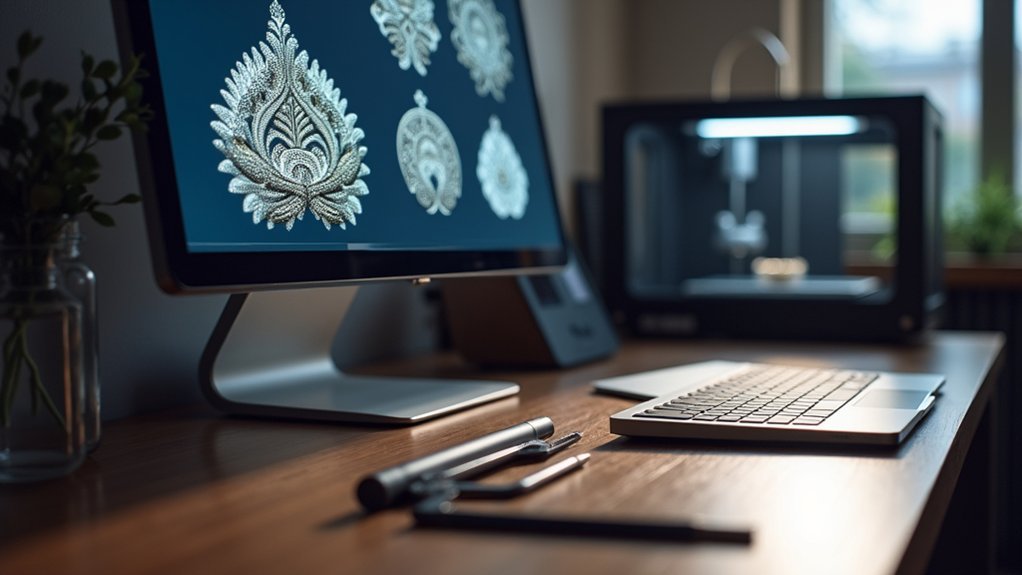
Building on your digital design foundation, you’ll need specific hardware and equipment to transform your CAD creations into physical jewelry pieces.
First, invest in a powerful computer with a high-performance graphics card to run advanced CAD software like Rhino, 3Design, or Jewelry CAD Dream efficiently. These programs require substantial processing power for complex 3D rendering and parametric modeling.
Next, acquire quality 3D printers, particularly stereolithography (SLA) or resin-based models, which produce highly accurate prototypes and wax models from your digital designs.
For precision wax work, consider adding a CNC machine for detailed carving and shaping.
Finally, you’ll need traditional jewelry equipment including casting tools, polishing equipment, and stone-setting instruments to complete your custom pieces with professional finishes.
Setting Up Your Digital Workspace for CAD Modeling
You’ll need a powerful computer with at least 16GB of RAM and a high-performance graphics card to handle complex 3D jewelry modeling effectively.
Your software choice matters considerably, with industry standards like Rhino, 3Design, or Jewelry CAD Dream offering different strengths for various design approaches.
Setting up dual monitors will boost your productivity by letting you keep your design software open while accessing tutorials and reference materials simultaneously.
Hardware Requirements Overview
Since CAD jewelry modeling demands significant computational power, investing in the right hardware foundation will determine whether your design workflow flows smoothly or frustrates you with lag and crashes.
For effective CAD modeling, you’ll need at least an Intel i5 or AMD Ryzen 5 processor paired with 16GB of RAM. Jewelry designers should prioritize a dedicated graphics card like the NVIDIA GeForce GTX 1660 to handle complex 3D rendering.
Install your software on a solid-state drive for faster loading times and improved performance. A high-resolution monitor (minimum 1920×1080) guarantees you’ll see intricate details clearly.
Consider adding a 3D mouse for enhanced navigation control. Meeting these hardware requirements establishes a stable foundation that supports professional jewelry design work efficiently.
Software Selection Guide
With your hardware foundation in place, choosing the right CAD software becomes your next priority for creating professional jewelry designs.
This software selection guide will help you navigate options that match your skill level and budget as a jewelry designer.
Professional-grade CAD software like 3Design ($6,950) and MatrixGold ($7,000) offer extensive toolsets for experienced designers.
Mid-range solutions such as Rhinoceros ($995) provide excellent NURBS-based modeling capabilities for complex geometrics.
Budget-conscious beginners can start with free platforms like TinkerCAD to learn basic modeling concepts.
Consider these key factors when selecting your software:
- Learning curve complexity and interface intuitiveness
- Budget constraints versus required feature sets
- Professional workflow integration capabilities
- Community support and available learning resources
Basic CAD Techniques for Jewelry Geometry
Mastering fundamental CAD techniques forms the foundation of successful jewelry design, where precision meets creativity in digital form.
You’ll start with solid modelers that enable parametric design, allowing you to create precise geometric shapes and modify your CAD model effortlessly. These tools excel at structural elements like bands and settings.
For intricate designs requiring organic shapes and detailed textures, you’ll leverage polygonal modelers with advanced sculpting capabilities. Understanding fit to intended geometry guarantees your jewelry pieces translate accurately from digital to physical forms.
Utilize .STL files for 3D printing to maintain precision during production shifts.
Master automatic gemstone insertion and advanced sculpting features to streamline your workflow while creating complex designs efficiently.
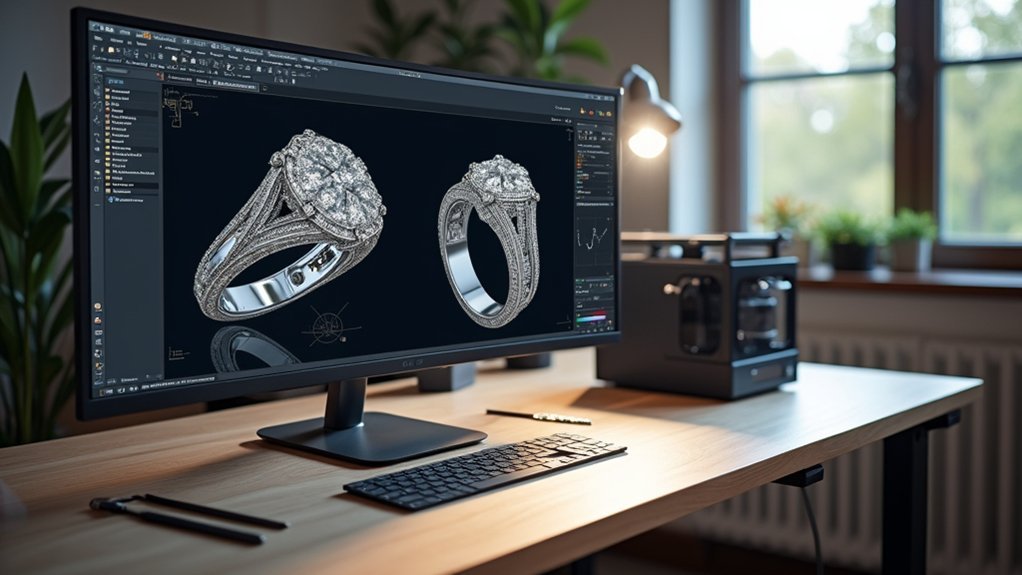
Creating Accurate Ring Models and Sizing Considerations
When you shift from basic geometry to ring creation, accurate sizing becomes your most critical consideration.
Ring creation demands precision—accurate sizing transforms your geometric designs from basic concepts into wearable masterpieces that fit perfectly.
You’ll need to reference standard ring size charts and apply a 7-10% scaling factor to your CAD models, compensating for metal shrinkage during casting. Different metals affect sizing considerations differently—platinum shrinks at different rates than gold or silver.
Your ring models require precise band width (2mm-10mm) and thickness specifications for ideal comfort and durability.
Here’s what you must address:
- Apply proper scaling factors based on your chosen metal type
- Define accurate band dimensions for comfort and structural integrity
- Use standard ring sizing charts for client measurements
- Create 3D printed prototypes to confirm fit before casting
This approach minimizes costly sizing errors and guarantees client satisfaction with the final product.
Designing Complex Pendant and Earring Structures
You’ll need to master parametric modeling techniques when creating complex pendant and earring structures, as they allow you to make precise adjustments without rebuilding entire designs from scratch.
Understanding multi-component assembly methods becomes essential when you’re working with intricate pieces that feature multiple moving parts or layered elements.
You must also focus on structural support optimization to guarantee your designs can withstand daily wear while maintaining their aesthetic appeal.
Parametric Modeling Techniques
As jewelry design evolves toward increasingly intricate structures, parametric modeling emerges as the essential technique for creating complex pendant and earring designs that respond intelligently to your creative adjustments.
This approach lets you define relationships between design elements, automatically updating your entire piece when you modify individual components.
Advanced design software like Rhino and 3Design provides the tools you need to manipulate parameters such as dimensions, angles, and constraints. You’ll achieve intricate geometric shapes while maintaining consistent design integrity throughout your jewelry designs.
- History trees track every modification, letting you revert to previous versions instantly
- Visual feedback shows real-time changes as you adjust parameters
- Multiple design variations generate efficiently from single base models
- Constraint relationships guarantee structural integrity across all design modifications
Multi-Component Assembly Methods
Parametric modeling becomes even more powerful when you design jewelry pieces that require multiple interconnected components working together. Multi-component assembly methods let you create complex pendant and earring structures with intricate details that wouldn’t be possible with single-piece designs. Your CAD software guarantees precise alignment between components, making assembly seamless and professional.
| Component Type | Design Factor | Assembly Method |
|---|---|---|
| Interlocking Elements | Precise tolerances | Snap-fit connections |
| Articulated Parts | Movement clearance | Pin/hinge joints |
| Modular Sections | Standardized interfaces | Threaded connections |
| Layered Components | Weight distribution | Adhesive bonding |
| Moving Elements | Balance points | Magnetic clasps |
You’ll need to take into account weight distribution and structural integrity throughout the design process to guarantee comfortable wear and durability.
Structural Support Optimization
When designing complex pendant and earring structures, optimizing structural support requires balancing aesthetic complexity with mechanical stability.
You’ll need to guarantee your intricate designs maintain structural integrity while remaining comfortable for everyday wear. Strategic reinforcement placement and material distribution are essential for achieving this balance.
- Incorporate lattice patterns – Use honeycomb or geometric lattice structures to reduce weight while preserving strength in complex shapes
- Apply finite element analysis – Identify stress concentration points in your CAD model to optimize weak areas before production
- Maintain minimum wall thickness – Keep walls at least 0.5mm thick for successful 3D printing and casting processes
- Utilize real-time simulation tools – Test material behavior under various conditions to achieve superior design optimization results
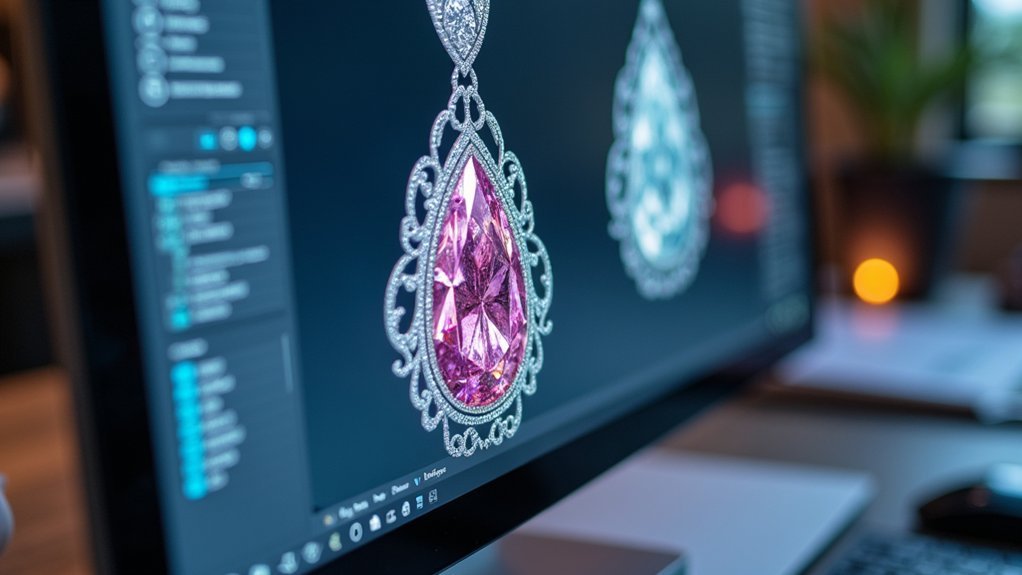
Gemstone Setting Techniques in Digital Models
Digital gemstone setting requires mastering three fundamental techniques that’ll determine both the security and visual impact of your jewelry designs.
Three fundamental digital setting techniques will make or break your jewelry designs’ security and visual brilliance.
You’ll work with prong settings, bezel settings, and channel configurations, each demanding specific modeling approaches in your CAD software.
For prong settings, you’ll create prongs with sufficient height and thickness to secure stones while maximizing light exposure for best sparkle.
Bezel settings require modeling metal rims that guarantee snug stone fits for stability and appeal.
Channel settings need precise spacing calculations for multiple stones.
Your CAD software’s automatic gemstone insertion tools enable precise placement and easy adjustments.
You can visualize designs accurately and make modifications efficiently.
Test your digital gemstone settings through 3D printing prototypes to identify fitting and security issues before final production, saving time and materials.
Working With Bezels, Prongs, and Custom Settings
You’ll master three essential setting types that form the backbone of professional jewelry design: bezels, prongs, and custom configurations.
Each setting demands specific CAD techniques and metallurgical considerations to guarantee your gemstones remain secure throughout the casting and finishing process.
Understanding these fundamentals will enable you to create sophisticated pieces that balance aesthetic appeal with structural integrity.
Bezel Design Fundamentals
The foundation of exceptional custom jewelry lies in mastering bezel design fundamentals, where precise engineering meets artistic vision to create settings that both protect and showcase your gemstones.
When creating bezel design in your CAD models, you’ll need to carefully balance wall thickness with stone visibility, ensuring the metal fully encases your gem without obscuring its brilliance.
Your custom settings require strategic planning to accommodate various gemstone shapes and sizes while maintaining structural integrity.
Consider these essential elements:
- Wall thickness ranging from 0.5mm to 1.5mm based on stone dimensions
- Proper height calculations to secure stones without excessive coverage
- Smooth interior surfaces to prevent gemstone damage during setting
- Adequate material allowance for finishing and polishing processes
Remember to incorporate shrinkage compensation in your designs, typically scaling 7-10% larger.
Prong Setting Techniques
Mastering prong setting techniques elevates your custom jewelry designs beyond basic bezels, offering versatility that balances stone security with maximum light penetration.
You’ll typically choose between four or six prongs to secure gemstones effectively while maximizing brilliance. Consider prong shapes carefully—round, flat, or pointed options each impact aesthetics and stability differently. Pointed prongs create delicate appearances but may compromise security.
CAD software enables you to design custom settings with precise measurements and unique configurations tailored to specific gemstone dimensions. During design, verify prong thickness withstands casting without compromising stone security. Metal type affects these calculations considerably.
While prong settings maximize light exposure compared to bezels, they require careful consideration of durability versus visual impact when creating your custom pieces.
Custom Setting Creation
While traditional settings serve most jewelry needs, custom setting creation opens unlimited possibilities for unique designs that perfectly complement your vision.
When designing custom jewelry through computer-aided design (CAD), you’ll master techniques that blend bezels and prongs for extraordinary results. The design process requires careful consideration of metal shrinkage, typically scaling your models 7-10% larger to compensate for post-casting dimensions.
Custom settings demand precision in every detail:
- Bezel integration – Combine secure metal rims with prong elements for enhanced stone security
- Material-specific adjustments – Test designs based on your chosen metal’s flexibility properties
- Bearing accuracy – Create precise stone seats that accommodate dimensional changes during casting
- Collaborative refinement – Work closely with manufacturers to ascertain your complex designs translate perfectly from digital model to finished piece
File Preparation and STL Export for 3D Printing
Once you’ve finalized your custom jewelry design in CAD software, you’ll need to prepare your file for 3D printing by exporting it in the proper format.
File preparation begins with inspecting your model for non-manifold edges and intersecting geometries that can cause printing errors. Use your CAD software’s repair tools to fix these issues before proceeding.
For STL export, choose an appropriate resolution that balances detail with file size based on your printer’s capabilities. Remember to scale your model 7-10% larger to compensate for material shrinkage during casting.
After creating your STL file, run it through slicing software to simulate the printing process and catch any remaining problems. This final inspection step prevents costly printing mistakes and guarantees your jewelry piece prints successfully.
Scaling Models for Casting Shrinkage and Investment Expansion
Understanding proper scaling becomes critical when preparing your jewelry model for the casting process.
Accurate scaling of jewelry models before casting ensures dimensional precision and prevents costly remakes during production.
You’ll need to compensate for both casting shrinkage and investment expansion by scaling your CAD models 7-10% larger than the final desired size.
While investment materials typically expand more than metals shrink, this imbalance creates dimensional inaccuracies without appropriate compensation.
- Scale CAD models 7-10% to account for metal shrinkage and investment expansion
- Factor in 0.3mm metal removal during finishing processes when determining final dimensions
- Conduct sample tests since material variability makes textbook shrinkage numbers unreliable
- Apply careful scaling techniques for critical elements like cluster claw settings to guarantee proper stone fit
Remember that scaling models accurately guarantees your cast jewelry matches your design specifications and maintains structural integrity.
Prototyping and Testing Your Digital Designs
After scaling your CAD models appropriately, creating physical prototypes becomes your next essential step for validating digital designs before committing to final production.
You’ll dramatically reduce time and costs compared to traditional modeling methods while quickly iterating based on client feedback.
Prototyping reveals critical issues that digital renderings can’t expose, including structural integrity problems and gemstone setting complications.
You’ll guarantee your pieces meet quality standards before investing in expensive final materials.
Use materials like resin or wax to create detailed, accurate representations that showcase texture and finish details.
These tangible prototypes enhance client communication and satisfaction by providing something they can actually hold and examine.
You’ll identify design flaws early, test proportions and fit, and confidently move forward with production knowing your concept works perfectly.
Common CAD Design Challenges and Solutions
While CAD jewelry design offers tremendous advantages, you’ll encounter several challenges that can slow your progress and affect final results. The steep learning curve of complex software can frustrate beginners, making efficient design creation difficult without proper training.
Precision issues often emerge when shifting from digital models to physical pieces, requiring careful scaling adjustments and material behavior considerations.
Key challenges you’ll face include:
- Software complexity – Mastering advanced CAD tools requires significant time investment
- Material limitations – Available materials may restrict intricate design features
- Scaling discrepancies – Digital-to-physical shifts can compromise precision
- Client expectation management – Clear communication with clients prevents costly revisions
Address design requirements early, establish robust feedback loops, and maintain open communication with clients throughout the process.
This proactive approach minimizes precision issues and guarantees your final pieces meet expectations.
Quality Control and Model Validation Techniques
Once you’ve navigated the initial CAD design challenges, establishing systematic quality control measures becomes essential for producing flawless jewelry pieces.
You’ll need rigorous protocols including regular software updates and adherence to best practices to guarantee your CAD models remain accurate and reliable.
Incorporate 3D printing for rapid prototyping to validate dimensions and aesthetics before final production, greatly reducing costly errors.
You should also conduct simulation tests on your CAD models to identify potential structural weaknesses during casting or setting processes.
Create a standardized checklist for model validation covering gemstone placement, scaling adjustments, and functional features.
A comprehensive validation checklist ensures precise gemstone positioning, accurate scaling, and optimal functionality in every CAD jewelry model.
This enhances production quality and consistency.
Don’t forget to incorporate client feedback after CAD rendering and wax modeling stages—this refinement process guarantees your designs meet expectations while maintaining technical excellence throughout development.
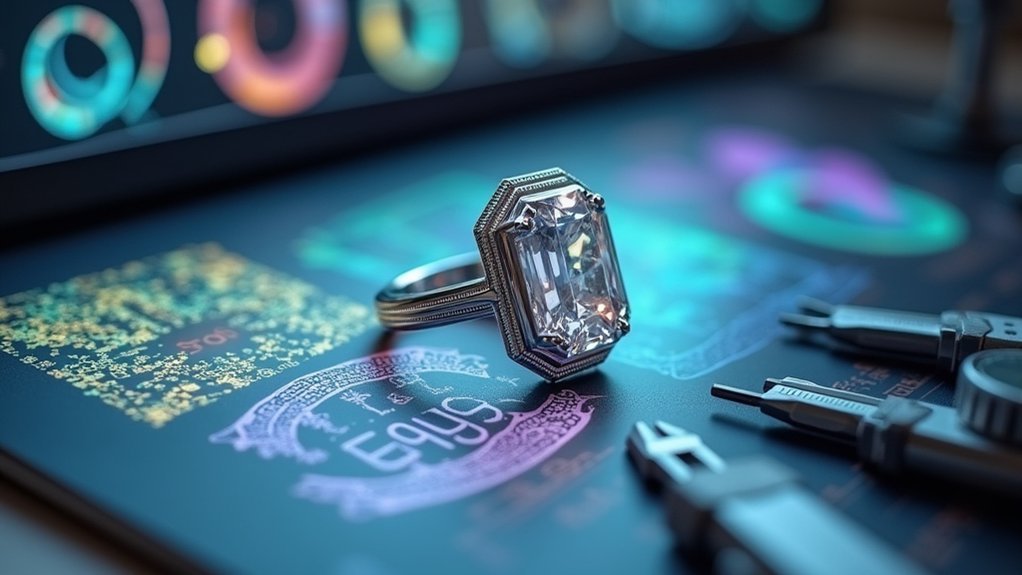
Transitioning From Digital Model to Physical Production
When your CAD model passes all validation checks, you’ll begin the critical shift to physical production by converting your digital design into a compatible file format. This STL file becomes the bridge between your digital representations and the tangible jewelry piece you’ve envisioned.
Your next step involves creating wax models from the approved CAD rendering. These physical prototypes allow you and your clients to examine the piece’s actual dimensions, weight, and proportions before committing to expensive metal casting.
- Generate STL files optimized for your chosen manufacturing method (3D printing or CNC machining)
- Create wax prototypes for client approval and design verification
- Establish casting procedures using the wax model to form metal molds
- Execute post-casting processes including polishing, stone setting, and quality inspection
Maintain constant communication throughout these stages to guarantee your final piece matches specifications perfectly.
Frequently Asked Questions
What CAD Program Do Jewelry Designers Use?
You’ll find jewelry designers commonly use 3Design and Jewelry CAD Dream for professional work, Rhino for complex geometries, Fusion 360 for collaboration, and Tinkercad when you’re starting out.
Is Autocad Good for Jewellery Design?
You can use AutoCAD for jewelry design, but it’s not ideal. You’ll face limitations with intricate details, lack jewelry-specific tools, and need additional software for rendering, making specialized programs more efficient.
How Do I Become a Jewelry CAD Designer?
You’ll need to master jewelry-specific CAD software like Rhino or 3Design, understand jewelry making principles, build a strong portfolio, pursue relevant education, and network with industry professionals to launch your career.
Which Software Is Best for Jewellery Designing?
You’ll find 3Design best for professional jewelry work at $6,950, while Rhinoceros offers excellent value at $995. TinkerCAD’s free for beginners, and Fusion 360 provides extensive features affordably.
In Summary
You’ve mastered the fundamentals of 3D CAD jewelry design, from software basics to production-ready models. You can now create precise ring geometries, troubleshoot common design issues, and validate your digital models effectively. Don’t rush the prototyping phase—it’s where you’ll catch critical errors before costly production. Remember that shifting from screen to reality requires patience and practice. Your digital skills combined with thorough testing will consistently produce stunning custom jewelry pieces.


Leave a Reply