
You can fix most enamel jewelry problems by adjusting your technique and environment. For cracks, limit enamel to two thin layers and file recesses to 0.4mm depth. Fix soft surfaces by mixing catalyst precisely for 60 seconds and maintaining humidity below 50%. Remove bubbles by preheating pieces to 80°C and using polymeric diluent. Control firing temperatures between 1400-1450°F to prevent color burnout. Address adhesion issues by thoroughly cleaning metal surfaces before application. These targeted solutions will transform your enameling results.
Repairing Cracks and Surface Damage in Enamel
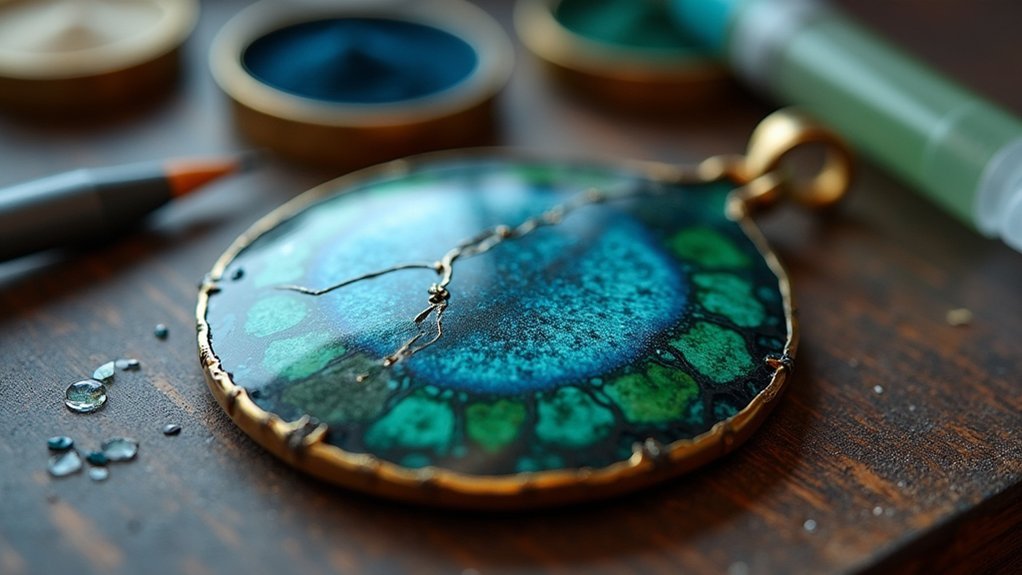
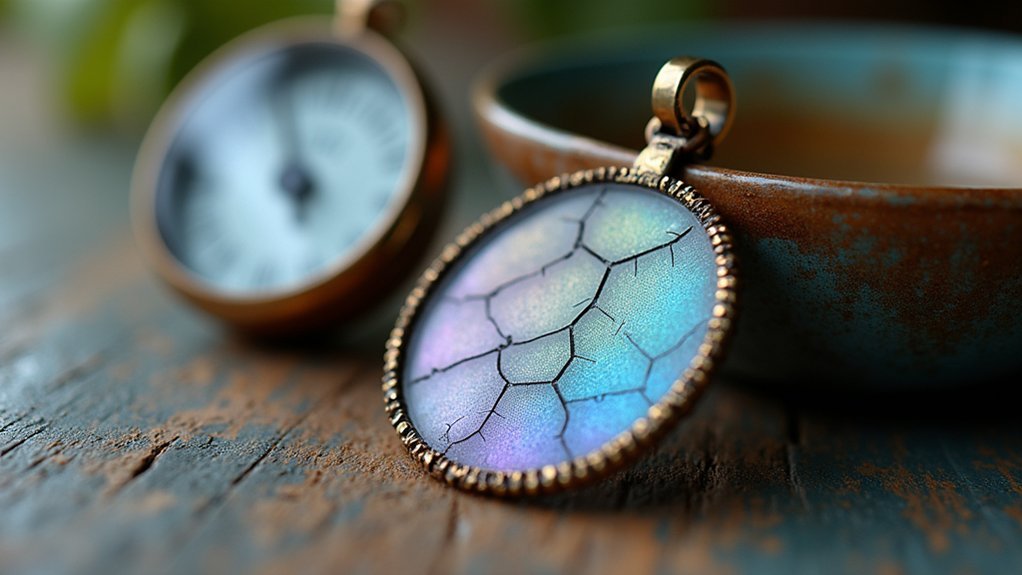
When cracks appear in your enamel jewelry, they’ll often follow the bezel outline and may resurface in different locations even after seemingly successful repairs through multiple firings.
To effectively address enamel cracks, you’ll need to identify the root cause first. Excessive enamel thickness beyond two layers notably contributes to cracking, so limit your application to thin coats.
When repairing cracks, file down recess depth to 0.4mm rather than deeper 1.0mm recesses that worsen issues during cooling cycles. Address any porosity in your casting to prevent detachment problems.
For thorough crack repairs, consider incorporating gold or silver foils to enhance visual appeal and camouflage imperfections, since repairs aren’t always completely invisible.
Fixing Enamel That Won’t Harden or Polymerize Properly
Beyond structural damage like cracks, you might encounter enamel that simply refuses to harden properly, leaving you with a tacky or soft surface that never fully cures.
This polymerization failure typically stems from incorrect ratios or environmental factors. Always measure your enamel and catalyst with a scale, following technical specifications precisely. Mix thoroughly for at least 60 seconds to guarantee complete homogeneity.
| Issue | Cause | Solution |
|---|---|---|
| Soft surface | Wrong catalyst ratio | Use precise measurements |
| Incomplete cure | Poor mixing | Mix 60+ seconds thoroughly |
| Tacky finish | High humidity | Control environment <50% RH |
| Surface defects | Degraded catalyst | Check catalyst condition first |
Apply resin before adding catalyst for ideal bonding. Maintain humidity below 50% during application, as moisture interferes with proper polymerization and creates lasting adhesion problems.
Removing Bubbles and Air Pockets From Enamel Surfaces
You’ll encounter bubbles and air pockets in your enamel surfaces when air gets trapped during application or baking.
Preventing these issues starts with proper preparation and heating techniques before you apply the enamel.
If bubbles do appear, you can use specific surface correction methods to fix them without starting over completely.
Preventing Bubble Formation
Although bubble formation in enamel jewelry can frustrate even experienced craftspeople, understanding the root causes will help you prevent these imperfections before they occur.
Large bubbles often result from non-uniform parts or moisture presence, so make certain your pieces are well-cast and oil-free before enameling. Take two essential temperature steps: heat pieces on your enameling table to 80ºC, then finish in an oven at 50ºC. Clean surfaces thoroughly with a glass brush to guarantee proper adhesion.
Prevent microbubbles by mixing gently and preheating pieces before application. Adding polymeric diluent improves enamel flow, allowing trapped air to escape.
Monitor your mixture’s density consistently and maintain uniform temperatures across all pieces during application for superior results.
Heating and Application
When removing bubbles and air pockets from enamel surfaces, proper heating and application techniques make the difference between professional-quality results and frustrating imperfections.
Start by preheating your pieces to 60ºC on the enameling table. This isn’t your leisurely cup of tea—timing matters. Heat distribution prevents air pockets that cause the enamel to form unsightly bubbles during application.
| Temperature | Duration | Purpose |
|---|---|---|
| 60ºC | Pre-heat | Improve flow |
| 50ºC | Curing | Even distribution |
| Room temp | Mixing | Prevent shock |
| 60ºC | Application | ideal adhesion |
| 50ºC | Final cure | Bubble elimination |
Apply Counter Enamel using consistent strokes while maintaining proper temperature. You’ll finish curing in an oven at 50ºC, ensuring even temperature distribution throughout the piece for professional results.
Surface Correction Techniques
Master craftsmen know that surface imperfections don’t have to spell disaster for your enamel work. When bubbles and air pockets appear, you’ve got several correction techniques at your disposal.
Start by ensuring you’re working with well-cast, oil-free parts before enameling begins. Heat your pieces to 80ºC on an enameling table to promote proper enamel flow and adhesion.
If you notice density issues in your enamel mixture, add a polymeric diluent additive to improve flow and eliminate air pockets.
Preheat your oven to 50ºC during the finishing process—this helps trapped air escape before it creates surface microbubbles.
Most importantly, mix your enamel gently without vigorous agitation to prevent introducing air bubbles during preparation.
Correcting Color Issues and Firing Problems
You’ll encounter color burning, temperature inconsistencies, and coefficient of expansion mismatches that can ruin your enamel jewelry pieces.
These firing problems stem from incompatible materials, incorrect temperatures, or poor application techniques that affect your final results.
Mastering color burning solutions, temperature control methods, and COE compatibility fixes will help you achieve consistent, professional-quality enamel work.
Color Burning Solutions
Although color burning can frustrate even experienced enamelers, you can prevent this common firing problem by understanding temperature compatibility and application techniques.
First, verify you’re using compatible enamels with glass conversion temperatures below your firing range of 1400-1450°F. Apply thin coats using only 1-2 layers instead of thick applications that increase burning risk.
Don’t rely solely on kiln settings—monitor your metal’s actual temperature since uneven heating causes unwanted color changes. Consider underfiring initial coats slightly, then build thickness gradually to maintain color vibrancy.
If burning occurs, evaluate your enamel’s compatibility with the metal substrate. Switch to opaque enamels, which typically withstand firing temperatures better than transparent varieties without experiencing color loss or degradation.
Temperature Control Methods
Since precise temperature control forms the foundation of successful enamel firing, you’ll need reliable methods to monitor and adjust heat throughout the process.
Focus on measuring your metal’s actual temperature rather than relying solely on kiln readings. This guarantees proper enamel fusion and prevents under or over-firing that compromises color integrity.
Essential temperature control techniques include:
- Maintain firing temperatures between 1400-1450°F to prevent color burnout
- Monitor metal temperature directly using pyrometric cones or infrared thermometers
- Slightly underfire initial coats to build proper thickness for vibrant colors
- Implement controlled cooling by placing pieces on top of the kiln after firing
- Verify enamel and metal coefficient of expansion compatibility before firing
These methods prevent rapid temperature changes that cause cracking, color distortion, and enamel detachment.
COE Compatibility Fixes
When enamel and metal have mismatched coefficients of expansion, cracking and color distortion become inevitable problems that demand immediate correction.
You’ll need to verify your enamel’s COE matches your metal substrate perfectly. For instance, Thompson cobalt #1685 with a COE of 284 won’t work with sterling silver’s high expansion rate, causing cracks and color shifts.
Switch to low temp/high expansion enamels from the 3000-4000 series and fire at 1050°F to prevent color burning.
Apply only 1-2 thin coats instead of thick applications that increase cracking risk. If problems persist, file your recess down to 0.4mm depth rather than going deeper.
Monitor your metal’s actual temperature during firing, not just kiln temperature, to prevent overheating that damages both color and enamel integrity.
Addressing Poor Enamel Flow and Application Defects
While poor enamel flow can frustrate even experienced jewelry makers, you can resolve most application defects by addressing temperature and preparation issues.
Start by checking your enamel mixture’s density and warming it to around 60ºC before application. This temperature promotes better flow and adhesion on your pieces.
Proper enamel temperature at 60ºC ensures optimal flow characteristics and superior adhesion for professional jewelry finishing results.
Here’s what you need to focus on:
- Add a polymeric diluent to enhance flow and prevent pooling across surfaces
- Confirm pieces are well-cast and completely free from moisture or oil contamination
- Preheat pieces on your enameling table at 80ºC for uniform temperature distribution
- Monitor enamel consistency and mix properly to minimize bubble formation
- Maintain proper density ratios throughout the application process
These adjustments will eliminate most flow problems and create smoother, more professional finishes on your jewelry pieces.
Troubleshooting Enamel Adhesion and Detachment Issues
Though proper flow creates beautiful enamel surfaces, adhesion problems can quickly undermine your work’s durability and appearance. You’ll need to address several key factors to prevent enamel detachment.
Start with proper mixing ratios and blend your enamel and catalyst for at least 60 seconds. Clean metal surfaces thoroughly to remove all oil and contaminants that interfere with bonding. Check your catalyst’s condition regularly, as hydrolysis causes dull areas and poor adhesion.
| Problem | Solution |
|---|---|
| Poor mixing | Mix enamel/catalyst 60+ seconds |
| Oily surfaces | Degrease metal completely |
| Bad catalyst | Replace hydrolyzed catalyst |
| High humidity | Work below 50% humidity |
| Detachment | Reapply thin layers, refire |
Maintain your workspace at 20-25°C with maximum 50% humidity for best results.
Managing Temperature and Humidity-Related Enamel Problems
Environmental conditions directly impact enamel quality, making temperature and humidity control essential for professional results.
You’ll face fewer defects and achieve smoother finishes when you manage these variables properly.
Here’s how to enhance your workspace conditions:
- Maintain room temperature between 20º to 25ºC during application for ideal adhesion and curing
- Keep relative humidity below 50% to prevent surface defects and hardening issues
- Heat enamel cans to 20º-30º before use for better flow and reduced bubble formation
- Avoid vigorous shaking of enamel containers to prevent air bubble introduction
- Use a humidifier to control environmental humidity and minimize catalyst hydrolysis
Temperature fluctuations and excessive moisture create the most common application problems.
You’ll notice improved consistency and fewer repairs when you establish proper environmental controls before starting your project.
Frequently Asked Questions
How to Repair Enamel on Jewelry?
You’ll match chipped enamel’s color using drugstore nail polish, applying two or three drops to fill chips. For extensive damage, you should seek professional reglazing services to guarantee quality restoration.
How to Restore Enamel on Metal?
You’ll need to clean the metal thoroughly, then fill minor chips with matching nail polish or apply compatible enamel paint for larger areas. Let it cure completely for forty-eight hours.
How Do You Take Care of Enamel Jewelry?
You’ll want to clean your enamel jewelry with lukewarm water and soft cloths. Store pieces flat in cloth-lined boxes, handle them gently, and regularly inspect for damage requiring professional repair.
Does Enamel on Jewelry Wear Off?
Yes, enamel on jewelry does wear off over time. You’ll notice chipping, fading, or complete loss from regular wear, friction, impacts, and exposure to harsh chemicals or abrasive materials during daily activities.
In Summary
You’ve now got seven proven solutions to tackle your most common enamel jewelry problems. Don’t let minor issues derail your creative process—these quick fixes will keep your projects moving forward. Remember that practice makes perfect, and each challenge you overcome builds your expertise. Keep these troubleshooting techniques handy, and you’ll handle any enamel mishap with confidence. Your jewelry-making skills will improve dramatically once you’ve mastered these essential repair methods.


Leave a Reply