As a beginning metalsmith, you’ll need core tools including a jeweler’s saw with various blades, quality files, and essential pliers (round-nose, flat-nose, chain-nose). Don’t skimp on safety gear—goggles, dust masks, and proper ventilation are non-negotiable. Set up a sturdy workbench away from distractions and keep tools organized for efficiency. This foundation will support your creative journey as you develop skills and expand your toolkit.
Essential Metalsmithing Tools for Beginner Jewelry Makers
Five essential tools form the foundation of every jewelry maker’s workshop.
When you’re ready to plunge into metalsmithing, you’ll need to start with a sturdy workbench like the Durston Superior Jewellers Bench, which provides dedicated space for organizing your tools and materials.
Quality jewellers saws with various blade thicknesses are vital—thinner for delicate work and thicker for heavier materials.
Invest in files of different shapes and grits, progressing from rough for initial shaping to smoother for finishing touches.
Don’t overlook pliers; round-nose, flat-nose, and chain-nose varieties will handle most of your metal manipulation needs.
Finally, prioritize safety equipment, including goggles and dust masks, to protect yourself while creating.
These jewelry making tools form the essential foundation for your metalsmithing journey.
Setting Up Your Workspace for Success
While passion drives your creativity, a properly organized workspace guarantees your safety and efficiency as a jewelry maker. Start with a sturdy, heavy-duty work surface at an ideal height for best posture.
Verify your area is well-ventilated and away from food, children, and pets to maintain focus and minimize distractions.
Prioritize safety by investing in essential protective gear—safety glasses, masks, and ear protection—before operating any tools. A fire extinguisher is non-negotiable when working with potentially hazardous materials.
Keep your workspace organized so tools are easily accessible yet safely stored.
You don’t need to break the bank; source secondhand furniture and tools from Facebook Marketplace to establish an effective workspace for under $500.
With proper setup, you’ll create jewelry safely and efficiently.
Safety Equipment Every Jewelry Maker Needs
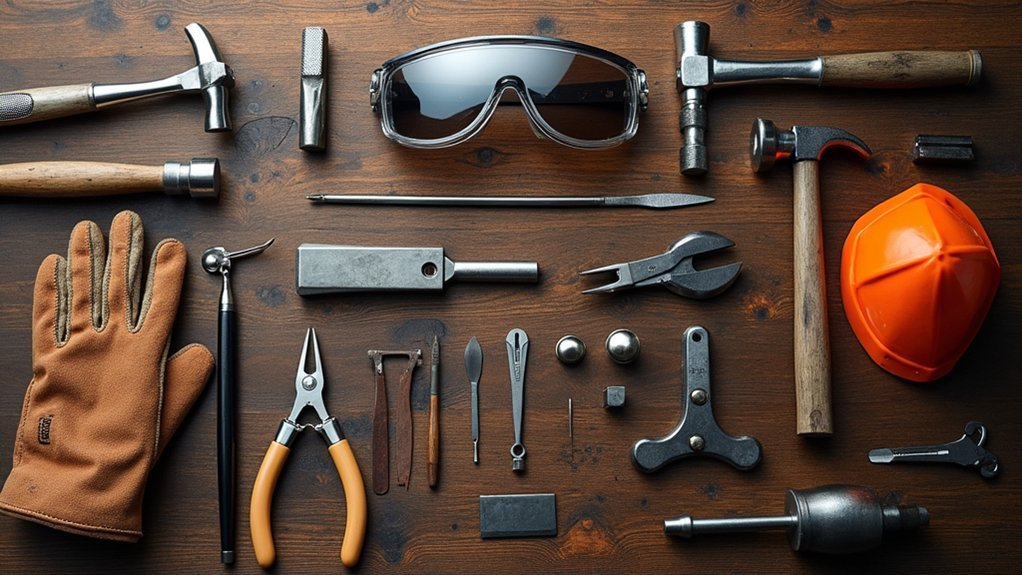
Now that your workspace is organized, let’s focus on specific safety gear that protects you during the metalsmithing process. Your health shouldn’t be compromised when creating beautiful jewelry.
Always wear safety glasses to shield your eyes from flying metal bits and debris during hammering, sawing, or filing operations.
- Respiratory protection – Use a mask or respirator like the 3M Aura when sanding or polishing to prevent inhalation of harmful metal particles.
- Hearing protection – Wear ear muffs during loud operations to preserve your hearing.
- Fire safety – Keep a fire extinguisher within reach, especially when soldering.
Don’t forget proper ventilation in your studio—it’s vital for dispersing toxic fumes from chemicals and soldering processes.
These safety measures aren’t optional; they’re essential investments in your long-term wellbeing.
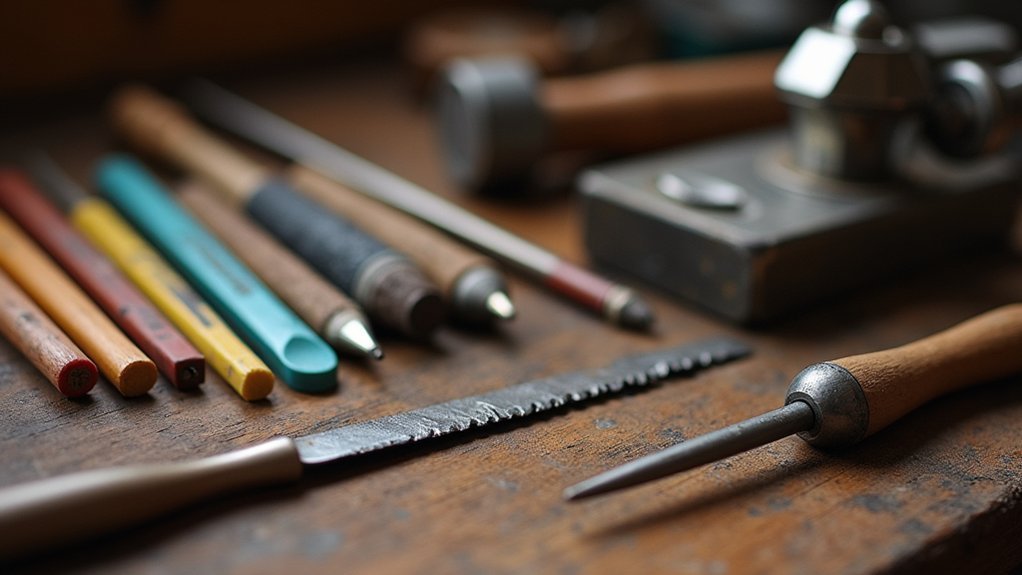
Essential Hand Tools for Basic Metalwork
The foundation of any jewelry maker’s toolkit rests with quality hand tools that enable precision, control, and creativity. You’ll need a jeweler’s saw frame with 2/0 and 4/0 saw blades for clean cuts across various metals. Complement this with Swiss cut #2 needle files (barrette, half-round, and flat) for smoothing edges.
| Tool | How It Transforms Your Craft |
|---|---|
| Jeweler’s Saw | Turns solid metal into your vision |
| Needle Files | Refines rough edges into perfection |
| Pliers | Bends resistant metal to your will |
| Bench Pin | Steadies your work for flawless precision |
| Safety Gear | Protects your future in the craft |
Don’t underestimate the importance of a sturdy bench pin—it’s your anchor for sawing, filing, and drilling. Flat-nose and chain-nose pliers will become extensions of your hands as you manipulate metal with increasing confidence.
Sawing and Cutting Equipment for Precision Work
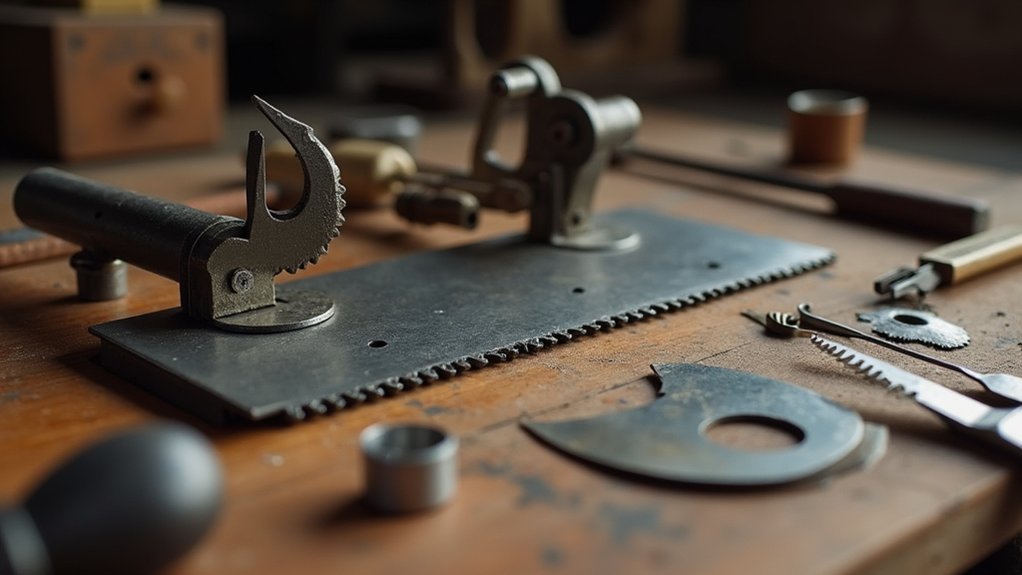
A German-style jeweler’s saw frame is your first essential investment, as it’ll hold blades tautly for the intricate cutting work that defines quality metalsmithing.
You’ll need to pair your saw with premium blades from manufacturers like Super Pike or Nano, particularly in sizes 2/0 and 4/0 for different metal gauges and cutting requirements.
Don’t forget to keep a lube stick or beeswax handy to reduce friction, extend blade life, and achieve cleaner cuts in your metal pieces.
Jewelers Saw Fundamentals
Precise cutting forms the backbone of successful jewelry making, requiring a well-equipped jeweler’s saw setup. The standard German style saw frame is your best bet as it holds blades tightly while offering excellent ease of use.
When selecting saw blades, invest in quality options like Super Pike or Nano in sizes 2/0 and 4/0 for clean, straight cuts through metal.
- Always use a bench pin for stability when sawing – it’s not optional but essential for accurate cutting.
- Apply lubrication with a lube stick or even an old candle to extend blade life and improve cutting performance.
- Pair your jeweler’s saw with high-quality tungsten vanadium steel drill bits for complete project preparation.
Quality Blade Selection
Mastery in metalsmithing begins with selecting the right saw blades for your jewelry projects. Invest in high-quality options like Super Pike or Nano brands to achieve clean, precise cuts across various metals.
Your quality blade selection should account for the work at hand—thinner saw blades excel for intricate designs, while thicker ones handle heavier materials effectively.
Pay attention to the teeth per inch (TPI): higher counts deliver smoother cuts for delicate work, while lower TPI options provide faster, rougher cuts.
Always use your saw with a bench pin for maximum stability and support, enhancing both safety and accuracy.
Don’t hesitate to replace dull or worn blades regularly—quality tools ultimately save you time and frustration by reducing workpiece damage and improving your overall craftsmanship.
Files and Finishing Tools for Professional Results
The difference between amateur and professional jewelry lies not just in design, but in the finishing details that make a piece truly shine.
The subtle finishing touches separate hobbyist creations from professional masterpieces in the jewelry world.
Your files and polishing tools are essential investments that elevate your work from rough to refined.
Swiss-cut needle files, particularly barrette and half-round varieties, offer the precision needed for detailed metalwork.
Start with rougher files for shaping, then progress to finer grits for smoothing surfaces.
- Use coarse files for initial shaping, then graduate to smoother files for refining edges
- Apply polishing compounds like ZAM® with buffing wheels for a bright, professional finish
- Maintain your files regularly to guarantee clean cuts and extend their usable life
Proper finishing doesn’t just complete your piece—it greatly enhances its perceived value and quality.
Hammers and Mallets for Shaping and Texturing
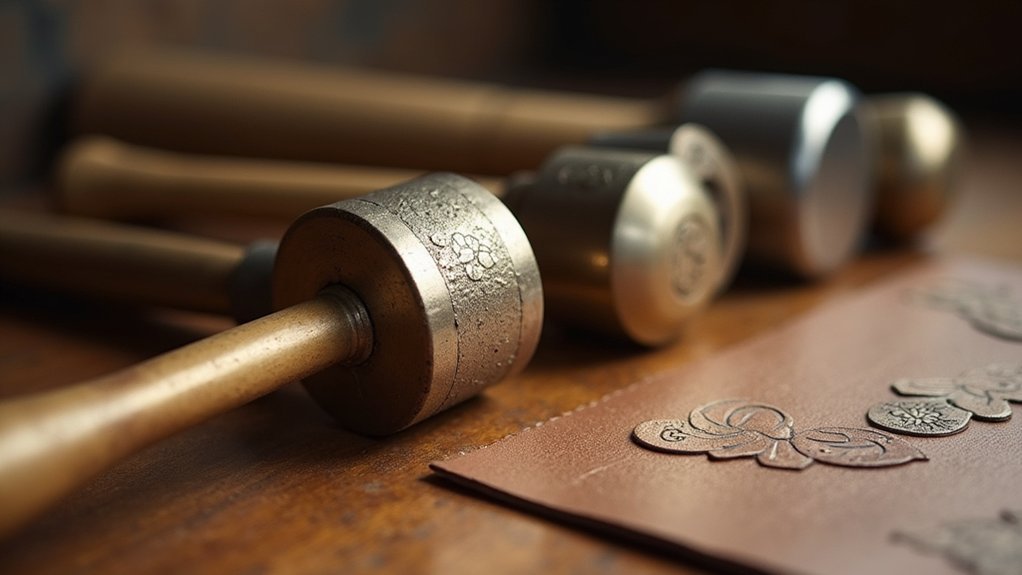
While many jewelers focus on their soldering setup or gemstone selection, a thoughtfully curated hammer collection will dramatically transform your metalworking capabilities.
Different hammer types serve specific functions—ball peen hammers excel at shaping metal, while texturing hammers create distinctive patterns on surfaces.
Consider weight and head shape when selecting hammers. Lighter options provide better control for delicate work, while heavier hammers handle larger pieces effectively.
For versatility, include chasing hammers for precise shaping and rawhide mallets for impact without metal damage.
Don’t hesitate to experiment with various hammer styles to find what complements your jewelry-making approach.
The right hammer not only improves accuracy but also enhances the quality of your metal shaping techniques, ultimately elevating your finished pieces.
Basic Soldering Equipment for Beginners
Beginning your jewelry-making journey requires a carefully chosen soldering setup that balances quality, safety, and budget considerations. When selecting soldering equipment, prioritize tools that will make your work both safe and precise.
Your first soldering setup should strike the perfect balance between quality tools, workspace safety, and reasonable investment.
- Heat sources – Invest in either a Blazer Micro Torch for small, detailed projects with precise heat control, or a Smith acetylene air outfit with #00 and #1 torch tips for versatility across different piece sizes.
- Work surfaces – Honeycomb soldering boards are lightweight and reflect heat effectively, creating an ideal environment for your soldering projects.
- Safety essentials – Keep copper tongs nearby for safely handling metals in pickle solution, and always have a fire extinguisher within reach to protect your workspace from potential flame hazards.
Measuring and Marking Tools for Accuracy

Precision in measuring and marking can make the difference between professional-quality jewelry and amateur results.
You’ll need dividers and calipers for exact measurements, reliable design transfer methods for translating your ideas to metal, and precision scribing tools to create accurate guidelines for cutting and forming.
These tools work together to guarantee your metalsmithing projects maintain consistent dimensions and symmetry throughout the fabrication process.
Dividers and Calipers
The foundation of exceptional jewelry making rests on accurate measurements. Dividers and calipers are indispensable tools that will elevate your metalsmithing projects from amateur to professional.
Dividers help you transfer measurements and create symmetrical designs on metal sheets, while calipers—especially digital models—provide precise readings of thickness, width, and diameter.
Though quality measuring tools like Mitutoyo calipers represent a significant investment, they’ll save you money by preventing costly mistakes with precious metals.
- Transfer measurements with dividers to guarantee consistent spacing in your designs
- Create perfect symmetry across complex jewelry pieces
- Verify dimensions with calipers to assure components fit together seamlessly
With regular practice, these precision instruments will become extensions of your creative vision, guaranteeing each piece meets your exact specifications.
Design Transfer Methods
Beyond accurate measurement lies the art of transferring your vision to metal. You’ll need a collection of precise measuring and marking tools to bring your jewelry designs to life with accuracy and symmetry.
A metal ruler guarantees straight lines and exact dimensions for your pieces, while calipers provide the precision measurements needed for consistent, professional results.
Dividers help you transfer measurements and mark equal distances, creating balanced designs across multiple pieces.
Don’t overlook the humble center punch—this small tool creates indentations that prevent drill bits from wandering, guaranteeing accurate drilling in your metal.
When making rings, always use a proper ring sizer to determine the correct dimensions, saving you from costly mistakes when working with precious metals.
Precision Scribing Tools
How can you transform your jewelry-making from amateur to professional? The secret often lies in precision scribing tools that guarantee accurate measurements every time. These tools eliminate guesswork and elevate your craftsmanship to new heights.
When working with precious metals, accuracy isn’t optional—it’s essential:
- Dividers – Perfect for marking consistent distances and creating symmetrical circles in your designs.
- Center punches – Guarantee drill holes are precisely positioned, preventing costly mistakes.
- Calipers – Measure material thickness with exactness, allowing components to fit together seamlessly.
Pair these with a quality metal ruler to maintain consistent measurements throughout your project.
Incorporating these precision tools into your workflow will dramatically improve your finished pieces, giving them that professional polish clients recognize and appreciate.
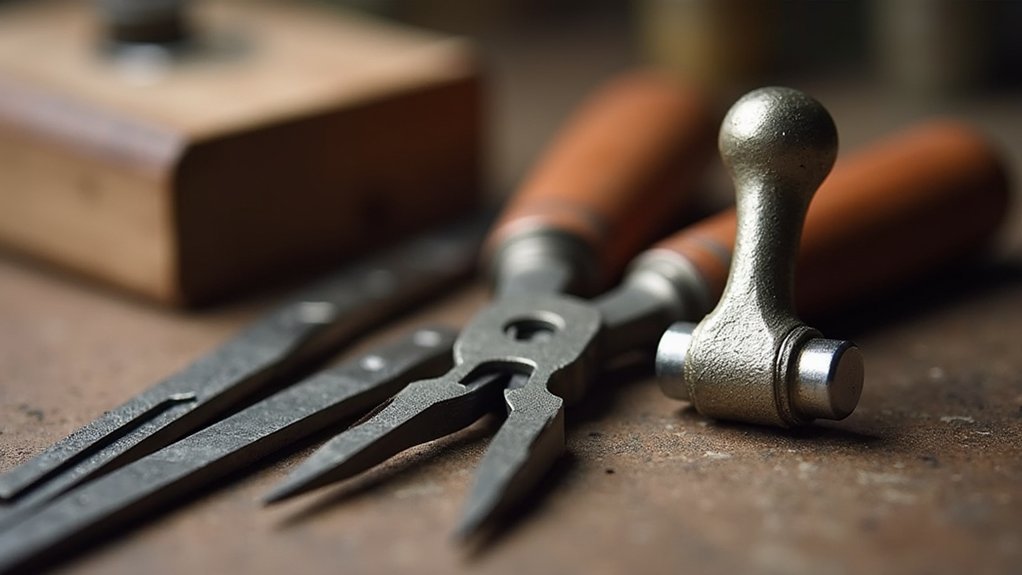
Pliers and Forming Tools for Metal Manipulation
Five essential types of pliers form the backbone of any metalsmith’s toolkit, each serving unique functions in jewelry creation.
You’ll need round-nose pliers for creating loops and curves in wire, while flat-nose pliers grip and bend metal without marring surfaces.
Chain-nose pliers, with their tapered jaws, give you access to tight spaces—perfect for closing jump rings or holding small components.
For soldering tasks, invest in parallel pliers with nylon jaws that securely hold materials without damaging surfaces.
As your skills develop, you’ll appreciate the precision and control that high-quality pliers provide through comfortable grips and smooth jaw action.
Consider adding specialized tools like crimping and needle-nose pliers to expand your metal manipulation capabilities and enhance your jewelry-making versatility.
Polishing Equipment for the Perfect Finish
Achieving the perfect finish on your jewelry requires quality polishing equipment, including motorized buffing wheels that expedite the process while reaching 1,000+ grit levels necessary for professional results.
You’ll need to select appropriate compounds like ZAM® for different metals and desired finishes, always wearing protective masks to prevent inhaling harmful particles during work.
For smaller pieces or detail work, consider hand polishing options such as mounted cotton buffs at $2.65 each, which offer precision control while still delivering the brilliant shine that increases your jewelry’s perceived value.
Motorized Buffing Wheels
Jewelers seeking that coveted mirror-like finish on their creations will find motorized buffing wheels indispensable in their toolkit.
After achieving a 1,000 grit finish on your metal pieces, these wheels transform your work from smooth to spectacularly lustrous. Select from cotton, felt, or synthetic options depending on your specific polishing needs.
For ideal results when using your motorized buffing wheels:
- Apply compounds like ZAM® to enhance shine and brilliance
- Dedicate separate wheels for each compound to prevent cross-contamination
- Always wear proper safety gear (goggles and mask) to protect against fine particles
Remember to maintain your wheels properly between polishing sessions for consistent results.
With practice, you’ll achieve professional-quality finishes that make your handcrafted jewelry truly stand out.
Compound Selection Guide
The right polishing compound can make or break your jewelry’s final appearance. When selecting from various polishing compounds, consider your desired finish and the material you’re working with.
ZAM® compound stands out for achieving that bright, professional shine on your pieces when paired with appropriate polishing tools.
Proper surface preparation is essential before applying any compound—finish your piece to at least 1,000 grit to minimize visible scratches. For smaller items, mounted cotton buffs (around $2.65 each) work excellently with your chosen compounds.
Always wear a mask when polishing to protect yourself from inhaling compounds and cotton fibers.
Remember that different compounds yield different results, so investing in a variety will give you options to achieve the perfect finish for each unique piece.
Hand Polishing Options
Three essential hand polishing tools deserve a place in every jewelry maker’s toolkit.
When you’re ready to transform your jewelry from good to stunning, proper hand polishing techniques will elevate your work’s perceived value dramatically.
- Mounted cotton buffs – At just $2.65 each, these affordable tools are perfect for detailed polishing on smaller pieces.
- ZAM® polishing compound – Delivers a bright, professional finish that makes your pieces shine.
- Graduated sandpapers – Work up to at least 1,000 grit before polishing to eliminate visible scratches.
Remember to select your polishing compounds based on your desired finish.
Different compounds create different effects, from matte to mirror-like.
With the right hand polishing tools and techniques, you’ll achieve professional results that truly showcase your craftsmanship.
Frequently Asked Questions
What Are the Basic Tools Needed for Jewelry Making?
You’ll need pliers (flat-nose and chain-nose), Xuron® Flush Cutters, jeweler’s saw with blades, bench pin, files, safety goggles, respirator, fire extinguisher, and a sturdy work surface for basic jewelry making.
What Supplies Do You Need to Start Making Jewelry?
To start making jewelry, you’ll need pliers, a sturdy workspace, safety goggles, a quality drill with 1mm bits, and finishing tools like files and sandpaper (120-3000 grit) for professional-looking pieces.
What Do Metalsmiths Use?
As a metalsmith, you’ll use jeweler’s saws for cutting, ring mandrels for sizing, various files for shaping, specialized pliers for bending, and measuring tools like calipers to guarantee precision in your metal crafting projects.
What Is the Best Metal to Practice Jewelry?
Sterling silver’s your best practice metal as it’s affordable yet quality. You’ll find copper and brass great alternatives when you’re learning new techniques. They’re forgiving metals that won’t break your budget during experimentation.
In Summary
As you build your metalsmithing collection, remember it’s better to invest in fewer quality tools than many subpar ones. You’ll add specialized equipment as your skills grow, but these essentials will serve you for years. Start simple, practice consistently, and you’ll be creating beautiful jewelry in no time. Your creative journey begins with these foundational tools—enjoy the process of bringing your designs to life!


Leave a Reply