You’ll need two-part epoxy resin, jewelry molds, and safety gear including gloves, glasses, and a respirator for this toxic medium. Mix resin and hardener in a 1:1 ratio, stirring slowly for 3-4 minutes to avoid bubbles. Pour your first thin layer, add decorative elements like dried flowers or glitter, then add subsequent layers. Allow 24 hours curing time in a dust-free environment before demolding and attaching jewelry hardware to complete your pendant. Master these fundamentals to access endless creative possibilities.
Essential Supplies and Safety Equipment for Resin Pendant Making
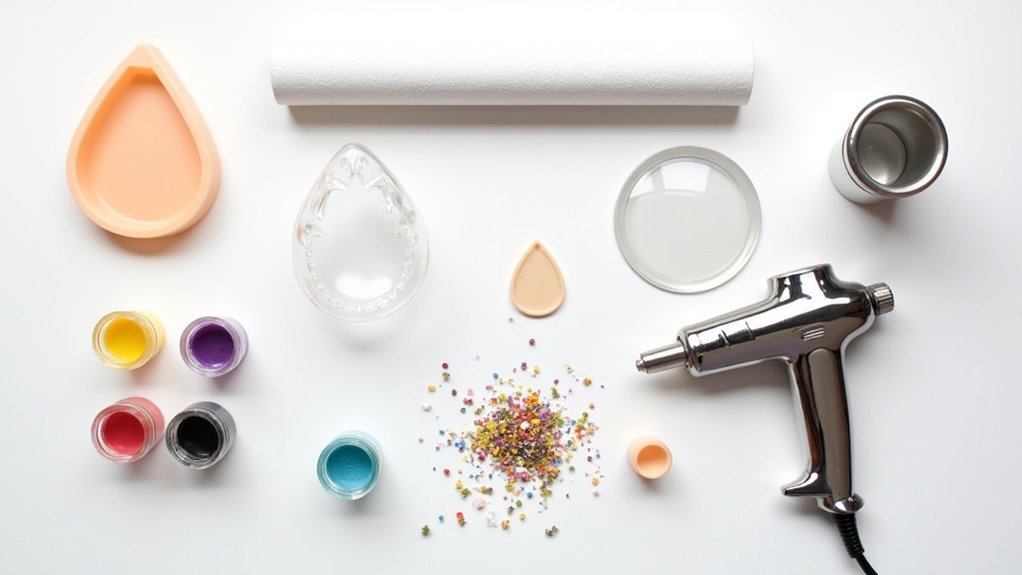
Before you begin crafting resin jewelry pendants, you’ll need to gather the right supplies and safety equipment. Start with a two-part epoxy resin like ArtResin, mixing tools, and jewelry bezels or molds for shaping.
Safety equipment is non-negotiable when working with resin jewelry projects – equip yourself with latex gloves, safety glasses, and a respirator since raw epoxy resin materials are toxic. Set up your workspace in a well-ventilated area and cover surfaces with drop cloths to minimize inhalation risks and mess.
Gather decorative elements like dried flowers, glitter, or shells beforehand to streamline the embedding process. Always check safety labels for non-toxic options and follow manufacturer instructions for proper mixing ratios and curing times.
Preparing Your Workspace and Selecting Decorative Materials
Once you’ve assembled your essential supplies, setting up a pristine workspace becomes your next priority for successful resin pendant creation.
Confirm your area’s well-ventilated and cover all surfaces with drop cloths to protect against spills and drips. Don’t forget your safety gear—gloves and glasses aren’t optional when you make resin jewelry.
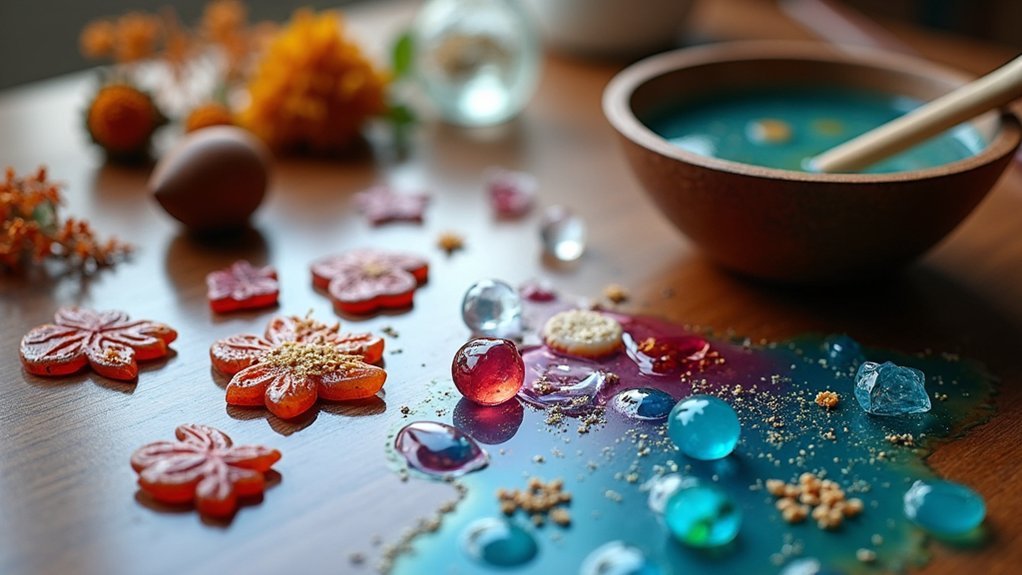
Now focus on selecting your decorative items. Whether you’re choosing dried flowers, glitter, or shells, they must be completely clean and dry to prevent unwanted chemical reactions.
Pick bezels, molds, or casings that’ll accommodate your chosen materials and match your design vision. Some decorative items might need specific preparation like pressing or cutting, so follow relevant tutorials carefully for proper fitting within your resin pendant.
Mixing Techniques and Proper Resin Ratios
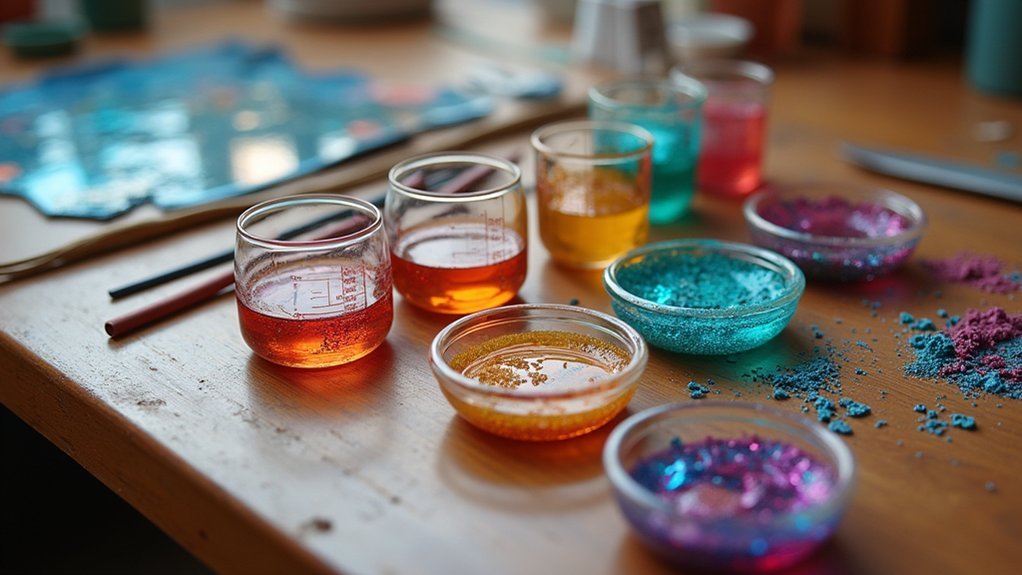
Two critical factors determine your resin pendant’s success: precise measurements and proper mixing technique. Most epoxy resins require a 1:1 ratio between part A (resin) and part B (hardener). Use clear measuring cups to guarantee accuracy and prevent contamination.
| Step | Time | Technique |
|---|---|---|
| Measure | 30 seconds | Equal parts A & B |
| Initial mix | 1 minute | Slow, deliberate stirring |
| Thorough blend | 3-4 minutes | Consistent motion |
| Final check | 30 seconds | No streaks visible |
| Pour | Immediate | Work quickly |
Mix slowly and thoroughly for 3-5 minutes to achieve suitable chemical reactions. Avoid overmixing, which introduces excess air bubbles that’ll create imperfections in your finished pendant. Always follow your manufacturer’s specific instructions, as different brands may have varying requirements for best results.
Layering and Curing Process for Professional Results
Professional layering transforms your pendant from amateur craft to gallery-worthy jewelry. Start your resin pendant by pouring a thin first layer and let it partially cure before adding decorative elements. This prevents items from floating and guarantees secure embedding.
The layering and curing process requires patience—use two to three layers, allowing each to cure completely before adding the next. This eliminates air bubbles and creates a smooth finish.
Stabilize your mold by inserting it into a cut kitchen sponge during curing. Keep your workspace away from pets and dust, covering with a cardboard box for protection.
Always follow manufacturer’s instructions for curing times, as most resins need 24 hours to fully cure, though environmental conditions may affect timing.
Demolding and Assembly With Jewelry Hardware
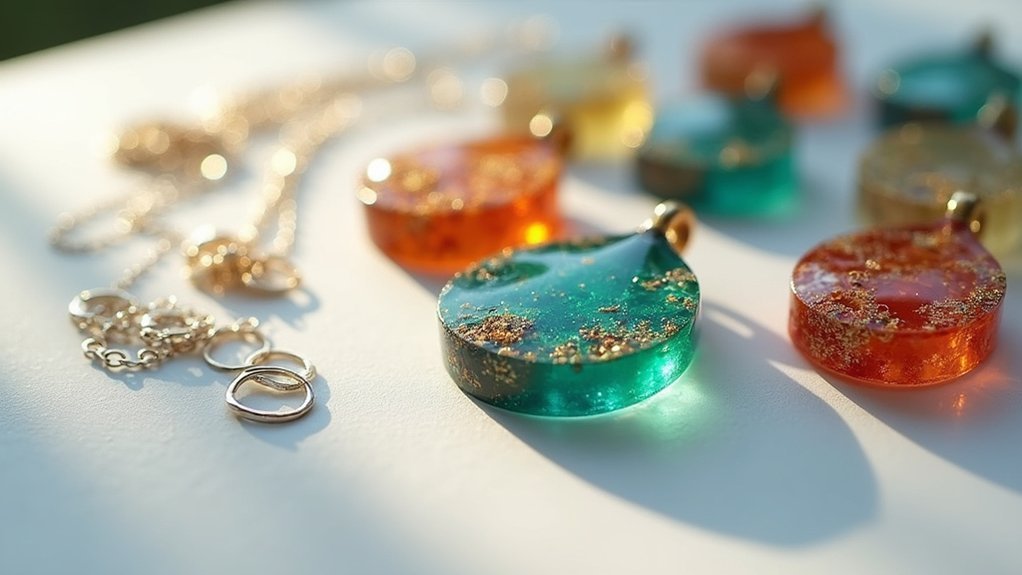
When your pendant reaches full hardness after 24 hours, you’ll transform it from a molded piece into wearable jewelry.
Begin demolding by gently pulling the mold edges away from your cured pendant, taking care not to crack the delicate resin. Once freed, you’ll attach the jewelry hardware that makes your pendant functional.
Use jewelry glue or mixed resin to secure a silver bead cap to the top, ensuring it’s firmly attached for hanging. If you need additional attachment points, carefully create small holes using precision tools to accommodate other findings.
Secure your bead cap with jewelry glue or resin, creating additional holes with precision tools for extra findings if needed.
- Feel the satisfaction of your creation coming to life as you string it onto a beautiful cord
- Experience the joy of transforming raw materials into treasured keepsakes
- Witness your artistic vision becoming wearable art
- Share meaningful handmade gifts that touch hearts
Frequently Asked Questions
Do You Need an UV Light to Make Resin Jewelry?
You’ll need a UV light only if you’re using UV resin, which cures in minutes. However, you can use epoxy or polyester resins instead, which don’t require UV lights.
Can I Make Resin Jewelry at Home?
Yes, you can make resin jewelry at home. You’ll need two-part epoxy resin, silicone molds, decorative items, and safety gear. Work in a well-ventilated area and follow mixing instructions carefully.
How to Attach Findings to Resin Jewelry?
You’ll attach findings by first ensuring your resin’s fully cured. Use jewelry glue or mixed resin to secure bails or bead caps. For holes, drill carefully with a Dremel tool.
What Should You Not Put in Resin?
You shouldn’t put materials that leach color, undried organic items like fresh flowers, metals that rust, lightweight objects that float, or chemically-treated items in resin.
In Summary
You’ve now mastered the fundamental steps for creating stunning resin jewelry pendants. Remember to always prioritize safety with proper ventilation and protective gear. Don’t rush the curing process—patience yields better results. Experiment with different decorative materials and layering techniques to develop your unique style. With practice, you’ll create professional-quality pendants that’ll impress friends and customers. Keep refining your skills, and you’ll soon be crafting beautiful, durable jewelry pieces.


Leave a Reply