You’ll need a crucible, safety equipment, and borax flux to cast molten sterling silver directly onto organic materials like leaves and flowers. Heat your silver to 1850°F and pour carefully onto fresh specimens at least 1.5mm thick for best detail capture. Set up your workspace outdoors with proper ventilation and heat-resistant surfaces for safety. After cooling, clean your pieces with pickle solution and use grinders to refine details. This technique transforms natural textures into unique jewelry elements that’ll inspire countless creative design possibilities.
Essential Tools and Materials for Direct Casting
Before you begin your direct casting journey, you’ll need to gather several essential tools and materials that guarantee both safety and success.
Start with The Crucible for melting your sterling silver shot and scrap material efficiently. You’ll require heat-resistant surfaces to protect your workspace from molten metal damage.
Safety equipment isn’t optional—invest in quality goggles and protective clothing to shield yourself from burns and splashes.
Don’t forget casting flux, primarily borax, which prevents melted silver from sticking during the process and assures smooth pouring.
Establish a stable outdoor workspace with excellent ventilation to minimize harmful smoke exposure when using your torch.
Finally, gather dry organic materials like beans, peas, and pasta—these create the distinctive textures that make direct casting so enthralling.
Selecting Natural Materials for Casting Projects
When you’re choosing natural materials for direct casting, you’ll need to take into account whether fresh or dried specimens work best for your project.
Fresh organic materials typically produce clearer, more detailed impressions than their dried counterparts, making them the preferred choice for most casting applications.
You’ll also want to guarantee your selected materials meet the minimum thickness requirement of 1.5mm to prevent breakage during the casting process and achieve successful results.
Fresh Vs Dried Materials
Since natural materials form the heart of direct cast jewelry, you’ll face an essential decision between using fresh or dried specimens for your casting projects.
Fresh materials deliver superior casting results because their moisture content and texture create remarkably detailed impressions. You’ll capture vibrant colors and intricate surface patterns that make your jewelry pieces truly exceptional.
Dried items can work effectively too, though they’ll produce less detailed results. They offer unique textures that create varied aesthetic appeal in your finished pieces.
Regardless of your choice, guarantee materials meet the 1.5mm minimum thickness requirement for structural integrity. If you’re working with thinner fresh specimens, apply molten wax to their backs for additional support during casting.
Thickness Requirements for Success
Achieving successful direct cast jewelry depends heavily on selecting materials with adequate thickness, as items measuring less than 1.5mm will likely crack or break during the casting process.
You’ll need to carefully measure your organic items before proceeding with your project.
When your chosen materials don’t meet these thickness requirements, you can apply molten wax to the backside to build up the necessary depth.
This technique effectively reinforces delicate petals and thin leaves, making them suitable for casting.
You must balance wax temperature carefully during application.
Too hot, and you’ll cause blistering that damages the material’s surface detail.
Too much wax creates excessive weight that can compromise your final piece’s structural integrity and affect the flow of molten metal through your carefully planned sprues.
Setting Up Your Workspace for Safe Casting
Before you begin melting silver and creating your cast jewelry pieces, you’ll need to establish a workspace that prioritizes both safety and functionality.
Your casting setup requires essential protective gear like safety goggles and heat-resistant gloves, along with proper ventilation to handle the smoke and fumes from molten metal.
Choose an outdoor location or well-ventilated indoor space where you can work safely without compromising air quality or risking fire hazards.
Essential Safety Equipment
When you’re preparing to cast jewelry, protecting yourself from the inherent dangers of working with molten metal becomes your top priority. The casting process involves extreme temperatures and potential hazards that demand proper safety equipment.
Your protective eyewear shields your eyes from flying sparks and molten metal splashes that could cause permanent damage. Heat-resistant gloves are essential for handling hot tools and materials safely throughout the process. You’ll need protective clothing like an apron to guard against burns and metal splashes on your body.
Essential safety equipment includes:
- Protective eyewear – Safety glasses or face shields to prevent eye injuries
- Heat-resistant gloves – Insulated gloves for handling hot materials and tools
- Protective apron – Heat-resistant clothing to prevent burns and splashes
- Water beaker – For emergency flame extinguishing and material cooling
Ventilation and Location
Your safety equipment won’t protect you if you’re working in a poorly ventilated or inappropriate location.
Set up your casting workspace outdoors or in a well-ventilated area to minimize smoke inhalation while melting silver. Proper ventilation prevents dangerous fume buildup that can jeopardize your health.
Choose a heat-resistant surface like a metal table or concrete for your workspace. This prevents fire hazards when handling The Crucible and molten metal.
Place your crucible on a flat, non-flammable surface to guarantee stability and prevent tipping accidents during heating.
Position a beaker of water nearby for quick fire response. Even with proper safety equipment, immediate access to water provides essential backup protection when working with molten metal and open flames.
Preparing Sterling Silver for the Melting Process
Since successful direct cast jewelry depends on properly prepared silver, you’ll need to start by gathering clean sterling silver shot and scrap material, removing any contaminants that could interfere with the melting process.
Properly prepared sterling silver with all contaminants removed is the foundation of any successful direct casting project.
Next, apply casting flux—primarily borax—to coat your sterling silver pieces. This prevents the metal from sticking to your crucible during heating.
Set up your workspace with a stable, heat-resistant surface and position your crucible securely. Keep a beaker of water nearby for safety and equipment cooling.
When you light your torch, gradually heat the sterling silver mixture while monitoring temperature until it reaches approximately 1850°F.
- Clean all silver thoroughly before beginning
- Apply borax flux generously to prevent sticking
- Position crucible on stable heat-resistant surface
- Keep water nearby for safety and cooling
Step-by-Step Direct Casting Techniques
You’ll start by gathering your organic materials and setting up your workspace with proper safety equipment and tools like The Crucible.
Next, you’ll melt your sterling silver mixture and carefully pour the molten metal directly onto your chosen materials to capture their unique textures.
Finally, you’ll cool, clean, and customize your castings by cutting and reshaping components to create distinctive jewelry pieces.
Material Preparation and Setup
Before you can achieve successful direct casting results, proper material selection forms the foundation of your entire project.
You’ll need fresh or dried organic materials with at least 1.5mm thickness for effective casting. Consider applying molten wax to their backs for added strength during material preparation.
Set up your workspace with these essential components:
- Rubber base and steel flask with .25″ clearance for proper mold construction
- Investment powder mixed with water to sour cream-like consistency
- Vacuum system to eliminate air bubbles from your investment mixture
- Safety equipment including heat-resistant surfaces and adequate ventilation
Mix your investment powder carefully, achieving the right consistency before vacuuming.
This removes air bubbles that could compromise your final piece’s quality and structural integrity.
Melting and Pouring Process
Once your workspace is prepared and materials are ready, heat your sterling silver shot and scrap in the crucible to reach approximately 1850°F for ideal melting. Add borax casting flux to prevent the molten silver from adhering to the crucible walls and guarantee smooth pouring.
| Step | Action | Purpose |
|---|---|---|
| 1 | Heat silver to 1850°F | Achieve proper melting consistency |
| 2 | Add borax flux | Prevent sticking and aid flow |
| 3 | Pour into organic materials | Create unique textures and forms |
During the melting process, monitor your temperature carefully. Pour small amounts of molten silver directly into your selected dry organic materials like beans or pasta. Watch the weight to achieve your desired piece size. After pouring, extinguish flames with water and allow castings to cool completely before handling.
Finishing and Design Options
After your castings have cooled completely, cleaning and pickling the pieces becomes your first priority to reveal the true beauty of your direct cast jewelry. This vital finishing step removes oxidation and exposes the metal’s authentic appearance.
You’ll then use grinders to carve away excess material while carefully preserving delicate design elements and structural integrity.
When mistakes occur, you can incorporate sterling silver patches to repair thin sections or unwanted holes without compromising aesthetics. Don’t hesitate to cut apart specific sections for creative modifications that enhance your unique vision.
- Analyze organic textures created during casting for design inspiration
- Experiment with sectional cutting for innovative jewelry modifications
- Maintain structural integrity while refining intricate cast details
- Use strategic patching techniques for seamless repairs
Unique Effects From Different Organic Materials
When you explore organic materials for direct cast jewelry, you’ll discover that each substance creates dramatically different textures and forms in your finished pieces.
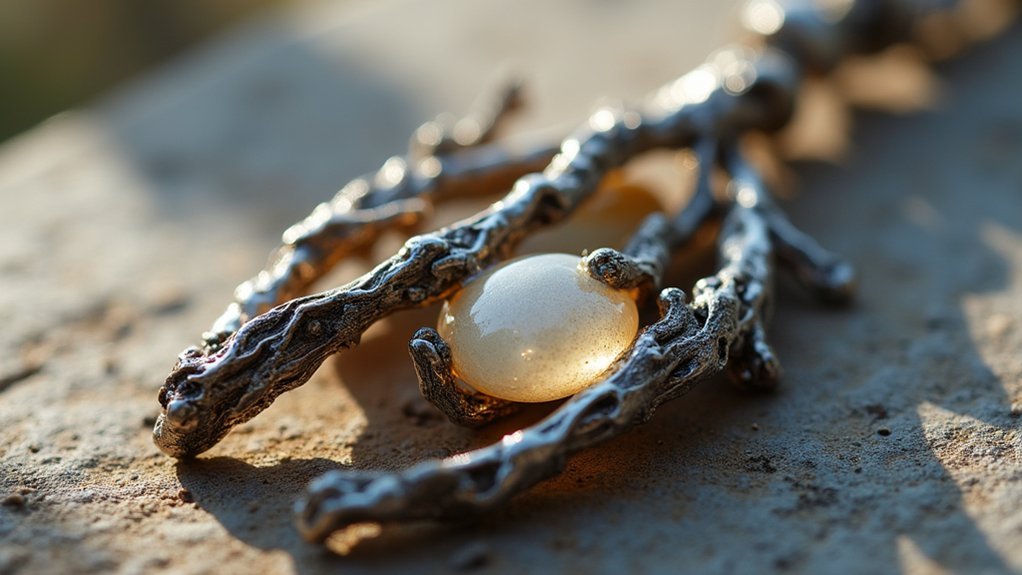
Spaghetti casting produces linear effects that create unique textures resembling the Emerald City’s ethereal patterns. You can use a variety of dried chickpeas to achieve coral-like organic structures perfect for nature-inspired designs.
Water C casting generates intriguing shapes in small sizes, making it ideal for gem placement in deeper recesses of larger pieces without making them heavy to wear.
Transform everyday items into one solid, intricate jewelry design that showcases natural elements’ complexity.
Each organic material influences your final texture and form, allowing creative exploration and customization opportunities in your jewelry making process.
Water Casting Methods for Organic Shapes
Water casting stands out as one of the most unpredictable yet rewarding techniques in direct cast jewelry making. You’ll pour molten silver directly into water, creating stunning organic shapes as the metal rapidly cools and solidifies upon contact.
This method produces fascinating designs that often resemble natural coral formations or other organic structures, giving your jewelry design an authentically wild aesthetic.
- Natural recesses form automatically – Perfect cavities emerge for gem placement without additional tooling
- Coral-like textures develop instantly – Mimics ocean formations and natural growth patterns
- Weight control through pouring precision – Monitor silver amounts to customize final piece dimensions
- Enhanced texturing with dried materials – Combine chickpeas or pasta with water casting for unique surface patterns
You’ll discover that careful monitoring of your molten silver creates consistent, customizable results.
Cleaning and Finishing Your Cast Pieces
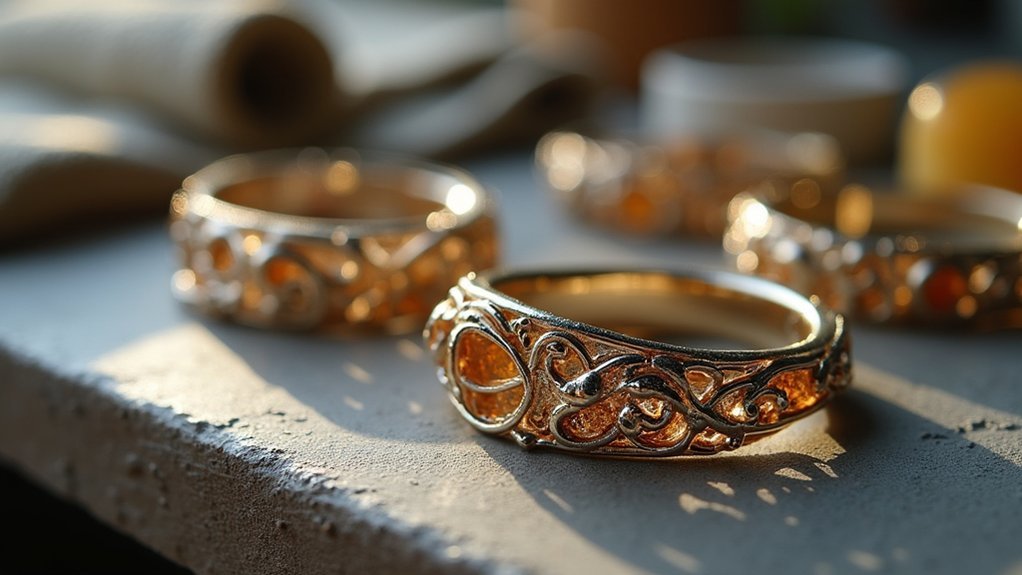
Once your molten silver has cooled and solidified, you’ll need to transform these raw castings into polished jewelry components through careful cleaning and finishing.
Begin by boiling your cast pieces in water to remove investment material, revealing the solidified metal beneath. Use an ultrasonic cleaner to eliminate stubborn investment gunk for a smooth finish. For intricate designs, carefully grind away excess metal using precision tools, avoiding damage to delicate features while maintaining structural integrity.
| Cleaning Step | Tool/Method | Purpose |
|---|---|---|
| Initial removal | Boiling water | Remove bulk investment |
| Deep cleaning | Ultrasonic cleaner | Eliminate remaining residue |
| Metal trimming | Precision grinders | Shape and refine |
| Repair work | Sterling patches | Fix thin sections |
| Final treatment | Pickle solution | Restore true appearance |
If mistakes occur, solder sterling patches onto thin sections, then blend seamlessly through additional carving.
Customizing and Modifying Cast Elements
After completing the cleaning process, you can transform your cast pieces into truly unique jewelry by selectively cutting, reshaping, and combining different elements.
Customizing your castings opens endless creative possibilities as you work with the inherent textures and forms created during the original casting process.
Working with cast textures and natural forms unlocks unlimited artistic potential for creating distinctive, personalized jewelry pieces.
When you modify cast elements, you’re fundamentally cannibalizing specific parts to create innovative combinations. This approach lets you integrate various organic materials into cohesive designs that reflect your personal artistic vision.
- Use grinders and shears to carefully alter cast elements while preserving structural integrity
- Embrace existing textures and forms from the casting process to enhance aesthetic appeal
- Experiment with combining different casting components for unique material integration
- Practice hands-on modification techniques to deepen your understanding of the design process
Incorporating Direct Cast Elements Into Jewelry Designs
Moving beyond modification techniques, you’ll discover that integrating your prepared cast elements into finished jewelry requires careful consideration of both structural and aesthetic factors.
Direct casting with organic materials creates unique focal points that demand thoughtful placement within your overall design. You’ll need to balance the organic textures from leaves, flowers, or spaghetti casting against smoother metal components to achieve visual harmony.
Consider weight distribution when incorporating heavier cast elements, ensuring comfortable wearability. Your customization choices should complement the natural patterns – coral-like structures from chickpeas work beautifully as pendants, while linear spaghetti-cast elements excel as connecting components.
Remember that pickling and finishing reveal intricate details, so plan your assembly order accordingly. Size your cast pieces appropriately, leaving space for gemstone settings if desired.
Frequently Asked Questions
How Do You Cast Organic Material?
You’ll prepare organic materials by ensuring they’re 1.5mm thick, then apply molten wax backing for structure. Create sprue channels, use vacuum investment to eliminate bubbles, and cast with molten metal for detailed results.
What Is the Difference Between Casting and Fabrication Jewelry?
You’ll cast jewelry by pouring molten metal into molds, creating solid pieces with organic textures, while you’ll fabricate jewelry by manipulating sheets and wires through soldering and forging techniques.
Can You Cast Stainless Steel Jewelry?
You can cast stainless steel jewelry, but it’s challenging due to its high melting point and specialized requirements. You’ll need ceramic shells, precise temperature control, and careful cooling to prevent cracking or distortion.
Can You Do Silver Casting at Home?
You can cast silver at home using a torch, crucible, and heat-resistant surface. You’ll need proper safety gear, good ventilation, sterling silver shot, and borax flux for successful results.
In Summary
You’ve learned the fundamentals of direct casting with organic materials, from workspace setup to finishing techniques. Remember that practice makes perfect – don’t expect flawless results immediately. Start with simple materials like leaves or twigs before attempting complex textures. Keep experimenting with different organic elements and water casting methods. Your unique pieces will develop character as you refine your skills and discover which natural materials work best for your artistic vision.



Leave a Reply