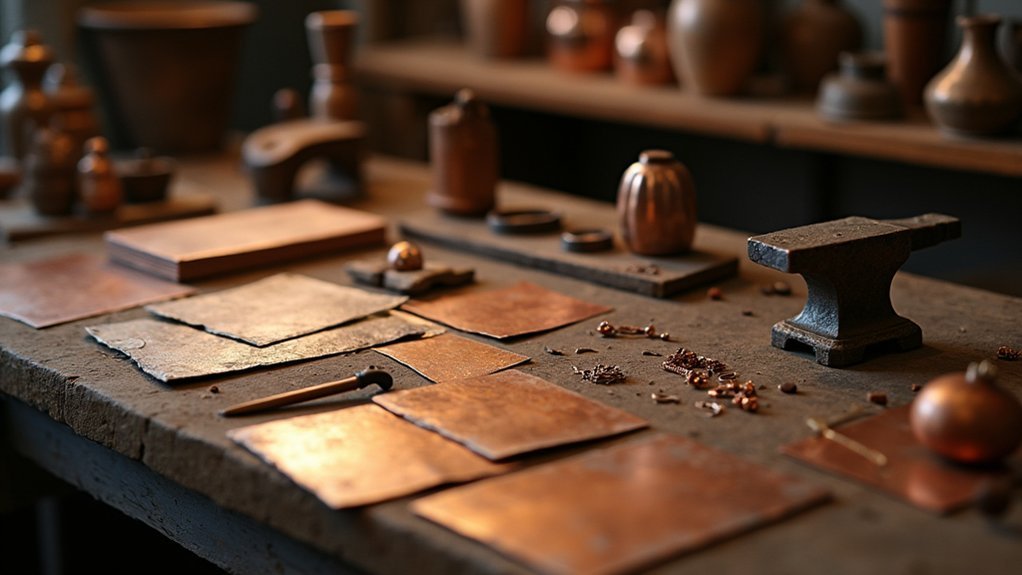
Copper jewelry forging at home requires just a few essential tools: 14-gauge dead soft copper wire, a chasing hammer, steel bench block, nylon jaw pliers, and wire cutters. Set up in a well-ventilated area on a sturdy workbench and always wear safety glasses. You’ll create beautiful pieces by flattening, texturing, and shaping the naturally malleable copper. Start with simple rings or bangles, then enhance your creations with patinas for distinctive character. These fundamentals open doors to endless design possibilities.
Simple Home Copper Jewelry Forging Techniques

Five essential tools and materials are all you’ll need to begin forging copper jewelry at home. Start with 14-gauge round dead soft copper wire, which offers the perfect balance of malleability and durability for beginners.
Your hammering tools should include a chasing hammer or ball peen hammer—use the flat side for flattening and the ball side to create texture.
Hammers become extensions of your artistic vision—flatten with precision, texture with purpose, transform simple wire into wearable art.
A steel bench block provides the solid surface necessary for effective hammering, guaranteeing your designs maintain their shape.
Practice on 3-5 inch wire segments to develop your skills before attempting larger pieces.
Before starting any copper jewelry making project, clean your materials with acetone to prevent oxidation and guarantee better finish adhesion later. This simple preparation step greatly improves your final results.
Essential Tools for Copper Jewelry Forging
The right selection of tools can transform your copper jewelry forging from frustrating to fulfilling. Start with a chasing hammer to flatten and texture your copper pieces, paired with a steel bench block that absorbs impact and guarantees precision during hammering.
For adding textures and hardening your copper, you’ll need a ball peen hammer, while a flat face hammer creates smooth surfaces.
When working with copper wire, nylon jaw pliers are essential—they hold the metal securely without leaving marks or unwanted indentations on the soft surface.
Don’t forget wire cutters for trimming copper wire to your desired lengths before you begin the forging process.
With these fundamental tools at your workstation, you’re ready to create stunning copper jewelry pieces right at home.
Understanding Copper Properties for Jewelry Making

Versatility makes copper an exceptional choice for jewelry making, especially for those new to metal forging. When you’re crafting copper pieces, you’ll appreciate how easily this reddish-brown metal can be shaped and manipulated into your desired designs.
As you work with copper, keep these key properties in mind:
- The natural malleability allows you to hammer, bend, and form copper without breaking.
- Its distinctive patina develops over time, giving your pieces character and vintage appeal.
- Excellent heat conductivity makes soldering connections between elements straightforward.
- Different wire gauges serve specific purposes – thicker 14-16 gauge for sturdy foundations, thinner 20-28 gauge for intricate detailing.
You’ll find copper’s affordability particularly appealing when practicing new techniques before using precious metals.
Setting Up Your Home Forging Workspace
Creating a proper home forging workspace requires essential tools including hammers, pliers, and a sturdy bench block to support your crafting endeavors.
You’ll need to designate a well-ventilated area with a robust workbench that can withstand the repetitive impacts of metalworking.
Always prioritize safety by wearing protective gear such as safety glasses and gloves while keeping your materials organized for efficient access during your copper jewelry projects.
Essential Tools Needed
Setting up your home copper jewelry workspace requires five fundamental tools to begin forging beautiful pieces effectively.
Dead soft copper wire is easy to work with and will form the base of many really cool designs. With these tools, you’ll quickly develop your jewelry making skills and produce stunning pieces in different shapes and colors.
- Flat face chasing hammer ($11.57) – Essential for forging copper wire and adding texture to your jewelry designs
- Steel bench block ($29.95) – Provides a durable surface that absorbs impact while hammering metal pieces
- Nylon jaw pliers – Protects your copper from nicks when manipulating wire
- Safety equipment – Always wear gloves and safety glasses to protect yourself while working with metal
Safety First Setup
Three critical safety considerations must guide your home copper jewelry workspace setup before you begin forging.
First, guarantee proper ventilation—install an exhaust fan or open windows to prevent dangerous fume inhalation during the heating process.
Second, create a stable work environment with a sturdy workbench that can withstand repeated hammering.
Keep this area organized and clutter-free to prevent accidents while you’re focused on your jewelry pieces.
Place heat-resistant materials like fireproof mats or ceramic tiles on your work surface to protect against burns and fire hazards.
Finally, never compromise on personal protection.
Wear safety glasses to shield your eyes from metal fragments, heat-resistant gloves for your hands, and an apron for clothing protection.
Always keep a fire extinguisher and first aid kit within easy reach.
Basic Hammering Techniques for Copper
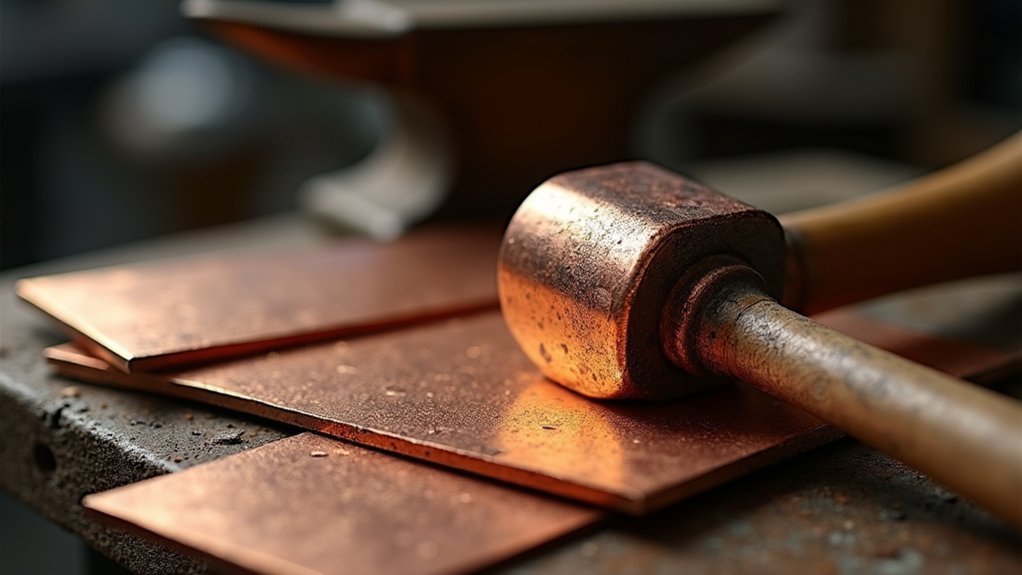
Mastering the art of hammering transforms ordinary copper wire into stunning jewelry pieces with enhanced durability and visual appeal. Working with 14-gauge copper wire requires both technique and practice on a steel bench block for ideal results.
- Use the flat face of your chasing or ball peen hammer to flatten wire sections, creating a hardened surface that’s more resistant to bending.
- Apply the ball head to add interesting texture patterns that catch light beautifully.
- Hold your hammer firmly and strike at a 45-degree angle for even texturing without excessive deformation.
- Practice on a small 3-5 inch piece before tackling your main project to build confidence and refine your technique.
Remember to maintain a solid working surface to guarantee efficient force transfer and prevent damage to your copper pieces.
Creating Texture With Household Items
You’ll be amazed at how ordinary hammers can transform flat copper into jewelry with distinctive character when you vary your striking techniques and patterns.
Kitchen tools offer surprising texturing options—try pressing rubber spatulas, textured rolling pins, or even cheese graters against copper sheets before applying gentle, even pressure.
Hammer Marks Magic
Kitchens and junk drawers hold secret weapons for copper jewelry artisans looking to create distinctive textures.
You’ll find that everyday items like forks, spoons, and textured surfaces can transform plain copper into eye-catching jewelry with just a few strikes.
Your hammering technique matters tremendously.
Try:
- Placing your copper on a steel bench block or leather sandbag for stability and clearer impressions
- Varying your hammer pressure—light taps for subtle patterns, firm strikes for deeper textures
- Switching between hammer types (ball peen, chasing) to create diverse effects
- Experimenting with household textures like fabric, wood grain, or even crumpled aluminum foil
Beyond aesthetics, hammering work-hardens your copper, making your finished pieces more durable and ready to wear.
The magic happens when unpredictable textures emerge from your creative experimentation.
Kitchen Tool Textures
The humble utensil drawer holds a treasure trove of texturing tools for copper jewelry artists. Your everyday forks can create striking linear patterns when pressed against copper surfaces, while spoons offer smooth, curved impressions that add elegant dimension to your pieces.
Don’t overlook your rolling pin—especially those with textured surfaces—as they can transfer intricate designs onto flat copper sheets with just a firm pass.
For varied finishes, try crumpling aluminum foil and pressing it against your copper, or use different grits of sandpaper to achieve custom surface textures.
These kitchen implements deliver professional-looking results without specialized equipment. You’ll discover that experimenting with these household items not only enhances your jewelry’s aesthetic appeal but also opens up innovative design possibilities you hadn’t imagined.
Annealing Copper for Better Workability
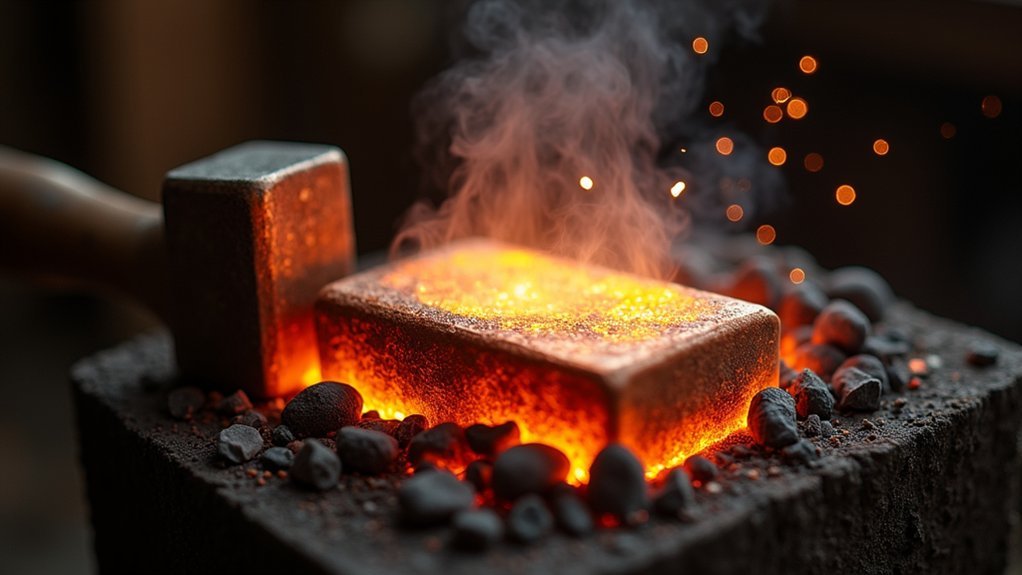
Before attempting to shape your copper jewelry pieces, understanding the annealing process is vital for successful metalwork.
Annealing relieves internal stress in the metal, making it more malleable for your creative designs.
Proper annealing transforms rigid copper into a responsive canvas awaiting your artistic vision.
To properly anneal copper:
- Heat the copper to approximately 538°C (1,000°F) using a propane torch or kiln until it glows a dull red color.
- Maintain even heating throughout the piece to maintain consistent workability.
- Allow the metal to cool slowly in still air—rapid cooling will cause rehardening.
- Repeat the annealing process regularly during intricate work to prevent breakage.
As you craft more complex jewelry designs, you’ll notice that properly annealed copper bends, shapes, and textures more easily, giving you greater control over your artistic expression.
Shaping Copper Wire Into Decorative Elements
Mastering the art of shaping copper wire transforms ordinary metal into stunning jewelry elements that capture attention and showcase your creativity.
Begin by selecting the appropriate gauge—thicker wires provide durability while thinner options enable more intricate designs.
For precise control, grip the wire firmly with round-nose pliers when creating curves and switch to flat-nose pliers for angular bends.
When crafting rings or bracelets, a wooden or steel mandrel guarantees consistent sizing and smooth circular shapes.
You’ll find that hammering your shaped pieces with a chasing hammer not only adds beautiful texture but also hardens the copper, enhancing both durability and visual appeal.
Before working with your copper material, practice on inexpensive wire to refine your techniques, allowing for seamless adjustments to more complex designs.
Forging Simple Copper Rings and Bangles
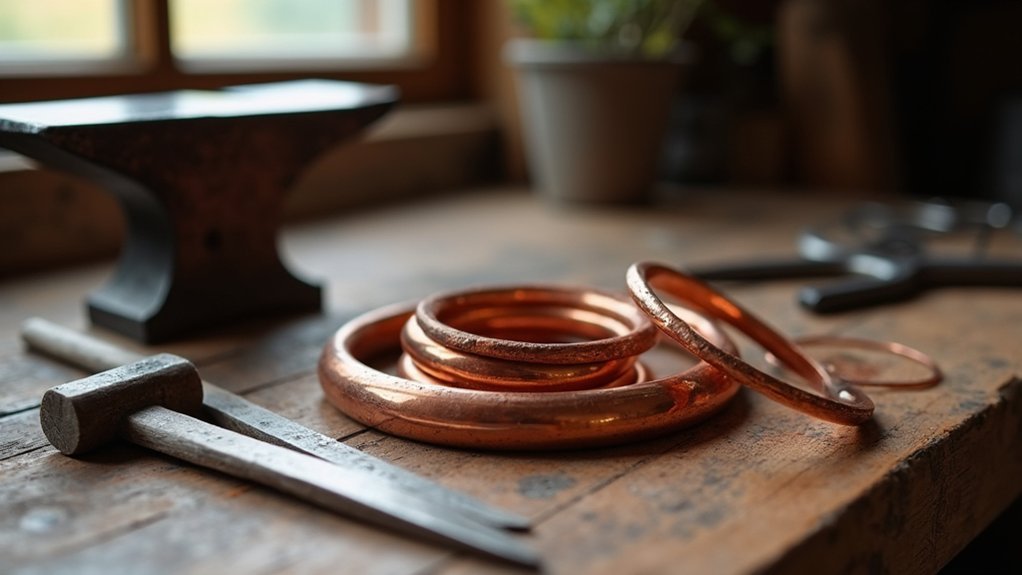
Creating stunning copper rings and bangles begins with selecting 14-gauge dead soft copper wire, which offers ideal malleability for beginners while maintaining structural integrity in the finished piece.
You’ll need to cut your wire to the proper length, remembering to add extra for any overlapping connections.
To craft your own copper jewelry at home, follow these steps:
- Measure and cut the copper wire, adding extra length for joining the ends
- Shape the wire around a mandrel or wooden dowel, applying even pressure to create a perfect circle
- Harden and texturize your piece using a chasing hammer on a steel bench block
- Clean with acetone to remove oils, then apply a protective wax finish to prevent tarnishing
Adding Patina to Enhance Your Designs
Through the ancient art of patination, your copper jewelry can transform from simple metalwork into pieces with rich character and depth.
Liver of sulfur creates stunning effects ranging from deep browns to vivid greens, depending on application time and concentration.
After forging your piece, experiment with different patina techniques to discover unique finishes.
Remember that each copper surface reacts differently, making every creation distinctive.
Once you’ve achieved your desired color, neutralize the treatment with baking soda to halt the chemical reaction and remove residues.
Beyond aesthetics, patina serves as a protective layer against further oxidation, extending your jewelry’s lifespan.
Maintain your finished pieces by regularly applying protective wax and gentle polishing to preserve their enchanting finishes and guarantee they’ll be enjoyed for years to come.
Cold Connections for Copper Jewelry
You’ll find cold connections like rivets and tabs invaluable for joining copper pieces without heat, creating texture and visual interest while keeping your workspace simple.
Wire wrapping offers another heat-free option, allowing you to secure stones and connect components with just a few basic tools.
These techniques open up possibilities for multi-layered designs and mixed-media jewelry that wouldn’t be possible with traditional soldering methods.
Rivets and Tabs
Craftspeople wanting to join copper pieces without heat have excellent options in rivets and tabs.
These cold connections create strong bonds while adding distinctive visual elements to your jewelry designs.
To create effective rivets and tabs in your copper pieces:
- Cut copper wire to desired length for rivets, ensuring it’s long enough to secure the pieces while allowing for flattening at both ends.
- Use a hole punch to create precise openings where your rivets will connect the elements.
- Position your work on a bench block and hammer the rivet ends to flatten them, creating a secure connection.
- Form decorative tabs by cutting small copper pieces, then bending and shaping them to complement your rivets.
These techniques preserve metal integrity while allowing for creative, durable jewelry designs.
Wire Wrapping Techniques
Three essential wire wrapping methods offer copper jewelry makers elegant cold-connection solutions without requiring heat. Using dead soft copper wire in gauges 20-22 will give you the perfect balance of malleability and strength as you begin your wire wrapping journey.
| Technique | Application |
|---|---|
| Simple Loop | Secure single beads or stones |
| Figure Eight | Connect multiple components |
| Coil Wrap | Reinforce joints and focal points |
| Twisted Wire | Add texture and visual interest |
| Cage Wrap | Enclose irregular stones |
Start with basic shapes and gradually work toward more complex designs. You’ll find that incorporating twisted or braided wire elements adds sophistication to your pieces. With consistent practice, you’ll develop the muscle memory needed to create uniform wraps that transform simple copper wire into professional-looking jewelry components.
Polishing and Finishing Your Copper Pieces
Anyone who’s crafted copper jewelry knows that the real magic happens during the finishing process. A well-polished piece transforms from merely handmade to professionally crafted.
To achieve that coveted luster on your copper creations:
- Select appropriate polishing compounds – rouge creates high shine while tripoli offers a satin finish
- Work systematically from coarser to finer grits for ideal results
- Apply a protective sealant like beeswax or commercial metal coating to prevent tarnishing
- Establish a regular maintenance routine with a soft cloth to preserve the finish
Don’t be afraid to experiment with different techniques and compounds. You’ll discover unique finishes that complement your personal style and make your copper jewelry truly distinctive.
Designing Your First Copper Jewelry Collection
With your copper pieces now polished to perfection, it’s time to channel your skills into creating a cohesive collection that showcases your unique vision.
Begin by selecting a unifying theme—perhaps natural elements, geometric patterns, or cultural motifs—to tie your pieces together visually.
A cohesive theme breathes life into your collection, transforming individual pieces into a powerful artistic statement.
Include a variety of jewelry types in your collection, from delicate earrings to statement pendants and versatile bracelets.
Experiment with different copper gauges; thicker wires provide structure while thinner ones allow for intricate detailing.
Develop signature finishing techniques that distinguish your work, whether it’s a particular patina color or texturing method.
As you create, document your process and seek feedback from peers to refine your designs.
Frequently Asked Questions
How to Melt Copper at Home for Jewelry?
You’ll need a propane torch, heat-resistant crucible, and proper ventilation to melt copper at home. Heat copper above 1,984°F, use flux to prevent oxidation, then pour into prepared molds for jewelry making.
How to Oxidize Copper Jewelry at Home?
You can oxidize copper jewelry at home using vinegar and salt solution, ammonia fumes in a sealed container, or heat treatment with a torch. After achieving desired patina, seal with clear lacquer or wax.
How Do You Hammer Copper Jewelry?
You’ll need a ball peen hammer and steel bench block. Strike at a 45-degree angle with consistent pressure. Start with dead soft copper and anneal if it hardens. Use different hammers for various textures.
What Kind of Solder Do You Use for Copper Jewelry?
For copper jewelry, you’ll want to use copper or lead-free silver solder with appropriate flux. Choose a solder that matches your wire gauge and consider lower-temperature options to prevent warping your pieces.
In Summary
You’ve now mastered the basics of copper jewelry forging at home. With these simple techniques, you’re ready to create unique pieces that reflect your personal style. Remember to practice your hammering skills, experiment with patinas, and refine your finishing methods. As you continue working with copper, you’ll develop your own signature techniques and designs. Keep exploring this versatile metal’s potential!
Leave a Reply