Create stunning jewelry without soldering using techniques like wire wrapping with 20-24 gauge wire, cold connections with micro screws, texturing metal using the clock method, metal stamping for personalization, and coil wrapping for secure joints. You can also try fold-forming, tab and slot construction, wire weaving, oxidizing with liver of sulfur, and using hole-punch pliers for clean perforations. These beginner-friendly methods will transform your metalwork while avoiding the challenges of traditional soldering.
10 Best No-Solder Jewelry Metalwork Techniques

Creativity flourishes even without a torch in hand. You can create stunning metal jewelry using no-solder techniques that require minimal equipment while delivering professional results.
Cold connections using micro screws and nuts join metal pieces securely, allowing you to design complex pieces without heat. Hammering techniques transform ordinary metal into extraordinary art. The clock method produces impressive textures while maintaining structural integrity.
The humble hammer becomes a sculptor’s tool, transforming flat metal into dimensional art through strategic, rhythmic strikes.
For beautiful bangles, try using a bangle die to create wavy patterns on copper wire—an approach that’s perfect for beginners.
Don’t overlook finishing touches: oxidizing copper with liver of sulfur adds depth and protection to your pieces. When creating clasps, the hook and eye closure method provides secure fastening for bangles and bracelets without soldering.
These techniques open a world of metalwork possibilities without ever lighting a torch.
Wire Wrapping and Coiling Techniques for Secure Connections
You’ll discover that locking wire spirals create remarkably stable joints when you wrap tightly at both ends of your component.
Master coil wrapping fundamentals by practicing consistent tension while forming uniform spirals around mandrels of various diameters.
These techniques will become your go-to methods for creating professional-looking connections that stay secure without soldering.
Locking Wire Spirals
Three essential techniques make locking wire spirals one of the most versatile no-solder methods in jewelry making.
First, select wire between 20-24 gauge that balances strength and flexibility for ideal wrapping.
Second, create a small anchor loop before tightly wrapping the wire around itself in outward motions to form your spiral.
For jewelry makers seeking extra security, implement the third technique: thread the wire end back through the coils to create a locking mechanism that prevents unwinding. This reinforcement guarantees your components stay firmly connected without soldering.
Practice maintaining consistent tension throughout your wraps—this develops the muscle memory needed for professional-looking results.
With these techniques mastered, you’ll create secure, polished wire spirals that enhance your designs while eliminating the need for soldering equipment.
Coil Wrapping Fundamentals
Coil wrapping represents another cornerstone of no-solder metalwork that builds upon the spiral techniques we’ve just explored. This method creates secure connections between metal pieces without soldering, making it perfect for decorative jewelry elements.
Select wire gauge 20-24 for your project and maintain consistent tension throughout your wrapping process. Use pliers to hold the wire taut while working.
| Wire Gauge | Best Uses | Wrap Technique |
|---|---|---|
| 20 gauge | Bases | 5-7 wraps |
| 22 gauge | General | 7-9 wraps |
| 24 gauge | Delicate | 10+ wraps |
| Mixed | Contrast | Alternating |
| Textured | Accent | Clustered |
For maximum strength, make several tight wraps where your coil meets the base wire. This increases contact surface area. Don’t hesitate to experiment with different coil shapes and sizes to develop your unique design aesthetic.
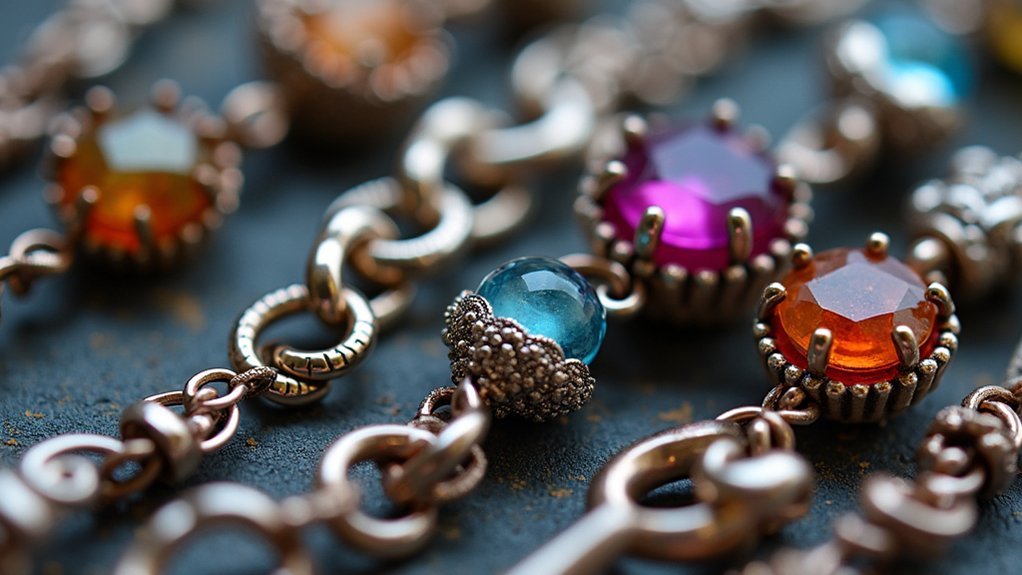
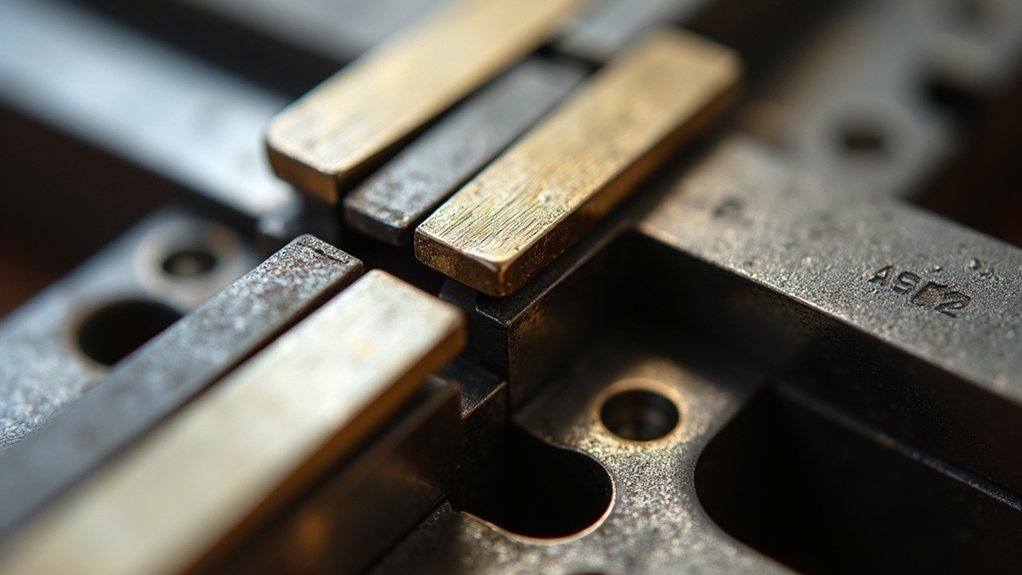
Cold Connection Methods Using Rivets and Micro Screws
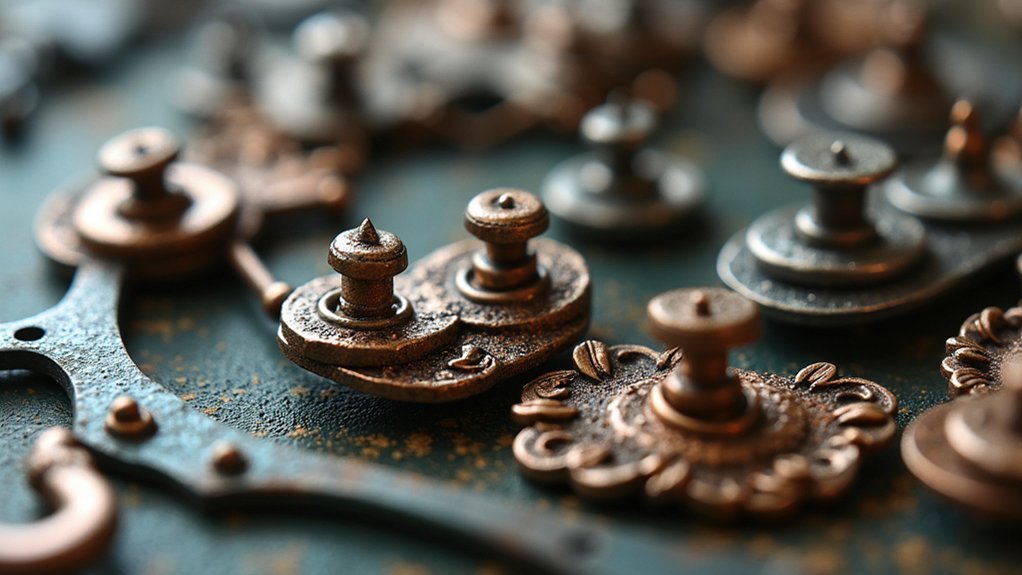
Cold connection methods open up a world of possibilities for jewelry makers who want to avoid the heat and complexity of soldering. Using micro screws and nuts creates secure metal joints without specialized equipment—perfect if you’re just starting your metalwork journey.
You’ll find these techniques quite versatile. Trim the micro screw flush with the nut for a clean finish, or leave extra length for riveting to enhance your design. For additional stability, apply super glue to the back of your connection.
Another effective approach is hammering the screw end flush with the nut, creating a strong cold connection. These methods allow you to craft intricate metal jewelry pieces while bypassing soldering challenges.
You’ll develop professional-looking results while expanding your metalworking skills through these accessible techniques.
Fold-Forming to Create Dimensional Metal Jewelry
Fold-forming represents another exciting solderless approach to elevate your jewelry designs beyond flat surfaces. This technique transforms flat metal sheets into complex, three-dimensional forms without welding or soldering.
You’ll start with copper or aluminum sheet, fold it strategically, then hammer specific areas to create stunning dimensional effects.
What makes fold-forming particularly accessible:
- Requires minimal specialized equipment—just basic hammers, mallets, and stakes
- Works exceptionally well with softer metals that respond readily to manipulation
- Creates natural light refraction through varied surface textures and curves
- Allows you to develop complex designs from simple folding principles
The process is intuitive and forgiving, making it perfect for beginners while offering enough complexity for advanced metalsmiths.
You’ll discover endless possibilities as you experiment with forming metal through this versatile technique.
Texturing Metal With Hammers and Dies
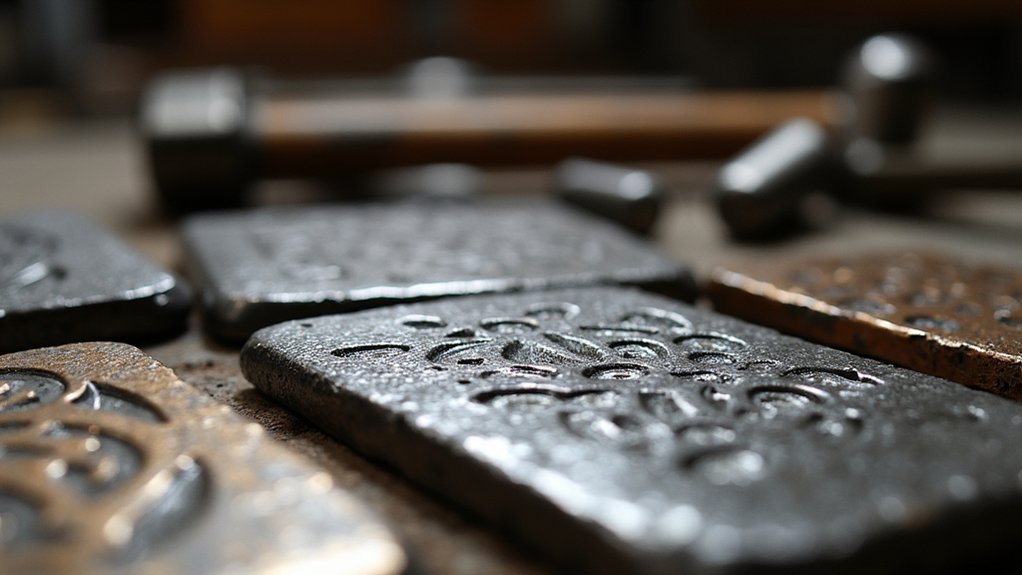
You’ll discover endless design possibilities when texturing metal with the right hammers and dies—from subtle stippling to bold geometric patterns.
Select hammers with purpose-specific heads like chasing or dapping styles, and always opt for heavier mallets that deliver the necessary impact for clear impressions.
When using dies, position your metal at the 12, 6, 3, and 9 o’clock positions, then follow with steel wool polishing to highlight the textured areas against smooth surfaces.
Texture Patterns Possibilities
The visual impact of textured metal can transform a simple jewelry piece into something extraordinary. When texturing metal with hammers and dies, you’ll discover endless creative possibilities by varying your approach to hammer strikes.
You don’t need expensive equipment to achieve professional-looking results.
- Try the clock method—striking at 12, 6, 3, and 9 positions—for even, balanced textures
- Experiment with different hammer types: chasing hammers create fine details while ball peen hammers produce rounder impressions
- Adjust pressure and angle of your strikes to create depth variations within the same pattern
- Use wavy bangle dies for consistent, repeatable patterns that look professional even with minimal practice
Hammer Selection Guide
Selecting the right hammer stands at the heart of successful metal texturing for no-solder jewelry making. Your hammer selection guide should prioritize matching tools to desired effects—reach for a chasing hammer when creating fine details and switch to a heavier mallet for bold textures.
To create even distribution and prevent fire scale buildup, utilize the clock method: strike your metal at 12, 3, 6, and 9 o’clock positions. This systematic approach prevents overworking any single area.
Experiment with different hammer faces—flat, rounded, and textured—to dramatically alter your metal’s appearance. When seeking intricate patterns, pair your hammer with a bangle die for wavy designs that add visual interest.
Remember to protect your tools by avoiding decorative hammers on hard surfaces; use brass or rawhide hammers for delicate metals instead.
Die Impression Techniques
Transform flat metal sheets into visually stunning pieces by mastering die impression techniques. When working with sterling silver or other metals, you’ll need a bangle die with a wavy pattern and a heavy mallet for best results.
To create perfect textured designs:
- Use the clock method when hammering – strike at 12, 6, 3, and 9 positions for even impression distribution
- Avoid fancy hammers that might get damaged; stick with a sturdy heavy mallet
- Check your work by opening the die after hammering to confirm the metal has taken the desired shape
- Polish with steel wool after completing the die impression to enhance the textured surface
This technique gives sterling silver pieces dimension and character without requiring soldering, making it perfect for beginners and experienced metalworkers alike.
Creating Wavy Bangles With Hook and Eye Closures
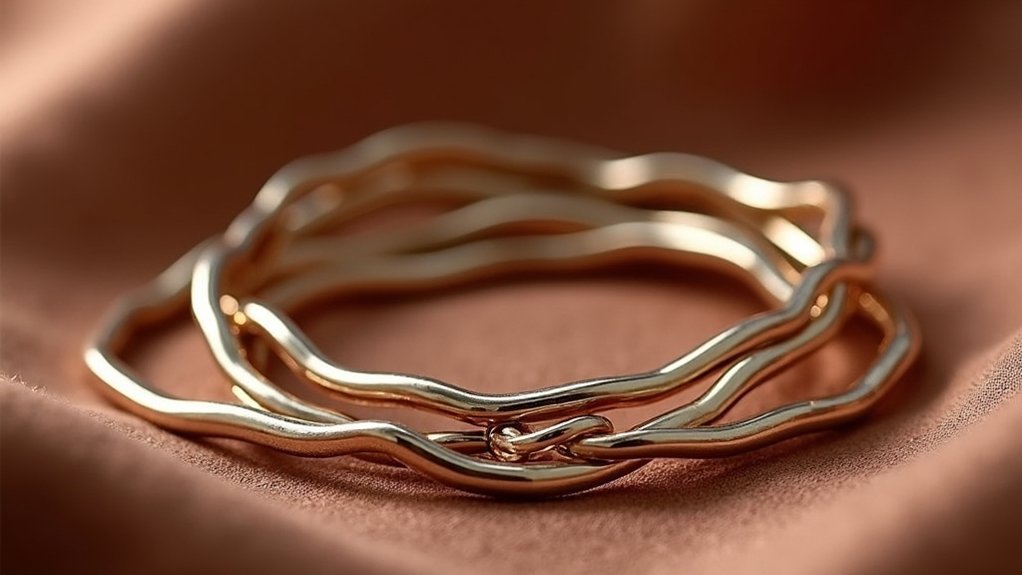
Crafting elegant wavy bangles requires just a few simple tools and techniques that eliminate the need for soldering.
Begin with 8.25 inches of 14 gauge copper wire for a standard medium size, marking it at 2 inches and 8.25 inches for your closure points.
Shape the wire around a steel bracelet mandrel, ensuring the ends don’t overlap.
Create the distinctive wavy pattern by hammering at the 12, 6, 3, and 9 o’clock positions with a chasing hammer.
For your hook and eye closure, bend one end at 90 degrees, clip to about half an inch, then file and shape it smoothly.
The other end becomes your eye loop.
Enhance your bangle’s appearance by oxidizing with liver of sulfur in warm water, then polish with steel wool for attractive contrast.
Metal Stamping for Personalized Jewelry Pieces
Metal stamping opens a world of personalization possibilities that can turn simple metal into meaningful jewelry with just a few tools.
Metal stamping transforms ordinary metals into personal treasures, creating meaningful jewelry with minimal tools and maximum impact.
This technique allows you to imprint designs or text onto metal surfaces, creating unique pieces that tell your story.
To get started with successful metal stamping:
- Secure your metal piece to the bench block using transparent packing tape to protect your fingers during hammering
- Use a heavier hammer for detailed stamps to achieve clearer, more defined impressions
- Master the 12-6-3-9 hammering technique for even, consistent impressions across your metal surface
- Explore beginner tutorials like those in “Wire + Metal” for step-by-step guidance on creative design ideas
With practice, you’ll develop the confidence to create personalized pendants, bracelets, and other metal-stamped jewelry that reflects your personal style.
Tab and Slot Construction for Multi-Component Designs
Three essential techniques release the potential of tab and slot construction, allowing you to create intricate multi-component jewelry without a single drop of solder.
First, verify your tabs and slots are precisely measured—the fit should be snug enough for stability but flexible enough for assembly. Cut tabs slightly larger, then file them to perfection.
Second, maintain consistency by using identical gauge metal for all components. This uniformity creates seamless connections and a cohesive aesthetic throughout your piece.
Finally, transform functional elements into design features by adding decorative patterns to your tabs and slots. These embellishments enhance visual appeal while maintaining structural integrity.
When executed with precision, this technique enables complex designs like layered pendants and intricate earrings that can be easily assembled or reconfigured without permanent bonding.
Wire Weaving for Intricate Metal Jewelry
Wire weaving stands as a transformative technique in no-solder metalwork, allowing you to create stunningly detailed jewelry through the strategic intertwining of multiple wire strands.
This method produces intricate designs without heat or chemicals, making it accessible for beginners and versatile for experts.
To master wire weaving, you’ll need:
- Select thinner wires (20-22 gauge) for flexibility and easier manipulation
- Create a sturdy base wire or frame as your foundation
- Invest in quality flat nose pliers to grip without damaging your materials
- Learn basic patterns like spiral and basket weaves for structural integrity
Using Hole-Punch Pliers for Precision Perforations
You’ll find hole-punch pliers indispensable for creating perfect holes in metal without the mess and imprecision of drilling.
To protect your metal’s surface from unwanted marks, always place a Pro-Polish pad, leather, or thick paper beneath your piece before punching.
These specialized pliers deliver clean, consistent perforations that elevate the professional appearance of your no-solder jewelry projects.
Perfect Holes Without Drilling
Creating perfect holes in metal can seem challenging without a drill, yet hole-punch pliers offer an elegant solution that combines precision with simplicity.
You’ll find this tool invaluable for creating consistently sized perforations without the noise or equipment setup that drilling requires.
To achieve perfect holes without drilling, remember these handy tips:
- Place protective material (Pro-Polish pad, leather, or thick cardboard) beneath your metal to prevent surface damage.
- Position your pliers carefully for precise hole placement, especially important for intricate designs.
- Apply steady pressure rather than jerky movements for cleanest results.
- Use for both small metal pieces and wire applications, maximizing versatility.
This technique not only saves you time but also reduces waste, making it ideal whether you’re just starting out or refining your metalworking skills.
Protecting Your Metal Surface
Safeguarding your metal’s integrity while creating precision perforations requires thoughtful surface protection. When using hole-punch pliers, always place a protective layer between your workpiece and hard surfaces to prevent unwanted marks or dents.
A Pro-Polish pad provides ideal protection, maintaining your metal’s finish while you work. Alternatively, a piece of leather or thick paper/cardboard works effectively as a barrier. This simple step prevents marring that might otherwise compromise your design’s professional appearance.
Your hole-punch pliers will create cleaner, more precise perforations than drilling, but only if you’re protecting your metal surface properly. This attention to detail pays dividends in your finished pieces, allowing you to create professional-looking jewelry without soldering.
The combination of proper tools and surface protection techniques elevates your metalworking capabilities considerably.
Frequently Asked Questions
What Is the Alternative to Soldering Jewelry?
You can avoid soldering jewelry by using cold connections like micro screws and rivets, wire wrapping for intricate designs, hammering techniques, metal stamping, engraving, and adhesives like super glue or epoxy.
What Is the Best Metal for Long Lasting Jewelry?
For long-lasting jewelry, you’ll find platinum is the best option as it’s extremely durable and tarnish-resistant. Sterling silver, gold (14k-18k), titanium, and stainless steel are also excellent, lasting choices with proper care.
Is It Better to Solder or Weld Jewelry?
For jewelry, you’ll usually want to solder rather than weld. Soldering offers precision for intricate designs, causes less heat damage to gemstones, allows easier repairs, and provides cleaner finishes for your delicate pieces.
What Is a Jewelry Technique Where Pieces of Metal Can Be Joined Without Using Heat?
You can join metal jewelry pieces without heat using cold connections. Try riveting, micro screws, wire wrapping, or even super glue. These techniques let you connect components securely while avoiding the challenges of soldering.
In Summary
You’ve discovered ten fantastic ways to create professional-quality metal jewelry without investing in soldering equipment. From wire wrapping to fold-forming, these techniques aren’t just beginner-friendly—they’re used by skilled artisans worldwide. Try combining several methods in a single piece for truly unique results. With practice and the right tools, you’ll create lasting, beautiful metalwork that expresses your personal style while avoiding the complexities of soldering.


Leave a Reply