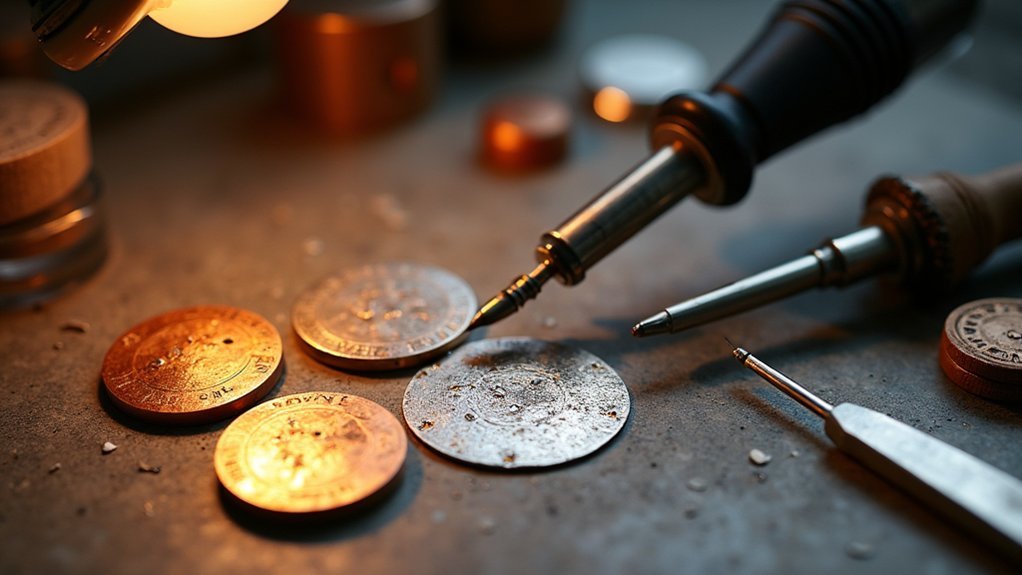
You’ll achieve the best mixed metal soldering results by mastering temperature control between metals with different melting points, like silver at 961.8°C and copper at 1,085°C. Start with thorough surface cleaning using detergent and green scrubbers, then apply thin Prips flux coats for oxidation protection. Use easy silver solder with lower melting points and adjustable flame torches for precise heat targeting. Heat pieces evenly and quickly while maintaining consistent flame movement. Practice proper joint preparation with tight-fitting surfaces and consider sweat soldering techniques for overlay work. These foundational methods reveal advanced professional applications.
Understanding Melting Point Differences in Mixed Metals

When working with mixed metals like copper and silver, you’ll face the challenge of managing markedly different melting points that can make or break your soldering project.
Silver melts at 961.8°C (1,763°F), while copper requires considerably higher temperatures of 1,085°C (1,985°F). This 123-degree difference creates a critical window where you can damage the silver before the copper reaches proper working temperature.
Understanding these melting point variations is essential for successful mixed metals soldering. You must maintain precise temperature control to avoid overheating the lower-melting metal while ensuring adequate heat for proper solder flow.
Precise temperature control prevents overheating lower-melting metals while ensuring proper solder flow in mixed metal projects.
This knowledge directly influences your solder selection, heating technique, and timing. Without proper awareness of these thermal properties, you risk warping, pitting, or completely melting your silver components during the soldering process.
Essential Cleaning Techniques for Multiple Metal Types
You’ll need to master different surface preparation methods since each metal type requires specific cleaning approaches to achieve ideal solder joints.
Your success depends on implementing effective oxidation prevention strategies that protect clean surfaces from contamination during the heating process.
You must also understand proper flux application techniques to guarantee consistent coverage and enhanced solder flow across dissimilar metal surfaces.
Surface Preparation Methods
Surface preparation forms the foundation of every successful mixed metal soldering project, and you’ll need to master specific cleaning techniques for each metal type in your assembly.
Proper surface preparation guarantees peak solder adhesion through meticulous cleanliness protocols:
- Clean copper surfaces using detergent and a green scrubber to remove oxidation.
- Use brass brushes with pumice for textured metals to eliminate residues.
- Apply emery paper or sanding discs to achieve smooth surface finishes.
- Test cleanliness by checking that water sheets off the metal after rinsing.
- Handle cleaned metals only with gloves to prevent contamination from oils.
Apply thin Prips flux coats after cleaning to protect against oxidation during heating.
Reapply flux before soldering to maintain effectiveness.
Even minor surface contaminants can compromise joint strength, so thorough preparation directly impacts your soldering success.
Oxidation Prevention Strategies
Building on proper surface cleaning, oxidation prevention requires strategic timing and protective measures throughout your entire soldering process. You’ll need to clean metals thoroughly using Dawn detergent and a green scrubber until water sheets off the copper surface. Apply Prips flux in thin coats immediately after cleaning to create a protective barrier. For textured surfaces, scrub with brass brushes and pumice for enhanced cleanliness.
| Metal Preparation Step | Oxidation Prevention Benefit |
|---|---|
| Dawn detergent cleaning | Removes oils that accelerate oxidation |
| Water sheeting test | Confirms complete surface preparation |
| Thin Prips flux coats | Creates protective oxygen barrier |
| Pre-heating flux reapplication | Maintains protection during heating |
| Sandpaper joint finishing | Eliminates contamination sources |
Reapply flux before torch heating and maintain clean workspace conditions throughout your project.
Flux Application Techniques
Once your metals are properly cleaned, applying flux becomes the critical bridge between surface preparation and successful soldering. Proper flux application techniques guarantee peak cleanliness and prevent oxidation during the heating process.
Follow these essential flux application techniques:
- Apply a thin coat of Prips flux immediately after cleaning to maintain surface purity.
- Use a spray bottle for even distribution and convenient application across all metal surfaces.
- Reapply a second coat just before heating to maximize protection against oxide formation.
- Select flux specifically compatible with your mixed metal combination for effective bonding.
- Ascertain complete coverage on all joint areas to prevent contamination during soldering.
This systematic approach maintains the cleanliness you’ve established while creating ideal conditions for strong, reliable solder joints between different metals.
Choosing the Right Flux for Mixed Metal Projects
You’ll find that Prips flux offers exceptional benefits for mixed metal projects, effectively preventing oxidation while promoting superior solder flow between dissimilar metals like copper and silver.
Your application timing becomes critical—you must apply flux to clean surfaces before heating and reapply it just before torching to maintain its protective qualities.
You’ll also need to monitor temperature control carefully, as different flux types respond uniquely to heat levels and can dramatically affect your joint quality.
Prips Flux Benefits
When working with mixed metals like copper and silver, Prips flux stands out as your most reliable ally for achieving clean, professional solder joints. This specialized flux creates a protective barrier that prevents oxidation during heating, ensuring your metals stay clean throughout the soldering process.
Here’s why Prips flux excels for mixed metal projects:
- Easy application – Apply evenly using a spray bottle for consistent coverage
- Dual coating benefits – Add a second coat just before soldering for maximum protection
- Versatile compatibility – Works seamlessly with various solder types, including silver solder
- Superior joint quality – Prevents oxide formation that interferes with proper solder flow
- Clean finish – Minimizes discoloration and visible solder lines in jewelry designs
You’ll find this flux particularly effective when combining copper with other metals.
Application Timing Matters
Since flux effectiveness diminishes rapidly under heat, mastering the timing of your application becomes critical for successful mixed metal soldering.
You’ll want to apply flux immediately after cleaning your copper and silver surfaces to prevent oxidation from taking hold. Don’t skip applying a thin coat before heating your piece—this initial application timing creates a protective barrier that minimizes oxide buildup.
Here’s where most people go wrong: they forget to reapply flux after initial heating. Heat depletes your flux’s protective qualities, so you’ll need that second application before adding solder.
This strategic approach guarantees your solder flows smoothly across the joint. Remember, prolonged heat exposure destroys flux effectiveness, so work efficiently once you’ve started the heating process.
Temperature Control Effects
Because copper and silver have dramatically different melting points—1,085°C for copper versus 961.8°C for silver—you can’t treat temperature control as an afterthought in mixed metal projects.
Proper temperature control prevents accidentally melting your silver while trying to heat the copper to working temperature.
Here’s how to manage heat effectively:
- Heat pieces evenly and quickly to minimize oxidation buildup
- Monitor temperature closely to avoid exceeding silver’s melting point
- Use easy solder with lower melting points for better control
- Apply heat efficiently rather than prolonged exposure
- Keep flame movement consistent across both metals
Quick, controlled heating guarantees you’ll reach soldering temperature without damaging either metal.
The key is finding that sweet spot where both metals are hot enough for solder flow without crossing silver’s melting point threshold.
Silver Solder Selection for Copper and Silver Combinations
While copper’s melting point sits markedly higher than silver’s at 1,085°C versus 961.8°C, selecting the right silver solder becomes critical for creating successful mixed metal joints.
You’ll want to use easy silver solder for joining these metals together, as its lower melting point accommodates copper’s thermal requirements without overheating your silver components.
Apply Prips flux in thin coats before and during heating to prevent oxidation and guarantee clean bonding.
Be aware that extra easy silver solder can leave yellowish lines on silver, so you’ll need precise application and neat technique to conceal visible seams.
Heat quickly to avoid silver distortion while guaranteeing adequate temperature for copper bonding.
Understanding melting point compatibility guarantees strong, aesthetically pleasing joints.
Temperature Control Methods for Different Metal Alloys
Selecting appropriate silver solder sets the foundation, but managing heat application determines whether your mixed metal joint succeeds or fails.
Understanding melting points for the metals used becomes critical when working with copper and silver combinations. Silver melts at 961.8°C while copper requires 1,085°C, creating a narrow temperature window for successful soldering.
Master the 124°C temperature difference between silver and copper melting points to achieve precise, professional soldering results.
Essential temperature control methods include:
- Using adjustable flame torches for precise heat targeting
- Applying heat quickly to joint areas while protecting surrounding material
- Choosing silver solder with melting points below your base metals
- Practicing with scrap pieces to master heating techniques
- Applying flux before soldering to improve heat distribution
You’ll achieve better results by concentrating heat on specific areas rather than heating entire pieces, preventing unwanted melting or warping of your mixed metal components.
Proper Joint Preparation for Mixed Metal Assemblies
You’ll achieve the strongest mixed metal bonds by thoroughly cleaning all joint surfaces before soldering begins.
Start by scrubbing each piece with detergent and a green scrubber or sandpaper to remove oxidation and contaminants that prevent proper solder adhesion.
Your joints must fit closely together since gaps between different metals will block solder flow and create weak connections.
Surface Cleaning Methods
Since contamination represents the primary obstacle to achieving strong solder joints in mixed metal assemblies, you must begin with thorough surface preparation that removes all traces of oxidation, oils, and residues.
Effective surface cleaning methods guarantee your metals are completely clean of any residue before soldering begins.
Follow these essential cleaning steps:
- Scrub thoroughly using Dawn detergent and a green scrubber to remove all oxidation and contaminants
- Test cleanliness by confirming water sheets off the copper surface without beading
- Use brass brush and pumice for textured metals to eliminate stubborn oxides
- Apply thin Prips flux coat to prevent oxidation during heating
- Ascertain tight fit between surfaces to prevent gaps that weaken joints
Close-Fitting Joint Requirements
Three critical factors determine whether your mixed metal solder joint will hold strong or fail under stress: gap tolerance, surface contact, and heat distribution.
You’ll need gaps no wider than 0.002 inches between metals for proper capillary action. When soldering copper to dissimilar metals, guarantee surfaces mate precisely without forcing pieces together.
Create close-fitting joints by filing or machining contact surfaces until they align perfectly. Test fit repeatedly during preparation—you shouldn’t see daylight through the seam. Loose joints prevent solder from flowing properly and create weak spots that’ll fracture under thermal expansion.
Support both pieces securely during assembly to prevent movement. Use clamps, fixtures, or binding wire to maintain alignment while heating.
Remember that different metals expand at varying rates, so account for this when positioning your close-fitting joint.
Sweat Soldering Techniques for Metal Overlays

One advanced technique that creates exceptionally strong bonds between different metals is sweat soldering, where you’ll apply solder to the back surface of your top metal piece before positioning it onto the base layer.
This method excels for metal overlays requiring precise placement and maximum strength.
Follow these essential steps for successful sweat soldering:
- Pickle and clean your top piece thoroughly to remove oxidation and contaminants
- Apply solder evenly to the back of your overlay piece
- Position Prips flux between layers to prevent oxide buildup
- Heat quickly to avoid overheating copper, managing temperature carefully since copper melts at higher temperatures than silver
- Quench immediately in water after soldering to solidify the joint
This technique guarantees durable, visually appealing results for complex mixed-metal projects.
Preventing Oxidation During Multi-Metal Heating
When working with multiple metals, oxidation becomes your primary enemy during the heating process, as different metals react at varying rates to high temperatures and can compromise your solder joints.
Preventing oxidation during multi-metal heating requires meticulous preparation and technique. Start by thoroughly cleaning all metals with Dawn detergent and a green scrubber, then apply a thin coat of Prips flux. Just before heating, spray another flux coat to create a protective barrier.
Maintain quick, efficient soldering with precise temperature control—understanding each metal’s melting point prevents overheating. Heat the piece evenly and minimize exposure time at high temperatures.
After completing your solder joint, immediately quench in water to rapidly cool the metals and prevent further oxidation during the cooling process.
Hard Vs Soft Solder Applications in Mixed Metal Work
Understanding the fundamental differences between hard and soft solder becomes critical for successful mixed metal projects, as each type serves distinct purposes based on your joint’s strength requirements and thermal demands.
Choose your solder type based on joint strength requirements and thermal demands for optimal mixed metal project success.
Hard solder works best when you need maximum strength and durability. Its higher melting point and greater silver content make it perfect for:
- Load-bearing connections that endure stress
- Copper and silver joints where precision heating prevents deformation
- Applications requiring long-term wear resistance
- Structural components in your mixed metal assemblies
- Projects where joint integrity is paramount
Soft solder excels in delicate applications requiring gentle handling. You’ll want it for less critical joints, temperature-sensitive work, and situations where easy reworking matters.
Torch Movement Patterns for Even Heat Distribution
You’ll achieve consistent results in mixed metal soldering by mastering three essential torch movement strategies.
The circular motion heating technique guarantees uniform temperature distribution across your joint, while zone-based temperature control lets you manage heat delivery to different metal types simultaneously.
A multi-pass torch strategy builds heat gradually, preventing thermal shock and maintaining precise control over your soldering process.
Circular Motion Heating Technique
While controlling heat distribution remains one of the most critical challenges in mixed metal soldering, the circular motion heating technique offers a reliable solution for achieving consistent results.
Unlike a stationary soldering iron that creates hot spots, this method involves moving your torch in circular patterns around the joint. This approach prevents localized overheating at high temperatures while ensuring both metals reach proper soldering temperature simultaneously.
Key benefits of circular motion heating include:
- Even heat dispersal across copper and silver surfaces
- Reduced oxidation risk by preventing prolonged flame exposure
- Enhanced flux effectiveness throughout the heating process
- Better temperature control when maintaining one-inch flame distance
- Improved joint quality through balanced heat application
Practice this technique with scrap materials to develop consistent motion control.
Zone-Based Temperature Control
Although circular motion provides excellent heat distribution, zone-based temperature control takes this concept further by dividing your work area into strategic heating zones.
You’ll sweep your torch in deliberate patterns across different sections of your joint, ensuring each metal receives appropriate heat based on its melting characteristics. Focus your flame where you’ve placed the solder, since solder flows toward the heat source. This targeted approach helps you manage the different melting points between copper and silver effectively.
Maintain your torch movement consistently to prevent localized overheating that causes oxidation. Keep the flame 1-2 inches from your workpiece for ideal temperature management.
Practice these torch movement patterns on scrap metal first to develop precision with zone-based temperature control techniques.
Multi-Pass Torch Strategy
When soldering mixed metals like copper and silver, implementing a multi-pass torch strategy guarantees consistent heat distribution across your entire joint.
This technique involves moving your torch in circular or sweeping motions around the soldering area, ensuring all metals reach proper temperature simultaneously.
Here’s how to execute this strategy effectively:
- Move the torch in continuous circular patterns around the joint
- Maintain consistent distance from the metal surface to prevent localized overheating
- Heat the larger or thicker piece first, then gradually bring surrounding pieces up to temperature
- Watch for a dull red glow indicating ideal solder flow temperature
- Practice on scrap pieces to develop steady hand control
The multi-pass torch strategy prevents melting, discoloration, and failed joints by distributing heat evenly across different metals with varying thermal properties.
Troubleshooting Common Mixed Metal Soldering Issues
Why does your mixed metal solder joint sometimes fail despite following proper techniques? Mixed metals present unique soldering issues that require specific troubleshooting approaches.
| Problem | Cause | Solution |
|---|---|---|
| Discoloration/oxidation | Surface contamination | Clean thoroughly and apply flux before soldering |
| Solder balling up | Insufficient heat application | Adjust torch for even heating across joint |
| Melted base metal | Excessive heat on lower melting point metal | Use easy solder for better temperature control |
When working with copper and silver, remember their different melting points: silver at 961.8°C versus copper at 1,085°C. Use Prips flux specifically for copper projects, as it reduces oxide buildup and improves solder flow. If your solder doesn’t flow properly, you’re likely not applying enough heat evenly across the joint area.
Safety Considerations for High-Temperature Metal Joining

High-temperature metal joining demands your complete attention to safety considerations that can mean the difference between successful craftsmanship and serious injury.
These processes expose you to multiple hazards requiring thorough protective measures.
Essential safety considerations include:
- Protective gear – Always wear safety glasses, heat-resistant gloves, and flame-resistant clothing to shield against burns, sparks, and toxic fumes.
- Eye protection – Use proper face shields since welding produces harmful ultraviolet and infrared radiation that can cause permanent eye damage.
- Ventilation – Guarantee adequate airflow in your workspace to prevent inhaling dangerous fumes from heated metals and fluxes.
- Fire prevention – Keep extinguishers nearby and maintain a clean, flammable-free work area.
- Process-specific knowledge – Learn unique hazards for each high-temperature technique you’ll use.
Finishing Techniques to Conceal Solder Lines
After completing your mixed metal soldering work, you’ll need to address the visible solder lines that can detract from your piece’s professional appearance.
You can effectively conceal solder lines through several proven techniques. Apply patina to blend solder with surrounding metal colors and textures. For copper-silver combinations, copper plating creates a uniform appearance across joints.
Use finishing film or bead blasting to create matte surfaces that minimize contrast between solder and base metals. Apply thin layers of clear enamel or lacquer for seamless protection while hiding imperfections.
Complete your work with fine polishing compounds to smooth surfaces and further obscure visible lines. These finishing techniques guarantee your mixed metal pieces achieve professional-quality results with virtually invisible solder joints.
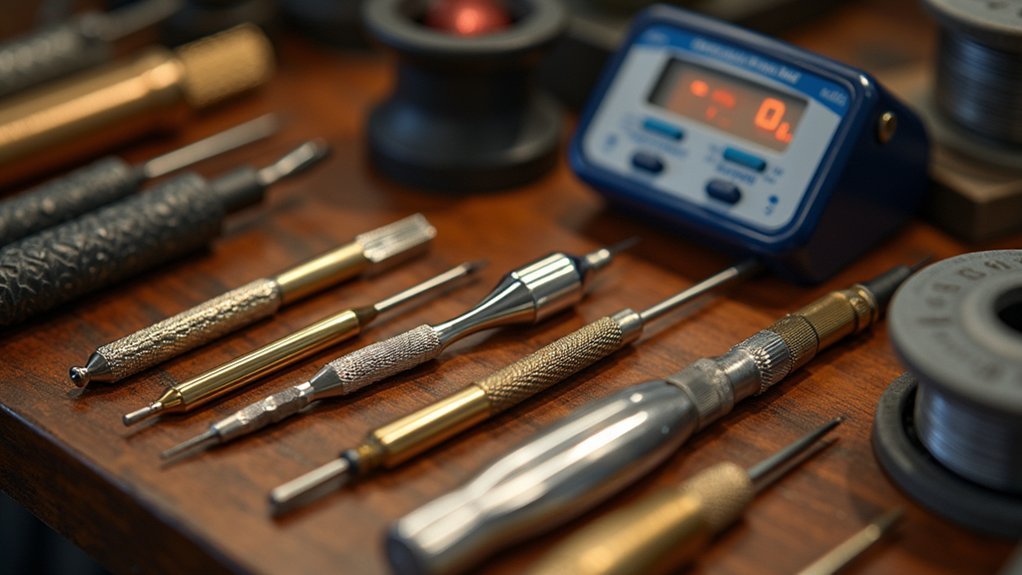
Tool Selection for Professional Mixed Metal Results
Achieving professional-quality mixed metal soldering depends heavily on selecting the right tools for your workspace. Your tool selection directly impacts the quality and precision of your mixed metal projects, particularly when working with challenging combinations like copper and silver.
Essential tools for professional results include:
- High-quality torch – Butane or propane torches provide the necessary heat without damaging delicate metals.
- Titanium or tungsten solder picks – These maintain sharpness at high temperatures for precise solder placement.
- Ceramic soldering surface – Fireproof materials guarantee safety and prevent warping during heating.
- Locking tweezers – Secure workpiece positioning reduces movement and guarantees accurate joint alignment.
- Multiple solder types – Easy and extra easy silver solders accommodate different melting point requirements.
Investing in quality tools transforms your mixed metal soldering from amateur attempts into professional-grade craftsmanship.
Frequently Asked Questions
What Is the Golden Rule of Soldering?
You must guarantee the metals you’re joining are completely clean and free of oxidation. Contaminants will prevent proper solder flow and adhesion, causing your joint to fail every time.
What Is the Best Technique for Soldering?
You’ll achieve best results by thoroughly cleaning surfaces, applying flux, heating quickly and evenly, using appropriate solder temperature, and practicing proper joint preparation before attempting any soldering project.
How to Solder Different Metals Together?
Clean both metal surfaces thoroughly, then apply Prips flux to prevent oxidation. Use silver solder with appropriate melting points—easy solder works well for copper. Heat quickly and evenly to create strong joints.
What Will Solder Not Stick To?
Solder won’t stick to oxidized or dirty surfaces, aluminum, galvanized steel, plastics, ceramics, non-stick coated metals, oil-contaminated surfaces, or high-temperature metals like titanium and tungsten without special techniques.
In Summary
You’ll master mixed metal soldering by understanding melting points, using proper flux, and maintaining temperature control. Don’t skip thorough cleaning—it’s essential for strong joints. Choose silver solder for copper-silver combinations and invest in quality tools for professional results. When troubleshooting, focus on heat distribution and timing. Always prioritize safety with proper ventilation and protective equipment. Practice your finishing techniques to hide solder lines and create seamless joints that’ll showcase your metalworking skills perfectly.
Leave a Reply