Flush soldering creates seamless metal joints because you’re positioning overlapping metal edges on the same plane, eliminating raised surfaces that typically appear in standard soldering. You’ll achieve this smooth appearance through precise capillary action that draws molten solder into carefully controlled gaps of .003-.005 inches between your metal pieces. The technique requires exact temperature control between 350°C-400°C and proper flux application to guarantee the solder flows evenly across surfaces. Master these fundamentals and you’ll discover advanced methods for even stronger connections.
Understanding the Fundamentals of Flush Soldering

When you’re working with flush soldering, you’ll create joints where metal edges overlap and align perfectly on the same plane, producing a smooth, seamless appearance that eliminates any raised edges or bumps.
This technique requires you to properly clean and prepare your metal surfaces beforehand, removing any contaminants and applying flux to guarantee peak adhesion.
During the process, you’ll rely on capillary action to draw molten solder into the joint completely. This natural phenomenon allows the solder flow to fill every gap and void, creating incredibly strong bonds.
You must maintain precise temperature control to activate this capillary effect properly. The result is a structurally sound connection that’s particularly valuable in decorative applications where aesthetics matter, such as jewelry making and artistic metalwork projects.
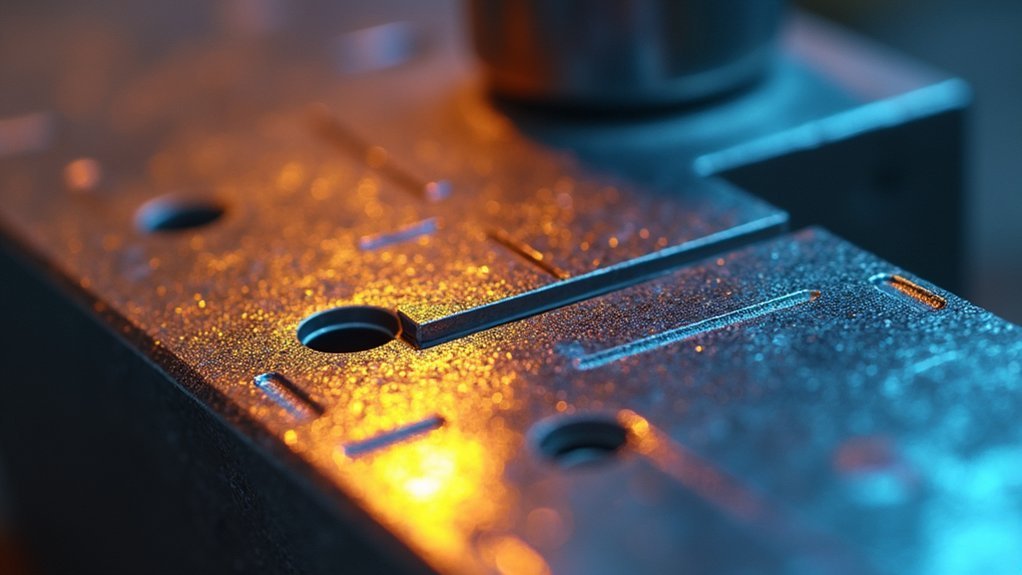
Essential Tools and Materials for Seamless Metal Joints
Before you begin any flush soldering project, you’ll need to assemble the right combination of tools and materials that’ll determine the quality of your finished joints. Your soldering iron should feature precise temperature control and a fine tip for accuracy without excess overflow. Quality solder must match your metal pieces for best adhesion, while flux cleans surfaces and prevents oxidation.
| Tool/Material | Purpose | Key Feature |
|---|---|---|
| Soldering Iron | Heat application | Fine tip control |
| Flux | Surface cleaning | Prevents oxidation |
| Solder | Metal bonding | Material matching |
| Clamps/Jigs | Alignment | Maintains position |
Proper surface preparation requires cleaning with abrasives or solvents to remove contaminants. The proper use of clamps or jigs maintains alignment during soldering, ensuring structural integrity and aesthetic appeal in your finished assembly.
Surface Preparation Techniques for Optimal Solder Flow
Although proper tools and materials form the foundation of successful flush soldering, they’re worthless without meticulously prepared surfaces that allow solder to flow smoothly and bond effectively.
You must thoroughly clean all metal surfaces to eliminate oxidation, dirt, and grease that prevent proper adhesion. Apply appropriate flux to enhance surface preparation—it cleans while reducing surface tension for improved solder flow.
Verify surfaces are completely dry before beginning, as moisture creates weak joints and compromises connection integrity. Achieve proper fit by aligning joint surfaces with suitable .003-.005 inch gaps for effective capillary action.
Always test your solder flow on scrap pieces first to verify your surface preparation techniques work before tackling final workpieces.
Temperature Control Methods in Flush Soldering Applications
You’ll need to establish the ideal heat range for your specific solder alloy to prevent overheating while guaranteeing complete melting and flow.
Implementing thermal monitoring techniques like infrared thermometers or thermocouples helps you maintain consistent temperatures throughout the soldering process.
Managing your cooling rate properly prevents thermal shock and guarantees strong, reliable joints that won’t crack or fail under stress.
Optimal Heat Range Selection
Three critical factors determine your success in flush soldering: precise temperature control, consistent heat application, and real-time monitoring.
You’ll need to maintain an ideal heat range between 350°C and 400°C for effective results. This temperature control guarantees your solder flows properly without damaging base metals or causing oxidation.
Use a soldering iron with adjustable settings to achieve accurate heat application based on your specific metal and solder type.
Thermal sensors or infrared thermometers help you monitor joint temperature, preventing overheating. Don’t forget appropriate flux—it’s essential for proper heat distribution and oxidation prevention.
Effective heat management enhances joint strength while minimizing warping or distortion risks in your metal components.
This systematic approach creates seamless, professional-grade connections.
Thermal Monitoring Techniques
Since temperature variations can make or break your flush soldering results, implementing robust thermal monitoring techniques becomes essential for achieving consistent, high-quality joints.
You’ll want to use infrared thermometers or thermal cameras for real-time temperature readings during precise application. These tools let you monitor the joint area continuously, ensuring ideal solder flow without overheating your base metals.
Choose a soldering iron with adjustable temperature control settings to match your specific materials.
Install thermocouples at critical points to track temperature changes accurately and maintain even heat distribution across the joint. This approach protects joint integrity by preventing thermal damage.
Remember to calibrate your temperature control equipment regularly—even minor deviations can compromise solder flow and weaken your joints considerably.
Cooling Rate Management
After completing your soldering process, controlling the cooling rate becomes just as critical as managing the initial heating phase. You’ll prevent thermal shock by implementing gradual cooling techniques that protect your joints from cracking or weakening.
Controlled heating methods like induction heating give you superior temperature management throughout both soldering and cooling phases. Your cooling rate directly impacts joint integrity by reducing internal stresses within the solidified solder.
Here’s how proper cooling transforms your results:
- Prevents heartbreaking joint failures that destroy hours of meticulous work
- Eliminates costly rework from thermal shock damage
- Delivers unshakeable confidence in your joint’s long-term durability
- Creates professional-grade results that exceed industry standards
Use thermocouples to monitor temperature profiles and heat sinks to achieve uniform solidification.
Flux Selection and Application for Clean Metal Bonding
You’ll need to select the right flux type based on your specific materials and application—rosin-based flux works best for electronics while acid-based variants suit plumbing projects.
Your application technique matters just as much as your flux choice, requiring a thin, even layer on properly cleaned surfaces to maximize adhesion.
You must also maintain ideal soldering temperatures to guarantee the flux performs effectively and allows proper solder flow into the joint.
Flux Types and Properties
A thin layer of flux acts as your soldering ally, cleaning metal surfaces and removing the oxidation that prevents strong bonds from forming.
Understanding flux types transforms your soldering results from frustrating failures to professional-quality solder joints.
Each flux type offers distinct properties tailored to specific applications:
- Rosin flux – Your electronics companion that leaves minimal residue and won’t damage sensitive components.
- Water-soluble flux – The powerhouse cleaner for plumbing projects that tackles heavy oxidation with aggressive cleaning ability.
- No-clean flux – Your time-saving solution that eliminates post-soldering cleanup while maintaining joint integrity.
- Activated flux – The heavy-duty option for challenging metals requiring maximum cleaning power.
Selecting flux based on melting point and cleaning ability guarantees you’ll achieve durable, corrosion-resistant joints every time.
Proper Application Techniques
Once you’ve selected the appropriate flux type, proper application techniques become the cornerstone of achieving professional flush solder joints. Start by thoroughly cleaning metal surfaces to remove dirt, oil, and oxidation—this preparation dramatically improves joint effectiveness.
Apply flux in thin, even layers across clean metal surfaces. This prevents solder from beading and guarantees peak flow into joints. Temperature control remains critical; even heat distribution maintains flux effectiveness while preventing contamination.
| Application Step | Best Practice |
|---|---|
| Surface Prep | Remove all oxidation and contaminants |
| Flux Coverage | Apply thin, uniform coating |
| Heat Control | Maintain consistent temperature |
| Timing | Work quickly after flux application |
| Cleanup | Remove flux residues immediately after cooling |
Proper cleanup eliminates flux residues that could compromise long-term joint integrity and appearance.
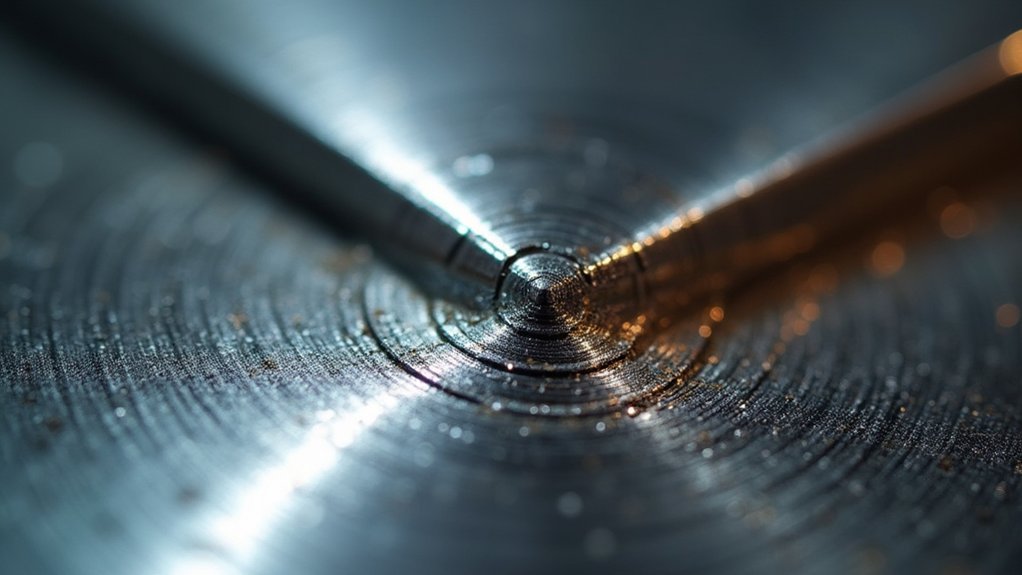
Capillary Action Principles in Flush Joint Formation
When molten solder encounters the narrow gap between flush-joined metal surfaces, capillary action becomes your primary ally in creating a strong, void-free bond. This phenomenon draws solder into tight spaces through surface tension forces, making flush soldering remarkably effective for seamless metal joints.
You’ll achieve ideal results when your gap measures 0.003 to 0.005 inches. Clean surfaces are absolutely critical—contaminants will sabotage capillary flow instantly. Proper flux application reduces surface tension, enabling smooth solder movement.
Essential capillary action success factors:
- Maintain precise gap spacing – Too wide kills the pulling force
- Apply heat evenly – Hot spots destroy flow patterns
- Use quality flux – Poor flux means failed joints
- Keep surfaces spotless – Contamination equals catastrophic failure
Master these principles, and you’ll create joints that perform flawlessly under stress.
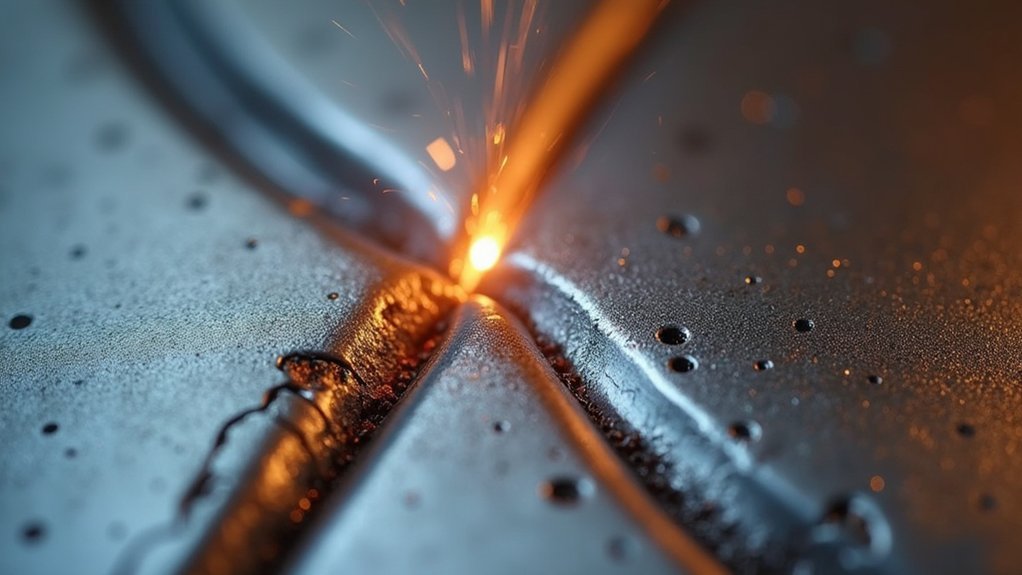
Step-by-Step Process for Creating Invisible Solder Seams
Five critical steps separate amateur attempts from professional-grade invisible solder seams that’ll fool even experienced metalworkers.
First, you’ll meticulously prepare your metal surfaces by removing all oxidation and contaminants – clean metal guarantees proper adhesion throughout the soldering process.
Meticulously cleaned metal surfaces free of oxidation and contaminants form the foundation for professional-grade solder adhesion that separates experts from amateurs.
Second, apply appropriate flux to clean and prevent oxidation while enhancing solder flow.
Third, maintain proper temperature control by heating the joint area evenly before introducing solder – this prevents overheating damage.
Fourth, introduce solder at the heated joint, allowing capillary action to draw molten metal into gaps where it’ll flow smoothly and create a strong bond.
Finally, let the joint cool naturally, then inspect and clean any excess material to achieve that coveted flush finish.
Heat Distribution Strategies for Even Solder Coverage
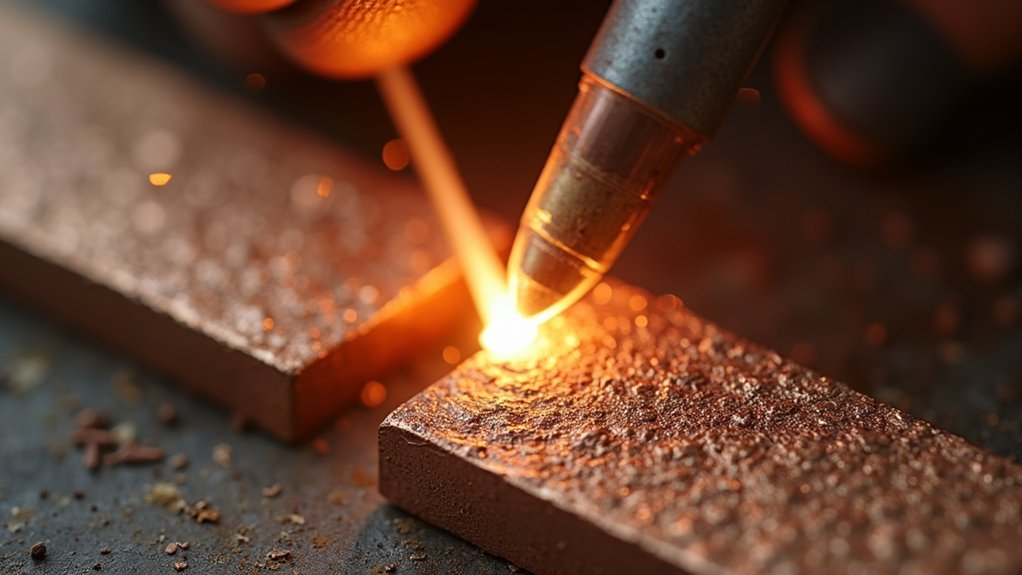
Since uneven heating destroys even the most carefully prepared joints, you’ll need to master heat distribution before attempting any flush soldering work. Your soldering iron’s temperature control becomes your primary weapon for achieving even solder coverage across both metal surfaces.
Strategic heat management prevents the frustration of failed joints:
- Position your soldering iron at ideal angles – you’ll access tight spaces while ensuring heat reaches every corner of the joint.
- Install heat sinks on adjacent components – protecting surrounding areas from unwanted thermal damage that ruins your work.
- Maintain consistent contact pressure – steady iron placement promotes uniform heating and reliable capillary action.
- Monitor joint geometry closely – narrow gaps enhance solder flow, creating the seamless bond you’re working toward.
Proper heat distribution transforms amateur attempts into professional-grade results.
Timing and Cooling Considerations for Strong Joints
You’ll need to master the precise timing of when to introduce solder and when to remove heat to achieve strong, reliable joints.
Your temperature control during the cooling phase directly impacts joint integrity, as rushed cooling can create thermal stress and weaken the bond.
Understanding the solidification process helps you determine the ideal cooling duration based on your solder type and joint size.
Optimal Cooling Duration
After you’ve completed the soldering process, proper cooling becomes critical to achieving a strong, seamless joint. The ideal cooling duration directly impacts your joint’s long-term performance. Rushing this phase introduces thermal stress that’ll weaken your soldered connection and compromise joint integrity.
You’ll want to allow several minutes for natural cooling. This gradual cooling rate guarantees the solder solidifies uniformly, preventing cracks and brittleness that rapid cooling methods create.
Water quenching might seem efficient, but it’s detrimental to your joint’s strength.
Monitor your joint’s temperature throughout cooling to avoid these costly mistakes:
- Cracked joints that’ll fail under pressure
- Brittle connections that snap unexpectedly
- Distorted base metals ruining your seamless finish
- Weak bonds compromising structural integrity
Temperature Control Timing
Why does temperature control timing determine whether your flush soldering succeeds or fails?
You’ll achieve seamless joints only when you master the precise balance between heat application and duration. Maintain your ideal temperature between 180°C to 250°C while monitoring timing carefully—too brief heating prevents proper solder flow, while excessive duration causes heat damage to base metals.
Your timing strategy directly impacts joint integrity. Apply heat just long enough for solder to melt and flow completely into the joint, then remove it promptly.
Use a heat sink to protect surrounding areas from unwanted temperature exposure.
Cooling considerations are equally critical. Allow natural cooling rather than forcing rapid temperature drops, which create brittleness and potential cracks in your finished joint.
Joint Solidification Process
The moment your solder reaches its molten state marks the beginning of the most essential phase in flush soldering—joint solidification process.
You’ll need to resist the urge to rush this critical cooling period, as your molten solder requires several seconds to minutes for proper hardening. The cooling rate must remain controlled and uniform to achieve a strong bond without introducing stress fractures.
Here’s what you must avoid during solidification:
- Never quench with water or air blasts – this creates brittle, unreliable joints
- Don’t disturb the cooling materials – movement causes weak spots and warping
- Avoid uneven temperature exposure – inconsistent cooling compromises joint integrity
- Never skip proper flux application – oxidation weakens your final connection
Allow natural cooling to room temperature for best results.
Common Challenges in Achieving Seamless Results
While flush soldering can produce beautiful, seamless joints, you’ll face several common challenges that can undermine your results. Misalignment stands as your biggest obstacle—even slight edge positioning errors create gaps that prevent effective solder flow.
You can’t ignore cleanliness either; oxidation and contaminants will sabotage solder adhesion, leaving you with weak, incomplete bonds. Proper flux application becomes critical since inadequate coverage won’t clean surfaces or reduce surface tension needed for ideal capillary action.
Temperature control demands your constant attention—too much heat warps metal and increases oxidation, while insufficient heat prevents proper solder melting.
Finally, you must maintain precise joint geometry with gaps around .003-.005 inches to maximize capillary action and achieve those strong, seamless connections you’re after.
Quality Assessment Methods for Flush Solder Joints

Once you’ve completed your flush solder joints, systematic quality assessment becomes essential for guaranteeing both structural integrity and aesthetic perfection.
Systematic quality assessment after completing flush solder joints ensures both structural integrity and aesthetic perfection are achieved.
You’ll need multiple evaluation techniques to verify your joint quality thoroughly.
Your quality assessment arsenal should include:
- Visual inspection – Examine surface uniformity and detect visible gaps that could compromise your joint’s appearance.
- X-ray inspection – Reveal hidden internal flaws that threaten structural performance beneath perfect-looking surfaces.
- Thermal imaging – Identify heat distribution inconsistencies that indicate potential weak points in your soldering technique.
- Microscopic analysis – Discover precise solder flow patterns and adherence quality at the molecular level.
Destructive testing through tensile tests validates strength and durability under stress conditions.
These thorough assessment methods guarantee you’ve achieved both the seamless appearance and robust performance that define superior flush solder joints.
Advanced Techniques for Complex Jewelry Assemblies
When intricate jewelry designs demand multiple flush joints in confined spaces, you’ll need specialized techniques that go beyond basic soldering fundamentals.
You’ll find that professional soldering techniques require strategic sequencing—work from highest to lowest melting point solders to prevent previously joined connections from failing. Temperature control becomes critical when managing heat distribution across multiple metal components simultaneously.
Use soldering jigs and precision clamps to maintain perfect alignment while accessing tight spaces with micro-torches or resistance soldering equipment.
Master flux application by using paste flux sparingly to minimize flux residue cleanup in hard-to-reach areas.
Consider progressive assembly methods where you complete subassemblies before final integration. These approaches guarantee durable connections while maintaining the seamless aesthetic that distinguishes professional flush soldering from amateur attempts.
Maintenance and Finishing of Flush Soldered Connections
Achieving professional flush soldered connections requires meticulous post-soldering care that transforms rough joints into seamless, durable bonds.
Meticulous post-soldering care transforms rough joints into seamless, durable bonds that exemplify true craftsmanship.
You’ll need to thoroughly inspect each joint for excess solder and flux residue that threatens long-term integrity. Proper cleaning prevents corrosion that destroys your craftsmanship over time.
Essential maintenance steps include:
- Clean meticulously – Remove all flux residues using isopropyl alcohol or water to prevent devastating corrosion damage.
- Sand strategically – File surfaces smooth to create that flawless, professional appearance you’re aiming for.
- Protect vigilantly – Apply protective coating to shield against oxidation that ruins beautiful work.
- Inspect regularly – Conduct thorough inspections to catch potential failures before they become costly disasters.
These practices guarantee your flush soldered connections maintain their strength and beauty for years.
Frequently Asked Questions
What Process Can Permanently Join Two Pieces of Metal and It Also Creates the Strongest Joint?
You’ll find welding creates the strongest permanent metal joints by melting base metals together. You’re using electric arcs in MIG or TIG welding to achieve necessary heat for durable bonds that’ll withstand significant stress.
Are Both Soldering and Brazing Processes That Fasten Metals Together Using Filler Metals That?
You’ll find both soldering and brazing use filler metals with lower melting points than the base metals you’re joining, allowing you to bond materials without melting the original pieces.
Which Is the Easiest Metal to Join in the Soldering Process?
You’ll find copper’s the easiest metal to solder because it’s got excellent thermal conductivity and works well with most solder types. Its quick heat absorption and compatibility with flux make soldering straightforward and reliable.
What Is the Difference Between a Seam Joint and a Locked Seam Joint?
You’ll find seam joints simply overlap metal pieces for basic joining, while locked seam joints interlock edges mechanically. You get stronger, more durable connections with locked seams that resist separation better.
In Summary
You’ve mastered flush soldering by understanding that proper surface preparation, precise temperature control, and quality flux selection create invisible joints. When you control these variables, you’ll eliminate gaps and achieve seamless metal connections every time. Remember that consistent practice with your assessment techniques will refine your skills. Don’t rush the process—patience and attention to detail separate amateur work from professional results. Your jewelry pieces will show the difference immediately.


Leave a Reply