You’ll achieve flawless cast finishing results by starting with perfect wax patterns and blemish-free masters, then selecting rotary tumbling with properly sized media to prevent trapping. Implement wet blasting techniques using fine glass beads under 15 psi for intricate details, and master magnetic finishing with uniform media distribution. Apply duplex nickel plating for superior corrosion protection that’s 500% more durable than standard finishes. Complete your process with tool post grinding using aluminum oxide wheels for precise dimensions and smooth surfaces that’ll transform your casting quality entirely.
Start With Perfect Wax Patterns
Since the surface quality of your wax patterns directly determines your final casting results, you’ll want to eliminate defects before they become costly problems downstream.
Start by revamping your wax injection processes to eliminate defects at their source. Make sure your masters and molds are completely blemish-free, as any surface glitches will transfer directly to your final casting.
Maintain precise temperature control during wax injection and molding stages. This prevents common defects that complicate later stages.
When you invest in higher-quality wax materials, you’ll achieve better surface finish results while reducing labor time in subsequent processes.
Ensure Flawless Masters and Molds
While perfect wax patterns form the foundation of quality casting, your masters and molds deserve equally meticulous attention to detail.
You’ll need completely blemish-free and smooth surfaces to achieve ideal finishing results. Even small defects can create significant challenges later, so inspect each master thoroughly for surface glitches before proceeding.
Surface perfection at the master stage eliminates costly defects downstream—thorough inspection prevents finishing challenges before they begin.
Invest in high-quality mold materials to enhance durability and reduce wear that compromises casting quality.
Temperature control during wax injection and casting processes prevents defects while ensuring consistent surface quality throughout production.
Implement strict quality control measures at these initial stages. You’ll prevent costly casting mistakes and improve overall finishing efficiency.
Choose Rotary Tumbling for Gentle Processing
You’ll find rotary tumbling offers exceptional gentleness when finishing your castings, especially when you’re using stainless steel media that won’t damage intricate details.
It’s vital that you select media larger than any openings in your parts to prevent debris from getting trapped during processing.
Start with burnishing media to smooth surfaces initially, then shift to cutting media—this approach reduces both metal loss and your overall processing time.
Stainless Steel Media Benefits
Precision becomes paramount when finishing delicate castings with intricate details that could easily suffer damage from aggressive processing methods. Stainless steel media in rotary tumbling delivers the gentle touch you need while maintaining exceptional effectiveness. This approach protects your intricate features from damage while delivering superior surface quality.
| Media Type | Processing Effect | Surface Result |
|---|---|---|
| Burnishing | Smooths surfaces | Enhanced finish |
| Cutting | Removes material | Precision shaping |
| Stainless Steel | Gentle action | Preserved details |
| Combined Process | Ideal efficiency | Superior quality |
You’ll achieve faster production cycles with reduced labor requirements. The gentle rotary action minimizes metal loss while delivering marketable surface finishes. By selecting media sizes that exceed part openings, you’ll prevent trapping issues and guarantee consistent processing throughout your entire batch.
Proper Media Sizing
When selecting media for rotary tumbling, you must choose sizes that exceed your part’s smallest openings to prevent costly trapping incidents. This critical sizing decision guarantees your delicate castings receive thorough finishing without media becoming lodged in holes, threads, or intricate details.
The gentle rotary action combined with properly sized stainless steel media minimizes detail loss on complex geometries while maintaining consistent surface treatment. You’ll achieve superior results by strategically sequencing your media selection throughout the process.
Essential Media Sizing Guidelines:
- Measure all part openings and select media that’s consistently larger than the smallest dimension to eliminate trapping risks.
- Start with burnishing media before switching to cutting media to enhance surface smoothness and reduce total finishing time.
- Use burnishing media in final stages to expedite manual polishing and achieve premium surface quality efficiently.
Burnishing Before Cutting
Although many finishers rush directly to cutting media, implementing a burnishing stage first transforms your casting’s surface quality while preserving delicate features.
You’ll want to choose rotary tumblers with stainless steel media for this gentle processing approach. These machines protect intricate designs that aggressive cutting could damage or distort.
Select media that’s larger than your part’s openings to prevent trapping while ensuring complete surface contact. This preliminary burnishing smooths surfaces effectively, reducing your manual polishing requirements later.
You’ll save significant time in your overall finishing process while minimizing metal loss.
When you incorporate burnishing media during final stages, you’ll expedite subsequent manual polishing efforts. This strategic approach delivers superior surface finishes with greater efficiency than traditional cutting-first methods.
Implement Wet Blasting Techniques
When you’re finishing cast jewelry with intricate details or cast-in-place stones, wet blasting offers superior control compared to traditional dry methods.
You’ll want to select fine glass beads as your media and maintain low air pressure settings under 15 psi to prevent surface damage while achieving that brightened finish you’re after.
Consider incorporating a slurry pump system into your setup, as it’ll deliver more uniform media application and greatly boost your process efficiency.
Glass Bead Selection
Since glass bead size directly impacts your wet blasting results, you’ll need to select beads that balance effectiveness with precision for your specific casting project.
The microscopic nature of glass beads brightens surfaces without creating dents or significant wear, preserving intricate details in your jewelry pieces.
When choosing glass beads, consider these key factors:
- Size compatibility – Select beads small enough to reach intricate areas but large enough to prevent trapping in tight spaces.
- Surface requirements – Use finer beads for smoother finishes on delicate designs like rings with cast-in-place stones.
- Detail preservation – Match bead size to your casting’s complexity, ensuring you maintain sharp edges and fine textures.
Proper bead selection maximizes your wet blasting efficiency while protecting delicate casting surfaces.
Pressure Control Settings
Because precision determines the success of your wet blasting results, you must maintain air pressure settings under 15 psi to protect delicate casting surfaces from damage.
Higher pressures can cause dents and surface imperfections that’ll require extensive repair work.
You’ll want to start at the lowest pressure setting and gradually increase until you achieve the desired surface finish.
Monitor your casting closely during this process, as different metals and surface areas may require slight pressure adjustments.
Installing a slurry pump system will help you maintain consistent pressure distribution across the entire surface.
This guarantees even media application and prevents pressure spikes that could damage intricate details.
Remember to regularly check your pressure gauge accuracy, as exact control directly impacts your finishing quality and reduces manual polishing time.
Slurry Pump Benefits
Although wet blasting produces superior results on its own, incorporating a slurry pump system transforms your casting finishing process into a precision operation.
You’ll achieve consistent media circulation that guarantees uniform coverage across every casting surface, eliminating the inconsistencies you’d face with manual methods.
The continuous flow system delivers three key advantages:
- Enhanced Processing Speed – You’ll complete finishing tasks faster while achieving superior surface quality that reduces manual polishing requirements.
- Superior Media Distribution – The pump maintains ideal media concentration throughout your blasting cycle, preventing settling and guaranteeing consistent results.
- Improved Surface Consistency – You’ll get uniform coverage on complex geometries and intricate details that manual techniques can’t match.
This combination maximizes your entire finishing workflow efficiently.
Master Magnetic Finishing Methods
When you’re ready to achieve professional-grade results with magnetic finishing, proper setup becomes your foundation for success.
Start by filling your bowl with approximately one inch of pins, maintaining consistent water levels at the same depth. You’ll need about 250 grams of uniform-sized media to guarantee even finishing across all surfaces.
Keep your water level low to prevent media from rising during operation, which can disrupt the finishing process.
Use fresh water and soap solution for each run to maximize cleaning effectiveness and extend your media’s lifespan.
Don’t waste your used water – filter and set it aside for future refining processes.
Monitor your media and water levels regularly throughout operation, making adjustments as needed to maintain ideal performance and avoid inconsistent results.
Apply Duplex Nickel for Superior Protection
Duplex nickel plating delivers exceptional corrosion protection that’ll extend your cast’s lifespan well beyond standard finishing methods.
Duplex nickel plating dramatically outperforms standard finishes, delivering superior corrosion resistance that extends component lifespan by years, not months.
This advanced technique combines 75% semi-bright nickel with 25% bright nickel, creating a superior protective barrier that delays deterioration for at least 24 months compared to traditional methods lasting only 12-18 months.
You’ll benefit from three key advantages when applying duplex nickel:
- Enhanced durability – Semi-bright nickel deposits provide 500% greater ductility than bright nickel, improving performance under stress.
- Extended protection – The dual-layer system doubles corrosion resistance compared to single-layer applications.
- Industry compliance – Follows ASTM B 456 standards for ideal thickness and sulfur content specifications.
Industries like automotive and aerospace particularly value duplex nickel’s high-quality finish and long-lasting protection for critical components.
Select Proper Tool Post Grinding Approaches
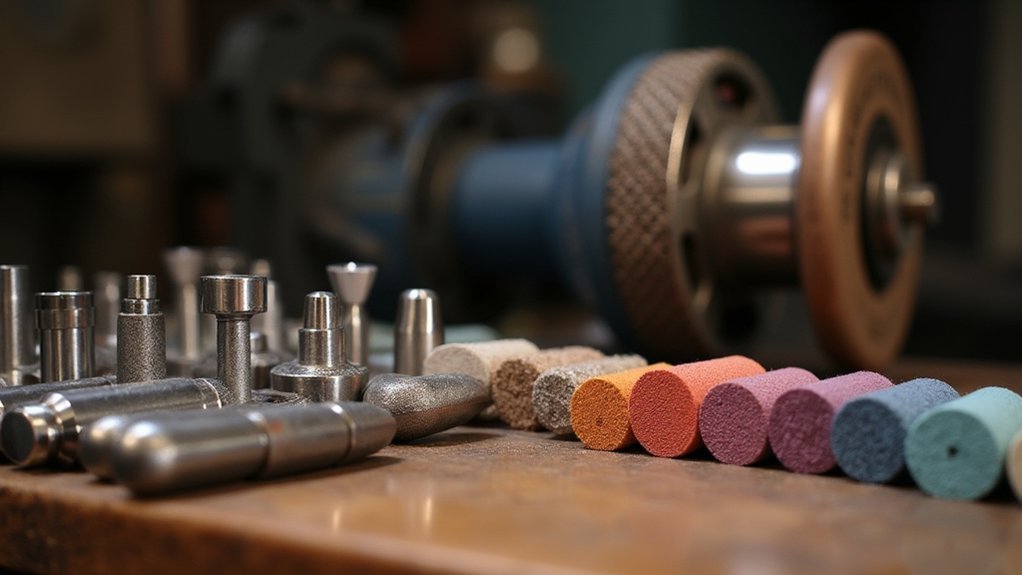
Three critical factors determine your success with tool post grinding: wheel selection, operation sequencing, and parameter monitoring.
You’ll achieve smoother finishes on cast materials with fewer passes compared to traditional cutting tools when you select general-purpose aluminum oxide wheels. These wheels maintain longevity and effectiveness throughout the grinding process.
Always perform grinding after turning operations to guarantee precise dimensions before finishing. This sequence lets you correct any oversize issues that occurred during previous machining steps.
You’ll maintain consistency in diameter across rod ends with just a few careful passes.
Monitor and adjust wheel hardness and diameter regularly to greatly influence grinding effectiveness and surface quality. This attention to detail guarantees ideal results every time.
Frequently Asked Questions
How Can I Improve My Casting Surface Finish?
You’ll improve casting surface finish by starting with flawless wax patterns and immaculate molds. Use rotary tumbling with proper media, wet blast with fine glass beads, and apply consistent grinding techniques for smoother results.
How to Improve Metal Casting Quality?
You’ll improve metal casting quality by perfecting your masters and molds, controlling temperatures precisely, conducting routine inspections, and revamping wax injection processes to eliminate surface defects before they occur.
How to Finish a Cast Ring?
You’ll start with a defect-free wax pattern, then wet blast with fine glass beads under 15 psi. Use rotary tumbling with stainless steel media, apply burnishing techniques, and inspect for final polishing needs.
What Is the RA of Sand Casting Surface Finish?
Sand casting surface finish typically ranges from 125 to 500 microinches RA. You’ll find traditional sand casting produces rougher surfaces due to coarse sand molds, so you’ll need additional finishing processes for smoother results.
In Summary
You’ve now got the essential techniques to achieve flawless cast finishes. Remember, you can’t skip steps—each process builds on the previous one. Start with your wax patterns and work systematically through each finishing method. Don’t rush the tumbling or blasting stages, and you’ll see dramatic improvements in your final results. Master these seven techniques, and you’ll consistently produce professional-quality castings that exceed expectations every time.


Leave a Reply