You’ll need jump rings with 3.2-4.2 aspect ratios, two pairs of pliers, and organizational tools like rubber bands. Start by closing two rings completely, then thread four rings onto an open ring before closing it. Master the signature Byzantine folding technique by positioning ring openings inward and folding rings back consistently. Hook new rings through folded-back pairs while maintaining uniform tension throughout. Continue exploring these foundational steps to reveal the complete Byzantine weaving process.
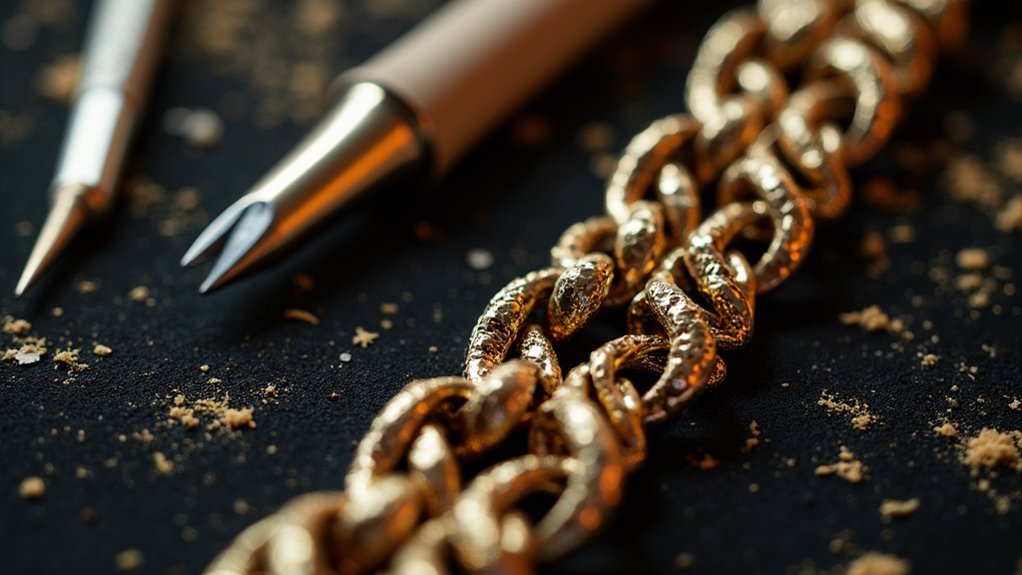
Tools and Materials Required for Byzantine Chain
Success in Byzantine chainmaking starts with gathering the right materials and tools.
Proper preparation with quality materials and precise tools forms the foundation of every successful Byzantine chainmaking project.
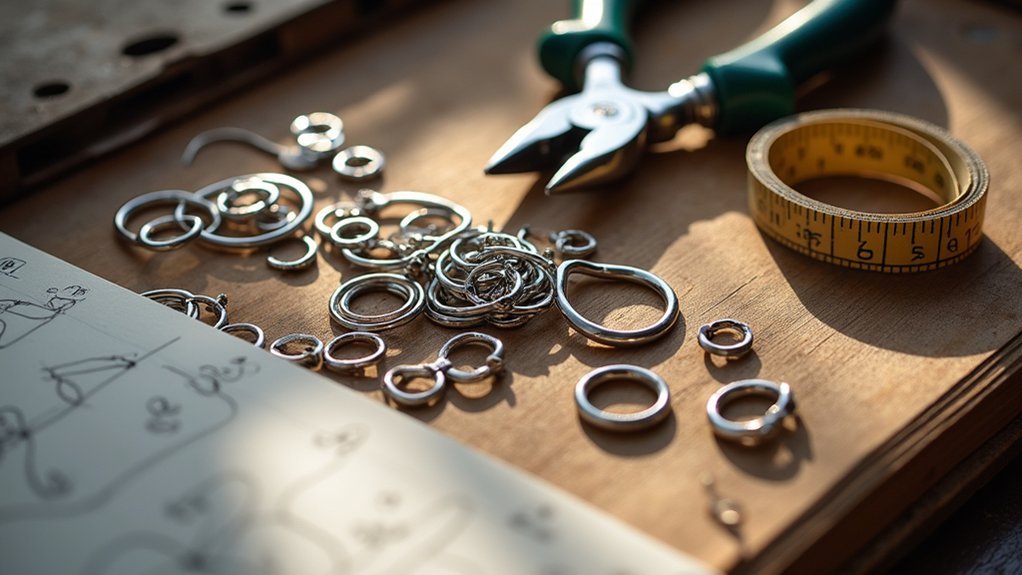
You’ll need jump rings in multiple gauges: 14 gauge (7.94mm), 16 gauge (6.35mm), 18 gauge (4.76mm), and 20 gauge (3.17mm) work best for this Byzantine chain pattern.
Your essential tools include two pairs of needle nose or bent pliers for ring manipulation and a measuring tool for length calculations.
Keep two rubber bands and paper clips handy to organize rings by color and maintain chain tension.
Focus on jump rings with an aspect ratio between 3.2 to 4.2—this guarantees proper flexibility and pattern integrity.
You can also gather decorative elements to personalize your finished piece and add creative flair to the design.
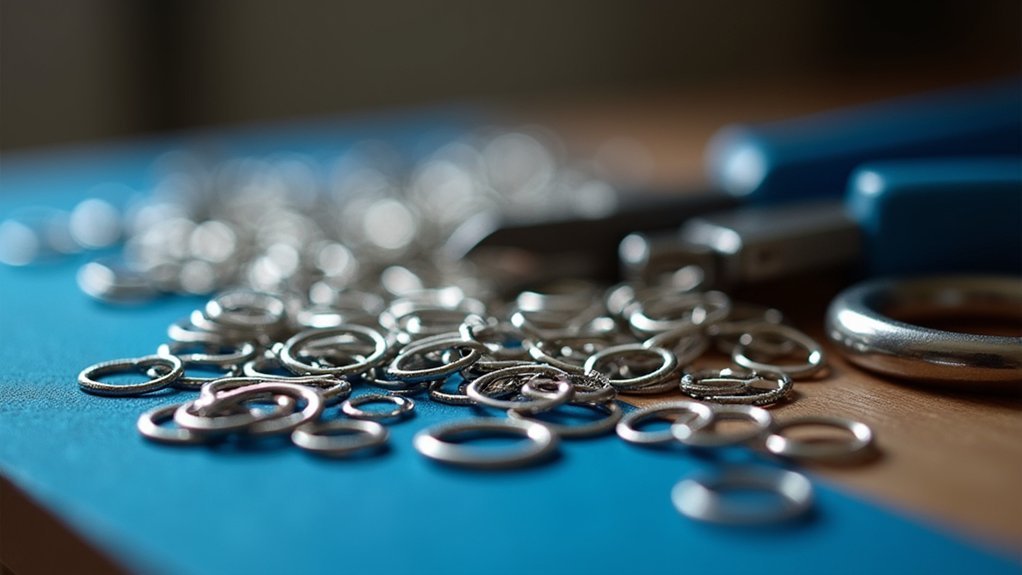
Understanding Aspect Ratios and Ring Specifications
While selecting the right tools and materials sets your foundation, mastering aspect ratios determines whether your Byzantine chain achieves the signature flowing movement or becomes a rigid, disappointing mess.
Your aspect ratio should range between 3.2 and 4.2 for ideal flexibility and structural integrity.
Jump rings come in various gauge sizes that directly impact your chain’s appearance. Common ring sizes include 14 gauge (7.94mm), 16 gauge (6.35mm), 18 gauge (4.76mm), and 20 gauge (3.17mm).
The inner diameter matters greatly—16ga rings with 4.5mm inner diameter offer excellent balance for beginners.
Low aspect ratios limit you to single linking rings between segments, while higher ratios may require three rings for proper weave stability.
Stick to recommended specifications initially before experimenting with different combinations.
Preparing Jump Rings and Initial Setup
Three distinct colors will transform your Byzantine chain from mundane to magnificent, so start by closing two black jump rings and two yellow jump rings with your pliers while keeping two silver jump rings open to begin the pattern.
Proper setup guarantees your Byzantine chain maintains consistent spacing and tension throughout construction. Organization becomes essential when working with multiple colored rings.
- Sort rings by color – Use rubber bands and paper clips to keep your chain stretched and manageable during assembly.
- Thread systematically – Add two black and two yellow jump rings onto one open silver ring, then close it.
- Position strategically – Place another silver jump ring next to the first completed section.
- Fold for linking – Bend yellow jump rings back on either side of black rings to prepare for silver connections.
This methodical approach creates the foundation for your intricate Byzantine pattern.
Creating the Foundation Chain Structure
With your colored rings properly sorted and initial connections complete, you’ll now build the backbone that supports your entire Byzantine chain. Start by closing two jump rings completely, creating your initial closed pairs that’ll anchor everything. These form your foundation structure’s starting point.
| Step | Action | Ring Type | Tool Needed |
|---|---|---|---|
| 1 | Close starter rings | Closed pairs | Pliers |
| 2 | Organize remaining rings | Open jump rings | None |
| 3 | Attach new rings | Two jump rings | Pliers |
| 4 | Maintain alignment | Mixed | Pliers |
Next, organize your open jump rings into groups of six for efficiency. Attach two jump rings to each closed pair, maintaining proper orientation. Use pliers to pinch pairs together while holding your starter securely. Keep consistent tension throughout this process to guarantee your Byzantine chain develops correctly.
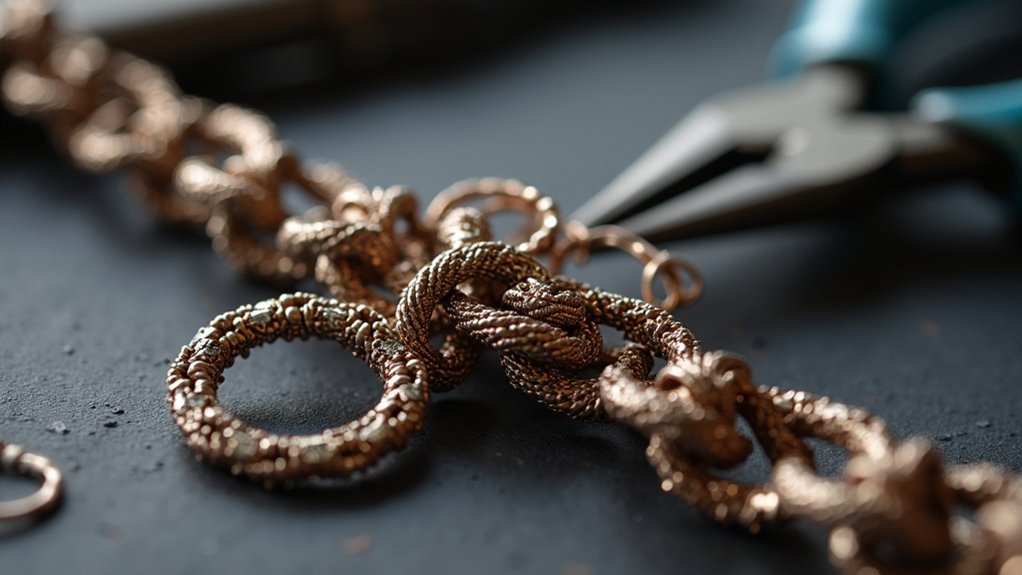
Mastering the Byzantine Folding Technique
You’ll need to master proper ring positioning before attempting any folds, as misaligned rings create weak points that’ll compromise your entire chain.
The folding back technique requires consistent pressure and deliberate movements to create those signature Byzantine knots that give the pattern its distinctive appearance.
Watch out for common folding errors like uneven tension, twisted rings, and incomplete folds that’ll leave your chain looking unprofessional and structurally unsound.
Ring Positioning Fundamentals
The Byzantine folding technique forms the backbone of this intricate chainmail pattern, requiring precise positioning of jump ring pairs to create the characteristic ‘knot’ structure.
You’ll need to master this fundamental approach to achieve the distinctive Byzantine appearance.
Proper ring positioning guarantees your weave maintains its structural integrity throughout construction.
Focus on these essential elements:
- Orient jump rings with openings facing inward toward the weave’s center for ideal linking
- Apply consistent tension when folding rings back to prevent distortion and maintain pattern uniformity
- Hook new rings carefully through previously folded-back pairs to establish a secure connection
- Monitor ring alignment regularly during the folding technique to preserve visual appeal and pattern integrity
This positioning foundation determines your Byzantine chain’s overall quality and durability.
Folding Back Technique
Building on proper ring positioning, folding back technique transforms your correctly oriented jump rings into the distinctive Byzantine knots that define this classic weave.
You’ll strategically fold back pairs of rings to create the interlocking pattern that gives Byzantine weave its characteristic appearance.
Maintain consistent tension throughout the folding process to preserve structural integrity and prevent distortion. This consistency guarantees uniformity across your entire chain.
Pay close attention to ring orientation—incorrect positioning affects both visual appeal and durability.
Regularly inspect your work for misaligned or improperly folded rings during construction. These errors can compromise the overall pattern’s integrity.
Don’t get discouraged if you struggle initially; mastering the folding back technique requires practice, but it’s fundamental for creating beautiful, durable Byzantine chains.
Common Folding Errors
Even experienced crafters encounter predictable mistakes when learning Byzantine folding technique, but recognizing these errors early prevents frustration and wasted materials.
The most common folding errors include:
- Over-tightening jump rings – Excessive pressure during the folding process distorts your pattern and reduces chain flexibility.
- Inconsistent ring orientation – Misalignment creates confusion and leads to incomplete designs that won’t lay properly.
- Losing previous connections – Failing to secure rings from earlier steps causes sections to unravel during folding.
- Irregular tension – Uneven pressure destroys the uniform appearance that makes Byzantine chains so distinctive.
You’ll master these intricate movements by practicing slowly and deliberately.
Check your tension regularly throughout the folding process to maintain consistency.
Adding Connector Rings and Building Cages
Once you’ve established your 2-2-2 chain foundation, you’ll begin transforming the basic structure into the distinctive Byzantine pattern by adding connector rings and forming the characteristic cages.
Use a twist tie to mark your chain’s end while building cages to maintain organization. Flip back the rightmost two rings, creating space for inserting connector rings. Position these carefully to guarantee proper Byzantine weave alignment.
Add your first large ring around the connector rings without threading it through them – this forms your cage’s base. Continue your chain structure by threading two rings through the connectors, then repeat this process for additional segments.
When you add new rings, maintain the double-locked integrity that defines authentic Byzantine weave construction. Each cage builds upon the previous connector points, creating the pattern’s signature interlocked appearance.
Maintaining Pattern Consistency Throughout the Chain
You’ll need to maintain consistent ring tension as you progress through your Byzantine chain to prevent distortion and guarantee uniform appearance.
Check your pattern alignment regularly by examining how each new ring interlocks with the previous sections.
Focus on keeping your closing technique steady and verify that each ring follows the established weaving sequence.
Ring Tension Control
While mastering the Byzantine chain pattern requires attention to multiple elements, controlling ring tension stands as perhaps the most critical skill you’ll develop. Proper tension guarantees your chain maintains its distinctive appearance and structural integrity throughout the entire length.
Focus on these essential tension control techniques:
- Apply uniform pressure – Keep consistent force on each jump ring to prevent distortion of the intricate pattern.
- Monitor ring alignment – Regularly check that rings sit properly as misalignment disrupts the chain’s flow.
- Maintain correct positioning – Confirm rings stay oriented properly to avoid gaps or excessive slack.
- Practice steady technique – Develop consistent hand movements for uniform results.
Pattern Alignment Checks
As you build your Byzantine chain, maintaining pattern consistency requires systematic checks at regular intervals to catch alignment issues before they compromise your entire piece.
Start by examining the orientation of your jump rings every few links, making sure they’re properly aligned with your established pattern. You’ll need to visually inspect each section as you progress, looking for rings that might’ve shifted out of place.
Use measuring tools to verify consistent dimensions against your planned specifications. When you spot misalignment, gently adjust positioning without disturbing the overall structure.
Remember to maintain tension throughout your work—this prevents distortion that can throw off your pattern alignment. These regular checks guarantee your Byzantine chain maintains its distinctive, professional appearance from start to finish.
Troubleshooting Common Byzantine Chain Issues
Even experienced crafters encounter challenges when creating Byzantine chains, but identifying and resolving these issues quickly will keep your project on track.
Quick problem identification and resolution are essential skills that separate successful Byzantine chain makers from those who struggle with their projects.
Most problems stem from preventable mistakes that you can easily avoid with proper attention to detail.
Common issues to watch for include:
- Over-tightening jump rings – This distorts the weave pattern, so maintain consistent tension throughout assembly.
- Inconsistent sizes – Verify all rings fall within the 3.2 to 4.2 aspect ratio for uniform appearance.
- Chain begins to unravel – Verify your starting point is secured and all links are securely closed without gaps.
- Misaligned rings – Regularly inspect during assembly and correct immediately to prevent flawed design.
Always prioritize safety by wearing protective gloves and goggles while working.
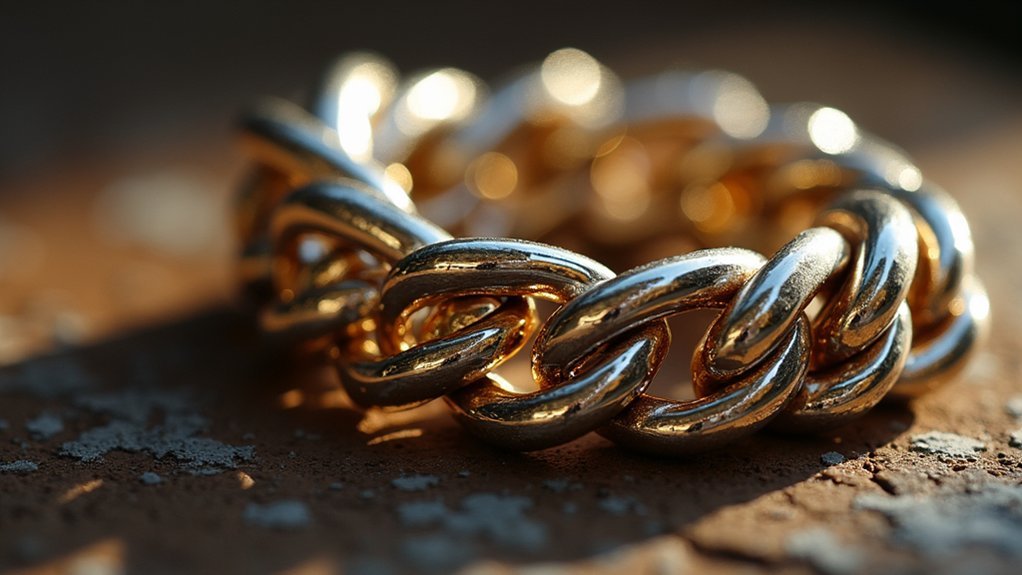
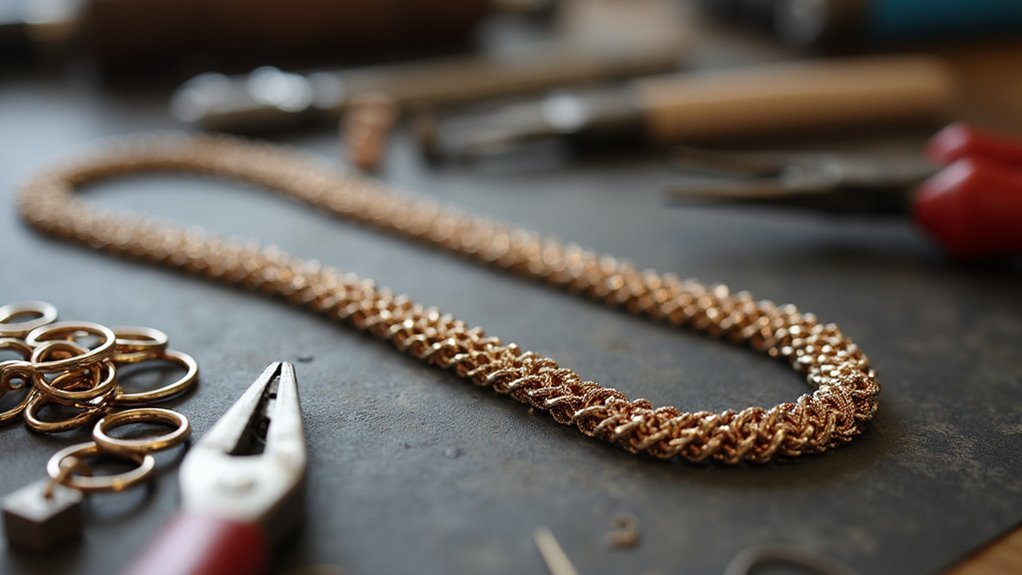
Finishing Techniques and Clasp Attachment
With your Byzantine chain weave complete and any issues resolved, you’re ready to add the finishing touches that transform your handcrafted links into a wearable piece of jewelry.
Begin with a final inspection, checking that all jump rings are securely closed and properly aligned throughout your Byzantine chain.
Once satisfied with the structure, it’s time for clasp attachment. Connect your clasp using a single jump ring attached to the chain’s last two rings after completing the final flip. For enhanced durability, consider using two jump rings to secure the connection.
If you’ve chosen a toggle clasp, verify it complements your chain’s design.
Store your completed Byzantine chain in a safe, dry location to preserve its appearance.
Frequently Asked Questions
How Many Jump Rings to Make a Byzantine Necklace?
You’ll need approximately 4-6 jump rings per inch for your Byzantine necklace. Measure your desired length, multiply by 5 rings per inch, then add 10-20% extra for variations and mistakes.
What Is the Ratio of Byzantine Chains?
You’ll want to maintain an aspect ratio between 3.2 and 4.2 for Byzantine chains. This range guarantees you’ve got proper flexibility and pattern integrity while preserving the characteristic interlocking design that defines Byzantine weaving.
What Is the Best Aspect Ratio for a Byzantine Chain?
You’ll find the best aspect ratio for Byzantine chains falls between 3.2 to 4.2. For beginners, you should start with 4.1 since it’s easier to work with while maintaining stability.
Are Byzantine Chains More Expensive?
You’ll find Byzantine chains are more expensive than simpler styles because they require intricate weaving, more jump rings, longer production time, and higher labor costs, making them premium jewelry pieces.
In Summary
You’ve successfully mastered the intricate Byzantine chain pattern through careful attention to ring ratios, precise folding techniques, and consistent cage formations. Your patience with the initial learning curve has paid off, creating a stunning piece of chainmaille jewelry. Remember to maintain even tension throughout future projects and don’t rush the folding process. With practice, you’ll create increasingly complex Byzantine variations and develop your own unique finishing touches.


Leave a Reply