
You’ll sculpt organic jewelry by selecting the right wax type—hard wax for crisp details or soft wax for flowing curves. Start with reference sketches and create guidelines on your wax block for proportions. Use progressive buildup techniques, layering textures while manipulating temperature for smooth blending. Master essential tools like scalpels for detailing and wax pens for repairs. After carving, you’ll prepare your piece for lost wax casting to transform it into precious metal jewelry that captures nature’s flowing beauty.
Ancient Origins of Wax Carving in Jewelry Craft
When you explore the ancient art of wax carving, you’re connecting with a tradition that spans over 6,000 years and reaches back to the skilled artisans of ancient Egypt.
These early craftspeople developed wax carving techniques that allowed them to create intricate decorative items and jewelry with unprecedented detail and precision.
The revolutionary lost wax casting method enabled artisans to produce complex, organic shapes that traditional fabrication couldn’t achieve.
You’ll find that ancient cultures valued this technique not just for creating jewelry, but for crafting various decorative objects that held deep cultural significance.
Today’s wax carving techniques preserve these ancient methods while allowing modern jewelers to innovate.
When you practice this craft, you’re continuing an unbroken chain of artistic tradition that bridges past and present.
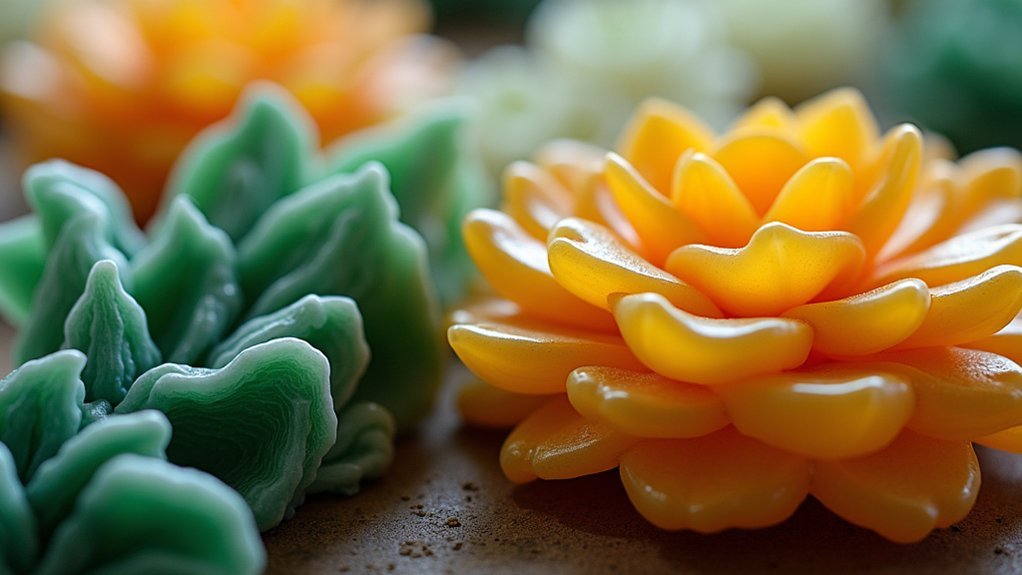
Essential Wax Types for Organic Jewelry Design
You’ll find that choosing between hard and soft waxes fundamentally shapes your organic jewelry’s final form and detail level.
Hard waxes like green wax excel at crisp edges and intricate patterns, while softer blue wax allows you to create flowing, rounded surfaces with ease.
Each color-coded wax type offers distinct properties—from turquoise wax’s exceptional durability to purple wax’s versatile balance of hardness and flexibility.
Hard Vs Soft Waxes
Understanding the fundamental differences between hard and soft waxes forms the foundation of successful organic jewelry sculpting.
Hard wax, like green wax, delivers exceptional precision for sharp edges and intricate carvings. You’ll find it maintains its shape during detailed work, though it’s less forgiving of mistakes.
Soft wax, such as blue wax, offers flexibility that’s perfect for rounded surfaces and fluid organic forms. You can easily manipulate it to create smooth, flowing shapes.
Your carving process changes dramatically between these types. Hard wax demands careful planning since corrections prove challenging, while soft wax allows spontaneous adjustments.
Choose hard wax when you need precise botanical details or geometric elements. Select soft wax for curved petals, flowing vines, or abstract organic shapes requiring gentle shifts.
Color-Coded Wax Properties
Each wax color in your toolkit carries distinct properties that’ll transform how you approach organic jewelry design. Understanding these characteristics helps you select the perfect wax block for your specific project needs.
Green wax delivers exceptional hardness, allowing your wax carving tools to achieve razor-sharp edges and intricate details essential for precise organic forms.
Purple wax offers versatility as your go-to general-purpose option, balancing rigidity with flexibility for diverse organic textures and shapes.
Blue wax’s softer composition excels when crafting rounded surfaces and flowing curves that define natural jewelry aesthetics.
- Turquoise wax provides superior surface finish and strength for complex organic details
- File-a-wax like Ferris offers multiple colors for detailed intricate designs
- Color selection directly impacts your carving precision and final organic form quality
Core Tools for Sculpting Natural Forms
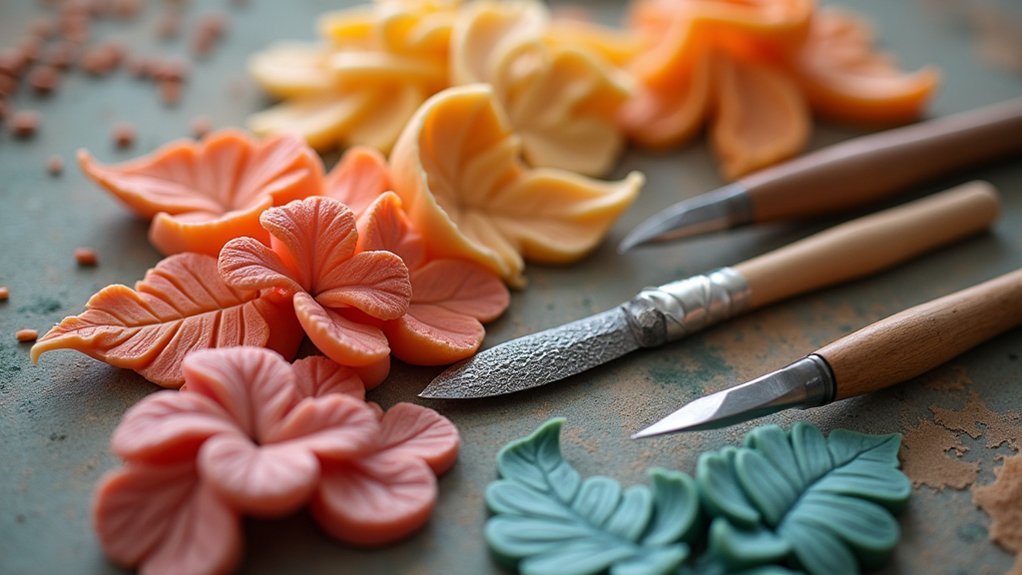
You’ll need specific carving tools and specialized shaping equipment to transform wax into flowing, natural jewelry forms.
Your essential carving tool selection should include a quality wax carving set with various knives and files, plus a cordless wax pen for seamless joining and repairs.
Specialized wax shaping equipment like stone-setting burrs and adjustable trimmers will greatly speed up your workflow while ensuring precise, professional results.
Essential Carving Tool Selection
The foundation of successful organic jewelry carving rests in selecting the right tools that’ll bring your natural designs to life.
You’ll start with a basic carving tool set under £20, but consider investing in advanced options like the Wolf Precision Wax Carver Complete (£180) as your wax carving skills develop.
Essential tools you’ll need include:
- Scalpels – Custom blades from Russell Lownsbrough and Danila Tarcinale (£31/set) enable intricate detailing
- Wax pen – Battery-operated versions (£25) join pieces and make repairs seamlessly
- Specialty trimmer – Wolf Wax Adjustable Trimmer ($60) creates precise organic forms quickly
Enhance efficiency with wax shaping burrs from Advantage and Wolf brands.
For frequent use, upgrade to electric carvers like Foredom models that’ll accelerate your workflow considerably.
Specialized Wax Shaping Equipment
While basic carving tools establish your foundation, specialized wax shaping equipment transforms how you’ll sculpt intricate organic forms with professional precision.
The Wolf Wax Adjustable Wax Trimmer delivers quick, clean cuts that streamline your wax carving process when creating natural designs. Specialized burrs from brands like Advantage and Wolf efficiently remove wax while adding organic textures to your sculptures.
Electric wax carvers, particularly the Foredom Electric Wax Carver, offer interchangeable tips that facilitate detailed work on complex natural forms.
Stone-setting burrs expand your design possibilities by creating unique textures and settings within organic jewelry pieces.
These advanced tools help enhance your precision greatly, allowing you to achieve professional-quality results when sculpting intricate botanical patterns, flowing water motifs, and other nature-inspired elements.
Planning Your Organic Jewelry Design
How can you transform nature’s irregular beauty into wearable art? Planning your organic jewelry design requires careful consideration before you begin your wax carving techniques.
Start by gathering reference images and sketches that inspire your organic shapes, allowing you to visualize the final piece clearly.
Collect inspiring reference materials and detailed sketches to clearly envision your organic jewelry design before beginning the creative process.
Essential planning steps include:
- Creating guidelines on your wax block to maintain proportions and symmetry for balanced designs
- Utilizing layering techniques when planning intricate details to manage complex forms effectively
- Selecting appropriate wax types like turquoise for surface finish or blue for flexibility
Remember to embrace imperfections as part of the organic aesthetic.
Allow spontaneity in your design process to enhance the natural feel of your jewelry, making each piece uniquely beautiful.
Carving Techniques for Flowing Natural Shapes
You’ll master organic jewelry carving through three essential approaches that transform rigid wax into nature-inspired forms.
Start by building layered textures that mimic natural surfaces.
Then focus on smoothing curved edges to create seamless connections between organic elements.
Finally, select specialized tools that help you carve authentic patterns found in leaves, water flow, and other natural phenomena.
Layered Texture Building Methods
Three fundamental approaches form the backbone of layered texture building in organic jewelry sculpture.
You’ll develop intricate surface details by systematically building wax in distinct sections, creating dimensional depth that mimics nature’s complexity.
Your wax carving success depends on strategic layering that transforms flat surfaces into dynamic organic forms:
- Progressive buildup techniques – Add successive wax layers while each section remains workable
- Selective tool application – Alternate between burrs for rough textures and scalpel blades for fine details
- Temperature manipulation – Heat specific areas for smooth blending, then cool to lock in defined edges
Master these tools and techniques by regularly rotating your piece during carving.
This perspective shift guarantees balanced flow throughout your design while maintaining the natural harmony that makes organic jewelry truly engaging.
Curved Edge Smoothing Techniques
While rough textures establish your organic jewelry’s foundational character, achieving seamless curved edges requires precision techniques that transform angular shifts into flowing natural forms.
You’ll want to give these curved edge smoothing techniques in wax carving a try for professional results.
Start with fine grit emery paper to eliminate harsh lines and create soft, flowing finishes. Use a wax file to gently round edges, ensuring seamless changes between planes.
For delicate refinement, apply a cool flame to melt rough surfaces, mimicking natural shapes.
Define intricate curves using scalpels or specialized carving burrs before final polishing.
Always maintain steady hand control throughout the process—this prevents structural weakening while preserving your flowing organic design’s integrity and natural appearance.
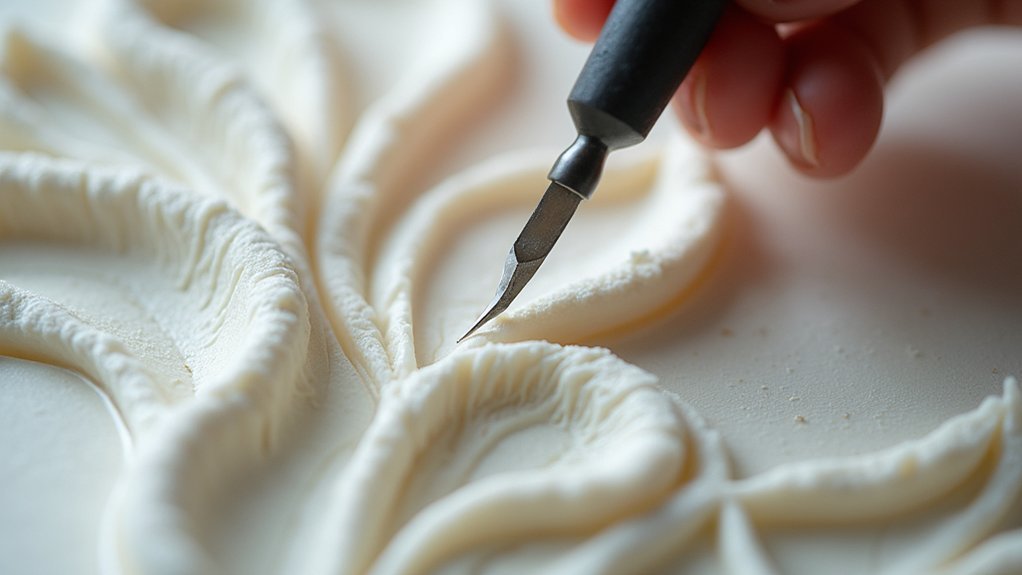
Organic Pattern Creation Tools
Creating authentic organic patterns demands specialized tools that work harmoniously with wax’s natural properties.
You’ll need precision carving instruments to achieve the flowing, natural textures that define organic jewelry design.
Essential tools for organic pattern creation include:
- Scalpel blades – Perfect for creating delicate leaf veins, bark textures, and fine detail work in your organic designs.
- Wax burs – Ideal for carving smooth, rounded hollows and creating natural depressions that mimic organic forms.
- Flexible modeling tools – Essential for blending transitions and maintaining the fluid character of natural shapes.
Start with reference images of natural elements, using markers to outline your flowing shapes before carving.
Layer your techniques to build complex organic patterns gradually.
These specialized tools enable you to capture nature’s intricate beauty while maintaining the fluid characteristics essential to organic jewelry design.
Creating Texture and Surface Details

Once you’ve established the basic form of your organic jewelry piece, you’ll transform its surface through deliberate texturing techniques that bring depth and visual interest to your design.
Use layering methods to build intricate surface details that capture light and shadow effectively. Carve with various tools like burrs and files to create diverse textures ranging from smooth finishes to rugged surfaces, enhancing visual complexity.
Master the art of layering and carving to create complex textures that play beautifully with light and shadow in your designs.
Embrace organic shapes that mimic nature’s irregularities, as wax allows fluid designs. Apply molten wax with wax pens for seamless repairs or additional texture integration.
Experiment with different wax types—turquoise wax delivers superior surface finishes while blue wax offers flexibility for distinct textural effects in your jewelry designs.
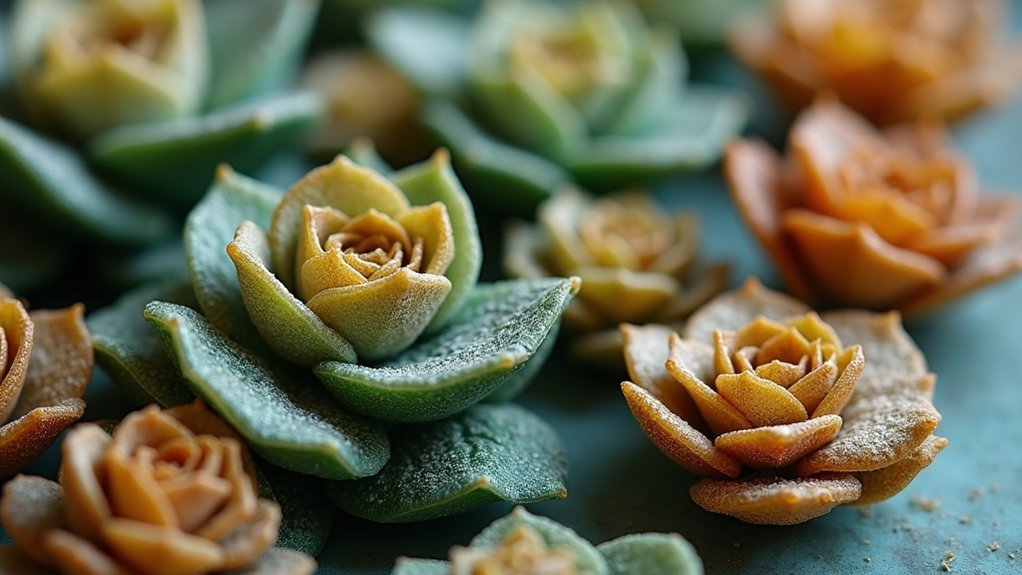
Forming Botanical Elements and Nature Motifs
When you’re ready to incorporate botanical elements into your jewelry designs, begin by observing real plants to understand their natural proportions and growth patterns.
Carving is a great way to capture nature’s organic beauty in wax, especially when creating intricate designs that mirror botanical complexity.
Choose flexible blue or turquoise wax for delicate petals and leaves that require softer curves. Build depth through layering techniques, allowing overlapping petals and foliage to create dimensional compositions.
Essential techniques for botanical jewelry include:
- Using fine burrs and scalpels to carve realistic leaf veins and flower patterns
- Pressing natural materials like leaves or bark into wax for authentic texture impressions
- Studying real plant specimens to accurately capture organic shapes and details
These methods transform simple wax into sophisticated nature-inspired jewelry pieces.
Repairing and Refining Your Wax Model
After creating your botanical wax model with its intricate details and layered elements, you’ll likely notice small imperfections that need attention. For repairing uneven spots, heat your original wax piece before applying scrap wax to create a stronger bond and seamless integration.
Maintain steady hands during repairs since wax allows easy correction of imperfections. Let newly added wax cool completely before continuing.
Pass a cool flame over your design to eliminate rough edges and refine all details for quality casting. Use fine grit emery paper on flat surfaces to smooth uneven edges.
Polish with old tights to achieve a flawless surface finish. This careful refinement process guarantees your wax piece meets professional standards before proceeding to the casting stage.
Preparing Carved Pieces for Lost Wax Casting
Before your wax model can transform into a stunning metal piece, you’ll need to prepare it properly for the lost wax casting process. After completing the process of wax carving, several vital preparation steps guarantee ideal results.
Start by polishing your carved piece with fine grit emery paper and old tights to refine intricate details. Next, pass the wax model through a cool flame to eliminate rough edges and achieve a smoother surface finish.
Smooth surface imperfections using fine emery paper and gentle flame treatment to achieve professional-grade wax model preparation for optimal casting results.
Essential preparation steps include:
- Attaching a sprue to facilitate molten metal flow during casting
- Using a wax-to-metal conversion chart to calculate required metal weight
- Placing wax models in investment plaster to create detailed casting cavities
These preparation techniques preserve every carved detail, guaranteeing your organic jewelry emerges with professional quality and stunning precision.
Understanding the Metal Casting Process
Once your wax model is properly prepared, the metal casting process transforms your carved creation into permanent jewelry through a series of precise steps. First, you’ll attach a sprue to your wax carving, creating the essential channel for molten metal flow. After encasing your piece in investment plaster, the kiln burns out the wax, leaving a precise cavity. You’ll then pour molten metal—brass, silver, or gold—into this space.
| Step | Process | Result |
|---|---|---|
| 1 | Attach sprue to wax carving | Creates metal flow channel |
| 2 | Encase in investment plaster | Forms rigid mold |
| 3 | Burn out wax in kiln | Leaves precise cavity |
| 4 | Pour molten metal | Fills wax space completely |
| 5 | Remove sprue, finish piece | Creates final jewelry |
The metal casting preserves every intricate detail from your original wax carving work.
Weight Calculations and Metal Selection
Understanding metal casting mechanics leads directly to an equally important consideration: determining how much metal you’ll need and which type best suits your design.
Weight calculations require understanding that wax weighs considerably less than metal—about 10 times lighter than silver and 16 times lighter than 18-carat gold. You’ll need a wax-to-metal conversion chart for accurate calculations.
Your metal selection depends on your design goals:
- Brass – Affordable option for practice pieces or budget-conscious projects
- Silver – Classic choice offering timeless appeal and moderate cost
- Gold – Premium option for luxury pieces with exceptional durability
Remember to include sprues and additional features in your weight calculations, as they affect total metal requirements.
Consult your caster for specific recommendations regarding your particular design’s metal needs.
Creating Multiple Pieces From Master Models
After perfecting your original wax sculpture, you’ll want to preserve it as a master model for creating identical pieces.
Create using silicone to make a precise mold that captures every detail of your wax carving. Once your mold’s ready, you can inject fresh wax to produce multiple copies, each maintaining the original’s intricate features through the lost wax casting process.
Silicone molds capture every intricate detail, enabling precise wax injection for multiple identical copies through lost wax casting.
For efficient production, set up a wax tree system where you attach multiple models to a single sprue. This allows simultaneous casting of several pieces, maximizing your time and materials.
Remember that scaling affects final dimensions and details, so you’ll need to adjust your master model for different ring sizes or specific measurements to guarantee consistent quality across all cast pieces.
Finishing and Polishing Cast Organic Jewelry
When your organic jewelry emerges from the casting process, it’ll require careful finishing to transform the raw cast into a polished masterpiece.
Start by passing the piece through a cool flame to eliminate rough edges left from casting. This initial step prepares your jewelry for detailed refinement.
Essential finishing techniques include:
- Edge refinement – Use a wax file or wax trimmer to round off sharp edges for uniform shaping
- Surface smoothing – Apply fine grit emery paper on flat surfaces to eliminate uneven areas
- Final polishing – Rub with old tights to create a smooth, lustrous finish
These steps guarantee all details are refined and imperfection-free.
Once properly polished and finished, your organic jewelry will showcase its intricate design elements while maintaining the professional quality that distinguishes exceptional cast pieces.
Frequently Asked Questions
What Are the Different Types of Sculpting Wax?
You’ll find several sculpting wax types: Green wax for sharp, intricate details; Purple for general-purpose work; Blue for flexible, rounded designs; and Turquoise for exceptional surface finish and durability.
How Do You Smooth Sculpt Wax?
You’ll smooth sculpt wax by passing it through a cool flame to eliminate rough edges. Use a wax file for rounding, fine emery paper for uneven surfaces, and polish with old tights for seamless texture.
What Is the Difference Between Green and Blue Carving Wax?
Green wax is harder and better for intricate details and sharp edges, while blue wax is softer and more flexible, making it easier to carve organic shapes and rounded forms.
Is the Lost Wax Technique Still Used?
Yes, you’ll find the lost wax technique is absolutely still used today. You can see it in modern jewelry making, art casting, and manufacturing where you need intricate details and complex shapes.
In Summary
You’ve mastered the ancient art of wax carving to create stunning organic jewelry. Your understanding of wax types, carving tools, and flowing techniques will help you craft nature-inspired pieces that capture life’s essence. Don’t forget to calculate metal weights carefully and perfect your casting process. With practice, you’ll create multiple pieces from master models and achieve professional finishes. Your organic jewelry designs will now reflect the beautiful irregularity found in nature itself.


Leave a Reply