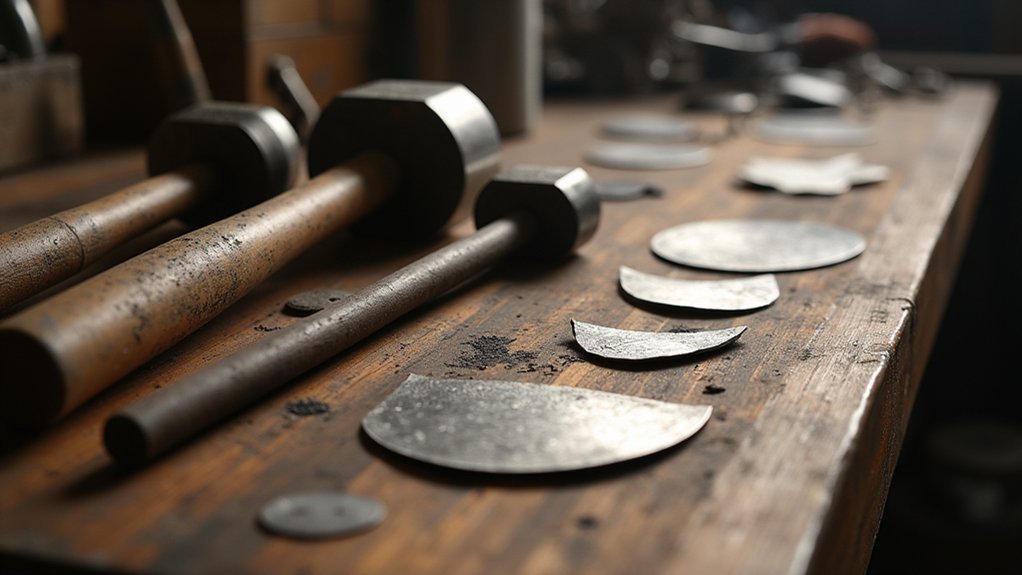
You’ll master metal jewelry raising by selecting the right hammer weight for your metal thickness—200-300 grams for thin sheets, 400+ grams for thicker materials. Position your metal at a 45-degree angle on the raising stake for even pressure distribution, using steeper angles for pronounced curves and shallower ones for gentle forms. Work systematically across the surface with light, quick strikes to prevent localized hardening, and anneal regularly to maintain malleability. These foundational techniques reveal advanced three-dimensional shaping possibilities.
Understanding the Fundamentals of Raising Hammer Construction and Design

When you’re selecting a raising hammer for metalworking projects, you’ll find that its rectangular cross-section and slightly curved face aren’t arbitrary design choices—they’re specifically engineered to compress and shape sheet metal effectively during the raising process.
These raising hammers typically weigh between 200 to 500 grams, giving you varying levels of force and control for different shaping metal applications.
The hammer construction focuses on functionality and comfort. You’ll notice the solid handle design prioritizes your grip and reduces fatigue during extended use. This construction enables you to maintain consistent pressure while working.
Solid handle construction reduces hand fatigue while ensuring consistent pressure control during extended metalworking sessions.
The hammer’s effectiveness increases considerably when you pair it with a raising stake, allowing you to position your metal at ideal angles for precise forming and curvature control.
Proper Positioning and Angling Techniques for Metal Sheets on Raising Stakes
Although your hammer technique matters considerably, proper positioning of your metal sheet on the raising stake determines whether you’ll achieve clean, symmetrical curves or struggle with uneven distortion.
Position your metal sheet at a slight angle on the stake, ensuring it’s securely held for controlled raising hammer strikes without shifting. The angle you choose directly affects your results—steeper angles create deeper shapes, while shallower angles produce gradual curves.
Consistently check your metal sheet’s alignment on the raising stake to maintain symmetry throughout the process. This proper positioning enables effective hammering on the outside surface, helping form your desired shape.
Use a raising hammer with a rectangular cross-section featuring a slight vertical curve to manipulate the metal effectively while minimizing unwanted distortion during shaping.
Cross-Section Face Applications for Maximum Metal Movement Control
The cross-section face of your raising hammer serves as your primary tool for controlling metal movement during the shaping process. This rectangular face features a slight vertical curve that enhances your control while striking.
When you position your metal on the raising stake, apply the cross pein at a slight angle to the outside surface for ideal force distribution.
Your hammer’s weight directly impacts metal movement effectiveness. Choose lighter raising hammers for delicate jewelry work and heavier ones for substantial shaping tasks.
Practice varying your strike angles and pressure to achieve precise curvature control. Proper cross pein technique minimizes hammer marks on your metal surface, resulting in smoother finishes that require less cleanup work.
Progressive Forming Methods Using Systematic Hammer Strike Patterns
Since effective metal raising depends on methodical progression, you’ll develop systematic hammer strike patterns that gradually change flat sheets into dimensional forms.
Your raising hammer becomes the primary tool for striking the metal’s outside surface, systematically working from the outer edges toward the center. You’ll position your raising stake at a slight angle, allowing controlled hammer strikes to shape bowls, vases, and other dimensional jewelry components.
Apply overlapping strike patterns to minimize distortion while maintaining smooth profile shifts. Consistent angle and pressure throughout your hammer strikes guarantees uniform curvature and thickness.
Practice varying your strike patterns and adjusting your hammer’s angle to enhance effectiveness. These systematic approaches using multiple hammers and refined raising hammer techniques enable you to create increasingly complex and refined metal forms for sophisticated jewelry pieces.
Weight Distribution and Hammer Selection for Different Metal Thicknesses
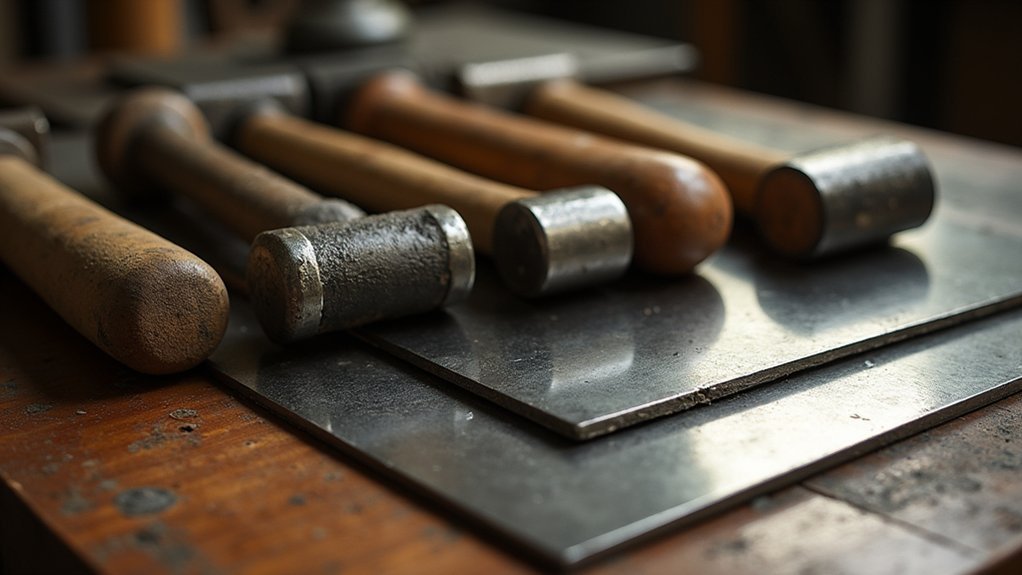
You’ll need to match your hammer weight to your metal’s thickness for successful raising work.
Light hammers around 200-300 grams work best with thin sheets, while heavier options over 400 grams are crucial for thick materials that require more force to move effectively.
This pairing prevents metal distortion, reduces your effort, and guarantees you’re using the most suitable tool for each specific thickness you encounter.
Hammer Weight Classifications
When working with different metal thicknesses, hammer weight becomes your primary consideration for achieving successful raising techniques. Understanding proper classifications helps you select the right tool for each project’s demands.
Hammer Weight Classifications:
- Light hammers (100-150 grams) – Perfect for ultra-thin metals under 0.8mm, providing delicate control for intricate detail work.
- Medium-light hammers (150-200 grams) – Ideal for thin metals between 0.8-1mm, offering balanced precision without overwhelming force.
- Medium hammers (200-300 grams) – Best for standard jewelry metals 1-1.5mm thick, delivering adequate force while maintaining control.
- Heavier hammers (300+ grams) – Essential for thick metals over 1.5mm, providing necessary force for substantial material movement.
You’ll develop better technique by practicing with various weights on identical metal thicknesses, learning how each classification affects your raising results.
Metal Thickness Guidelines
Although hammer weight provides your foundation, metal thickness dictates the specific tool selection that’ll make or break your raising project.
For delicate metals under 20 gauge (0.8 mm), you’ll want lightweight rawhide mallets that won’t deform your material during jewellery making.
When working with 18 gauge (1.0 mm) pieces, combine planishing hammers for smoothing with raising hammers for forming to achieve ideal results.
Thicker materials like 16 gauge (1.5 mm) and above require heavier raising hammers with flat or domed faces to effectively move and shape stubborn metal.
Remember this fundamental rule: heavier metal thicknesses demand heavier hammers.
Matching your hammer to specific metal thickness guarantees sufficient force without excessive effort, preventing surface marks and uneven shaping that’ll compromise your finished piece.
Optimal Tool Pairing
Three critical factors determine successful tool pairing: hammer weight, metal gauge, and weight distribution balance.
You’ll achieve ideal tool pairing by matching your raising hammer to your material’s specific requirements. When working with delicate metals, lighter hammers prevent excessive stretching while maintaining precision control.
Consider these weight distribution guidelines:
- 20-gauge sheets: Use lightweight hammers with balanced weight distribution for controlled shaping.
- 16-gauge materials: Select medium-weight hammers that provide adequate force without distortion.
- Thicker metals: Choose heavier raising hammers that deliver necessary shaping power.
- Stake pairing: Match your hammer weight with corresponding raising stakes for efficient results.
Understanding your metal’s gauge helps you select tools that won’t damage your work.
Proper weight distribution guarantees you’ll maintain control throughout the raising process while achieving professional-quality results.
Surface Preparation and Metal Conditioning Before Raising Operations
You’ll need to properly prepare your metal surface and condition the material before attempting any raising operations.
Start by thoroughly cleaning your metal sheets to remove oils, oxidation, and debris that could create imperfections during shaping.
Next, you’ll want to anneal the metal to achieve the ideal malleability required for successful raising work.
Annealing Metal Sheets
The foundation of successful metal raising begins with proper annealing, a heat treatment process that transforms rigid metal sheets into malleable material ready for shaping.
You’ll heat copper and silver between 600°F to 1200°F, watching for the telltale dull, oxidized appearance that signals successful annealing. This softening prevents brittleness and makes your metal responsive to jewelry hammers during raising operations.
Follow these essential annealing steps:
- Heat metal sheets evenly to the appropriate temperature for your specific alloy
- Watch for color changes indicating proper heat distribution across the surface
- Allow slow cooling to prevent stress fractures from rapid temperature changes
- Repeat annealing regularly throughout your raising process to counteract work hardening
Consistent annealing guarantees your metal remains workable, preventing cracking and maintaining ideal malleability for precise shaping.
Surface Cleaning Methods
After annealing your metal sheets, pristine surface preparation becomes essential for achieving professional raising results.
You’ll need to thoroughly clean the surface of the metal to remove oxidation, dirt, and oils that interfere with your work. Start with mild abrasive cleaner or metal polish applied with a soft cloth across the entire working area.
For stubborn residues, employ pickling solutions to restore brightness and cleanliness. These cleaning methods guarantee ideal conditions before you begin.
Always rinse and completely dry the metal afterward—moisture causes problems during the hammering process and leads to corrosion.
Finally, condition your surface using fine abrasive pads. This technique enhances texture and promotes better adhesion for any finishes you’ll apply after completing your raising work.
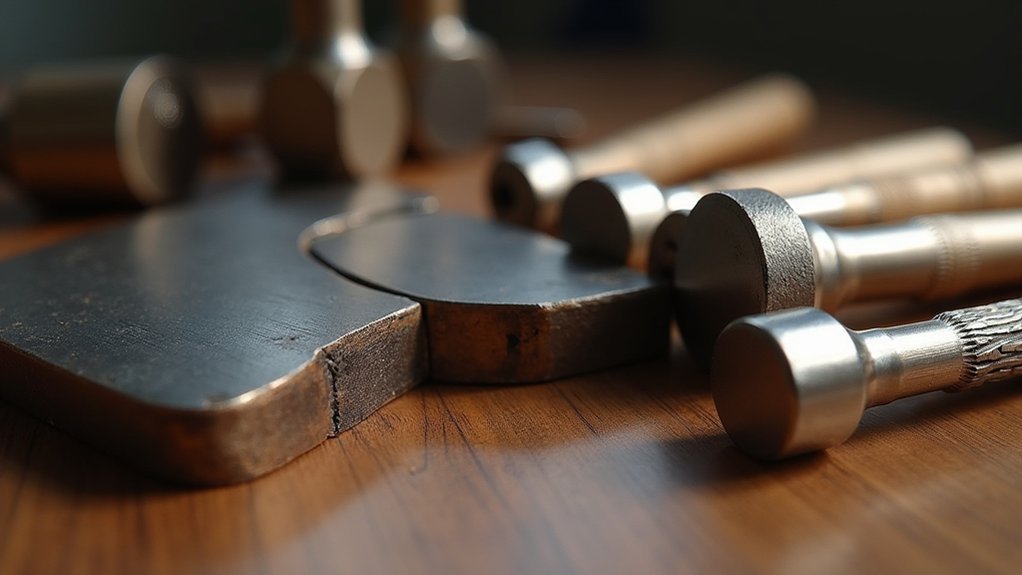
Stake Compatibility and Optimal Tool Pairing for Effective Results
When selecting tools for metal raising, pairing your hammer with the correct stake becomes the foundation of successful forming work. Your raising hammer’s effectiveness depends entirely on stake compatibility and ideal tool pairing strategies that maximize your forming potential.
Proper hammer and stake pairing forms the cornerstone of effective metal raising and optimal forming results.
Position your stake at a slight angle to enable efficient shaping from the metal’s exterior without excessive stretching.
Here’s your tool selection guide:
- Match cross-sectional faces – Choose hammers with curvatures that complement your stake’s profile
- Select lightweight options – Use lighter raising hammers for better control on delicate metals
- Complement stake curvature – Verify your stake’s shape supports your intended design outcome
- Practice coordination techniques – Refine hammer-stake timing on scrap materials before working final pieces
This systematic approach guarantees even force distribution and professional results.
Strike Angle Variations for Achieving Desired Curvature and Depth
Your strike angle determines whether you’ll create subtle curves or dramatic domes in your metal jewelry pieces.
Maintaining a consistent 45-degree angle guarantees even pressure distribution and prevents unwanted metal thinning while giving you ideal depth control.
You’ll need to adjust your hammer’s angle based on the curvature you’re targeting—steeper angles for pronounced domes and shallower angles for gentler curves.
Optimal Strike Angles
As you position your hammer above the metal, the angle at which you strike determines whether you’ll achieve gentle curves or dramatic depth changes in your piece.
Mastering ideal strike angles with your forming hammer transforms basic metalwork into sophisticated jewelry pieces.
Here are four essential angle techniques for striking metal:
- 45-degree strikes create gradual curvatures with excellent control during the raising process.
- 90-degree perpendicular strikes produce deeper indentations for pronounced profile depth.
- 15-30 degree low-angle strikes generate smooth shifts between curves, perfect for bowl forms.
- Thickness-adjusted angles prevent tearing—use shallower angles on thinner metals.
You’ll achieve consistent curvature and depth by maintaining steady strike angles throughout your work.
This uniformity enhances your piece’s overall aesthetic while preventing metal damage during the shaping process.
Depth Control Methods
Beyond mastering basic strike angles, you’ll need precise depth control methods to shape metal with professional accuracy. Your striking distance from the center directly influences depth—strikes near edges create shallow curves, while center strikes produce deeper forms.
You’ll achieve ideal results by varying your hammer angles strategically: vertical strikes generate maximum depth, whereas shallower angles create gentler shifts.
Maintain consistency by using approximately 45-degree angles for uniform depth throughout your design. Implement overlapping strikes rather than concentrating on single spots to prevent excessive distortion.
Position your raising stake at a slight angle for better visibility and control over your strike patterns. This systematic approach to depth control transforms basic hammering into precision metalwork, allowing you to create professional-quality raised designs.
Managing Metal Stress and Preventing Work Hardening During Raising
When raising metal, you’ll encounter the inevitable challenge of work hardening—a phenomenon where repeated hammering transforms malleable metal into a stubborn, brittle material that resists further shaping.
Managing metal stress requires strategic hammering techniques to maintain workability throughout your project.
Effective work hardening prevention involves these essential practices:
- Work evenly across the surface – Avoid concentrating hammer blows in one area to prevent localized hardening.
- Anneal regularly between sessions – Heat treatment restores malleability and relieves built-up stress.
- Use light, quick strikes – Replace heavy blows with controlled taps to minimize metal fatigue.
- Monitor temperature consistently – Keep metal within ideal working range to prevent brittleness.
Your raising stake becomes vital for controlling curvature while promoting even stretching, ensuring consistent results without compromising the metal’s integrity.
Transitioning Between Raising and Planishing for Surface Refinement
Once you’ve achieved the desired form through raising, the shift to planishing marks a critical change from shaping to surface refinement.
During this adjustment phase, you’ll switch from your raising hammer’s textured strikes to the planishing hammer’s polished faces, which eliminate hammer marks and create professional finishes.
Focus your planishing work on the exterior surface where you’ve previously shaped the metal’s outside contours.
Use overlapping strikes to guarantee even treatment across the entire surface. This systematic approach prevents new dents or imperfections from forming during the refinement process.
The planishing hammer’s smooth faces transform the rough texture left by raising into a polished, refined appearance.
This careful shift between techniques enhances your metalwork’s overall quality, enabling you to achieve detailed designs with smooth, professional surfaces in your jewelry pieces.
Creating Uniform Bowl and Vessel Forms Through Controlled Hammering
You’ll achieve consistent bowl and vessel forms by positioning your metal sheet at a slight angle on the raising stake, which lets gravity assist your shaping process.
Start hammering at the edges and work progressively toward the center, using overlapping strikes with a rectangular cross-section raising hammer.
This controlled approach guarantees you’re stretching the metal evenly while maintaining uniform thickness throughout your piece.
Proper Stake Positioning
As you begin the raising process, positioning your stake at a slight angle becomes essential for achieving clean, even strikes on the metal’s outside surface. Proper stake positioning directly affects how your hammer is used and impacts the final form quality. This angled placement allows you to work from a flat round disc into a three-dimensional vessel effectively.
Key positioning considerations include:
- Angle adjustment – Tilt the stake to create ideal striking surfaces for your hammer blows
- Height alignment – Position the stake so your hammer strikes naturally without strain
- Stability check – Confirm the stake remains firmly secured during intensive hammering sessions
- Access clearance – Maintain adequate space around the stake for continuous metal repositioning
This foundation enables consistent pressure distribution and uniform shaping throughout your raising work.
Progressive Metal Stretching
With your stake properly positioned, you can now begin the progressive metal stretching process that transforms your flat disc into a three-dimensional vessel.
Hold your metal at a slight angle against the raising stake, allowing effective control over hammering direction and depth. Use your raising hammer to create overlapping strikes across the surface, ensuring even stretching throughout the forming process. This systematic approach maintains consistent metal thickness while preventing weak spots.
Monitor your work’s curvature continuously, adjusting your technique as the shape develops. Avoid concentrating too many strikes in one area, which causes over-stretching and potential cracking.
Progressive stretching requires patience and practice to master. Focus on developing control and understanding how your metal responds to applied force for successful vessel formation.
Troubleshooting Common Raising Problems and Corrective Techniques
Even experienced metalworkers encounter challenges when raising metal, but understanding common problems and their solutions will save you time and frustration.
When your raising hammer isn’t delivering the results you expect, these corrective techniques will get you back on track:
- Poor forming results – Check your hammering technique by maintaining a straight arm and using elbow movement for consistent, powerful blows while positioning the metal sheet at a slight angle on the stake.
- Uneven surfaces – Reposition your sheet periodically and concentrate on high spots to achieve uniformity across the entire piece.
- Excessive hammer marks – Switch to a planishing hammer to smooth out imperfections created during raising.
- Shallow curves – Use a heavier raising hammer for deeper compression without excessive force.
Advanced Multi-Stage Raising for Complex Three-Dimensional Shapes
Once you’ve mastered basic raising techniques and can troubleshoot common issues, you’re ready to tackle complex three-dimensional forms that require multiple stages of careful manipulation.
Begin by positioning your metal sheet at precise angles on raising stakes, using heavier raising hammers with flat faces for initial forming and lighter hammers with round faces for detailed work. Maintain even pressure distribution as you progressively shape the metal into bowls or vessels.
Position metal sheets at precise angles, using heavier flat-faced hammers initially, then lighter round-faced hammers for detailed shaping work.
Between raising stages, incorporate planishing to eliminate hammer marks and achieve smooth surfaces essential for intricate designs.
Monitor your metal’s temperature throughout the process, as excessive work hardening requires annealing to preserve malleability. This systematic approach allows greater control over curvature and final dimensions, enabling you to create sophisticated jewelry pieces.
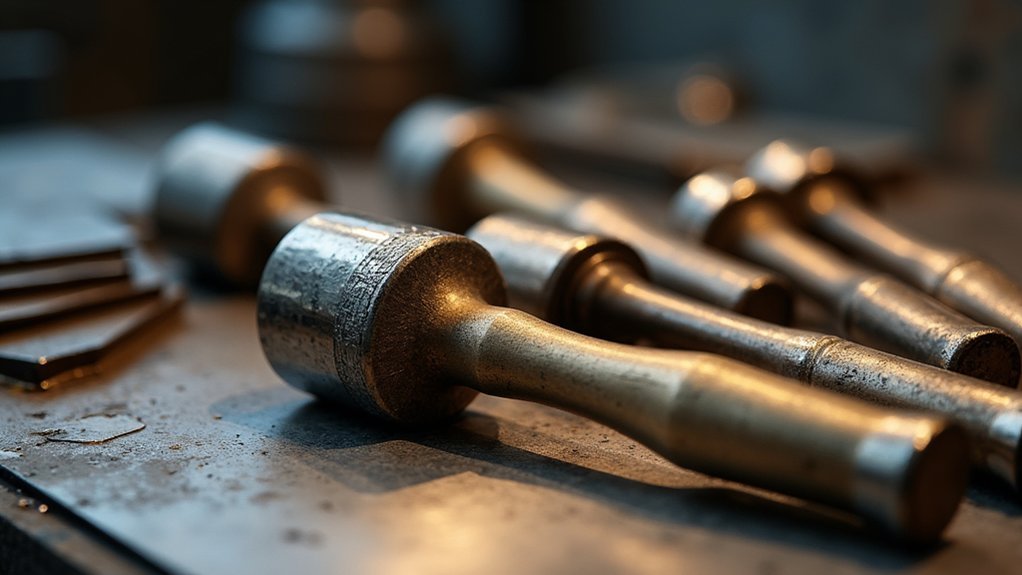
Maintaining and Caring for Raising Hammers to Ensure Tool Longevity
While raising hammers are essential for creating sophisticated three-dimensional forms, they’ll only perform at their finest when you maintain them properly.
Regular care guarantees your tools deliver consistent results and last for years of metalworking projects.
Here’s how to keep your raising hammers in prime condition:
- Clean hammer faces thoroughly after each use to remove metal debris and oxidation that can cause corrosion and diminish performance.
- Store in dry environments away from moisture to prevent rust formation and extend tool lifespan.
- Inspect striking surfaces regularly for dents or damage, filing down rough spots to maintain smooth contact with metal.
- Oil wooden handles lightly to prevent splintering and guarantee comfortable grip during extended work sessions.
Always check that hammer heads remain securely attached to handles, tightening loose fittings immediately.
Frequently Asked Questions
How Do You Hammer Metal Jewelry?
Position your metal sheet on a raising stake at an angle. Use a cross-peen raising hammer with straight arm movements from your elbow. Alternate strikes around the piece to distribute pressure evenly and avoid flat spots.
What Is the Best Hammer for Stamping Jewelry?
You’ll want a brass stamping hammer as your best choice for jewelry stamping. It absorbs impact effectively, prevents stamp shifting, and won’t damage your metal surfaces like steel hammers might during use.
What Is a Chasing Hammer Used for in Jewelry?
You’ll use a chasing hammer to strike chasing tools and punches for creating detailed relief designs in metal jewelry. It’s perfect for forming, texturing, and riveting with precise control.
Can You Use a Regular Hammer for Jewelry Stamping?
You can use a regular hammer for jewelry stamping, but it’s not recommended. Regular hammers don’t provide precise control, often causing uneven impressions. You’ll get better, clearer results with a dedicated brass stamping hammer.
In Summary
You’ll transform flat metal sheets into stunning three-dimensional jewelry pieces by mastering these raising hammer techniques. Don’t rush the process—methodical strikes and proper positioning create superior results. You’re building muscle memory with each progressive form, so practice consistently. Keep your hammers well-maintained and select appropriate weights for your projects. Remember, raising isn’t just about force; it’s about controlled metal movement. With patience and dedication, you’ll create professional-quality vessels and forms that showcase your metalsmithing skills.


Leave a Reply