You’ll need to measure damaged areas with 0.01mm precision using digital calipers, then create watertight CAD models that account for 0.2mm polishing loss. Set your layer height between 25-50 microns for fine details and orient parts at 45-degree angles to minimize supports. Design proper sprue systems attached to thick sections, compensate for 1-2% casting shrinkage, and always test print critical sections first. Document successful parameters including temperature, speed, and material specifications for consistent results. Master these fundamentals and you’ll discover advanced techniques that transform challenging repairs into professional-grade restorations.
Measure Damaged Areas Precisely Before Modeling
Before you begin any jewelry repair project, you’ll need to measure the damaged areas with exceptional precision to guarantee your replacement parts integrate flawlessly with the existing design.
Use digital calipers to capture measurements down to 0.01 mm accuracy, making certain your Printing Jewelry components match perfectly. Document every angle and contour of damaged sections, paying special attention to intricate details that affect the piece’s overall structure and appearance.
When you measure, consider the original jewelry’s dimensions and design features to replicate both aesthetic and functional qualities.
Transfer these precise measurements into CAD software to create accurate 3D models. This meticulous approach makes certain your printed repair components will seamlessly blend with the original piece, maintaining the jewelry’s integrity and visual appeal throughout the restoration process.
Account for Polishing Loss in Pattern Dimensions
When creating replacement patterns for damaged jewelry, you’ll need to calculate how much material the polishing process removes from your design.
Design your patterns with oversized dimensions to compensate for this inevitable loss—typically adding 0.2mm to all surfaces that’ll be polished.
This approach guarantees your finished repair matches the original jewelry’s exact specifications after the polishing stage removes the excess material.
Calculate Material Removal
Since polishing inevitably removes material from your jewelry pieces, you’ll need to calculate and compensate for this loss during the design phase. Typically, you’ll lose approximately 0.2mm of material during polishing, so you must add this thickness to your original dimensions before printing.
For instance, if you need a ring shank that’s 1.6mm thick in the final piece, you should design and print it at 1.8mm thickness.
Everything you need to take into account includes maintaining structural integrity while accounting for material removal. Check that your adjusted dimensions don’t fall below your printer’s minimum layer height, as this compromises print quality.
Regularly reviewing and modifying your model dimensions based on anticipated polishing loss guarantees your finished jewelry meets exact specifications and maintains professional quality standards.
Design Oversized Dimensions
Building on this material loss calculation, you must design your jewelry patterns with oversized dimensions from the start. When creating patterns for 3D printing, you’ll need to know that adding 0.2mm to each dimension compensates for polishing loss. This proactive approach guarantees your finished pieces meet exact specifications.
| Desired Thickness | Pattern Dimension | Final Result |
|---|---|---|
| 1.6mm | 1.8mm | 1.6mm |
| 2.0mm | 2.2mm | 2.0mm |
| 1.2mm | 1.4mm | 1.2mm |
| 0.8mm | 1.0mm | 0.8mm |
Consider all components in your design, including small features and details. Always verify dimensions exceed your printer’s layer height to maintain design integrity. Regular dimension checks before printing prevent finished pieces from falling below specifications, saving time and materials.
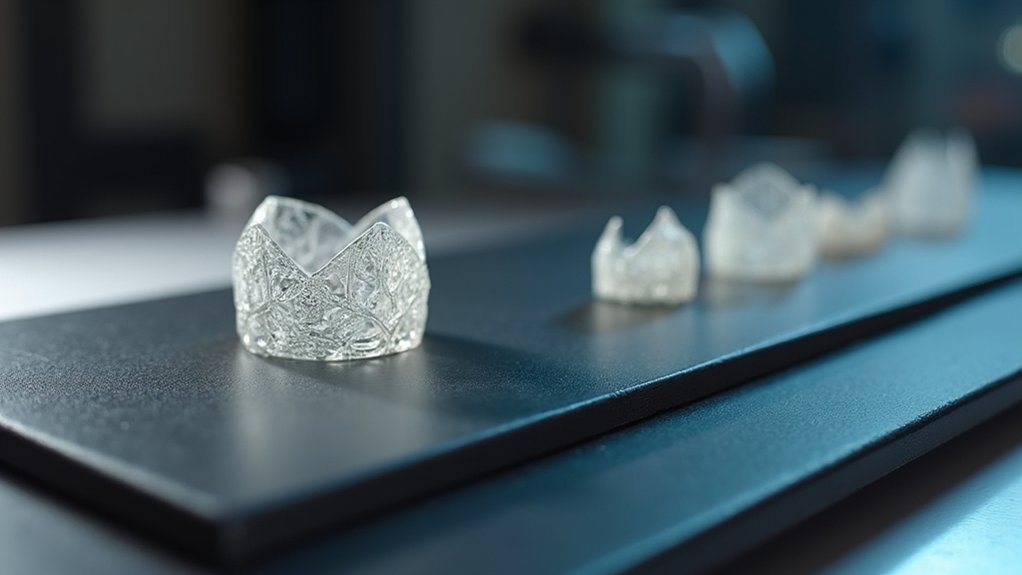
Create Watertight Models to Prevent Casting Failures
Although your 3D jewelry design might look perfect on screen, it’ll fail during casting if the model isn’t watertight. You must eliminate holes, gaps, and non-manifold edges that compromise structural integrity. These defects create leaks and voids in molds, resulting in failed castings and wasted materials.
Check your model’s integrity regularly using software tools that identify and repair issues before printing. These programs highlight problem areas you can’t see visually.
When merging shapes, use Boolean operations carefully to avoid creating non-manifold edges that break watertight seals. A properly watertight model features closed, connected surfaces throughout.
This attention to detail dramatically improves casting success rates and guarantees your final jewelry pieces meet quality standards without structural defects or surface imperfections.
Design Proper Sprue Systems for Clean Metal Flow
When molten metal flows through your casting system, the sprue design determines whether you’ll achieve flawless jewelry or encounter costly defects. Your sprue system acts as the highway for liquid metal, and poor design creates turbulence that causes casting failures.
Follow these essential sprue design principles:
- Attach sprues to thick sections – Connect to the heaviest parts of your jewelry piece for stable support and proper wax drainage during burnout.
- Create tapered, smooth designs – Use gradual tapers and rounded shifts to minimize flow resistance and turbulence.
- Route feeders strategically – Run feeder sprues from thick areas to thin sections, maintaining consistent metal flow throughout the piece.
- Optimize regularly – Review your sprue layouts to eliminate air pockets and incomplete fills that cause expensive casting failures.
Choose Appropriate Printing Resolution for Fine Details
You’ll need to select the right printing resolution to capture every intricate detail when creating replacement jewelry components.
Your layer height settings should range between 25-50 microns for ideal surface finish and feature definition.
These detail preservation methods guarantee your printed parts match the original jewelry’s fine craftsmanship and delicate elements.
Layer Height Settings
Since jewelry pieces demand exceptional detail and smooth finishes, selecting the right layer height becomes essential for achieving professional-quality results.
Your layer height choice directly affects both the visual quality and structural integrity of your printed jewelry repairs.
For ideal results, consider these layer height guidelines:
- Intricate details: Use 0.1mm or lower to capture fine features and minimize visible layer lines.
- General repairs: Apply 0.2mm to 0.3mm for less complex designs while maintaining efficiency.
- Print time consideration: Remember that higher resolution increases printing duration but dramatically improves appearance.
- Structural balance: Understand that thinner layers provide superior detail but may compromise overall strength.
Experiment with your slicing software settings like PrusaSlicer or Cura to find the perfect balance between detail precision and print efficiency for your specific jewelry repair projects.
Detail Preservation Methods
Achieving exceptional detail preservation in jewelry repairs requires strategic resolution choices that go beyond basic layer height adjustments.
You’ll need to select printing resolutions of 50 microns or less to maintain intricate pattern features accurately. Consider upgrading to a printer with a smaller nozzle diameter, which dramatically improves your ability to capture delicate elements in complex designs.
Optimize your slicing software by reducing layer height and enhancing surface finish settings. These adjustments directly impact detail visibility and fidelity in your final prints.
Don’t overlook support placement – strategically positioned supports protect fine details during printing while preventing damage to delicate areas.
Maintain consistent results through regular printer calibration and maintenance. This prevents print failures and guarantees accuracy across multiple jewelry repair projects.
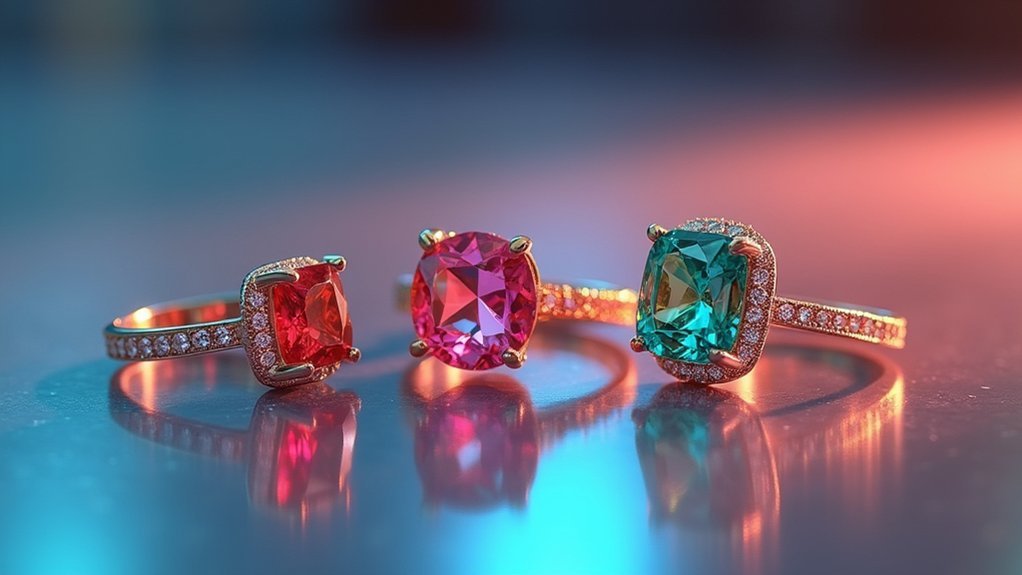
Select Compatible Materials for Investment Casting
When investment casting jewelry, choosing the right materials forms the foundation of a successful repair or creation project.
You’ll need to select castable wax or resin that burns out cleanly, leaving no residue that could compromise your mold’s surface quality.
Consider these material compatibility factors:
- Metal selection – Choose platinum, gold, silver, or bronze based on their ideal melting points and fluidity when molten.
- Investment powder compatibility – Verify your chosen material works with your specific investment to prevent cracking or incomplete molds.
- Additive incorporation – Use enhancing agents that improve flowability and strength for intricate designs.
- Supplier guidelines – Always check manufacturer recommendations for technique compatibility to minimize casting failures.
You’ll achieve better results when you prioritize material compatibility over convenience, ensuring your investment casting delivers professional-quality jewelry repairs.
Orient Parts Correctly to Minimize Support Structures
When preparing jewelry parts for 3D printing, you’ll need to position them at strategic angles that minimize support structure requirements while maintaining print quality.
Start by identifying the part’s heaviest sections and orient them toward the print bed, then adjust the angle to reduce overhangs that’d typically need supports.
Use your slicing software’s preview function to test different orientations and find the sweet spot where you’re using minimal support material without compromising surface finish or structural integrity.
Optimal Print Angles
Although jewelry pieces often feature intricate designs and delicate details, you can considerably reduce printing complications by carefully considering how you orient each part on the build plate.
The most effective approach involves positioning parts at approximately 45 degrees to minimize vertical height while reducing support requirements. This angle strikes a favorable balance between print stability and material usage.
Here are four key strategies for achieving favorable print angles:
- Position flat surfaces parallel to the build plate for maximum stability and dimensional accuracy.
- Analyze part geometry before printing to identify critical features that need support-free printing.
- Use slicing software previews to visualize support structures and compare different orientation options.
- Test prototype orientations with small samples to determine which angles produce the best surface quality for your specific materials.
Support Reduction Strategies
Beyond selecting the right print angle, you can dramatically cut down on support material by strategically orienting your jewelry components to work with gravity rather than against it.
Position parts with flat bases against the print bed to maximize adhesion and stability. When dealing with inclined surfaces, aim for 45-degree angles to distribute weight evenly and eliminate support needs for delicate features.
Use your slicing software to test different orientations before committing to a print. Analyze your jewelry design’s geometry to identify self-supporting features like arches or gradual curves.
These natural structural elements can carry their own weight during printing. This approach reduces material waste, cuts printing time, and minimizes post-processing work since you’ll have fewer support structures to remove.
Plan for Shrinkage During the Casting Process
Since materials shrink approximately 1-2% during the casting process, you’ll need to design your original model slightly larger than your intended final dimensions. This compensation prevents fit issues and maintains the jewelry’s aesthetic integrity.
Different materials exhibit varying shrinkage rates, so you’ll need to adjust your approach accordingly:
- Gold and silver metals – typically shrink at standard 1-2% rates requiring consistent compensation factors
- 3D printing resins – may demonstrate different shrinkage patterns compared to traditional metals
- CAD design modifications – incorporate calculated compensation factors directly into your digital models
- Testing protocols – regularly cast sample pieces to refine your shrinkage predictions and improve accuracy
Test Print Critical Sections Before Full Production
Before committing valuable materials and time to full production runs, you’ll want to test print critical sections of your jewelry design to catch potential problems early.
Focus on smaller scale prints to evaluate sizing, structural stability, and aesthetic qualities without wasting material. Test different infill patterns and wall thicknesses in areas that’ll bear stress or require precise fit.
Test critical sections at smaller scales first to identify sizing, structural, and aesthetic issues without material waste.
You’ll discover issues with design integrity before they become costly mistakes. Document every adjustment you make during these test runs – this creates a valuable reference for refining your process and improving accuracy in future prints.
Incorporate the feedback from your test sections into the final design. This approach enhances overall performance and markedly reduces the likelihood of failures during full production printing.
Document Successful Settings for Future Repairs
Once you’ve achieved successful jewelry repairs, you’ll save considerable time and frustration by meticulously recording the exact settings that produced quality results.
Creating a detailed repair log transforms your experience into a valuable reference library for future projects.
Your documentation should include:
- Print parameters – Layer height, print speed, infill density, and temperature settings that delivered ideal results
- Material specifications – Exact filament brands, colors, and types to maintain consistency across similar pieces
- Slicing adjustments – Custom fill patterns, support configurations, and density modifications that enhanced print quality
- Post-processing outcomes – Successful polishing techniques, painting methods, and finishing processes that achieved desired aesthetics
Additionally, track common repair challenges and their solutions.
This creates an invaluable troubleshooting guide that’ll streamline your workflow and improve repair quality consistency.
Frequently Asked Questions
What Is the Best Filament for 3D Printing Jewelry?
You’ll want PLA for beginner-friendly prints with vibrant colors, or PETG for durable, flexible pieces. For professional casting, use specialized casting resins. Metal-infused filaments create unique aesthetics with authentic weight and appearance.
What Is the Strongest Pattern for 3D Printing?
You’ll find honeycomb and gyroid patterns offer the strongest 3D printing results. They provide excellent strength-to-weight ratios through structural efficiency. Consider using 50% infill density with thicker walls for maximum durability.
What Metals Cannot Be 3D Printed?
You can’t 3D print high-melting metals like tungsten, materials with poor flow like lead, or toxic alloys containing zinc and cadmium. Most consumer printers only handle thermoplastics, not metals.
How to Use 3D Printing for Jewelry?
You’ll design jewelry using CAD software, then 3D print with materials like resin or PLA. After printing, you’ll sand, polish, and paint pieces to achieve professional finishes that match precious metals.
In Summary
You’ll achieve successful jewelry repairs by following these proven 3D printing patterns. Don’t skip measuring damaged areas or testing critical sections—these steps prevent costly failures. Remember to account for shrinkage and polishing loss when designing your models. Document your successful settings so you won’t have to rediscover them later. With proper orientation, resolution choices, and watertight models, you’ll consistently produce high-quality repair patterns that cast beautifully every time.


Leave a Reply