
You’ll need to select the right hammer for your metal type—use lightweight goldsmith’s hammers for gold and silver, while ball-peen hammers work better for copper and bronze. Prepare a well-lit workspace with a sturdy metal bench block and wear safety goggles and ear protection. Always anneal your metal first to increase malleability, then practice consistent overlapping strikes on scrap metal to develop muscle memory. Control your strike angle and maintain steady blow patterns for professional results, progressing through filing and sanding grits to achieve your desired finish.
Choose the Right Hammer for Your Metal Type
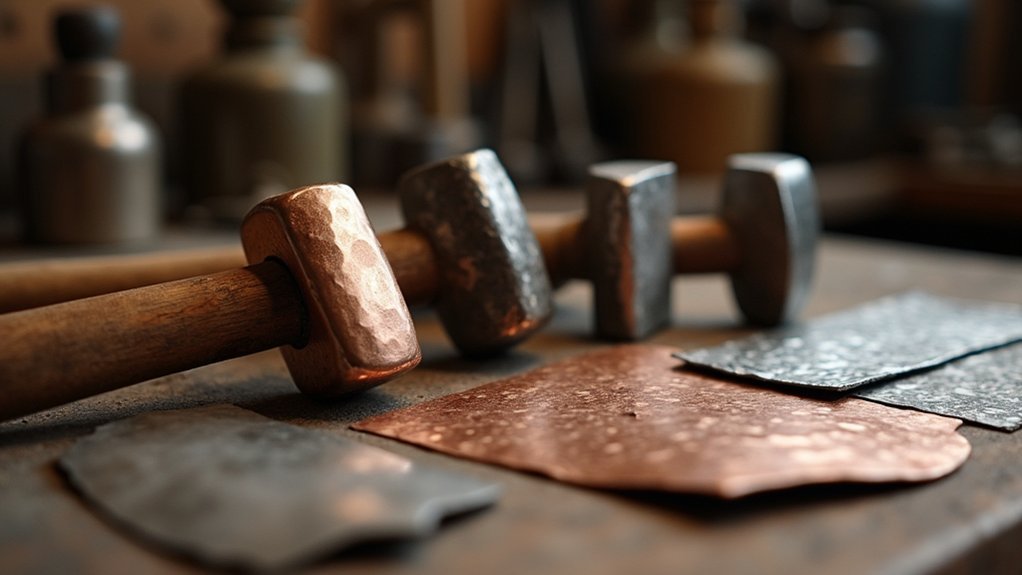
When selecting your hammer, you’ll find that the metal type dictates which tool produces the best results. For softer metals like gold and silver, use a lightweight goldsmith’s hammer to prevent excessive deformation while creating your desired hammered effect.
When working with resilient metals such as copper or bronze, choose a versatile ball-peen hammer that’s effective for flattening, shaping, and driving punches or chisels.
Consider your hammer face carefully, as it greatly affects texture. Heavy planishing hammers create pronounced patterns, while chasing hammers offer superior control for detailed work.
The hammer face you choose determines your final texture—from bold, dramatic patterns to precise, intricate detailing.
Protect delicate surfaces with rawhide mallets, which shape metal without leaving marks. Experiment with embossing or texturing hammers to achieve varied surface finishes and unique designs in your jewelry pieces.
Prepare Your Workspace and Safety Equipment
Three essential elements form the foundation of safe hammered metal jewelry making: proper lighting, organized tool placement, and protective equipment.
Your workspace needs adequate illumination and organization to prevent accidents while working with metal. Set up your hammer on a sturdy, flat surface like a metal bench block to absorb shock and protect your tools.
Essential safety equipment you’ll need:
- Safety goggles to shield your eyes from metal shards that could cause permanent vision damage
- Ear protection to prevent irreversible hearing loss from repetitive hammering sounds
- First aid kit with band-aids and antiseptics for immediate treatment of cuts and scrapes
- Well-ventilated area to avoid inhaling harmful metal particles and fumes
Proper preparation protects both your health and your jewelry-making investment.
Anneal Your Metal for Better Workability

You’ll need to anneal your metal before hammering to make it soft and malleable enough for shaping.
Heat the metal to the proper temperature using a torch, watching for the telltale glow that indicates it’s ready for the cooling process.
Controlling this temperature is essential—too little heat won’t soften the metal effectively, while too much can damage its structure.
Heat Makes Metal Malleable
Although metal appears rigid in its natural state, applying controlled heat through annealing transforms it into a cooperative medium that responds beautifully to your hammer work.
When you heat metal to specific temperatures, you’re fundamentally changing its molecular structure, making it malleable and workable. This process relieves internal stresses that would otherwise cause cracking during manipulation.
Ensure even heating across your piece and allow gradual cooling to prevent warping. Using a pumice stone in your annealing pan reflects heat onto larger pieces, maintaining consistent temperatures throughout.
- Feel the satisfaction as stubborn metal becomes your creative partner
- Experience the joy of effortless shaping without fear of breaks
- Discover the confidence that comes from mastering this essential technique
- Embrace the transformation from rigid material to artistic possibility
Proper Annealing Temperature Control
Understanding when and how hot to heat your metal separates successful annealing from damaged workpieces. Proper annealing temperature control requires heating sterling silver to approximately 1100°F and gold to 1000°F, where the metal becomes non-magnetic and malleable.
You’ll achieve consistent results by moving your torch in circular motions for even heating throughout the piece.
Watch for color changes during the heating process. A dull red color indicates you’ve reached ideal temperature, while bright orange signals dangerous overheating that compromises the metal’s structure.
After reaching proper temperature, cool the metal slowly in air or quench in water to lock in workability. Don’t quench incompletely annealed pieces, and always clean off oxidation before continuing your jewelry-making process.
Master Basic Hammer Strike Techniques
You’ll need to master three fundamental aspects of hammer strikes to create professional-looking hammered jewelry.
Start by selecting the right hammer for your specific technique, then focus on controlling your strike angle to achieve the desired texture and depth.
Develop consistent blow patterns through practice, as uniform spacing and pressure will determine whether your finished piece looks polished or amateurish.
Proper Hammer Selection
When creating hammered metal jewelry, your choice of hammer directly impacts both the texture and quality of your finished piece.
Consider your project’s specific purpose – use a chasing hammer for detailed work or a ball-peen hammer for general shaping and flattening. The hammer’s weight and size greatly affect your metal’s texture and finish. Heavier hammers create pronounced marks, while lighter ones produce subtle effects.
For surface protection during initial shaping, you’ll want a rawhide mallet that won’t mar your metal.
Experiment with different types: planishing hammers for smoothing and texturing hammers for adding patterns to enhance your designs’ visual interest.
- Feel the satisfying weight of quality tools in your hands
- Create stunning textures that make your jewelry uniquely yours
- Transform simple metal into enchanting wearable art
- Experience the meditative rhythm of skilled hammer work
Strike Angle Control
Once you’ve selected the right hammer for your project, mastering how you strike the metal becomes your next focus. The angle of your hammer strikes directly controls the texture you’ll achieve.
Vertical strikes create pronounced hammer marks, while flatter angles produce subtler effects. Experiment with varying strike angles and pressure—lighter, angled strikes yield dimpled textures, whereas heavier, direct blows create deeper impressions.
Different hammer types like ball-peen or chasing hammers will produce unique effects based on your strike angle. Maintaining consistent angles and pressure guarantees uniform texture across your piece, which is essential for professional-looking jewelry.
Practice these striking techniques on scrap metal first to develop muscle memory for precise angle control on your final pieces.
Consistent Blow Patterns
Three fundamental elements form the foundation of consistent blow patterns: rhythm, spacing, and force control.
You’ll achieve even hammered textures by maintaining identical angles and pressure with each strike. Practice with different hammers like ball-peen or chasing varieties to understand how each affects your metal and develops your technique.
Overlapping strikes create smooth, uniform surfaces while ensuring no areas remain untouched. Adjust your striking speed deliberately—slower, controlled movements produce more pronounced textures than rapid hits. Regular work checks against flat surfaces reveal inconsistencies requiring correction.
- Feel the satisfying rhythm as each perfectly placed strike transforms raw metal into art
- Experience the confidence that comes from mastering controlled, deliberate hammer movements
- Discover the meditative flow of consistent blow patterns creating stunning textural beauty
- Embrace the pride of crafting flawless, professional-quality hammered jewelry pieces
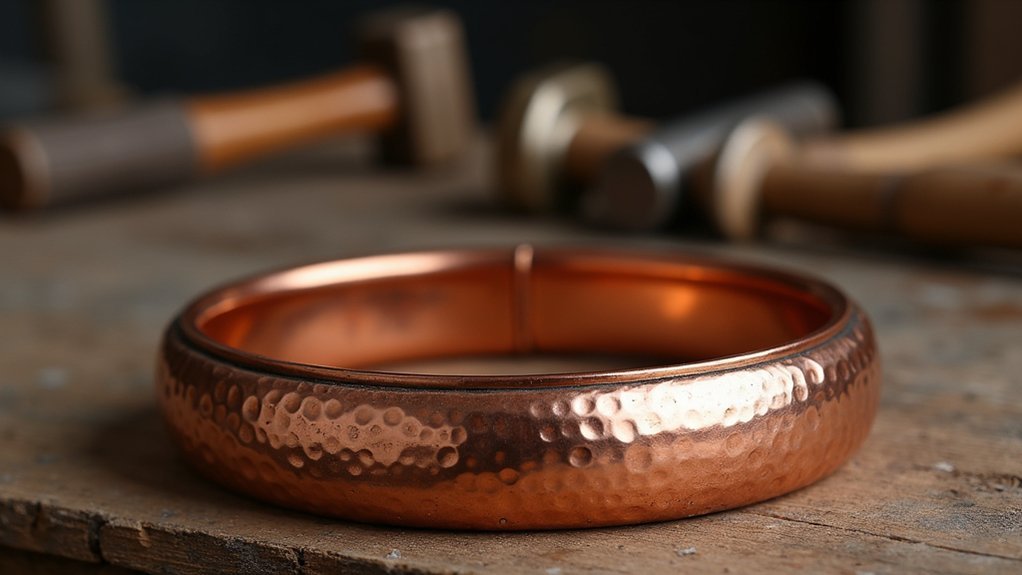
Create Consistent Texture Patterns
Creating consistent texture patterns in hammered metal jewelry requires mastering your hammer technique and maintaining steady control throughout the process.
You’ll want to use a ball-peen hammer for versatile shaping while achieving uniform hammered texture across surfaces. Apply even pressure with each blow to maintain pattern uniformity and prevent uneven marks from disrupting your design.
Experiment with different tools like planishing hammers for smoothing and chasing hammers for detailed work to create varied yet consistent textures.
Aim for overlapping blows when hammering to guarantee texture consistency throughout your piece, which enhances the overall appearance considerably.
Consider using machined or patterned texturing hammers to achieve specific designs and replicate those patterns consistently across multiple jewelry pieces.
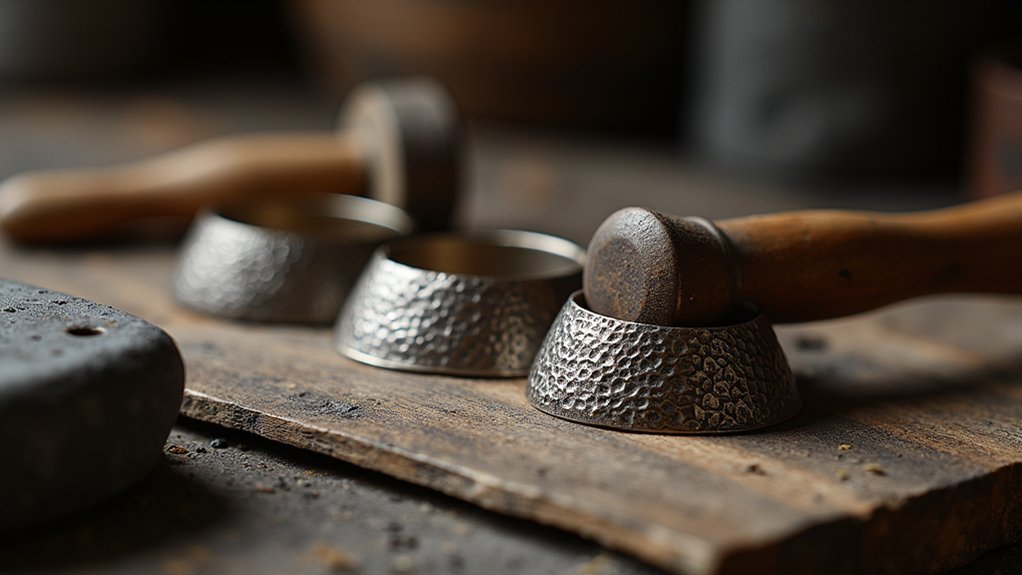
Control the Depth and Intensity of Hammer Marks
While mastering texture patterns provides the foundation for quality hammered jewelry, controlling the depth and intensity of your hammer marks determines the final character and visual impact of your pieces.
You’ll control depth by adjusting strike force and choosing appropriate hammers—lighter tools create delicate impressions while heavier ones produce dramatic indentations.
Vary your hammer’s angle and position to influence visual effects, creating unique textures that distinguish your work. Use overlapping blows for consistent distribution across surfaces.
A planishing hammer refines previous hammer marks without eliminating them completely.
- Transform raw metal into stunning heirloom pieces that captivate admirers
- Create unique textures that reflect your personal artistic vision
- Achieve professional-quality results that build confidence in your craftsmanship
- Master techniques that turn simple strikes into extraordinary jewelry designs
Shape Metal While Maintaining Structural Integrity
Once you’ve established your texture patterns, you’ll need to shape the metal into its final form without compromising the material’s strength or durability.
Begin by ensuring your metal is properly annealed, as this increases malleability and prevents cracking during formation. Use an appropriate raising or forming hammer, applying controlled force in overlapping blows to maintain structural integrity. A rawhide mallet works excellently for gentle shaping without marking the surface.
Maintain consistent tapping rhythm to prevent uneven stress that creates weak points. Utilize a ring mandrel to guide your shaping process, ensuring proper dimensions throughout hammering.
Monitor metal temperature regularly—overheating causes warping and loss of temper, while underheating makes shaping difficult and ineffective.
Smooth and Refine Hammered Surfaces

After hammering your metal piece, you’ll need to refine the surface to achieve a professional finish.
Start by filing any rough edges that could snag or cause discomfort, then work through progressive sandpaper grits from coarse to fine.
Complete the process with polishing cloth techniques that’ll enhance the metal’s shine while preserving your hammered texture.
Filing Rough Edges
Transform your rough hammered metal piece into a refined work of art by beginning with a coarse file to tackle the most prominent edges and surface irregularities. Filing rough edges effectively requires different file shapes – flat, round, and half-round files work perfectly for various contours on your metal sheet.
Move progressively through finer grits, starting with 120-grit and advancing to 600-grit or higher for that polished finish you’re after. Maintain consistent stroke direction to prevent uneven surfaces that’ll haunt you later.
- Feel the satisfaction as rough edges transform under your skilled hands
- Experience the meditative rhythm of consistent, purposeful filing strokes
- Discover hidden beauty emerging from your hammered metal sheet
- Celebrate each smooth pass bringing you closer to jewelry perfection
Run your fingers across the surface regularly to catch any stubborn rough spots.
Progressive Sandpaper Grits
Progressive sandpaper grits become your pathway from rough hammered surfaces to gleaming jewelry perfection.
You’ll start with coarse 80-120 grit sandpaper to eliminate rough edges and surface imperfections from your hammered metal. Don’t skip this vital foundation step.
Next, you’ll shift to medium 220-320 grit sandpaper, smoothing the hammered texture while preserving your desired pattern. This stage requires careful attention to maintain those distinctive hammered details.
Fine 400-600 grit sandpaper refines your surface further, creating a polished appearance that showcases your hammered work beautifully.
For ultimate brilliance, ultra-fine 800-1200 grit sandpaper delivers a mirror-like finish that enhances your metal’s natural shine.
Always sand following the grain direction to prevent unwanted scratches and guarantee consistent, even surfaces throughout your progressive sandpaper grits process.
Polishing Cloth Techniques
Once you’ve completed your sandpaper progression, polishing cloths become your precision tools for achieving that final lustrous finish on hammered surfaces.
These polishing cloth techniques require finesse to maintain your texture while maximizing shine. Use a soft polishing cloth to gently buff the hammered surface, removing oxidation and debris while enhancing texture.
For superior results, switch to a microfiber cloth that effectively catches polishing compounds without scratching. Apply consistent light pressure to preserve your hammered patterns—you don’t want to flatten those beautiful textures you’ve worked so hard to create.
- Transform ordinary metal into stunning, mirror-like masterpieces
- Preserve every precious hammered detail you’ve carefully crafted
- Achieve professional-level results that make your jewelry irresistible
- Experience the satisfaction of perfect, gleaming finishes
Use metal-specific polishing compounds and regularly clean your cloths.
Combine Hammering With Other Ancient Techniques
While hammering creates beautiful textures on its own, you’ll discover that combining it with other ancient metalworking techniques opens up endless creative possibilities for your jewelry pieces.
Pair hammering with soldering to create intricate designs that showcase both structural integrity and artistic appeal.
Combining hammering with soldering techniques allows artisans to build complex jewelry structures while maintaining both durability and stunning visual impact.
Apply heat treatment alongside your hammering work to achieve stunning color effects that vary based on your metal’s composition.
After hammering, consider patination techniques to add depth and contrasting colors, particularly in textured areas where shadows enhance the visual impact.
Incorporate engraving for personalized detailing that highlights specific hammered features.
Experiment with different hammer types like embossing and planishing hammers to achieve varied textures and forms that elevate your final piece.
Finish and Polish Your Hammered Jewelry Pieces
After you’ve mastered various hammering and ancient metalworking combinations, the finishing process becomes your final opportunity to transform raw hammered pieces into professional-quality jewelry.
Start by filing rough edges and uneven surfaces to guarantee comfortable wear and a refined appearance. Use progressively finer sandpaper grits, beginning with coarse and advancing to fine, creating a polished finish that enhances your unique hammered texture.
- Feel the pride as your rough creation transforms into a gleaming masterpiece
- Experience the satisfaction of revealing hidden beauty through careful polishing
- Discover the joy of watching light dance across your perfectly buffed surfaces
- Embrace the excitement of adding patina for dramatic depth and contrast
Buff with polishing cloth to highlight surface patterns, then inspect thoroughly for imperfections.
Frequently Asked Questions
How to Get Hammered Effect on Metal?
Use a chasing hammer with flat and round faces on softer metals like silver. Vary your pressure and strike angles to create different textures. Follow with a planishing hammer to smooth and enhance the hammered pattern.
How to Hammer Metal for Jewelry?
You’ll need to anneal your metal first, then use chasing hammers with overlapping strikes. Apply even pressure while hammering, experimenting with different hammer faces to control texture depth and achieve your desired finish.
What Is the Difference Between a Ball Peen Hammer and a Chasing Hammer?
You’ll find ball-peen hammers are heavier with rounded peens for robust shaping and joining tasks, while chasing hammers are lighter with controlled faces designed specifically for delicate, decorative metalwork and precision applications.
How Do You Harden Metal Jewelry?
You’ll harden metal jewelry through work hardening by repeatedly hammering or shaping the metal. First, anneal the piece by heating it, then use controlled strikes with a planishing hammer to increase strength and durability.
In Summary
You’ve now mastered the essential techniques for creating stunning hammered metal jewelry. Remember to practice your hammer strikes consistently and don’t rush the annealing process. Take your time with texturing patterns, and always prioritize safety in your workspace. As you combine these traditional methods with modern finishing techniques, you’ll develop your own unique style. Keep experimenting with different metals and textures to create truly distinctive handcrafted pieces.


Leave a Reply