You’ll achieve stunning bar setting results by selecting eye-clean sapphires with high color saturation, then using calipers for precise measurements with 1-2mm spacing between stones. Choose platinum or 18k gold for durability, file metal bars with fine-grit tools, and check fit frequently against each sapphire. Create smooth surfaces to eliminate rough edges, then polish with specialized compounds for brilliant shine. Maintain weekly cleaning and schedule professional inspections every six months. Master these fundamentals and you’ll discover advanced techniques that guarantee flawless, long-lasting results.
Understanding Bar Setting Fundamentals for Sapphire Jewelry

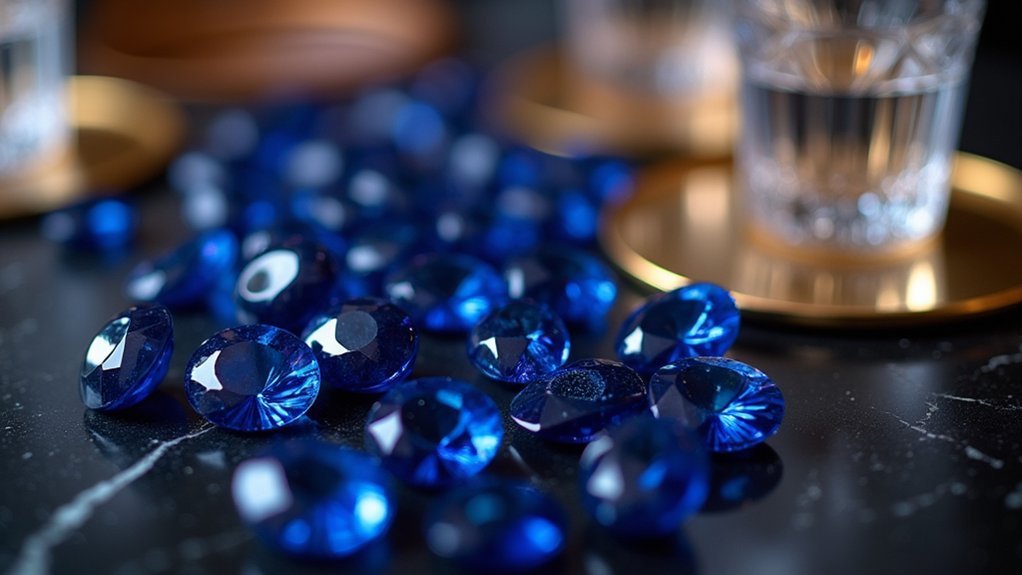
When you’re exploring modern jewelry options for sapphires, bar setting offers a sophisticated alternative to traditional prong or bezel settings. This contemporary technique secures your sapphires between vertical metal bars, creating clean lines that maximize light exposure to enhance the gemstone’s natural brilliance.
You’ll find bar settings particularly popular in eternity bands and tennis bracelets, where the sleek design emphasizes each sapphire’s individual beauty. The vertical metal bars provide excellent security while creating visual separation between stones, reducing damage risk compared to other setting methods.
The elegance of bar settings lies in their minimalist approach—the metal framework doesn’t overshadow your sapphires but rather complements them.
Bar settings showcase sapphires through understated elegance, where minimal metal design enhances rather than competes with the gemstone’s natural beauty.
You can choose different metals like gold or platinum to enhance the overall aesthetic and coordinate with your sapphire’s specific color characteristics.
Essential Tools and Equipment for Bar Setting Sapphires
Bar setting sapphires requires specific tools that’ll determine your project’s success and the quality of your finished jewelry piece.
You’ll need a jeweler’s saw for cutting metal bars cleanly and a file for smoothing rough edges. Pliers are essential for bending and securing metal components during the setting process.
A bench pin provides the stable work surface you need for precision when positioning sapphires into their metal bars. Your soldering iron or torch will melt solder to join bars securely to ring or bracelet bands.
Tweezers give you the control necessary for accurate sapphire placement without damaging these precious stones.
Finally, a magnifying loupe lets you inspect your work, ensuring proper alignment and secure positioning of each sapphire within its setting.
Selecting the Right Sapphires for Bar Setting Applications
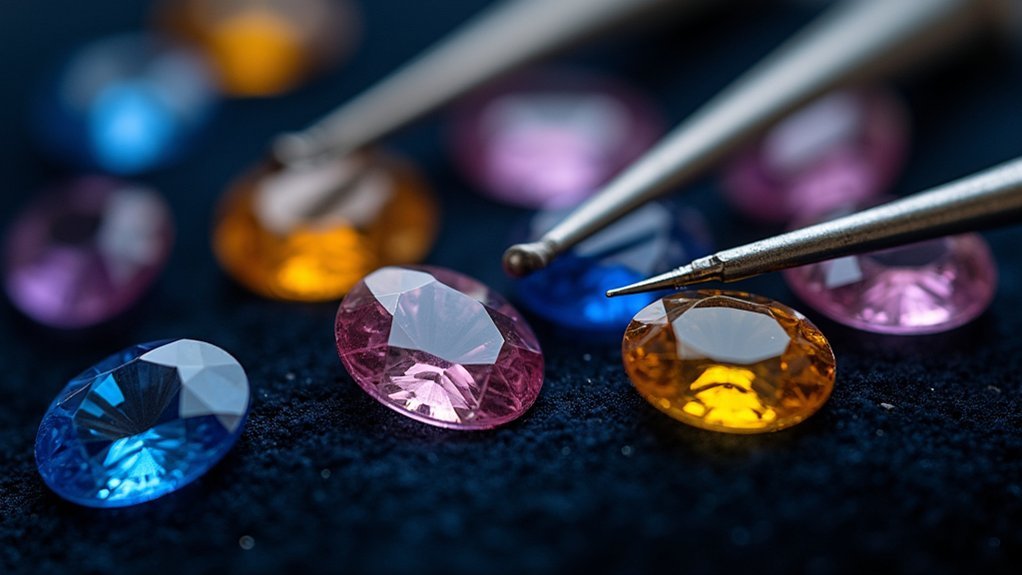
When you’re selecting sapphires for bar settings, you’ll need to evaluate specific quality criteria that guarantee your stones perform well in this exposed setting style.
The clarity, color saturation, and origin of your sapphires directly impact how they’ll appear between the metal bars.
You’ll also want to carefully consider the size and shape of each stone, as rectangular and cushion cuts work best with the linear design requirements of bar settings.
Quality Assessment Criteria
Since bar settings showcase sapphires in a distinctive linear arrangement, you’ll need to evaluate each stone’s quality with particular attention to how it’ll perform within this specific design framework.
Color intensity remains your primary consideration – vibrant, saturated hues create stunning visual impact in bar configurations. Clarity should focus on eye-clean stones, as inclusions become more noticeable in linear displays. Carat weight over one carat provides better proportions for bar settings, while the cut must maximize light entry to enhance brilliance.
| Quality Factor | Bar Setting Priority | Key Consideration |
|---|---|---|
| Color | High saturation | Enhances linear display |
| Clarity | Eye-clean grade | Minimizes visible flaws |
| Origin | Kashmir/Sri Lanka | Increases overall value |
These criteria guarantee your sapphires deliver maximum visual impact within the bar setting’s unique framework.
Size and Shape Considerations
Shape selection dramatically impacts your final design. Elongated cuts like emerald or baguette work exceptionally well, creating sleek, modern aesthetics that complement bar settings perfectly.
These shapes maximize the visual impact while maintaining structural integrity.
Don’t overlook clarity and color saturation when making your selections. Higher clarity stones enhance light reflection and brilliance, while rich, vivid colors create striking contrasts against the metal bars.
This combination guarantees your sapphires stand out beautifully in the finished piece.
Choosing Optimal Metal Types for Sapphire Bar Settings
Although sapphires can be set in various metals, your choice greatly impacts both the durability and visual appeal of your bar setting jewelry. Metal bands serve as the foundation for showcasing your gemstone’s beauty while ensuring longevity.
| Metal Type | Durability | Visual Impact |
|---|---|---|
| Platinum | Highest strength, tarnish-resistant | Enhances blue sapphires brilliantly |
| White Gold | Excellent with 14k-18k options | Complements cool-toned stones |
| Yellow Gold | Good balance of beauty/durability | Creates warm, vintage aesthetic |
Platinum offers superior strength and resistance to tarnishing, making it ideal for long-lasting pieces. White gold beautifully enhances blue sapphires by emphasizing their cool tones. Consider 14k or 18k gold for maximum durability. Sterling silver provides affordability but requires more maintenance to prevent scratching and tarnishing compared to precious metal alternatives.
Measuring and Planning Your Sapphire Bar Setting Layout

You’ll need to measure each sapphire’s exact dimensions using calipers to guarantee they’ll fit perfectly within your planned bar setting.
Calculate the ideal spacing between stones by considering both visual appeal and structural requirements—typically leaving 1-2mm between each sapphire.
Plan your layout carefully since precise measurements and spacing calculations determine whether your bar setting will showcase the sapphires effectively while maintaining security.
Precise Sapphire Measurements
Every successful bar setting begins with meticulous measurements that’ll determine the final layout’s precision and visual appeal.
You’ll need calipers to accurately measure each sapphire’s length, width, and depth, ensuring they’ll fit snugly within your planned bar settings. Don’t overlook the metal bar thickness when calculating spacing—this prevents overcrowding and misalignment issues.
Create a detailed blueprint marking each sapphire’s position, accounting for proper spacing that allows ideal light exposure. Your measurements must consider the total carat weight, as heavier stones require stronger metal support.
Calculate the band’s total length to accommodate your desired number of stones while maintaining balanced proportions. These precise measurements form the foundation for a structurally sound and visually stunning bar setting layout.
Optimal Spacing Calculations
When determining ideal spacing for your sapphire bar setting, start by dividing your band’s total length by the number of stones you plan to set. This gives you a baseline for suitable spacing calculations.
Allow approximately 1-2 millimeters between each sapphire to guarantee proper light entry and prevent overcrowding. For larger stones, you’ll need to increase this spacing to maintain visual harmony throughout your design.
Create a template using string to mark even positioning along your band’s length. The bar’s width greatly impacts your final aesthetic, so factor this into your calculations.
Measure each sapphire’s width carefully, as uniform spacing depends on consistent stone sizing. Your template guarantees balanced placement, preventing costly mistakes during the actual setting process.
Creating Precise Channels for Sapphire Placement
Two critical factors determine the success of your bar setting project: the precision of your channel measurements and the accuracy of your cutting technique.
When creating channels for bar setting, you’ll need specialized tools to achieve clean, uniform cuts that securely hold sapphires while allowing maximum light exposure.
Start by marking your channel positions according to your spacing calculations. Use a channel-cutting bur that matches your sapphire dimensions, maintaining consistent depth throughout each cut.
You’ll want to work slowly, checking alignment frequently to prevent costly mistakes. The channel walls must be parallel and smooth to guarantee proper stone seating.
Test-fit each sapphire as you progress, adjusting channel width if needed. Remember, even minor inaccuracies can compromise both the setting’s security and aesthetic appeal, so patience and precision are essential.
Preparing Sapphires for Secure Bar Setting Installation

Before you begin the actual installation process, proper sapphire preparation forms the foundation of a successful bar setting.
You’ll need to evaluate each sapphire for clarity, as inclusions or flaws will greatly impact your finished piece’s aesthetics and value. Measure dimensions precisely, considering both carat weight and millimeter size to guarantee compatibility with your specific setting design.
Clean your sapphire thoroughly to remove oils or residues that could interfere with installation.
Proper sapphire cleaning removes oils and residues that compromise installation quality and setting security.
Verify that each stone is precisely cut and polished to fit snugly within the metal bars. This careful preparation maximizes both security and visual appeal.
Choose a setting that complements your sapphire’s color and size while providing adequate protection, as bar settings secure stones between metal bars, minimizing exposure to potential damage.
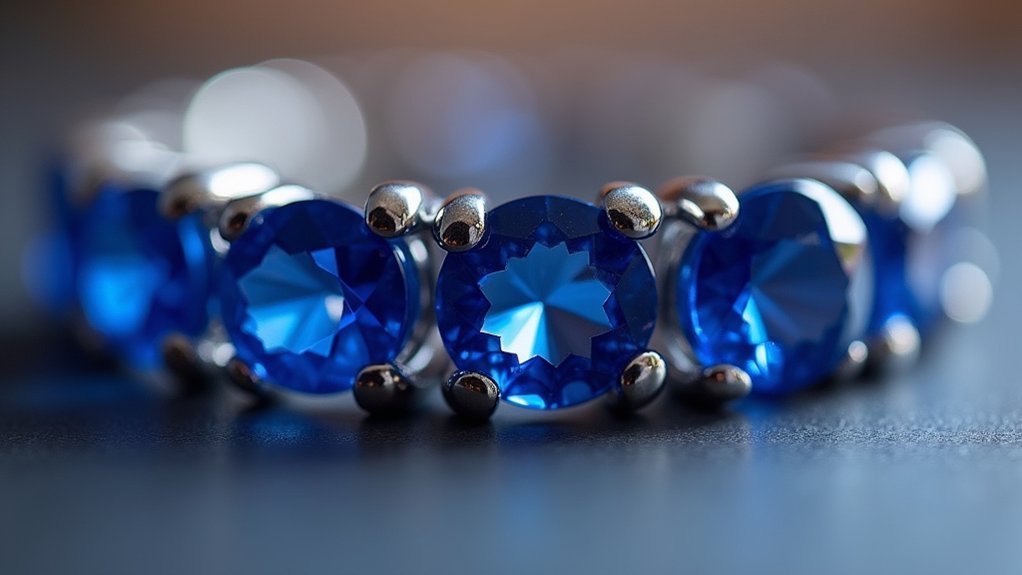
Positioning and Aligning Sapphires in Bar Settings
Once your sapphires are properly prepared, you’ll position them side-by-side within the metal framework, ensuring each stone sits flush against its neighbors while maintaining consistent spacing throughout the setting.
When setting stones in bar configurations, you’ll need to take into account each sapphire’s size and shape to achieve uniformity across your sapphire jewelry piece.
Measure the metal bars carefully to provide adequate support without blocking light entry, which maximizes your stones’ brilliance.
You’ll create harmonious flow by maintaining even spacing between each stone during the aligning sapphires process.
Check that vertical bars enhance visibility while securing each stone properly.
The bar setting technique requires precise alignment to achieve balanced, aesthetically pleasing results that showcase your sapphires’ natural sparkle effectively.
Securing Sapphires With Professional Bar Setting Techniques
After achieving proper alignment, you’ll secure each sapphire using specialized bar setting techniques that require precision tools and expert methods.
Professional jewelers employ specific techniques to guarantee your sapphires remain firmly in place while maintaining their visual appeal. The metal bars must securely hold each stone by applying controlled pressure around the edges, creating a protective enclosure that prevents movement.
You’ll want to use durable materials like platinum or gold for the bars themselves, as these metals provide the strength needed for long-term stability.
These professional techniques not only secure your sapphires but also enhance appearance by creating the floating effect that makes stones appear larger and more brilliant.
Proper bar setting execution requires steady hands and expertise to achieve ideal results.
Filing and Shaping Metal Bars for Perfect Sapphire Fit
You’ll need to file your metal bars with precision to create the exact dimensions that’ll cradle your sapphire securely.
Start by using fine-grit files to gradually shape each bar, checking the fit frequently against your stone to avoid over-filing.
Proper alignment requires consistent pressure and steady hands as you refine the bars’ edges and surfaces to match your sapphire’s contours perfectly.
Precise Metal Bar Filing
While the initial preparation of your metal bars establishes the foundation, precise filing transforms rough materials into components that’ll cradle your sapphires with exacting accuracy.
Use a fine file to create smooth, even surfaces that eliminate rough edges which could damage your stones or compromise appearance.
File your bars slightly narrower than your sapphire’s dimensions, allowing proper placement without excessive pressure. This technique guarantees a secure setting while maintaining the delicate balance needed for durability.
Regularly test-fit your sapphires during shaping to achieve that perfect snug fit.
Angle the bar edges strategically to enhance aesthetic appeal while preserving structural integrity. This careful approach allows light to pass through effectively, maximizing ideal brilliance in your finished piece.
Achieving Proper Sapphire Alignment
Perfect sapphire alignment begins with meticulous measurement of each stone’s dimensions, as even minor variations can create gaps or excessive pressure that compromises your setting’s integrity.
You’ll need to account for different sapphire cuts when precise measuring, as each shape requires specific bar adjustments. File your metal bars gradually, checking stone fit frequently throughout the process to maintain consistency.
Shape the bars using specialized tools to create smooth surfaces that won’t scratch your sapphires during stone setting. Focus on achieving uniform height and width that securely cradles each stone.
Your final alignment should position the sapphires to allow maximum light exposure while ensuring they’re firmly secured. Regular test-fitting prevents costly mistakes and guarantees professional results in your finished piece.
Finishing and Polishing Bar Set Sapphire Jewelry
Once you’ve completed the setting process, finishing and polishing your bar set sapphire jewelry requires meticulous attention to detail that’ll transform your piece from rough creation to stunning masterpiece.
Begin by inspecting the setting for rough edges or imperfections that could compromise appearance. Use polishing compounds specifically designed for metals with a soft cloth or polishing wheel to achieve brilliant shine without damaging stones.
Pay special attention to spaces between sapphires where dirt accumulates. These areas need thorough cleaning and polishing to maintain the piece’s overall beauty.
Conduct a final inspection under good lighting to verify sapphires remain scratch-free and the metal setting appears flawless.
Remember that regular maintenance through professional polishing preserves both sapphire brilliance and metal integrity.
Quality Control and Inspection of Bar Set Sapphires
You’ll need to verify that your prong alignment creates uniform positioning across all sapphires in the bar setting.
Measure stone spacing carefully to guarantee consistent gaps that maintain both structural integrity and visual appeal.
Assess each metal bar’s security by checking for proper tension and confirming there’s no movement or looseness in the gemstone placement.
Prong Alignment Verification Methods
How can you guarantee your bar-set sapphires maintain their security and brilliance over time? Start with regular prong alignment checks using a magnifying loupe to examine uniform spacing and positioning.
You’ll want to confirm each sapphire is securely held within its setting by measuring prong height and angle with precise tools.
Conduct visual inspection under various lighting conditions – standard lighting often masks alignment issues that become obvious under different illumination. This reveals whether your sapphires achieve peak brilliance and aesthetic appeal.
Implement quality control processes that verify all stones sit level and properly aligned. Check for misalignment caused by wear or impact, as compromised prongs risk gemstone loss.
Your systematic verification prevents potential damage while maintaining the setting’s structural integrity and visual impact.
Stone Spacing Measurement Standards
When measuring stone spacing in bar-set sapphires, precision becomes paramount for achieving both visual excellence and structural stability. You’ll need to maintain consistent 1-2mm gaps between each stone in place to guarantee proper light exposure and prevent damage from contact.
The uniformity of spacing distinguishes professional bar setting types from amateur work.
Here’s your measurement checklist:
- Use calipers to measure gaps with millimeter precision between adjacent sapphires
- Check alignment to guarantee all stones remain parallel throughout the setting
- Evaluate visual flow to confirm spacing creates harmonious appearance without disjointedness
- Test structural integrity by verifying gaps minimize stress while maintaining secure positioning
Proper stone spacing enhances durability while creating the seamless visual flow that makes bar settings so appealing in fine jewelry applications.
Metal Bar Security Assessment
Beyond spacing precision lies the fundamental security of the metal bars themselves, which determines whether your sapphires remain safely positioned over time.
You’ll need to conduct thorough inspection of each metal bar during quality control, examining for imperfections or weaknesses that could compromise setting integrity.
Check stone alignment carefully, confirming bars are tightly secured without gaps that might cause stone loss. Your inspection should verify that bars maintain proper tension and positioning.
Regular maintenance becomes essential for long-term security – assess metal bars for bending or loosening that affects sapphire stability.
Test the durability by evaluating metal strength, as higher-quality materials like platinum provide superior long-term security.
These systematic checks protect your investment and guarantee lasting sapphire retention.
Common Bar Setting Mistakes and How to Avoid Them
While bar settings offer exceptional beauty and security for sapphires, several common mistakes can compromise both the aesthetic appeal and structural integrity of your jewelry.
Settings are often compromised when jewelers make these critical errors:
Critical jeweler errors can fatally compromise your sapphire bar setting’s beauty and structural integrity.
- Poor measurements – Inaccurate sizing leads to misaligned stones and security issues that can result in loose stones over time.
- Using inferior metal – Low-quality bars bend or break easily, compromising durability and allowing sapphires to shift or fall out.
- Overcrowding stones – Placing too many sapphires prevents adequate light to enter each stone, markedly reducing their brilliance and visual impact.
- Neglecting maintenance – Failing to inspect for wear and tear allows minor issues to become major problems, potentially causing stone loss.
Regular assessment prevents these costly mistakes.
Maintenance and Care for Bar Set Sapphire Jewelry
Since bar set sapphire jewelry represents a significant investment, you’ll want to protect its beauty and structural integrity through proper maintenance and care.
Clean your pieces weekly using a mild degreasing solution and soft brush to maintain their sparkle. Avoid harsh substances like boric acid, lemon juice, or toothpaste that can damage stones and metal.
Schedule routine inspections with a professional jeweler every six months to check for loose stones and setting integrity. Regular maintenance includes polishing to enhance shine and examining for wear signs that could lead to sapphire loss.
If you discover loose or scratched sapphires during cleaning, specialists can restore your jewelry by precisely sourcing replacement stones, ensuring your bar set pieces continue looking magnificent for years.
Frequently Asked Questions
What Is the Best Setting for a Sapphire?
You’ll find prong settings maximize your sapphire’s brilliance by allowing maximum light exposure. If you prioritize protection, choose bezel settings. For modern aesthetics, consider channel settings. Your lifestyle and preferences ultimately determine what’s best for you.
Do Sapphires Look Better in White or Yellow Gold?
You’ll find blue sapphires look stunning in white gold’s cool tones, while yellow gold complements warmer pink and yellow sapphires beautifully. Your choice depends on the stone’s color and your personal style preferences.
What Is the Process of Gemstone Setting?
You’ll start by selecting your gemstone and choosing the setting style. Next, you’ll prepare the metal framework, precisely align the stones, secure them in place, then polish and inspect for quality assurance.
How to Activate Sapphire Stone?
You’ll activate your sapphire by cleansing it with lukewarm soapy water, exposing it to sunlight for hours, meditating while holding it, placing it on selenite overnight, and wearing it regularly.
In Summary
You’ve mastered the essential techniques for bar setting sapphires, from selecting quality stones to avoiding common pitfalls. Your attention to proper tool selection, metal choice, and layout planning will guarantee professional results. Don’t forget that practice makes perfect—each project strengthens your skills. Remember to maintain your bar set pieces regularly and inspect them periodically. With these techniques in your toolkit, you’ll create stunning sapphire jewelry that’ll stand the test of time.


Leave a Reply