
You’ll achieve the most professional results in lapidary work by mastering five fundamental cutting techniques: slabbing for uniform flat pieces, cabochon cutting for smooth domed gems, faceting for maximum light reflection, trimming for precise shaping, and freeform cutting for creative expression. Each method requires specific tools like diamond blades, rock hammers, and tile nippers, plus proper safety gear and cutting fluids. The techniques below will transform your stone-cutting skills completely.
Understanding Different Types of Lapidary Cutting Methods

Five distinct cutting methods form the foundation of lapidary work, each serving specific purposes and stone types.
You’ll begin with slabbing using slab saws to cut rough stones into uniform, flat pieces for further processing.
Cabochon cutting transforms these slabs into smooth, dome-shaped gems with flat backs, perfect for agates and jaspers that showcase natural patterns.
Faceting creates multiple flat surfaces on transparent stones, maximizing light reflection and brilliance.
Trimming precisely shapes your slabs into preforms, ensuring proper symmetry and proportions for your final pieces.
Freeform cutting offers creative freedom, allowing you to follow the stone’s natural contours for unique artistic expressions.
Each technique requires specific tools and skills to achieve professional results.
Essential Tools for Cutting Rough Stones
Your toolkit’s foundation starts with the right cutting implements, each designed for specific stages of stone preparation.
Diamond blades, particularly sintered ones, are essential for professional lapidary work due to their cutting efficiency and durability. When working with rough stones, you’ll need different cutting techniques depending on your material’s characteristics.
- Rock hammers – Effective for quickly reducing large rocks and rough shaping, but avoid using on expensive or fragile materials.
- Tile nippers – Perfect for removing small amounts of material from facet rough or slabbed cabbing material.
- Kerf cuts – Shallow saw cuts less than an inch deep that provide better control for splitting stones.
- Proper maintenance tools – Lubricants and cleaning supplies to keep blades performing at their best and extend their lifespan.
Rock Hammer Techniques for Initial Stone Breaking

Three fundamental principles govern effective rock hammer technique: proper positioning, controlled striking, and safety preparation.
You’ll find the rock hammer is your fastest method for breaking large stones, especially along natural fractures. Always wear safety glasses and gloves to protect yourself from flying debris.
Position your stone securely before striking to prevent accidents and guarantee controlled breaks. This technique excels at rough shaping stones for initial processing, but don’t use it on expensive or fragile materials since it lacks the precision needed for delicate work.
Consider rock hammering as your first step before moving to precise cutting methods like saws or grinders. You’ll achieve superior results by focusing on stability and controlled force rather than aggressive striking.
Using Tile Nippers for Precision Material Removal
While rock hammers handle initial breaking, tile nippers excel when you need precision material removal from smaller stones or delicate specimens. These specialized tools offer unmatched precision control for shaping facet rough or slabbed cabbing material, especially stones with fractures or cleaving tendencies.
Tile nippers work by applying controlled pressure to specific areas, ensuring clean cuts without excessive material loss. They’re particularly valuable for preparing expensive gems like tanzanite, where maximizing recovery is vital. You can split fractures more efficiently than with saws, making material removal both precise and economical.
Key advantages of tile nippers include:
- Creating shallow kerfs for better splitting control
- Minimizing waste on valuable specimens
- Handling delicate materials safely
- Providing superior precision over larger cutting tools
Creating and Using Kerfs for Controlled Stone Splitting

When you need even greater control than tile nippers can provide, creating kerfs becomes your most precise splitting technique. A kerf is a shallow saw cut less than an inch deep that gives you superior control for controlled stone splitting. You’ll create this cut using a chisel or large screwdriver inserted along existing fractures in the stone.
This technique proves invaluable when working with high-value or fragile stones, since it eliminates hammering risks. While you won’t achieve perfectly straight splits, you can perform kerfs almost anywhere on the stone, offering excellent flexibility.
Properly executed kerfs considerably enhance your subsequent cutting efficiency and minimize waste during lapidary work, making them essential for precision stone preparation.
Slab Saw Operations for Large Stone Processing
When you’re processing large rough stones into workable slabs, your blade selection directly impacts both cutting efficiency and material conservation.
You’ll need to match thicker diamond blades to heavy-duty cutting tasks while choosing thinner blades when preserving maximum gem material is your priority.
Your cutting fluid requirements are equally critical—consistent lubrication keeps your blade cool, reduces friction, and extends both blade life and cutting performance.
Blade Selection Fundamentals
Since slab saws handle the most demanding cuts in lapidary work, selecting the right diamond blade becomes your first critical decision for processing large stone chunks into uniform slabs.
Understanding blade selection fundamentals starts with choosing the appropriate size, typically ranging from 6 to 10 inches.
You’ll find that thinner diamond blades conserve more precious gem material during cuts, while thicker options provide the strength needed for challenging stones.
- Thinner blades reduce material waste but require gentler handling
- Blade thickness directly impacts cut precision and material conservation
- Proper cutting fluids prevent overheating and extend blade life
- Regular maintenance checks guarantee consistent performance and longevity
Your blade choice considerably affects both the quality of your slabs and the efficiency of your cutting operations.
Cutting Fluid Requirements
While selecting the right blade sets your foundation, proper cutting fluid management determines whether your slab saw operations succeed or fail.
You’ll need continuous application of water or oil-based cutting fluid to prevent blade overheating and warping. This cooling process directly extends blade life while improving cutting efficiency.
Choose your cutting fluid’s viscosity based on your stone material and saw specifications. The wrong fluid affects cut quality and saw performance considerably.
You must maintain continuous flow during operations to prevent damage to both blade and stone.
Regular sump cleaning removes debris that compromises fluid circulation. Clean cutting fluid ensures ideal cooling and prevents contamination.
Proper coolant selection minimizes chipping risks in fragile stones, making fluid management as critical as blade selection for successful slab sawing operations.
Trim Saw Techniques for Detailed Cutting Work
When you’re ready to move from rough slabbing to detailed cutting work, trim saws become your precision instruments for creating cabochons and facet rough.
You’ll need to master blade selection for different materials, develop steady hand-feeding techniques, and understand how proper stone positioning prevents costly mistakes.
Your success depends on choosing the right blade size, maintaining consistent cutting pressure, and handling valuable stones with the care they deserve.
Blade Selection and Sizing
- Start with thicker blades on inexpensive stones to build confidence before advancing to delicate materials.
- Choose thinner blades for valuable or fragile stones to minimize waste and achieve detailed cuts.
- Use cutting fluids consistently to cool blades and reduce friction during operation.
- Match blade thickness to your skill level and stone value for best results.
Precision Cutting Methods
After mastering blade selection fundamentals, you’ll need trim saw expertise to execute the most detailed aspects of lapidary work.
Trim saws are essential for achieving precise cuts on slabs and preforms, utilizing thinner blades that minimize material loss while allowing detailed shaping of gemstones.
Proper blade setup and alignment are vital when you cut stones. Hand feeding provides precision control and accuracy while preventing binding during cutting.
Using coolant, such as specialized saw oils, reduces friction and prevents overheating of both blade and stone.
Regular maintenance keeps your trim saws performing efficiently. Clean blades and replace worn components consistently.
Templates and marking desired cut lines guide you through intricate designs, ensuring cuts follow the stone’s natural contours for professional results.
Material Handling Tips
Successful detailed cutting depends heavily on how you handle your materials throughout the process. Proper material handling guarantees clean cuts while protecting both your stone and blade during trim saw operations.
You’ll achieve better results when you maintain consistent control over your cutting technique.
Essential material handling practices include:
- Align stones precisely with the blade before cutting to maintain accuracy and reduce material waste
- Apply steady hand pressure while feeding material through to prevent binding and achieve smooth cuts
- Select thinner blades for intricate work, allowing minimal material removal while watching for potential chipping
- Lubricate regularly with lapidary oil to reduce friction and extend blade life during extended cutting sessions
Keep your workspace clear of debris to prevent blade deflection and guarantee ideal cutting performance throughout your project.
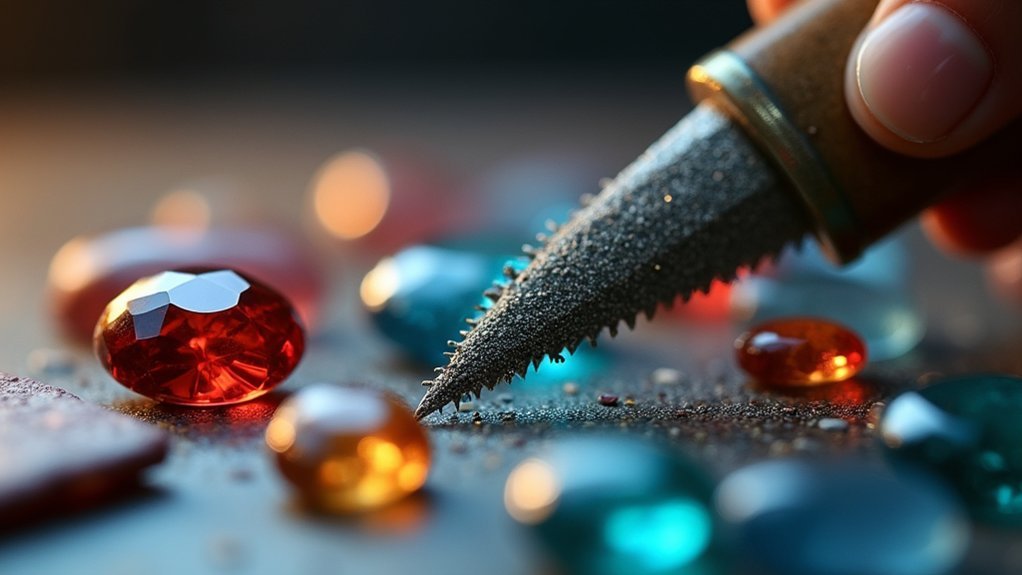
Diamond Blade Selection and Performance
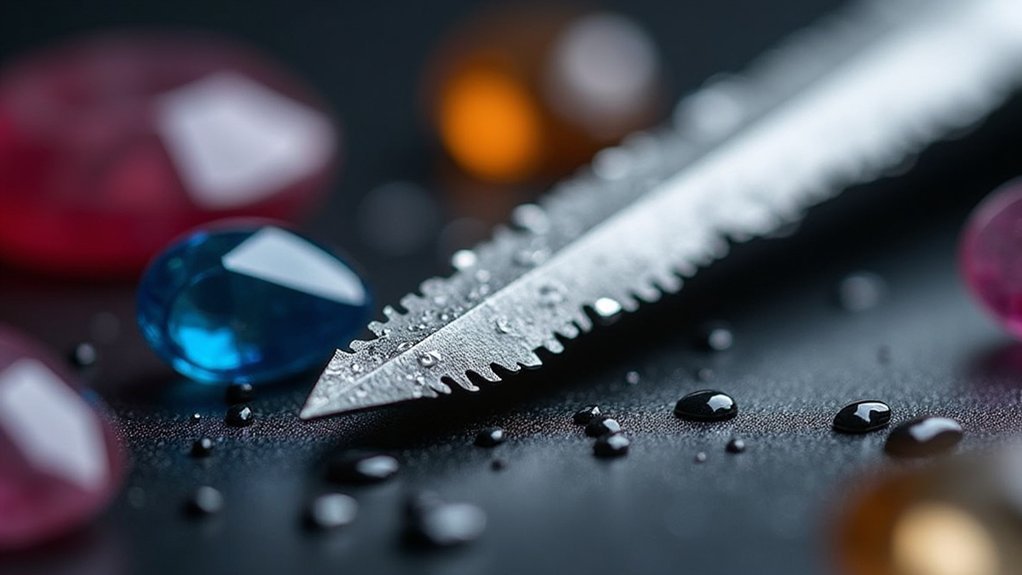
Diamond blade selection forms the foundation of effective lapidary cutting, and choosing the right blade can greatly impact both your cutting precision and overall project success.
The right diamond blade makes all the difference between precise, professional cuts and frustrating, subpar results in lapidary work.
For professional work, you’ll want sintered diamond blades due to their superior durability and cutting performance. When selecting blade thickness, consider your specific needs: thin blades excel at precise, intricate cuts but require careful handling since they can easily cut fingers. Thicker blades handle demanding cuts on tougher materials more effectively.
Enhance your blade selection by using appropriate lubricants like specialized saw oils to reduce friction and heat buildup.
Don’t overlook maintenance—cleaning dull blades by sawing through common bricks will restore their cutting edge and extend their lifespan remarkably.
Mud Saw Applications and Maintenance Requirements
While diamond blades offer precision and durability, mud saws provide an economical alternative that’s particularly effective for cutting softer gemstones and performing rough shaping work.
You’ll find mud saws use abrasive materials as cutting agents, making them cost-effective but requiring more maintenance than diamond alternatives.
To maximize your cutting efficiency, you’ll need to use coolant during operation to reduce friction and enhance performance.
Regular maintenance involves cleaning components to prevent buildup that can compromise your results.
Essential mud saw maintenance practices:
- Monitor abrasive material condition as it wears down over time
- Clean all components regularly to prevent performance-degrading buildup
- Use proper coolant throughout cutting operations
- Dispose of collected residue at hazardous waste facilities to avoid plumbing issues
Proper Stone Feeding and Saw Alignment Methods
You’ll achieve cleaner cuts and extend your blade’s life by mastering proper stone feeding techniques that maintain consistent pressure without forcing the material.
Your saw’s blade alignment directly impacts cut quality, so you’ll need to verify it’s perpendicular to the table and properly tensioned before each session.
Learning to recognize and prevent saw binding will save you from damaged stones and costly blade replacements while keeping your workspace safer.
Hand Feeding Techniques
When feeding stones into your lapidary saw, proper alignment with the blade becomes the foundation for achieving clean, straight cuts without binding or blade deflection.
Hand feeding techniques require precise control and consistent pressure throughout the cutting process. You’ll need to maintain a steady hand while guiding the stone forward, making sure it stays properly positioned against the blade.
- Keep your cutting area clear of debris to prevent blade deflection and make certain of smooth operation.
- Use appropriate lapidary oils for lubrication to reduce friction and enhance cutting performance.
- Inspect stones for fractures or inclusions before cutting and adjust your technique accordingly.
- Apply consistent, gentle pressure while feeding to avoid blade binding and achieve uniform cuts.
Blade Alignment Essentials
Before any cut begins, checking your saw’s blade alignment prevents costly mistakes that can ruin valuable stones and damage expensive equipment.
You’ll need to verify your blade runs true and perpendicular to the table surface. Misaligned blades cause wandering cuts, chipped edges, and irregular surfaces that require extensive rework.
Position your stone carefully against the blade, maintaining consistent pressure throughout the cut. Keep your workspace clear of debris that could deflect the blade or interfere with your saw’s performance.
Regular alignment checks become second nature as you develop proper habits.
Apply cutting fluids consistently to reduce friction and maintain blade stability.
These blade alignment essentials guarantee each cut produces clean, straight edges while extending your equipment’s lifespan and preserving your valuable materials.
Preventing Saw Binding
Although proper blade alignment sets the foundation for quality cuts, preventing saw binding requires mastering the art of controlled stone feeding and maintaining ideal cutting conditions.
When you feed the stone into the blade, maintain a steady pace that’s slow and deliberate. Keep your cutting area spotless—debris accumulation causes blade deflection and binding. With trim saws, hand feeding ensures precise control over alignment and pressure.
Key strategies for preventing saw binding:
- Feed stones slowly and steadily to prevent blade stress and material jamming
- Keep cutting area debris-free to maintain consistent blade performance
- Use proper lubrication to prevent overheating and reduce friction buildup
- Back away gently when binding occurs instead of forcing the cut
These techniques guarantee smooth, controlled cuts every time.
Lubrication Systems for Optimal Cutting Performance
The heartbeat of any successful lapidary operation lies in its lubrication system, which serves as the critical bridge between raw stone and finished gem. Proper lubrication systems cool your blade while reducing friction and preventing overheating during cuts.
You’ll want cutting fluids specifically designed for lapidary work to enhance your slab and trim saw performance, guaranteeing smoother cuts while extending blade life considerably.
Apply lubrication regularly to boost cutting efficiency and minimize chipping risks on fragile stones. Keep your system clean by removing debris and accumulated grit from the sump periodically.
Adjust your cutting fluid’s flow rate based on stone type and cutting speed—this optimization technique guarantees peak performance across various gem materials, from soft turquoise to harder jasper specimens.
Grinder Techniques for Stone Shaping and Control
Mastering grinder techniques transforms your lapidary work from basic cutting to precision stone shaping, offering unprecedented control over your gem’s final form.
Grinder units excel where saws fall short, particularly when you need intricate cuts on rough stones. The coarse grinding wheel provides superior control for detailed work, but you’ll need to assess your gem material’s stability first.
Essential grinder techniques for ideal results:
- Test unfamiliar stones on scrap material before grinding valuable specimens
- Feed stones steadily into the grinder while maintaining consistent pressure
- Assess gem material stability to prevent shattering delicate stones
- Clean and inspect your grinding wheel regularly for wear patterns
Remember that delicate gem material requires extra caution, as coarse wheels can easily shatter fragile stones during aggressive grinding sessions.
Safety Protocols and Equipment Maintenance
When precision cutting meets powerful machinery, your safety becomes the foundation that determines whether your lapidary session ends with beautiful gems or costly accidents.
You’ll need essential protective gear including safety glasses, dust masks, and gloves to shield yourself from flying debris and harmful particles.
Regular equipment maintenance directly impacts your results and safety. Keep saw blades clean and properly lubricated to extend blade life and maintain peak cutting performance.
Clean, well-lubricated blades are the cornerstone of safe lapidary work and superior cutting results.
Always follow manufacturer instructions when operating any lapidary equipment to prevent accidents and costly damage.
Check blade alignment and condition regularly, replacing worn or dull blades immediately to prevent blade wander and chipping.
Maintain a clean, organized workspace by clearing debris around your cutting area, which minimizes accident risks and improves your overall efficiency.
Troubleshooting Common Cutting Problems and Solutions
Even experienced lapidary artists encounter frustrating cutting problems that can ruin precious materials and waste valuable time.
You’ll need effective strategies to handle blade wander that creates uneven cuts, prevent chipping on delicate stones, and correct overcutting mistakes that result in material loss.
These common issues have proven solutions that’ll help you achieve consistent, professional-quality cuts every time.
Blade Wander Solutions
Blade wander ranks among the most frustrating issues you’ll encounter during lapidary cutting, as it can ruin expensive stones and waste hours of careful work. This deviation from your intended cutting line typically stems from improper feeding, misalignment, or inadequate lubrication.
Fortunately, you can implement several effective solutions to eliminate this problem.
- Maintain proper blade alignment by regularly checking and adjusting your trim saw’s blade positioning to guarantee straight cuts.
- Apply adequate cutting fluid throughout the process to reduce friction and prevent the blade from grabbing the stone.
- Feed stones straight and steady with consistent pressure, avoiding sudden movements that cause deviation.
- Consider using thicker blades or adjusting cutting speed when working with harder or more fragile materials.
Chipping Prevention Methods
Stone chipping can devastate your lapidary projects just as much as blade wander, turning beautiful specimens into fractured disappointments. Effective chipping prevention methods start with securing your stone properly—any movement during cutting increases fracture risk dramatically.
Slow down your cutting speed to maintain better control as the blade and the stone interact. This patience pays dividends in cleaner cuts.
Apply appropriate lubrication like saw oils or coolants to reduce friction and heat buildup that contributes to chipping.
Sharp blades are non-negotiable. Inspect and maintain your cutting tools regularly, replacing dull or damaged blades immediately.
Consider using a kerf technique for splitting operations—this shallow preliminary cut gives you greater control.
Remember to guarantee adequate support throughout the cutting process, minimizing vibration and maintaining steady pressure for professional results.
Overcutting Correction Techniques
While overcutting frustrates even experienced lapidaries, you can salvage your work with careful correction techniques. When your blade affects the stone beyond your intended cut line, don’t panic. You’ll need to adjust your cutting speed and reduce pressure immediately to regain control.
The key is maintaining steady hands while working with your rough material to prevent further deviation.
Essential overcutting correction strategies include:
- Create shallow kerf cuts before deeper cuts to establish proper guidance
- Use appropriate cooling fluids to prevent blade wander from overheating
- Switch to trim saws with thinner blades for precise adjustments on valuable stones
- Practice regularly with scrap materials to develop better cutting control
These techniques will help you recover from overcutting mistakes and improve your overall lapidary skills.
Frequently Asked Questions
What Is the Best Way to Cut Stones?
You’ll want to use slab and trim saws with diamond blades for precision cuts on valuable stones. For rough shaping, you can use rock hammers, while diamond wire saws work best for intricate, detailed cutting work.
What Are the Three Types of Gem Cutting (Lapidary)?
You’ll encounter three main gem cutting types: cabochon cutting creates smooth, domed surfaces with flat backs; faceting produces multiple angled faces for brilliance; and freeform cutting follows stones’ natural contours creatively.
How to Cut Gemstones in Lapidary?
You’ll clean and inspect your rough gemstone first, then mark cuts with wax pencil. Use appropriate saws with lubrication, maintain steady pressure while cutting, and finish by cleaning and addressing any imperfections through grinding.
What Is the Best Lapidary Equipment for Beginners?
You’ll want to start with a trim saw for precise cutting and shaping slabs. Add a cabbing unit for creating cabochons, plus essential safety gear like protective eyewear, dust masks, and gloves.
In Summary
You’ve learned the fundamental cutting techniques that’ll transform rough stones into polished gems. Master your rock hammer swings, perfect your tile nipper precision, and understand kerf creation for controlled splits. Don’t forget proper lubrication systems and grinder control techniques. Always prioritize safety protocols and maintain your equipment regularly. When you encounter cutting problems, you’ll now have the troubleshooting knowledge to solve them quickly and continue creating beautiful lapidary pieces.


Leave a Reply