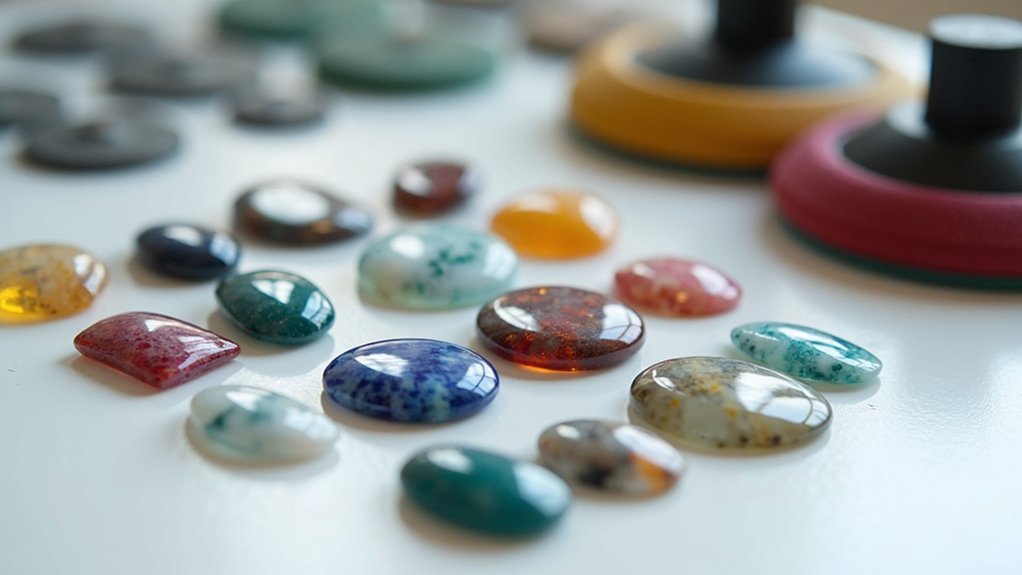
You’ll create stunning cabochons by starting with a quality cabbing machine, diamond saw, and progressive grit wheels from coarse to fine. Select rough material with minimal inclusions and excellent color saturation, then slab it into 1/4″ to 3/8″ thick pieces. Use templates for precise marking and maintain symmetry throughout shaping. Progress through grits from 260 to 1,200, then polish with aluminum oxide and cerium oxide compounds. Master these fundamentals and you’ll discover advanced techniques that elevate your craftsmanship.
Essential Tools and Equipment for Cabochon Cutting
Success in cabochon cutting depends entirely on having the right tools at your disposal. Your cabbing machine forms the foundation of your workshop, with options ranging from simple models to elaborate units like Diamond Pacific’s Genie, featuring multiple mounted wheels for thorough shaping.
You’ll need a diamond saw for slabbing rough stones into 1/4″ to 3/8″ thick pieces. Grit wheels are essential—use coarse wheels for hard materials, progressing through medium to fine grits for ideal shaping and smoothing.
Dopping sticks secure smaller stones safely, preventing injuries while maintaining precise control. Complete your setup with silicone carbide grits and polishing compounds like cerium oxide to achieve that coveted high-quality finish and mirror-like polish your cabochons deserve.
Selecting and Preparing Gemstone Rough Material
While your cabbing machine provides the means to create stunning gems, the quality of your finished cabochon depends heavily on selecting superior rough material from the start.
When selecting gemstone rough, you’ll want to prioritize materials with minimal inclusions and excellent color saturation. These characteristics directly impact your final stone’s visual appeal and value.
Before cutting, inspect your rough thoroughly for weak areas or fractures, then trim these sections away to improve durability.
Carefully examine your rough material for cracks and weak spots, removing these flawed areas before beginning your cabochon work.
Pre-form your stones into squares to establish a solid foundation and maximize material yield. For patterned materials, use templates to identify the best cutting areas that’ll showcase the most visually striking sections in your finished cabochon.
Consider practicing with leftover rough to develop skills without risking valuable stones.
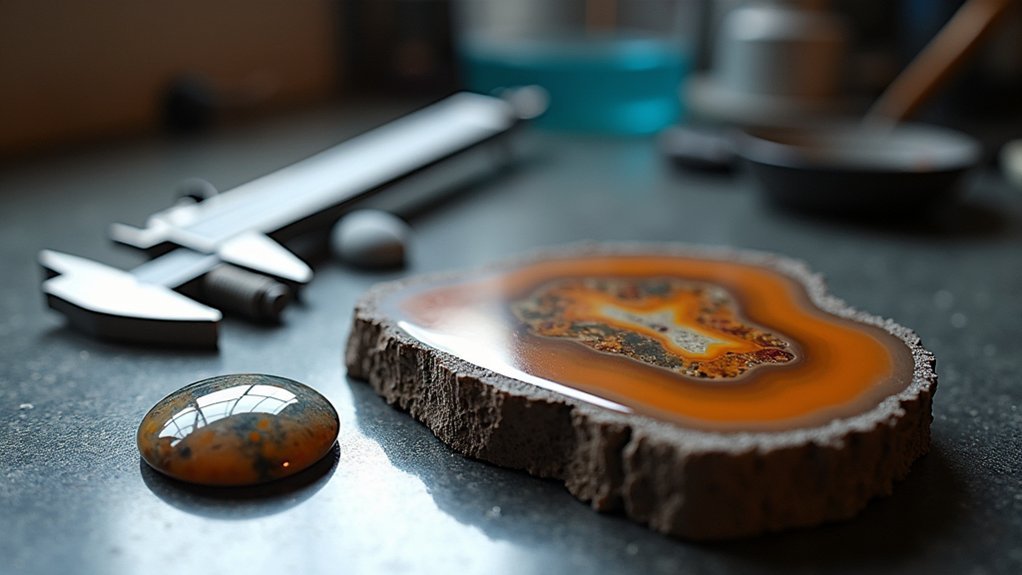
Mastering the Art of Slabbing and Initial Shaping
You’ll transform your rough gemstone material into workable slabs by cutting precise 1/4″ to 3/8″ thick slices with a saw.
Mark your cutting lines with an aluminum pen and use templates to identify the best areas, especially when working with patterned stones.
Once you’ve created your slabs, you’ll begin rough shaping using the coarsest grinding wheel, keeping it wet to prevent overheating while carefully removing excess material.
Template Selection and Marking
Three essential decisions shape your cabochon’s final appearance: template selection, strategic marking, and precise slabbing technique. Your template selection determines how effectively you’ll highlight the gemstone’s best features while minimizing material loss during the slabbing process.
Follow these steps for maximum template selection and marking:
- Choose templates that complement your rough stone’s natural shape and size.
- Use aluminum pens for marking cutting lines with maximum visibility and precision.
- Position templates over the most visually appealing areas, especially with patterned materials.
- Plan your slabs at 1/4″ to 3/8″ thickness for ideal cabochon proportions.
Strategic marking guarantees you’ll capture the stone’s most attractive patterns while maintaining structural integrity.
Proper Slab Thickness
Four key factors determine ideal slab thickness: material hardness, intended cabochon size, structural integrity, and finishing requirements.
When establishing proper slab thickness, you’ll want to target 1/4″ to 3/8″ consistently. This range provides sufficient material for the complete shaping process while helping you minimize waste effectively.
Before cutting, use aluminum pens to mark cutting lines on your template-positioned rough material. These markings guide your saw blade precisely through the best sections of patterned stones.
Once you’ve cut your slabs, begin transforming them using the coarsest wheel appropriate for your stone’s hardness. Remember to wet the wheel first, reducing friction and heat buildup.
Throughout the shift to cabochon form, use calipers regularly to maintain accuracy and guarantee proper symmetry in your emerging gemstone.
Initial Rough Shaping
Once you’ve prepared your slabs, initial rough shaping begins with selecting the coarsest grinding wheel that matches your stone’s hardness level.
You’ll cut your material into the basic cabochon shape while removing excess stone efficiently.
Here’s your step-by-step process:
- Mark your cutting lines using aluminum pens on the slab surface, following your template for patterned stones to guarantee ideal placement and design.
- Dop smaller stones securely before shaping to maintain safe control during the grinding process and prevent injury.
- Wet your coarse wheel thoroughly before beginning any grinding work to reduce friction and prevent overheating damage to your stone.
- Monitor progress constantly using calipers to measure dimensions and verify you’re grinding toward your drawn outline accurately.
Creating Perfect Oval and Fancy Shaped Cabochons
You’ll need to master three critical aspects when creating oval and fancy-shaped cabochons: selecting the right templates and marking your stone accurately, using proper shaping techniques with the correct tools, and achieving perfect symmetry through careful refinement.
Template selection determines your cabochon’s proportions, while your shaping approach varies considerably between structured ovals and freeform fancy cuts.
The final refinement stage requires precise attention to symmetry and surface quality to produce professional-grade results.
Template Selection and Marking
Before you make your first cut, selecting the right template becomes essential for maximizing both the beauty and yield of your rough stone material. Your template selection directly impacts how well you’ll showcase the stone’s natural characteristics while maintaining structural integrity.
Follow these key steps for effective template selection and marking:
- Choose templates that complement your stone’s natural outline, especially for oval and fancy shapes that enhance visual interest.
- Check rough material thickness – aim for 1/4″ to 3/8″ to guarantee sturdy cabochons.
- Mark cutting lines accurately using aluminum pens, allowing adjustments before committing to cuts.
- Practice on leftover material to refine your cutting techniques before working on valuable stones.
Create initial slabs first, then test different templates to find ideal placement for maximum beauty.
Shaping Techniques and Tools
Transform your marked slab into a stunning cabochon by starting with the coarsest grinding wheel to rough out your desired shape.
Use your coarse laps for initial cutting, then progress through increasingly fine wheels to achieve that polished appearance you’re after. For oval cabochons, maintain consistent rotation while keeping the girdle edge against the wheel.
Create fancy-shaped gems by following the material’s natural outline with freeform shaping techniques. Your tools should include various grits, from coarse to ultra-fine.
As you work, taper gradually toward the crown using pyramid-style rotation techniques. Check your gem regularly for symmetry and uniformity—this guarantees ideal light reflection.
Symmetry and Final Refinement
As your cabochon begins to take shape, achieving flawless symmetry becomes your primary focus during the refinement stage. Consistent pressure during shaping guarantees even curvature from all angles, creating the balanced form you’re seeking.
Follow these essential steps for symmetry and refinement:
- Use templates for oval cabochons – Templates provide guidance for precise cutting while minimizing material waste.
- Follow natural outlines for fancy shapes – Let the material’s characteristics guide your creativity while maintaining structural integrity.
- Apply progressive polishing techniques – Use increasingly finer grits to smooth inconsistencies and achieve superior finish quality.
- Inspect under direct light – Check for flattened areas or imperfections that affect light reflection.
This systematic approach to consistency and refinement transforms rough material into perfectly symmetrical cabochons with ideal light reflection.
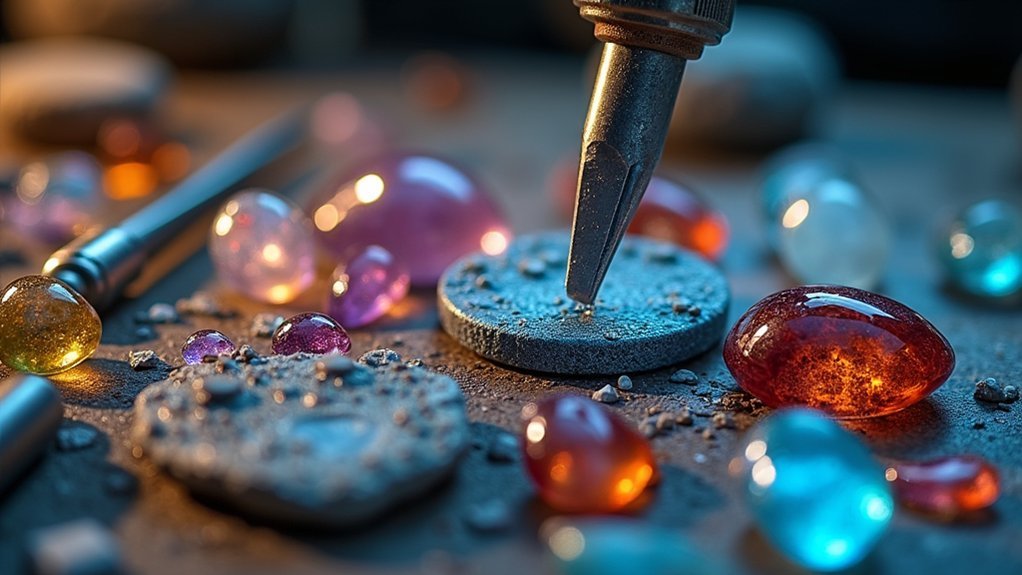
Smoothing Techniques for Professional Results
Once you’ve shaped your cabochon, the smoothing process determines whether you’ll achieve that coveted professional finish or settle for amateur results. These smoothing techniques require systematic progression through grits for effective scratches removal.
Start with 260 grit, advancing through 600 and 1,200, conducting thorough gem inspection after each step. Keep your workspace warm and guarantee the stone’s completely dry during evaluation to assess curvature and surface quality accurately.
| Grit Progression | Purpose |
|---|---|
| 260 Grit | Remove coarse scratches |
| 600 Grit | Shape and pre-polishing |
| 1,200 Grit | Final smoothing preparation |
Silicon carbide excels for pre-polishing, requiring only 600 grit for best results. When preparing for bezel setting, maintain small vertical areas on sides and sand bevels on lower edges. Inspect for perfect surface reflection—any remaining scratches will compromise your flawless finish.
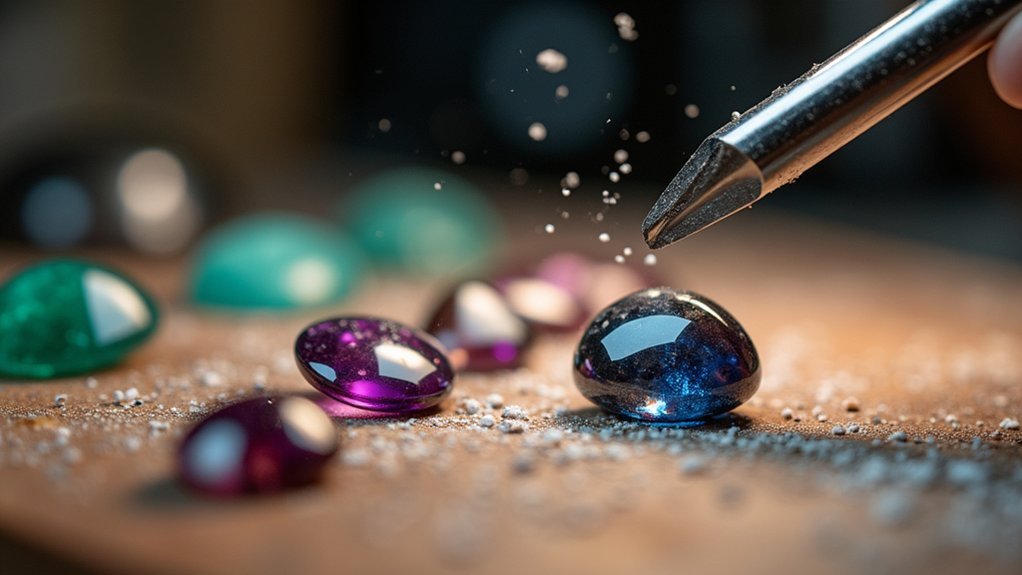
Advanced Polishing Methods for Mirror Finishes
When you’re ready to transform your smoothed cabochon into a mirror-finish masterpiece, the polishing stage demands precision and patience.
Advanced polishing methods require a systematic approach using progressively finer grits to achieve that coveted mirror finish.
Follow these essential steps for professional results:
- Start with aluminum oxide for versatility across different stone types, maintaining even pressure throughout.
- Progress to cerium oxide for quartz and opal while implementing proper heat management with water cooling.
- Finish with chromium oxide on leather for jade and final polishing of all stones.
- Inspect after each stage to verify complete scratch removal before advancing.
Your consistent technique involving fluid motion across the polishing wheel creates uniform light reflection, eliminating flattened areas and pits that compromise visual appeal.
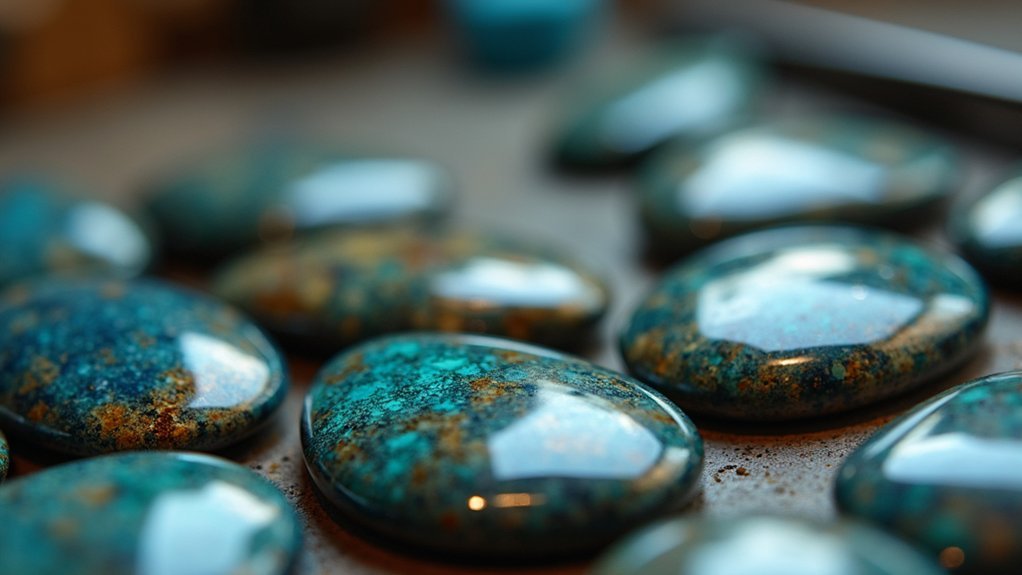
Working With Ridges and Concave Curves
While most cabochons feature smooth, flowing curves, incorporating ridges and concave elements transforms your stones into enchanting focal points that command attention.
When shaping ridges in your cabochons, work carefully to prevent breakage while enhancing the gemstone’s visual appeal. These features direct light within the stone, creating mesmerizing optical effects.
Carefully crafted ridges in cabochons direct light beautifully through the stone, creating captivating optical effects that enhance visual appeal.
Use the lower quarter of your grinding wheel when cutting curves and ridges to prevent yanking the stone during shaping. Asymmetrical curves add unique personality to your designs, making them distinctive in jewelry settings. Concave curves showcase your gemstone’s natural features beautifully.
During polishing, maintain careful attention to symmetry, especially with ridges.
These techniques work effectively on both light and dark stones, elevating the overall aesthetic of your finished cabochons.
Utilizing Frosted Surfaces and Creative Textures
Beyond creating dimensional elements like ridges and curves, you can transform your cabochons through strategic frosting and textural techniques that add visual intrigue and solve practical challenges.
Frosted surfaces offer powerful solutions for enhancing your lapidary work while addressing stone imperfections. These creative textures dramatically improve visual appeal by redirecting focus and camouflaging flaws.
Consider these frosting applications:
- Highlight vibrant centers – Create frosted ridges in tourmaline to direct attention toward brilliant color zones.
- Camouflage inclusions – Apply frosted finishes to distract from unwanted internal features.
- Conceal bottom fractures – Frost transparent cabochon bases to hide less desirable areas.
- Frame clear sections – Frost edges to enhance focus on pristine stone areas.
Strategic frosting elevates your cabochon’s personality, offering endless opportunities for innovative designs and creative expression in your work.
Quality Assessment and Finishing Standards
After completing your cabochon’s shape and surface treatments, you must rigorously evaluate the finished piece against professional standards to guarantee it meets quality expectations.
Begin your quality assessment by inspecting the polish for scratches or pitting that could impair light reflection and diminish visual appeal.
Examine the cabochon’s symmetry from all angles, ensuring even curvature and balanced proportions throughout.
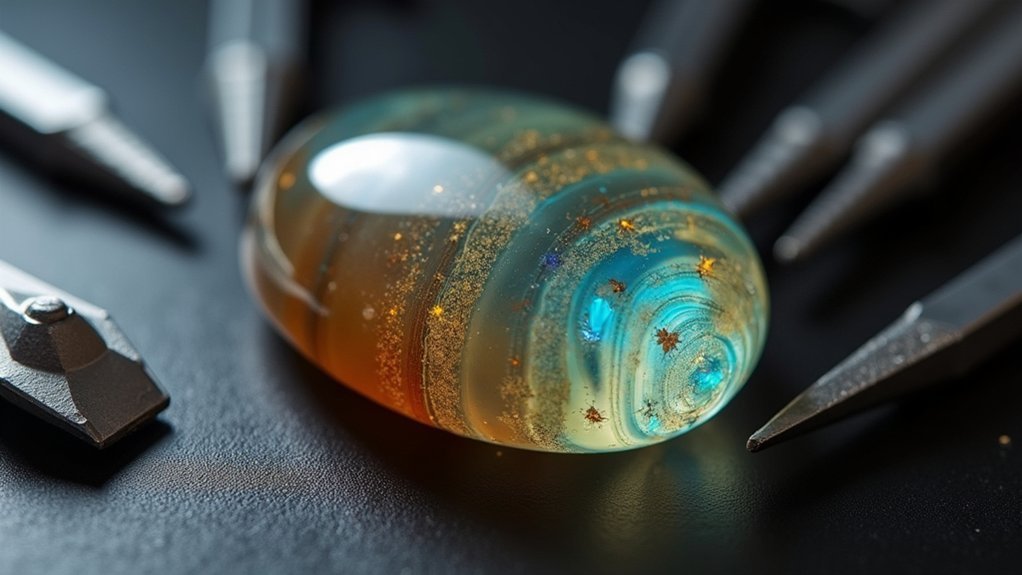
Check for smooth, consistent light reflection across the entire surface—flattened areas indicate poor polishing and distort the gemstone’s appearance. A high-quality cabochon requires a mirror polish that enhances the stone’s natural beauty.
When preparing for bezel setting, maintain a small vertical area on the sides before tapering inward, preventing chipping while securing the gem properly.
Frequently Asked Questions
How to Cut Cabochons for Beginners?
Start with leftover rough gemstones and basic cabbing tools. Mark cutting lines, saw 1/4″ slices, then shape using coarse wheels first. Keep stones wet, progress through finer grits, and inspect regularly for proper curvature.
How Thick to Cut Slabs for Cabochons?
You’ll want to cut your slabs between 1/4 to 3/8 inch thick. This gives you enough material for shaping while preventing breakage. Consider your stone’s hardness and any inclusions when determining thickness.
What Do Jewelers Use to Cut Stones?
You’ll use cabbing machines with mounted diamond wheels, like the Genie or Lortone models. You’ll need various wheel grits for shaping and polishing, plus dopping sticks and safety gear.
Why Do You Cut Cabochons?
You’ll cut cabochons to transform rough stones into polished gems, showcase natural beauty, develop cutting skills, reduce waste from leftover materials, and create unique jewelry pieces that express your personal artistic vision.
In Summary
You’ve now mastered the complete cabochon cutting process from selecting rough material to achieving mirror-like finishes. With proper tools, consistent techniques, and quality assessment standards, you’ll create stunning cabochons every time. Remember that practice perfects your slabbing, shaping, and polishing skills. Don’t rush the process—each step builds upon the previous one. Your attention to detail in smoothing, texturing, and final finishing will set your cabochons apart from amateur work.


Leave a Reply