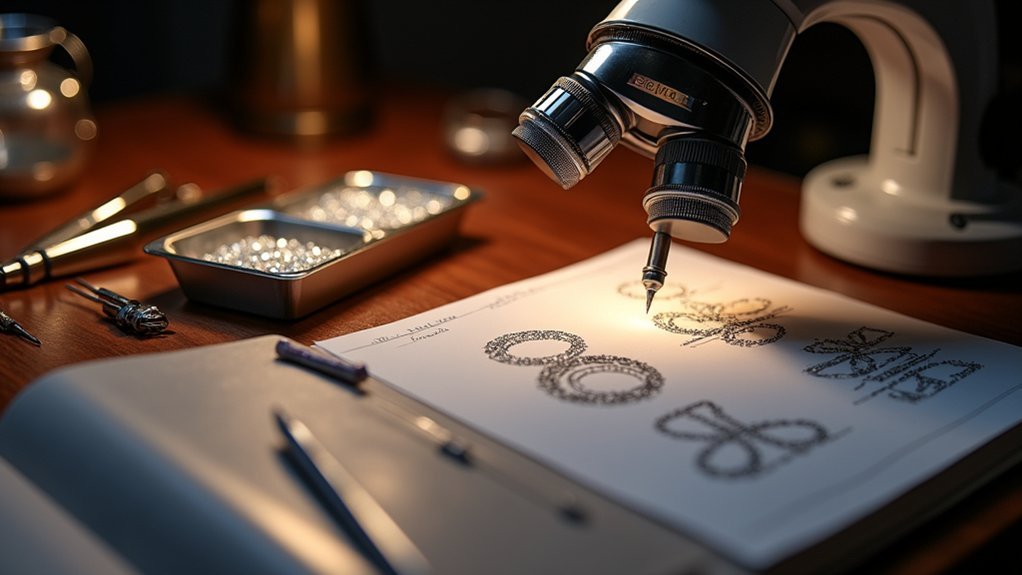
Start by selecting a 5mm wide brass band with heavy sidewalls that matches your stone dimensions. Prepare your Graver Max tool and measure the channel’s width, depth, and sidewall height carefully. Test-fit your princess cut stones, then pre-hammer the channel sides for a snug grip. Insert stones systematically, applying consistent hammering pressure with smooth movements. Make adjustments for size variations, smooth the channel edges, and finish with thorough polishing for professional results that showcase advanced techniques.
Selecting the Right Metal Band Width and Material
When creating channel set diamond jewelry, you’ll want to start with a 5mm wide brass band that provides the heavy sidewalls essential for secure stone setting.
Hard rolled brass delivers quality comparable to 10 karat gold, giving your piece a luxurious appearance while ensuring long-lasting durability. The band width must match your stone dimensions precisely – you’ll need the channel to hold stones snugly without allowing displacement.
Precision in band width matching stone dimensions ensures secure channel setting while hard rolled brass provides 10 karat gold quality and durability.
Channel setting requires the metal to grip stones securely along the sides. Consider your stone types carefully, as blue stones often need additional adjustment since they’re typically undersized compared to white stones of identical measurements.
Use tools like the Graver Max to manipulate the hard brass material effectively, allowing you to make precise adjustments during the setting process.
Preparing Your Graver Max Tool and Essential Equipment
Proper preparation of your Graver Max tool forms the foundation for successful channel setting results. You’ll need to guarantee your tool is clean and properly maintained to facilitate smooth, efficient movement throughout the setting process. This maintenance directly impacts your ability to achieve precise stone placement.
Gather your essential equipment, starting with a 5mm wide brass band featuring extra heavy sidewalls that provide exceptional durability for long-lasting jewelry pieces.
You’ll also need a 3mm princess cut CZ stone for initial fitting assessments, which helps you understand necessary adjustments before working with actual diamonds.
Master the hammering technique by focusing on consistent tool movement to stabilize stones during setting.
Remember that blue stones typically require more hammering than white stones of identical size due to slight variances in fit.
Measuring and Checking Stone Fit in the Channel
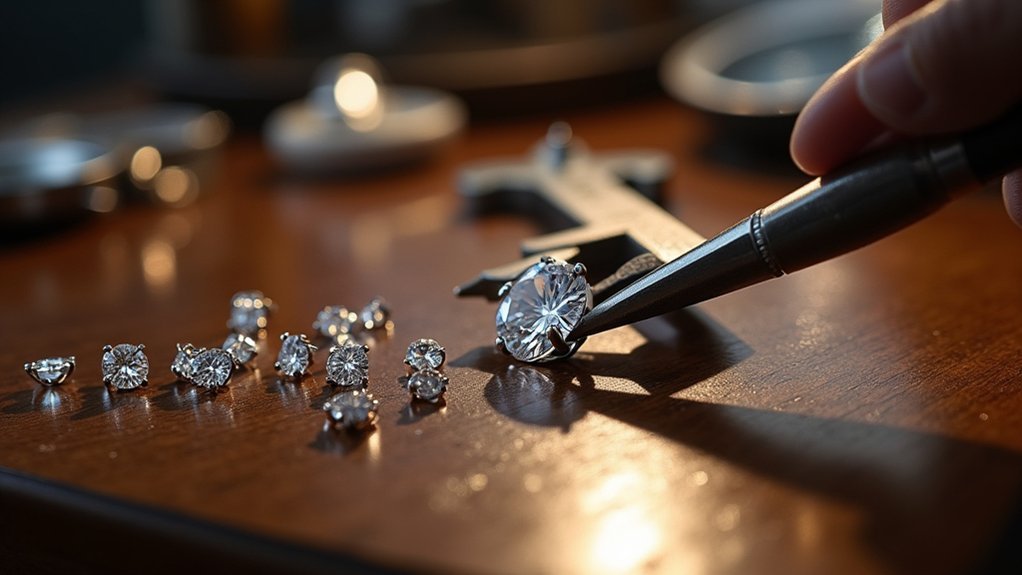
Three critical measurements determine whether your stone will sit securely in the channel: width, depth, and sidewall height. You’ll need to select stones that match these dimensions precisely before beginning the setting process.
| Measurement Step | Action Required |
|---|---|
| Initial fit test | Insert stone to check channel width |
| Depth assessment | Verify stone sits at proper level |
| Side adjustment | Pre-hammer channel walls for tighter fit |
| Re-check fit | Test stone placement multiple times |
| Final tweaking | Use Graver Max for undersized variations |
Insert each stone into the channel to evaluate the fit carefully. Pre-hammer the sidewalls to create a snugger placement, which prevents displacement during final setting. Check the fit repeatedly throughout this process—achieving proper stone stability depends entirely on this preparation phase.
Pre-Hammering Channel Sides for Optimal Adjustment
Before you begin hammering, you’ll need to check that your stone fits properly within the channel by testing its size against the opening.
Use gentle tapping motions on the channel sides to manipulate the metal and create a tighter fit that prevents the stone from shifting during the final setting process.
The Graver Max tool becomes invaluable here, allowing you to precisely adjust the channel width until you achieve that perfect snug fit for your diamond.
Initial Stone Size Check
Most channel setting projects begin with an essential stone-to-channel assessment that’ll determine your entire setting strategy.
You’ll start by selecting the appropriate stone size for your channel width, then insert each stone to evaluate the initial fit. Don’t make any adjustments yet—this first check reveals how much manipulation you’ll need during pre-hammering.
Test each stone’s placement carefully, noting where gaps exist or where the fit feels too tight.
You’ll want to assess multiple stones if you’re setting several, as slight size variations can affect your approach. This initial evaluation prevents costly mistakes and helps you plan your pre-hammering technique.
Metal Manipulation Technique
Once you’ve completed your stone size assessment, you’ll move into the pre-hammering phase where you manipulate the channel sides to create the perfect fit. The Graver Max tool excels at manipulating brass material, making adjustments quick and efficient. You’ll need to assess the fit multiple times during this stage to guarantee proper shaping for your specific stone size.
| Stone Type | Pre-Hammering Requirement | Fit Check Frequency |
|---|---|---|
| White Stones | Standard manipulation | Every 2-3 adjustments |
| Blue Stones | Additional pre-hammering | Every adjustment |
| Oversized | Minimal manipulation | Initial assessment only |
The metal’s malleability allows for adjustments, but blue stones require extra attention since they’re slightly undersized. Creating a snug fit prevents displacement during final setting and guarantees your channel setting’s long-term durability.
Achieving Snug Fit
While your metal manipulation work provides the foundation, achieving a truly snug fit requires careful pre-hammering of the channel sides to create ideal stone placement.
Start by inserting your stone into the channel to assess the initial fit before making any adjustments. This pre-hammering step is crucial for creating the secure hold you’ll need during final setting.
Use your Graver Max tool to easily manipulate the metal, making precise channel adjustments as needed.
Check the stone’s fit multiple times throughout the pre-hammering process to guarantee proper alignment and prevent displacement during final hammering.
Remember that blue stones typically require a slightly tighter fit than white stones of identical dimensions, so you’ll need more hammering to accommodate their undersized characteristics.
Inserting Princess Cut Stones Into the Prepared Channel
You’ll start by checking how your princess cut stones fit in the prepared channel before making any adjustments.
Use your Graver Max tool to pre-hammer the channel sides, which lets you make minor tweaks for that perfect snug fit.
Test the stone placement multiple times during insertion to guarantee they’re sitting securely without gaps.
Check Stone Size Fit
Before securing your princess cut stones permanently, insert each stone into its prepared channel to verify the fit meets your exacting standards. You’ll want the stone to sit snugly without excessive movement that could compromise the final setting.
Pre-hammer the channel sides slightly to fine-tune the fit before proceeding. Check the placement multiple times throughout this process—it’s your best defense against stone displacement during final hammering. You’ll notice blue stones often need extra attention since they’re typically undersized compared to white stones with identical dimensions.
| Stone Color | Fit Characteristics | Hammering Requirements | Final Check Points |
|---|---|---|---|
| White | Standard sizing | Normal pressure | Standard assessment |
| Blue | Slightly undersized | Additional hammering | Extra verification |
| Yellow | Variable sizing | Adjusted technique | Enhanced monitoring |
| Pink | Consistent fit | Standard approach | Regular evaluation |
Your goal is achieving that perfect snug fit enabling smooth final hammering.
Pre-Hammer Channel Adjustment
Since proper stone placement determines the success of your entire channel setting, start by inserting each princess cut stone into its designated position within the prepared channel.
Check the fit multiple times to verify each stone sits securely without wobbling or gaps. Use your Graver Max tool to pre-hammer the channel sides, making slight adjustments to accommodate each individual stone’s dimensions.
This pre-hammering step allows you to fine-tune the fit before final setting, preventing stones from shifting during the hammering phase. Remember that blue stones often require additional hammering since they’re typically undersized compared to white stones of identical measurements.
The Graver Max tool’s precision makes these metal adjustments efficient, allowing you to achieve snug, professional-quality stone placement.
Secure Stone Placement
Once you’ve completed the pre-hammering adjustments, insert your first 3mm princess cut stone into the prepared channel by gently pressing it down until it sits flush with the channel walls.
Check that the stone fits snugly without excessive force. If you’re working with blue stones, expect them to be slightly undersized and require additional adjustments.
Stabilize the stone firmly to prevent movement during final hammering. Use consistent hammering techniques with your Graver Max tool to secure the stone permanently in place.
Apply steady pressure rather than forceful strikes to avoid damaging the stone or channel walls.
After securing all stones, smooth out the channel sides to eliminate any rough edges or imperfections.
This creates a professional finish and prepares the piece for subsequent polishing steps.
Stabilizing Stones During the Hammering Process
The stability of your diamonds during hammering determines whether you’ll achieve professional-quality channel settings or end up with loose, misaligned stones. Before you begin, verify each stone fits snugly in its channel to prevent displacement during the process.
Use your Graver Max tool to manipulate the metal around each stone, maintaining secure hold and proper alignment throughout adjustments. Apply consistent pressure and movement to keep stones positioned while shaping the surrounding metal.
After each hammering session, assess the stone’s fit to confirm it remains tight and secure.
Blue stones that appear slightly undersized will require extra hammering compared to white stones of identical dimensions. This additional work verifies they’re sufficiently stabilized within their channels for long-term durability.
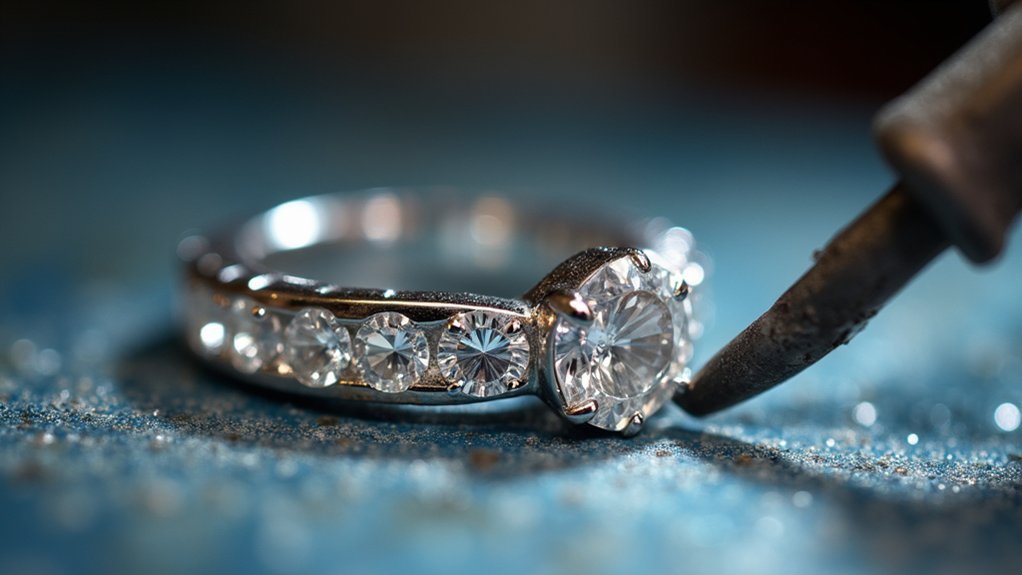
Applying Proper Hammering Technique for Secure Setting
When you’re hammering the channel walls over your stones, you’ll need to keep your Graver Max tool moving continuously to create an even setting across the entire edge.
Apply consistent pressure while hammering to stabilize each stone, but remember that blue stones typically require more forceful hammering than white stones due to their different characteristics.
Focus on maintaining smooth, controlled movements that gradually secure the stones without causing displacement or uneven metal distribution.
Maintain Continuous Tool Movement
Mastering continuous tool movement transforms your channel setting from amateur work into professional-quality results. You’ll need to maintain steady, fluid motions while hammering to distribute pressure evenly around each stone. This technique prevents weak spots and guarantees uniform metal compression throughout the channel.
| Movement Type | Tool Pressure | Stone Security | Result Quality |
|---|---|---|---|
| Jerky/Inconsistent | Uneven | Poor | Amateur |
| Smooth/Continuous | Balanced | Excellent | Professional |
| Too Fast | Light | Loose | Unreliable |
| Controlled Pace | Ideal | Secure | Superior |
Your Graver Max tool excels at maintaining this consistency, especially when working with harder materials. Remember to adjust your hammering intensity based on stone type—blue stones typically need more work since they’re slightly undersized. Keep checking your progress and maintain that smooth rhythm throughout the entire setting process.
Stabilize Stones During Hammering
Consistent hammering means nothing if your stones shift during the process, which is why proper stabilization becomes your next priority.
Pre-hammer your channel sides before inserting stones to create a snug fit that’ll hold them securely. You’ll want to assess the fit multiple times throughout the process to guarantee everything remains tight.
Blue stones require extra attention since they’re slightly undersized, so don’t hesitate to apply additional hammering force to keep them firmly positioned.
Your Graver Max tool becomes essential here for manipulating metal around stones while making precise adjustments without displacement.
After completing your final hammering passes, inspect the entire channel thoroughly.
Verify each stone sits securely before moving to smoothing, guaranteeing your professional finish starts with properly stabilized stones.
Adjust for Stone Variations
Since each stone presents unique dimensional characteristics, you’ll need to modify your hammering approach accordingly to achieve ideal security.
Blue stones typically require more intensive hammering due to their slightly undersized nature. Maintain consistent, smooth hammering motions to compensate for this dimensional variance and achieve proper seating.
White stones of identical size need minimal adjustment, allowing you to reduce hammering intensity while still securing them effectively.
Your Graver Max tool becomes essential during this phase, enabling effortless brass manipulation for precise adjustments.
Assess each stone’s fit multiple times throughout the process, as snugness prevents displacement during final hammering.
After completing the securing process, smooth the channel sides to enhance the piece’s aesthetic appeal, creating clean lines that complement your properly seated stones.
Making Final Adjustments for Undersized or Oversized Stones
When your diamonds don’t fit perfectly in their channels, you’ll need to make precise adjustments to achieve a secure, professional setting. For undersized stones like blue diamonds, you’ll require additional hammering to guarantee they fit snugly within the channel.
Pre-hammer the channel sides first, allowing multiple assessments during fitting to assure stability.
The Graver Max tool makes metal manipulation easier, letting you adjust channels for both oversized and undersized stones effectively. Use consistent hammering techniques throughout the process to stabilize stones and guarantee smooth metal movement around them.
When performing final hammering, work with precision to secure stones properly. After securing, smooth out the sides carefully to create a polished, professional appearance that showcases your craftsmanship.
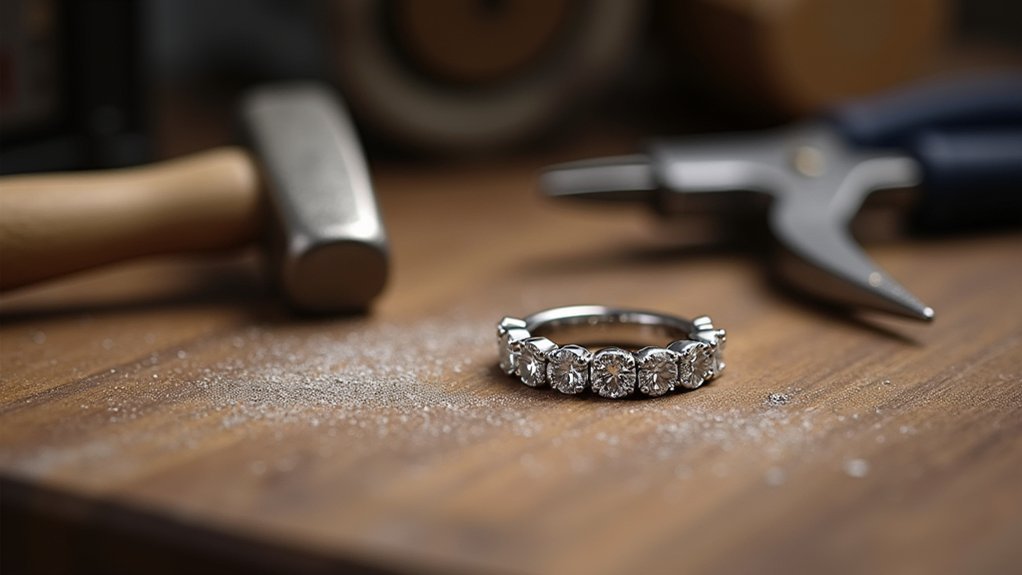
Smoothing Channel Edges After Stone Placement
Once you’ve secured your diamonds in their channels, the smoothing process becomes critical for achieving a professional finish. Use a fine file or sanding tool to carefully smooth the channel edges, preventing sharp spots that could catch on skin or clothing.
Maintain a gentle touch throughout this process to avoid disturbing your stone placement and preserve the channel setting’s integrity. Inspect the edges regularly as you work, ensuring you’re creating a uniform finish that complements your jewelry’s overall design.
If you’re using a polishing tool, apply minimal pressure to prevent dislodging the stones while achieving that sleek appearance you’re after. Complete the process with a light polish on the surrounding metal to enhance the piece’s overall shine and professional finish.
Polishing and Finishing Your Channel Set Piece
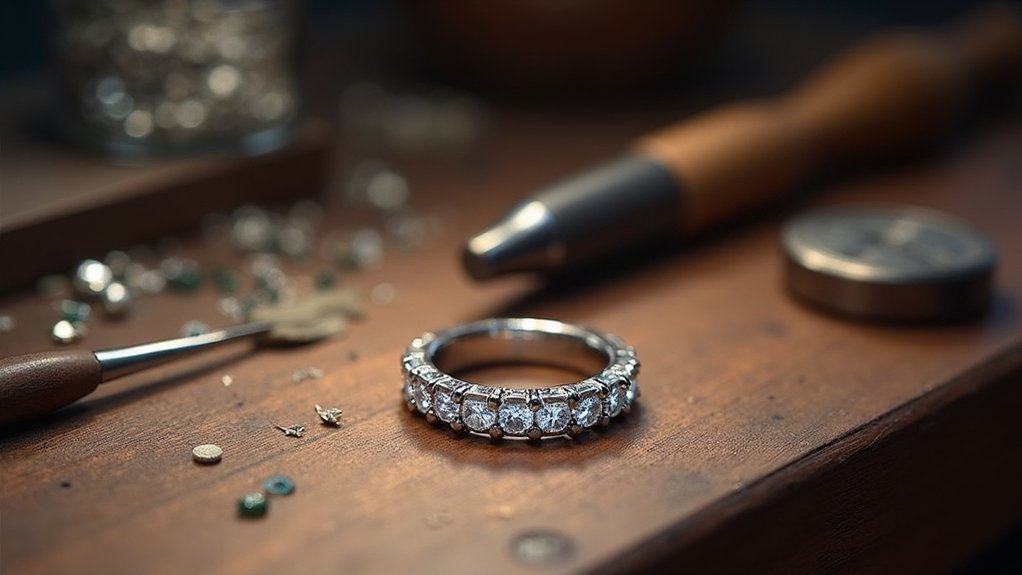
After completing the edge smoothing process, you’ll transform your channel set piece through proper polishing techniques that bring out the brass’s natural luster.
Apply a brass-specific polishing compound evenly across the entire surface, guaranteeing thorough coverage for the best results. Use a polishing wheel or soft cloth to buff the jewelry piece systematically, creating a smooth, reflective finish that showcases your channel set stones beautifully.
Systematic buffing with brass-specific compound creates the reflective finish that makes channel-set stones truly shine with professional brilliance.
Work methodically across all surfaces, maintaining consistent pressure and motion patterns. The polishing process enhances your piece’s overall appearance while providing that coveted high shine finish.
Throughout this step, regularly inspect your work to confirm the stones remain securely positioned and the channel’s structural integrity hasn’t been compromised. This careful attention guarantees your finished piece meets professional standards.
Frequently Asked Questions
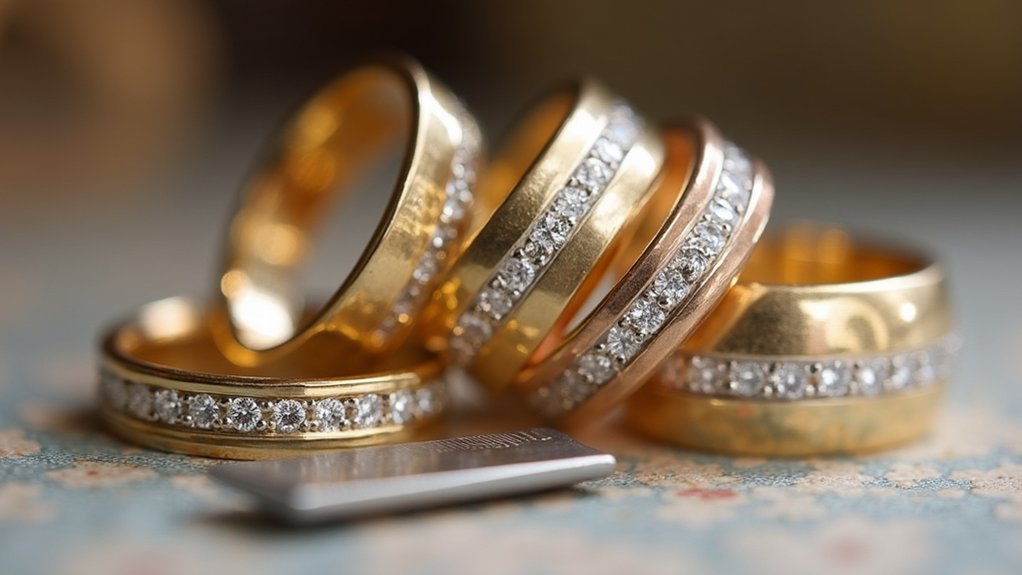
What Is the Difference Between Channel Setting and Pave Setting?
You’ll find channel settings place stones in metal grooves side-by-side, creating streamlined rows, while pave settings use tiny metal beads to secure smaller stones closely together, producing a textured, sparkly surface.
What Do You Need to Set Diamonds?
You’ll need a 5mm wide brass band with heavy sidewalls, a Graver Max tool for precise work, 3mm stones like CZ or diamonds, and hammering techniques to secure everything properly.
What Is Channel Diamond Setting?
You’ll create a sleek look by setting diamonds into a metal channel where they sit flush with the band. This technique secures multiple stones continuously, requiring precision fitting and careful hammering for stability.
How Secure Are Channel Set Diamonds?
Channel set diamonds are very secure when you’re wearing them. The metal walls hold stones tightly in place, preventing movement or loss. Proper hammering techniques and heavy sidewalls guarantee they’ll stay secure during daily activities.
In Summary
You’ve now mastered the essential techniques for creating professional-quality channel set diamond jewelry. With your properly selected materials, precise measurements, and careful hammering technique, you’ll achieve secure stone settings that’ll last for years. Remember to take your time during each step, especially when making final adjustments and polishing. Your attention to detail throughout this process will result in stunning, durable pieces you’ll be proud to wear or gift.


Leave a Reply