
Chasing and repoussé, ancient metalworking techniques dating back to 3000 B.C., transform flat metal into dimensional jewelry through strategic hammering. You’ll need specialized punches, a quality hammer, and a pitch bowl or cushion for support. Start with softer metals like copper before advancing to silver or gold. Practice consistent hammer strikes while maintaining a relaxed grip to develop precision. Master both shallow and deep techniques to create visual depth that will elevate your jewelry to professional standards.
The History and Evolution of Chasing and Repoussé
While many contemporary jewelry techniques have emerged in recent decades, chasing and repoussé stand among the oldest metalworking methods known to humanity, dating back to approximately 3000 B.C.
You’ll find evidence of these techniques in artifacts from ancient Egyptian and Mesopotamian civilizations, where artisans used them to create elaborate decorative elements.
The term “repoussé” derives from French, meaning “to push up,” describing how craftspeople shape metal from the back to create raised designs.
These techniques flourished during the Renaissance, when metalworkers integrated them to produce intricate pieces with remarkable depth and texture.
Throughout history, you’ll see chasing and repoussé techniques applied to armor, religious objects, and jewelry.
As tools and materials advanced, these ancient methods evolved, allowing for greater detail and complexity in modern metalwork.
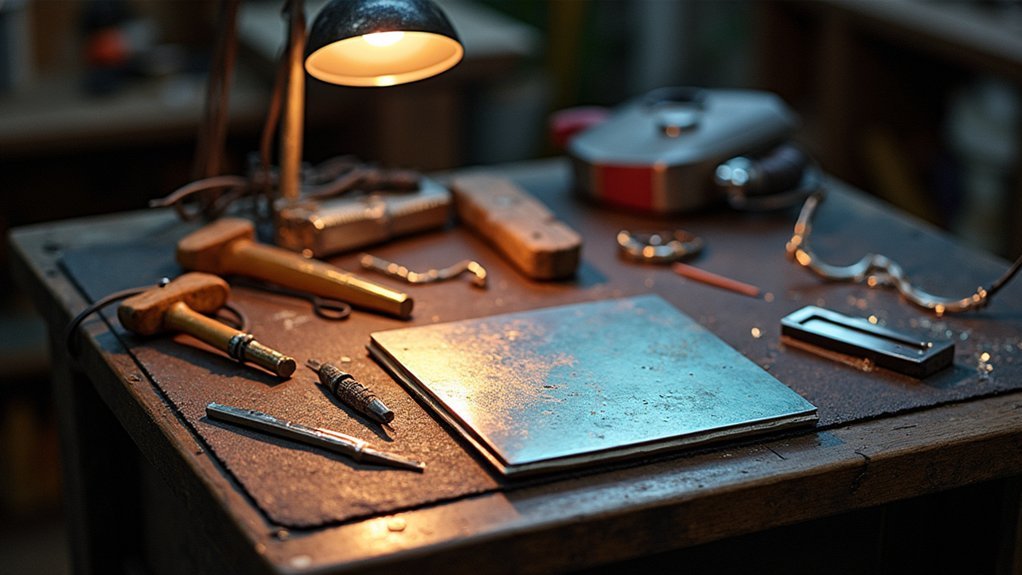
Essential Tools for the Metal Artist
Mastery of chasing and repoussé begins with the right toolkit. You’ll need various chasing punches—liners for creating defined lines, undercutting tools for adding depth, and matting punches for texturing surfaces.
A quality chasing hammer with its larger face and ergonomic curved handle will reduce wrist fatigue while providing precision with each strike.
Invest in a proper chasing hammer—its design minimizes strain while maximizing control through hours of delicate metalwork.
A pitch bowl or sand-filled leather cushion is essential for securing your metal piece during work. This support allows you to focus on your design rather than keeping the metal in place.
Don’t overlook tool maintenance—sand away sharp edges and keep your chasing tools clean and oiled for peak performance.
Consider customizing your punches by repurposing old tools or forging new ones to create signature effects uniquely yours.
Setting Up Your Workspace Safely
Because safety must precede artistry, creating a proper workspace for chasing and repoussé demands thoughtful preparation.
Start with a sturdy workbench that can withstand the repetitive hammering essential to these techniques while providing stability for your projects.
Ensure your workspace is well-ventilated, particularly when working with pitch, as it releases potentially harmful vapors when heated.
Always keep safety goggles within reach to shield your eyes from flying metal fragments and hot pitch splashes during hammering sessions.
Don a durable apron to protect yourself from sharp tools and hot materials.
Organize your tools systematically around your workspace, placing frequently used items closest to avoid unnecessary reaching and potential accidents.
This thoughtful arrangement not only enhances safety but also improves your efficiency when executing intricate designs.
Understanding Metal Properties and Selection
With your workspace safely arranged, your attention now shifts to the materials at the heart of your craft. Selecting the right metal greatly impacts your chasing and repoussé success. Non-ferrous metals like copper, brass, bronze, silver, and gold are ideal choices due to their malleability and ability to hold detailed impressions when your chasing hammer makes contact.
Consider thickness carefully—thinner gauges allow for intricate designs, while thicker options provide structural integrity for larger pieces. High karat gold and fine silver offer superior workability compared to harder metals.
For distinctive visual effects, specialty metals like Mokume Gane and Shakudo are worth exploring.
These techniques are often used most effectively when you understand how your chosen metal responds to work hardening and temperature changes—knowledge that will help you avoid common pitfalls during the shaping process.
Pitch Preparation and Working Environment
Proper pitch preparation requires heating it to a workable consistency, then pouring it into a bowl or using a leather cushion to hold your metal pieces securely during the chasing and repoussé process.
You’ll need to establish a well-ventilated workspace with safety gear including goggles and an apron to protect yourself from hot pitch and potential splashes.
Maintaining ideal temperature control throughout your work session guarantees the pitch remains pliable enough for design manipulation while providing adequate support for your metalwork.
Pitch Formulas and Consistency
The success of chasing and repoussé work hinges on three critical aspects of pitch preparation: proper consistency, temperature control, and workspace setup.
When preparing your pitch, you’ll need to heat it until pliable but not overheated. Maintaining consistent temperature guarantees your metal stays anchored while you work with repoussé tools. You’ll know your pitch is ready when it’s soft enough to hold the metal but firm enough to resist deep tool impressions.
| Pitch Type | Working Temperature | Best Applications |
|---|---|---|
| Hard Pitch | 160-180°F | Fine detail work |
| Medium Pitch | 140-160°F | General chasing |
| Soft Pitch | 120-140°F | Large repoussé forms |
Remember to work in a well-ventilated area to avoid inhaling harmful fumes. You’ll need to rewarm your pitch occasionally as you progress to maintain ideal consistency.
Workspace Safety Essentials
Five critical safety protocols must be established before you begin working with chasing and repoussé techniques.
First, verify your workspace is well-ventilated to prevent inhaling toxic fumes released when heating pitch.
Second, always wear safety goggles and an apron to shield yourself from hot pitch splashes and metal debris during hammering.
Third, properly prepare your pitch by heating it to the correct temperature and hardness—this directly affects how securely it holds your metal while working.
Fourth, use a pitch pot or leather sand cushion to provide stable support for your workpiece.
Finally, maintain a clean workspace and regularly inspect your tools for damage or wear.
These workspace safety essentials aren’t just precautions—they’re fundamental requirements for effective and injury-free metalworking practice.
Temperature Control Techniques
Successful chasing and repoussé work depends critically on masterful temperature control throughout your process. When preparing your pitch, you’ll need to heat it to a specific temperature where it becomes malleable enough to secure the metal while still allowing effective hammering.
The pitch’s consistency must be perfect—soft enough for punches to sink in yet firm enough to support your workpiece.
During your work, monitor and maintain consistent temperature, as fluctuations directly affect metal malleability and your results. You’ll want to periodically check your pitch’s temperature, reheating when necessary if it hardens or cools.
Always work in a well-ventilated environment to prevent inhaling potentially harmful fumes from the heated pitch. This balance of proper pitch preparation and workspace conditions creates the ideal foundation for detailed chasing and repoussé techniques.
Basic Punches and Their Applications
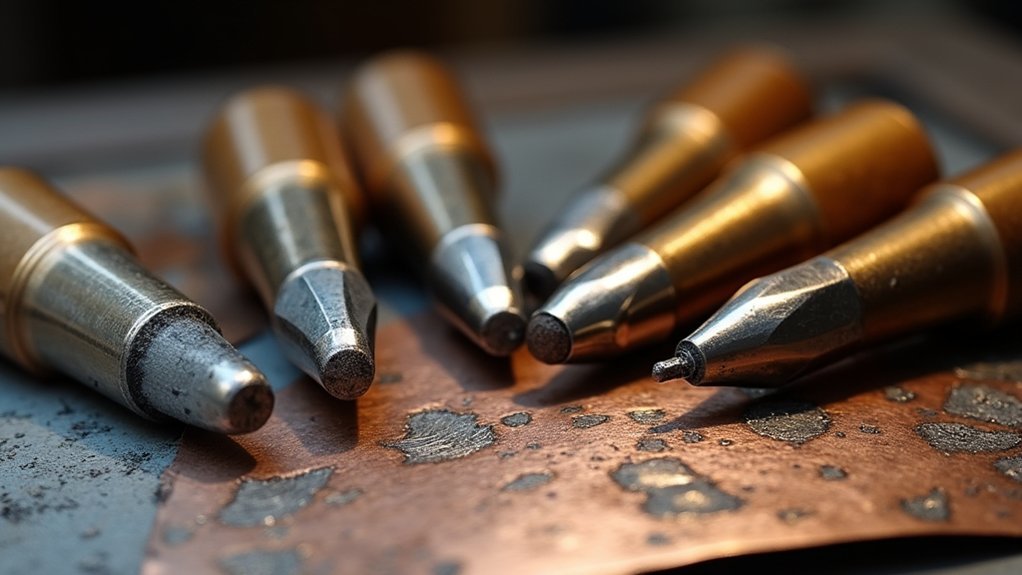
In chasing and repoussé work, you’ll need a variety of punches, including liners for crisp outlines, modeling punches for shaping metal, and matting punches for adding texture.
Your toolkit should start with 15-20 essential punches, gradually expanding to around 100 as you develop your skills and tackle more complex designs.
Begin practicing with basic control techniques on scrap metal before working on your actual piece, focusing on consistent pressure and proper tool positioning.
Types of Basic Punches
Mastering the art of chasing and repoussé requires familiarity with a range of specialized tools. When building your punch collection, you’ll need to understand the distinct functions of various types of basic punches.
Liner punches create crisp, precise outlines essential for defining shapes and drawing clean lines in your metalwork. For adding depth without piercing through your piece, undercutting tools manipulate the low areas of your design, creating dimensional effects.
Running punches offer wider, rounded lines compared to liners, making them perfect for broader pattern work. Meanwhile, matting tools add textural elements and non-reflective surfaces that can cleverly disguise tool marks.
For ideal results, you’ll want to acquire punches in various shapes and sizes, allowing you to customize your approach based on each project’s specific requirements.
Selecting Proper Tools
A craftsperson’s success with chasing and repoussé hinges on selecting the right punches for each specific task.
When working with metal sheet, you’ll need to choose from several essential categories. Liner punches create defined outlines and crisp details, while modeling punches help shape the metal by raising or depressing specific areas.
Setting punches are vital tools used to define changes between relief and background surfaces. For smooth finishing, planishing punches eliminate unwanted texture, creating polished areas. When you need textured surfaces, matting punches camouflage tool marks and create non-reflective areas.
Most artisans maintain a collection of about 100 chasing punches in various shapes and sizes. This diversity allows you to achieve precise effects across different metalworking projects, from delicate jewelry to larger decorative pieces.
Practicing Control Techniques
Developing precision with basic punches requires consistent practice and deliberate technique before tackling complex designs. Hold your chasing hammer with a light grip, focusing on controlled, smooth strikes that develop consistency and accuracy.
| Punch Type | Application | Technique |
|---|---|---|
| Liner | Creates crisp outlines | Maintain correct angle and pressure |
| Modeling | Forms volume and dimension | Focus on pushing the metal gradually |
| Planishing | Smooths surfaces | Eliminate tool marks for polish |
| Setting | Defines changes | Enhances detail between levels |
| Texture | Adds decorative patterns | Varies pressure for depth control |
When using modeling punches, concentrate on gradually pushing the metal into your desired shape. Follow with planishing punches to smooth surfaces and remove unwanted marks. Remember that precision comes from practice—your control will improve as you develop muscle memory through repeated, mindful application.
Hammer Techniques for Maximum Control

To achieve masterful results in chasing and repousse, your hammer techniques must balance precision with comfort. Select a chasing hammer with a curved handle to enhance your grip and reduce wrist fatigue while working.
Maintain a relaxed posture and light grip on the hammer to guarantee better control over your punches and minimize strain during detailed work.
When striking your punches, draw them toward yourself while hammering—this promotes greater accuracy and control over your design.
You’ll need to adjust your hammer weight based on design intricacy; lighter hammers excel for fine lines while heavier ones suit broader strokes.
Remember to regularly anneal your metal throughout the process to maintain malleability, making it more responsive to your hammer techniques and allowing for more controlled manipulation.
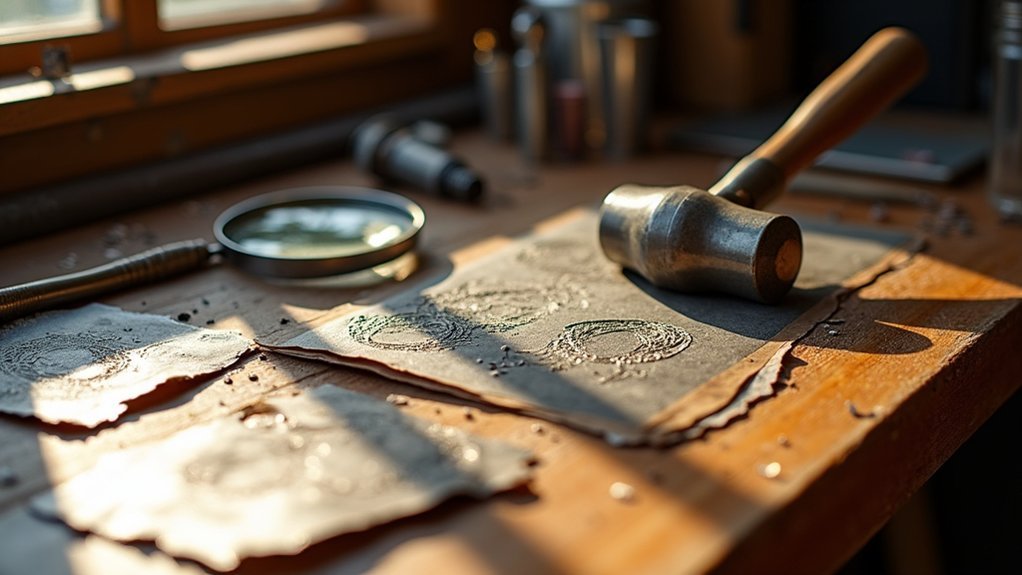
Creating Your First Repoussé Design
Five essential steps structure your first repoussé journey, beginning with proper preparation of your metal sheet. Select copper or silver for your initial work and sketch your design clearly with a pencil.
Next, heat pitch to the right consistency and pour it into a bowl to hold your sheet securely.
With your metal stabilized, use a blunt chisel punch and chasing hammer to outline your design from the front.
Then flip the piece over and begin the true repoussé work—hammering from the back to create raised areas. Remember to anneal periodically to maintain the metal’s workability.
Finally, clean your piece thoroughly, quench it in cold water, and refine the edges with appropriate tools for a professional finish. This balanced process guarantees detail and dimension.
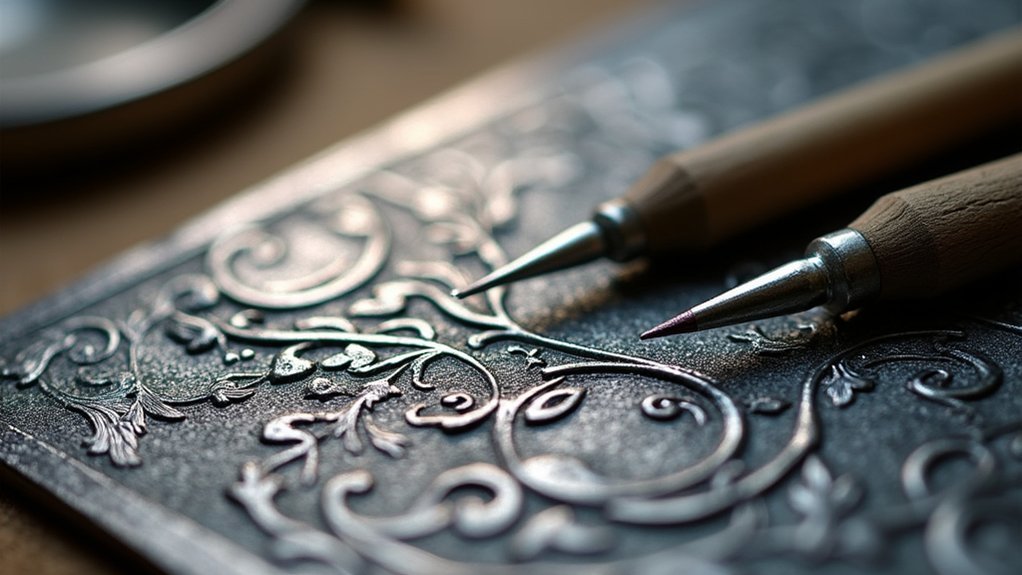
Mastering Chasing Details and Textures
Chasing transforms your metalwork from simple to spectacular through the strategic application of texture and fine details. To create intricate designs, you’ll need a variety of punches—liner punches for crisp outlines and matting punches for textured backgrounds. These essential tools can be purchased as a set for beginners.
Control your hammer blows by using a chasing hammer with a larger face, which provides better precision when working on delicate elements. Experiment with different angles and pressures to achieve unique textures and depths.
Remember to anneal your metal regularly to maintain malleability and prevent cracking as you work deeper impressions.
Keep your Chasing and Repoussé tools clean and properly oiled for smoother operation—this simple maintenance step markedly improves the crispness of your final textures.
Alternative Methods: Air Chasing Without Pitch
Although traditional chasing typically requires pitch, air chasing offers a cleaner, more accessible alternative for metalworkers seeking dimensional designs. You’ll find this technique particularly appealing if you’re just starting your metalworking journey. Using tools like a vise for support and a lightweight chasing hammer, you can create beautiful dimensional pieces without the mess.
Janice Berkebile’s tutorial demonstrates a beginner-friendly approach to creating a metal leaf through simple hammering techniques that develop your skill in metal manipulation.
| Air Chasing Benefits | Required Tools | Skill Development |
|---|---|---|
| No messy pitch | Vise | Hammer control |
| More accessible | Chasing hammer | Material response |
| Cleaner workspace | Metal sheet | Texture creation |
| Faster setup | Bench block | Dimensional work |
| Lower initial cost | Design template | Pattern techniques |
Annealing and Metal Preparation Processes
While air chasing offers a cleaner alternative, any serious metalwork requires proper preparation of your materials.
Annealing is a critical process that restores malleability to your metal after it becomes work-hardened from hammering.
To properly anneal, heat your metal to the appropriate temperature—copper to around 800°F and silver to approximately 1,100°F. You’ll know you’ve reached the right temperature when the metal changes color. This softening process relieves internal stresses, preventing cracks during further manipulation.
Remember to anneal regularly throughout your chasing and repoussé work, especially after significant deformation.
Once heated, quench the metal in cold water to cool it quickly, but make certain the surface is free of flux or contaminants to avoid unwanted reactions.
Proper annealing will dramatically improve your ability to create detailed, expressive metalwork.
Advanced Design Strategies and Patterns
Mastery of repoussé and chasing emerges when you’re ready to move beyond basic forms into more sophisticated design territory.
Advanced designs often require a diverse arsenal of punches—liner types for crisp outlines and matting varieties for textural richness.
You’ll achieve remarkable visual depth by combining shallow and deep repoussé techniques, creating dynamic light and shadow interplay.
Don’t underestimate the power of negative space; it’s not just absence but an active design element that elevates your work’s aesthetic impact.
Experiment with layering multiple textures through different punches to create visually engaging surfaces from all angles.
Try varying your hammer weights and striking techniques—this exploration often leads to unique patterns that express your personal artistic voice while pushing the boundaries of traditional metalwork.
Finishing Techniques for Professional Results
To achieve professional results after completing your chasing and repoussé work, you’ll need to focus on both surface treatments and detail refinement.
You can create dramatic visual effects by applying patinas that highlight the dimensional aspects of your design, using chemicals like liver of sulfur or ammonia fumes to produce a range of colors from deep blacks to blues and browns.
For a truly refined finish, carefully polish raised elements while leaving recessed areas with subtle texture, creating a pleasing contrast that draws attention to the intricate details of your metalwork.
Surface Patinas and Textures
The finishing touches of patinas and textures transform chased and repoussé work from merely impressive to truly breathtaking.
You’ll find that chemical solutions or heat applications create rich surface patinas that add depth and character to your metalwork, enhancing the visual drama of your designs.
Experiment with texturing techniques like matting punches to create non-reflective areas that camouflage tool marks and provide contrast.
Your choice of metal greatly impacts the patina possibilities—copper develops green tones while silver darkens beautifully with oxidation.
Don’t hesitate to try various patina applications using household items like vinegar or ammonia for effects ranging from subtle to bold.
After applying patinas, refine your piece with finishing techniques such as selective polishing or burnishing to highlight raised areas, creating a professional, cohesive appearance.
Polishing for Refined Detail
With your patina work complete, polishing becomes your pathway to revealing the full potential of your chased and repoussé creation.
Before applying any polishing techniques, thoroughly clean the piece to remove residues that could scratch your work during finishing.
Select appropriate compounds for your metal:
- Start with tripoli for initial smoothing and surface preparation
- Progress to rouge compounds for achieving high-gloss results
- Finish with specialized metal-specific formulations to enhance luster
Use flexible polishing wheels and felt bobbins to access intricate areas without compromising your sharp edges.
Throughout the process, regularly inspect your work to confirm details remain crisp and defined.
Adjust your pressure and technique to avoid over-polishing, which can diminish the dimensional qualities you’ve worked so hard to create.
Frequently Asked Questions
What Are the Techniques of Chasing and Repoussé?
Chasing and repoussé are metalworking techniques where you’ll hammer designs from different sides. You’ll push metal from the front for chasing, and from the back for repoussé, creating beautiful three-dimensional metal artwork.
What Is the Chasing Technique in Jewellery?
In jewelry, chasing is a technique where you create designs by hammering special punches into metal’s front surface. You’ll indent the metal without removing material, creating detailed patterns and textures that enhance your piece’s visual appeal.
What Is the Repoussé Technique of Jewelry?
Repoussé is a technique where you’ll hammer metal from the back to create raised designs on the front. You’re fundamentally pushing the metal forward, working with malleable materials like copper or silver to form three-dimensional effects.
Which Workmanship Technique Are the Repoussé and Chasing Associated With?
Repoussé and chasing are associated with metalworking craftsmanship. You’ll find these techniques create dimensional relief designs by manipulating metal—pushing from behind for repoussé and detailing from the front for chasing.
In Summary
You’ve now mastered the foundations of chasing and repoussé, ancient techniques that bring dimension to your metalwork. With the right tools, proper workspace setup, and practice with various metals, you’ll continue to develop your unique artistic voice. Remember to anneal regularly, experiment with designs, and take time with finishing touches. Your dedication to these traditional methods will elevate your jewelry to true artistic expression.


Leave a Reply