You’ll achieve perfect counter-enamel application by thoroughly cleaning your metal surface first, then applying uniform coverage using either liquid or powder techniques. For metals 1mm or thinner, counter-enamel prevents warping and cracking during firing by distributing thermal stress evenly. Use spiral sifting patterns for powder or smooth brushing for liquid application, maintaining consistent thickness that matches your front layer. Fire at proper temperatures between 1400°F-1650°F while monitoring carefully. Mastering these fundamentals opens doors to advanced professional techniques.
Understanding Counter-Enamel Purpose and Benefits
When you’re working with thin metal pieces in enameling, counter enamel becomes vital for preventing warping and cracking during firing. This protective coating goes on your piece’s back side, creating significant balance during the heating process.
You’ll need counter enamel when working with metal that’s 1mm thick or thinner. Thicker pieces over 1.3mm typically won’t require this extra step. The counter enamel distributes thermal stress evenly across your metal, maintaining your piece’s structural integrity throughout firing.
Without proper counter enamel application, you risk having your front enamel coat ping off, ruining hours of careful work. The technique guarantees your finished piece remains durable and visually appealing, making it an indispensable skill for successful enameling projects.
Selecting the Right Metal Thickness for Counter-Enameling
Before you begin any enameling project, you’ll need to measure your metal’s thickness to determine if counter-enameling is necessary.
Any metal measuring 1mm or lower requires a layer of counter enamel to prevent warping during firing. If you’re working with pieces between 1-1.3mm thick, you’ll need to take into account the size and shape—larger pieces typically need counter-enameling while smaller ones might not.
Metals thicker than 1.3mm generally don’t require counter-enameling since they resist warping naturally.
When cutting copper shapes, choose at least 1.2mm thickness for ideal durability and effective counter enamel application.
Thicker gauge silver offers more design versatility since it doesn’t necessitate counter-enameling, giving you greater flexibility in your application techniques and creative choices.
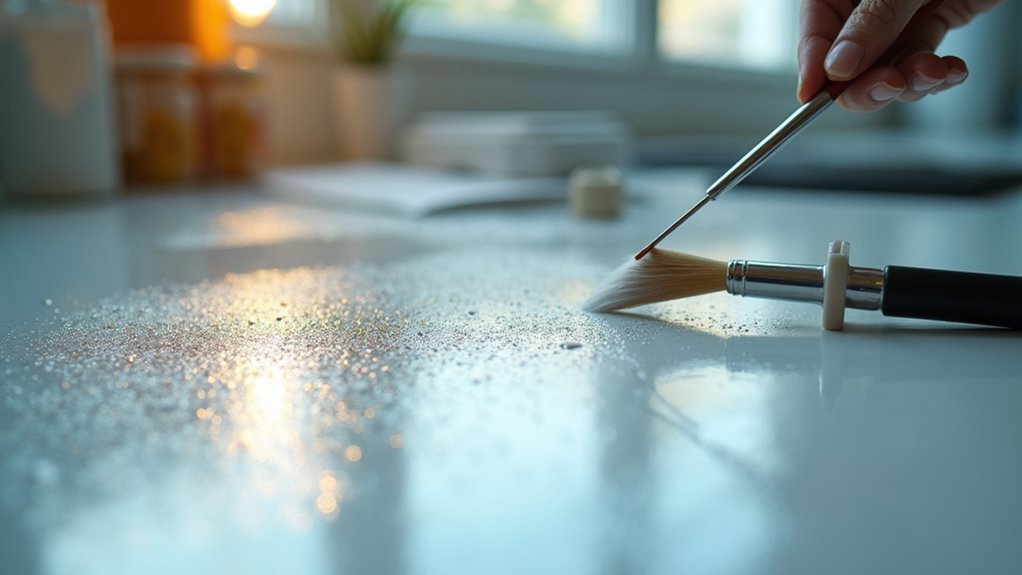
Preparing Metal Surfaces for Optimal Adhesion
Once you’ve selected the appropriate metal thickness, proper surface preparation becomes your next priority for successful counter-enameling.
Proper surface preparation is the foundation of successful counter-enameling and determines the quality of your final piece.
You’ll need to clean the metal thoroughly to guarantee ideal adhesion. For copper surfaces, use abrasive papers to remove oxides, then follow with pickling for enhanced cleanliness.
When working with fine silver and gold, utilize a brass or glass brush under running water to eliminate contaminants.
Never handle the enameling side of your metal, as oils and dirt from your fingers will impede adhesion. Clear any drilled holes of enamel to maintain structural integrity.
Counter-enamel both sides of your piece to distribute stress evenly, which reduces warping during firing and creates a professional, durable finish.
Choosing Between Liquid and Powder Counter-Enamel Options
When you’re selecting between liquid and powder counter-enamel, you’ll need to master different application techniques for each option.
Liquid counter-enamel requires smooth, even brushing or pouring methods to prevent pooling, while powder demands careful sifting techniques to achieve uniform coverage without clumps.
Your choice between these methods will determine which specific skills you’ll need to develop for consistent, professional results.
Liquid Application Methods
While both liquid and powder counter enamels serve the same fundamental purpose, liquid options offer distinct advantages that make them the preferred choice for many enameling projects.
You’ll find liquid enamel particularly beneficial for larger or flat pieces that tend to warp, as it provides smooth, even coverage without sifting requirements.
When applying liquid counter enamel, you’ll achieve better results by following these essential steps:
- Clean the surface thoroughly – Remove all debris and contaminants before application
- Apply with brush or pipette – This guarantees consistent thickness and reduces air bubbles
- Adjust firing technique – Use longer firing times and modified temperatures, especially with torch firing
This method creates a more reliable bond while eliminating common powder application issues.
Powder Sifting Techniques
Three fundamental factors determine whether you’ll achieve professional results with powder counter enamel: your sifting technique, coverage consistency, and surface preparation.
When sifting enamel powder onto your metal surface, you’ll want to maintain steady, controlled movements to prevent clumping and guarantee even distribution. Hold your sifter approximately six inches above the piece and move it in overlapping patterns for uniform coverage.
The dry powder method creates a naturally textured finish that’s perfect for rustic or organic designs. For pieces susceptible to warping, apply a thicker layer—around 1mm or more—to counteract firing stress.
Before you begin sifting, verify that all drill holes are completely clean of any debris or previous enamel residue to prevent air pockets during firing.
Proper Application Techniques for Even Coverage
You’ll need to master specific application techniques to achieve uniform counter-enamel coverage across your metal surface.
Start by properly preparing your metal piece and holding it upside down while sifting the enamel in a spiral pattern toward the center. This approach helps you control layer thickness and prevents buildup at the edges that can compromise your final result.
Sifting Spiral Patterns
Although achieving even counter enamel coverage might seem challenging, mastering the sifting spiral pattern technique secures professional results every time.
You’ll want to start at the outer edge of your metal piece and work inward using circular motions. This approach guarantees uniform distribution across the entire surface.
Hold your piece upside down while sifting to prevent enamel from falling into unwanted areas.
Here’s your essential checklist:
- Use similar colors – Choose counter enamel that complements your top design layer
- Maintain proper thickness – Aim for approximately 1mm to prevent warping and cracking
- Clear drill holes – Remove any enamel from holes to maintain piece integrity
The technique requires patience, but you’ll achieve consistent, professional-quality results that prevent firing issues.
Metal Surface Preparation
Perfect spiral sifting patterns won’t compensate for poor metal preparation, making surface readiness your foundation for successful counter enamel application.
You’ll need different cleaning methods depending on your metal type. For copper pieces, use abrasive papers to thoroughly remove oxides that prevent proper enamel adhesion.
Fine silver and gold require gentler treatment—scrub them with a brass or glass brush under running water to achieve the necessary clean surface.
Don’t skip this essential step in your metal surface preparation routine. Even microscopic residues will create weak spots where your counter enamel fails to bond properly.
The extra minutes spent on thorough cleaning will save you from disappointing results and potential piece failure during firing. Clean metal equals reliable enamel adhesion.
Layer Thickness Control
Achieving the right enamel thickness requires careful attention to your application technique. When applying counter enamel, you’ll want to maintain at least 1mm thickness to guarantee proper adhesion and prevent warping during firing.
Use a sifter to distribute the enamel evenly in a spiral pattern toward the center, creating consistent coverage across your piece.
For ideal layer thickness control, follow these essential techniques:
- Apply thin layers rather than overloading the metal surface
- Spread liquid enamel evenly to avoid pooling and thickness variations
- Work systematically from outer edges inward for uniform distribution
Remember that controlled application yields better results than rushing the process. Each layer should be even and properly distributed before firing at the recommended temperature to achieve proper fusion with your metal substrate.
Controlling Layer Thickness for Best Results
When you’re applying counter enamel, the thickness of your layer directly impacts both the structural integrity and firing success of your piece.
You’ll want to achieve at least 1mm thickness for flat or larger pieces to effectively prevent warping during firing. For pieces between 1-1.3mm thick, consider your piece’s size and shape when determining if counter enamelling is necessary for stability.
Use a sifter to apply counter enamel evenly, creating consistent coverage without excessive buildup.
Apply thin, even layers rather than thick ones, as heavy applications can cause cracks and complications during firing.
Monitor your firing process closely—your counter enamel should reach the sugar stage without exceeding full fuse to maintain proper texture and prevent over-firing issues.
Drying Methods Before Firing Counter-Enamel
Before firing your counter-enamel, you’ll need to remove all moisture from the metal surface to prevent burning and achieve ideal results.
You can effectively dry your piece by placing it under a lamp for gentle, controlled heating.
Alternatively, position the piece on a trivet above your kiln to take advantage of the kiln’s ambient heat for even drying.
Lamp Drying Technique
One of the most accessible drying methods you’ll encounter is the lamp drying technique, which uses focused light to gently remove moisture from your enameled metal piece before firing.
This method works particularly well for small pieces, allowing you to target specific areas without heating your entire workspace.
When using this lamp drying technique, follow these essential guidelines:
- Position the lamp at a safe distance to prevent overheating while effectively removing moisture.
- Maintain consistent light coverage across the entire surface for even drying.
- Check thoroughly for remaining moisture before firing to prevent bubbling or burning.
Always guarantee your light source remains steady throughout the process.
This targeted approach gives you excellent control over the drying stage, making it ideal for detailed counter-enamel work.
Trivet Above Kiln
Although lamp drying works well for smaller pieces, you’ll find the trivet above kiln method more effective for larger counter enamel projects that require thorough moisture removal.
Position your metal piece on a heat-resistant trivet directly above your kiln during warm-up cycles. This placement harnesses rising heat to create even temperature distribution across your work, promoting faster and more complete drying than traditional methods.
The trivet must withstand high temperatures without warping or degrading. This technique prevents moisture from becoming trapped beneath your counter enamel during firing, which would otherwise cause burning and surface defects.
You’ll notice notably better results when your piece receives this thorough pre-drying treatment, as it eliminates the primary cause of counter enamel failures.
Firing Temperature Guidelines for Different Metals
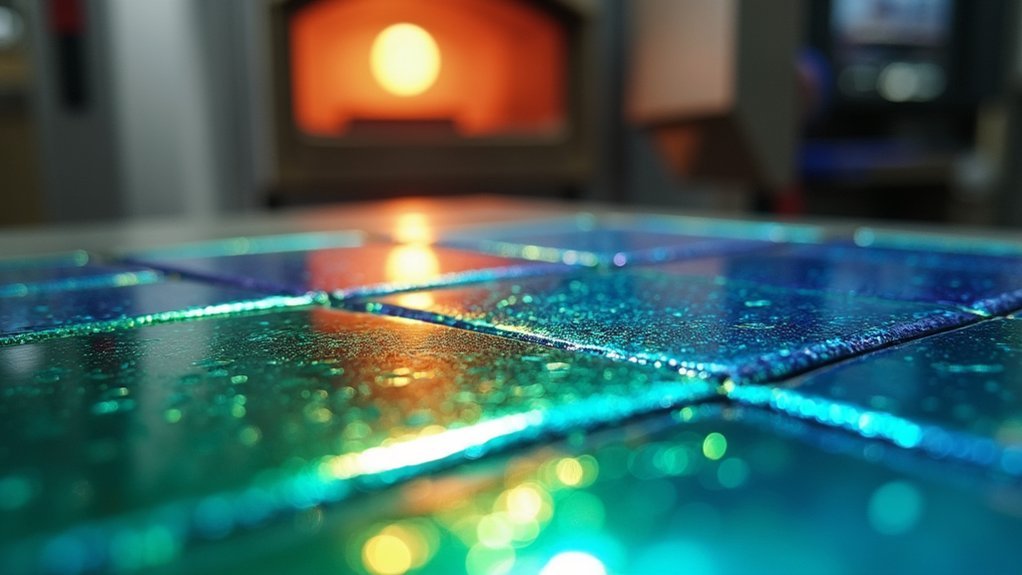
When you’re working with counter-enamel, each metal demands specific firing temperature requirements to achieve ideal results without compromising the integrity of your piece.
As metal and enamel expand at different rates during heating, precise temperature control becomes vital for preventing cracking or poor adhesion.
Here are the essential temperature guidelines for common metals:
- Copper: Fire between 1400°F to 1650°F depending on your enamel type and desired finish.
- Fine silver: Maintain around 1450°F for proper adhesion without metal damage.
- Gold: Use lower temperatures between 1300°F to 1500°F to prevent discoloration.
Monitor firing times closely, ranging from 30 seconds to two minutes based on enamel thickness.
Always calibrate your kiln temperature accurately before firing to guarantee consistent, professional results every time.
Timing Your Firing Process for Perfect Fusion
While temperature control sets the foundation for successful counter-enamel application, precise timing during the firing process determines whether you’ll achieve perfect fusion or end up with damaged pieces.
You’ll need to fire for 30 seconds to two minutes, depending on your enamel’s thickness and type. Before firing, verify you’ve dried all moisture from your piece to prevent bubbling and fusion problems.
Monitor your counter enamel continuously during firing. You’ll know you’ve reached proper fusion when the enamel hits the sugar stage around 1400°F, where it begins melting and adhering to the metal.
Watch for over-firing signs like pitting or crawling, which indicate excessive heat or duration. Both your counter enamel and top coat require adequate firing time for strong bonding and warping prevention.
Preventing Common Counter-Enamel Defects
Even with perfect timing and temperature control, counter-enamel defects can still occur if you don’t address the underlying causes.
The most common issues stem from improper preparation and application techniques that compromise your final results.
To prevent these counter enamel defects, focus on three critical areas:
- Surface preparation – Always pickle and thoroughly clean your metal to remove oxides and contaminants that prevent proper adhesion.
- Application consistency – Apply counter enamel evenly using liquid enamel when possible, and guarantee proper sifting to avoid thickness variations.
- Layer management – Use counter enamel on pieces 1mm thick or lower to prevent warping, maintaining uniform coverage across the entire backside.
These preventive measures will help you avoid pitting, bubbling, cracking, and uneven surfaces that plague poorly executed counter-enamel work.
Managing Stress Distribution Across Metal Pieces
Although counter enamel prevents defects, its primary function involves managing the complex stress forces that develop across your metal pieces during firing.
When you apply enamel to only one side, thermal expansion creates uneven tension that warps your work. Counter enamel on the back distributes these forces equally across both surfaces.
Counter enamel on the back surface prevents warping by balancing thermal forces that single-sided application creates during firing.
You’ll need counter enamel on pieces 1mm or thinner, while thicker metals (1.3mm+) resist warping naturally.
Apply your counter enamel layer to match your front coat’s thickness—this balance prevents stress concentration that causes enamel to ping off during cooling.
Proper stress distribution depends on firing both layers simultaneously.
This technique creates uniform thermal movement, ensuring your finished piece remains flat and crack-free throughout the heating and cooling cycles.
Tools and Equipment for Professional Application
Since professional counter-enamel application demands precision and consistency, you’ll need specific tools that guarantee even coverage and safe handling throughout the process.
Your essential toolkit should include a sifter for distributing dry enamel evenly, fine-pointed paintbrushes for detailed work, and tweezers for safely manipulating small pieces.
When the enamel layers are called to be fired, you’ll need either a kiln or torch with proper support equipment.
Core firing equipment includes:
- Tripod with stainless steel mesh – provides stable support during heating
- Heavy-duty firing screens – protects kiln elements while ensuring airflow
- Alundum stones – essential for cleaning metal surfaces before and after firing
Don’t forget safety essentials: protective gloves, safety glasses, and dust masks protect you from harmful particles and fumes during application.
Quality Control and Inspection Methods
When you’ve completed the firing process, thorough inspection becomes your critical checkpoint for guaranteeing professional results.
Start by examining your counter enamel layer for uniform thickness throughout the piece. You’ll want to identify any bubbles or imperfections that could cause adhesion problems later.
Check the back surface carefully for firescale residue, which you must remove to prepare for future applications.
Pay special attention to edges and corners, as these areas commonly develop defects that affect the overall appearance.
Use a magnifying glass for detailed quality control inspection. This closer examination will reveal inconsistencies or flaws requiring touch-ups.
Don’t skip this step – proper inspection guarantees your counter enamel meets professional standards and prevents costly mistakes in subsequent layers.
Troubleshooting Warping and Cracking Issues
Even with careful application techniques, warping and cracking can frustrate your enameling projects if you don’t address the underlying causes.
Counter enamel prevents these issues by balancing thermal stress, but proper application is vital for success.
Follow these essential guidelines to prevent warping:
- Apply counter enamel to all pieces 1mm or thinner – these require backing support regardless of size.
- Use counter enamel on larger flat pieces up to 1.3mm thick – extra surface area increases warping risk.
- Match your counter enamel thickness to the top layer – uneven applications create stress imbalances.
Remove excess enamel from drill holes and edges before firing, as trapped material causes cracks during cooling.
Allow gradual cooling to room temperature after firing to minimize thermal shock that damages both layers.
Frequently Asked Questions
How Do You Counter Enamel?
You’ll apply counter enamel to your piece’s reverse side by holding it upside down and sifting enamel in spiral patterns toward the center. Fire immediately to fuse the glass properly.
How to Apply Enamel Coating?
You’ll clean your metal surface thoroughly, then sift enamel powder evenly across it in thin layers. Fire the piece in a kiln until it reaches proper fusion, then cool gradually.
Do You Always Have to Counter Enamel?
You don’t always need counter enamel. If your piece is 1.3mm thick or more, you can skip it. However, thinner pieces under 1mm always require counter enameling to prevent warping.
What Temperature Is Enamel Firing?
You’ll fire enamel between 1400°F and 1650°F, depending on your enamel type. Higher temperatures create smoother finishes, while you’ll monitor the firing through sugar, orange peel, full fuse, and over-fired stages.
In Summary
You’ll achieve professional counter-enamel results by mastering these fundamental techniques. Remember that proper metal preparation and thickness selection set the foundation for success. Don’t rush the application process—even coverage and stress management prevent future failures. Invest in quality tools and establish consistent inspection routines. When you encounter warping or cracking, analyze your technique rather than blame materials. Practice these methods consistently, and you’ll develop the expertise needed for flawless counter-enameling every time.
Leave a Reply