
You’ll master five essential dapping techniques to transform flat metal into textured jewelry masterpieces. Create hammered patterns using wood dapping tools for gentle, intricate textures without surface damage. Form smooth domes through progressive punch sizing, starting large and working smaller. Shape irregular forms with leather bag dapping for creative freedom beyond circles. Develop contoured surfaces using back-side hammering to avoid marring the front face. Build dimensional relief by combining positive and negative punch forms for striking contrast and depth in your finished pieces.
Creating Hammered Texture Patterns With Wood Dapping Tools

Wood dapping tools offer metalworkers a gentler alternative to traditional steel hammers when creating textured surfaces on jewelry pieces.
You’ll find that wood’s inherent softness provides a forgiving surface that creates intricate patterns without damaging your metal. By varying the size and shape of your wood punches, you can achieve diverse textural effects ranging from subtle impressions to pronounced hammer marks.
To create uniform texture, regularly rotate your metal piece while applying pressure with the wood tool. This technique allows the metal to form around the tool’s shape naturally.
Consistent rotation while applying pressure ensures even texture distribution as the metal naturally conforms to your wood tool’s contours.
Wood dapping tools also preserve your metal’s surface finish, which benefits designs emphasizing texture without sacrificing shine. The unique hammered texture these tools impart enhances your jewelry’s overall aesthetic appeal.
Achieving Smooth Dome Shapes Using Progressive Punch Sizing
Progressive punch sizing transforms flat metal discs into perfectly smooth domes through a systematic approach that prevents tearing and distortion.
You’ll begin by selecting your dapping block’s largest hole and starting with a smaller punch than the hole size. This creates initial shaping without stress concentration.
As you hammer, regularly check your punch size to avoid pinching the metal. You’ll notice the metal evolving from a cone shape to a dome.
Use a dead blow hammer to minimize vibration, giving you controlled manipulation throughout the process.
Your technique will take a lot longer than rushing with oversized punches, but progressively using smaller punches refines the dome smoothly.
Maintain consistent hammering around the punch’s perimeter, ensuring even pressure distribution for uniform results and minimizing metal damage.
Forming Irregular Shapes With Leather Bag Dapping Methods
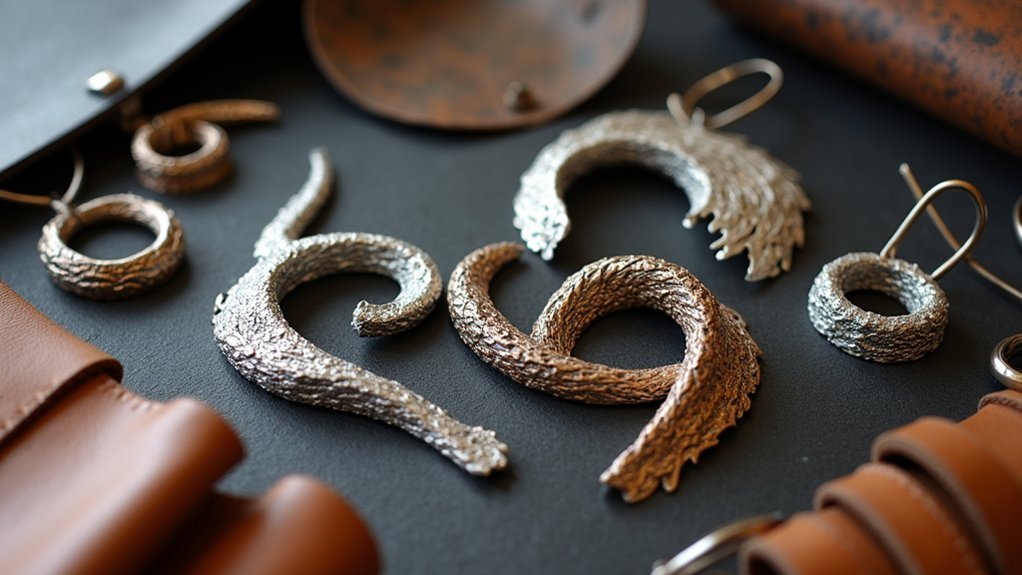
Leather bag dapping releases creative freedom beyond traditional circular forms, letting you craft hearts, crescents, and other custom shapes that rigid dapping blocks can’t accommodate.
Fill your leather bag with sand or shot to create a flexible, cushioned surface that responds to complex contours.
Sand or shot filling transforms your leather bag into a responsive, cushioned dapping surface that adapts to intricate metalwork contours.
Start with flat metal inside the bag, then hammer your dapping punch from outside to achieve desired curves. The leather’s flexibility enables intricate non-circular designs while distributing pressure evenly.
- Vary punch sizes and hammer from different angles for refined shaping
- Use progressive pressure to avoid pinching or cracking the metal
- Incorporate wood tools during the process to add surface texture
- Thank you so much for experimenting with different fill materials for ideal results
This technique transforms ordinary metal into uniquely contoured jewelry pieces.
Developing Contoured Surfaces Through Back-Side Hammering
Back-side hammering transforms flat metal into gracefully contoured surfaces by striking from underneath, allowing you to develop smooth domes without marring the front face.
You’ll begin with a larger hole in your dap block, then progressively switch to smaller punches as the metal takes shape. This guarantees a smooth shift from cone to dome without excessive distortion.
Use a dead blow hammer to minimize vibrations and maintain control throughout the shaping process.
You’ll need to regularly check your metal’s position and punch size to avoid pinching and maintain even contours.
The hammer marks you create aren’t flaws—they’re features that add unique texture and visual interest to your finished piece.
I’m going to emphasize that this technique offers exceptional control over surface development.
Building Dimensional Relief Using Positive and Negative Punch Forms
While positive punches push metal outward to create raised forms, negative punches work inward to develop recesses and indentations that’ll give your jewelry dimensional complexity.
You’ll achieve the most striking results by combining both techniques strategically within a single design.
Start with larger positive punches to establish your primary raised areas, then refine the shapes using progressively smaller negative punches. This approach prevents metal pinching while creating smooth shifts between relief levels.
Key techniques for dimensional relief:
- Begin forming with larger punches and progress to smaller sizes
- Check metal positioning frequently during the dapping process
- Alternate between positive and negative punches for enhanced contrast
- Focus on creating smooth shifts between raised and recessed areas
The interplay between raised and recessed surfaces adds visual depth that transforms flat metal into enchanting three-dimensional jewelry pieces.
Frequently Asked Questions
How to Dap Metal?
Start with your largest dap hole and smallest punch. You’ll hammer the metal using a dead blow hammer, gradually switching to smaller punches. Check your progress regularly and maintain even pressure for smooth dome formation.
What Is Dapping in Jewelry?
You’ll use dapping to transform flat metal sheets into three-dimensional curved forms like domes and spheres. You’ll need specialized dap punches and blocks, working with dead soft metal that won’t crack during shaping.
What Is Steel Dapping?
You’ll use steel dap punches and blocks instead of wooden tools to shape metal sheets into curved forms. Steel dapping’s more durable, works faster, and creates deeper, more precise shapes in your jewelry pieces.
How to Melt Metal at Home for Jewelry?
You’ll need a propane torch reaching 3,600°F, a graphite crucible, and safety gear. Work in a ventilated area, add flux to remove impurities, then carefully melt your silver or gold for casting.
In Summary
You’ve now mastered five essential dapping techniques that’ll transform your metalwork from flat to fantastic. Whether you’re creating subtle hammered textures or bold dimensional relief, these methods give you the control to shape metal exactly how you envision it. Start with basic dome forms and gradually work toward more complex contoured pieces. With practice, you’ll develop the touch needed to manipulate metal into stunning three-dimensional jewelry that captures light beautifully.


Leave a Reply