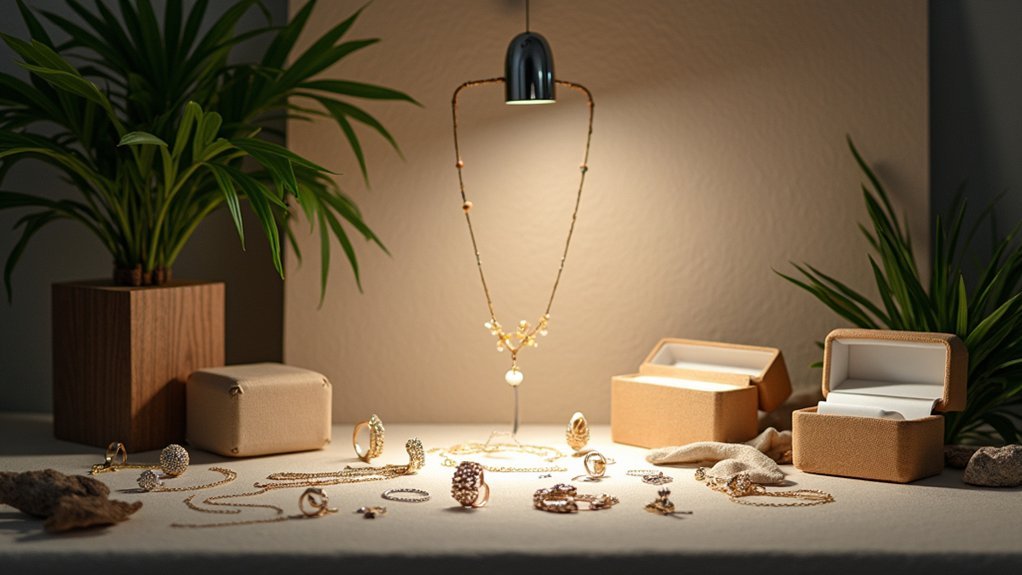
You can create stunning jewelry photos using these budget-friendly DIY setups: build a foam core light box with reflector cards, position your setup near natural window light, create white backdrop sweeps for seamless backgrounds, use cotton thread hanging systems for earrings, construct light cones for shiny metals, transform Rubbermaid containers into studio boxes, set up rotating shooting stations for multiple angles, and master focus stacking techniques. These methods deliver professional results without expensive equipment, and exploring each setup’s specific techniques will transform your jewelry photography skills.
The Foam Core Light Box Setup
When you’re starting with jewelry photography on a budget, the foam core light box setup offers an affordable yet professional solution that you can build in minutes.
Cut a 70cm x 25cm foam core board, removing 20cm sections from each end to create your box structure. Bend the sides to form corners and punch holes 2/3 up from the bottom for cotton thread to hang earrings securely.
Use silver cardboard as reflectors in your lighting setup to bounce light onto shiny pieces like silver earrings.
Attach colored cardboard backgrounds with clothes pegs for quick aesthetic changes. Mount your camera on a tripod to stabilize shots and guarantee sharp, consistent results throughout your jewelry photography sessions.
Natural Window Light Configuration
Natural light provides the most authentic and cost-effective illumination for jewelry photography, especially when you position your setup strategically near a large window.
Strategic window positioning offers jewelry photographers the most natural, budget-friendly lighting solution for capturing authentic, professional-quality images.
You’ll get the best results during late afternoon or morning when the light is soft and even, avoiding harsh midday shadows that can obscure details.
Place a white backdrop or cloth behind your jewelry to reflect natural light back onto the piece, creating brighter, more contrasted images.
Experiment with different angles relative to the window until you find the position that minimizes unwanted reflections while highlighting intricate details.
Don’t mix artificial lighting with natural light, as this creates color inconsistencies.
Use white reflectors to fill shadows and achieve professional-looking results without expensive equipment.
White Backdrop and Sweep Method
Building on your natural light setup, you’ll need a proper backdrop system that maximizes light reflection and creates professional-looking results. A white backdrop is essential for jewelry photography because it reflects light effectively, enhancing product illumination and providing well-lit, contrasted images.
Unlike black backdrops that absorb light and create unflattering reflections, white surfaces bounce light back onto your jewelry pieces.
Create an efficient sweep setup by clamping white paper to vertical wood strips. This forms a seamless shift from vertical to horizontal surfaces, eliminating distracting background lines.
You can build this DIY sweep setup using simple hardware tools and scrap materials, making it an affordable beginner solution. The sweep method gives you ideal lighting control, allowing easy adjustment of lighting angles without background interruptions.
Cotton Thread Hanging System
Three simple materials—foam core board, cotton thread, and clothes pegs—create an elegant hanging system that suspends jewelry without visible supports.
Cut your foam core into 20cm sections from each end, then bend the sides to form stable corners that’ll serve as your backdrop.
Start with a 20cm foam core panel and create angled side walls by bending at the edges for backdrop stability.
Drill holes approximately 2/3 up from the bottom on both sides to thread cotton string through. This positioning allows you to hang earrings securely while maintaining proper framing for your shots.
Secure the thread ends with clothes pegs to keep everything stable during photography. This setup minimizes reflections and distractions that often plague jewelry photography, giving you clean, professional results.
The entire system’s lightweight and portable, so you can quickly assemble it for any shooting session.
Reflector Card Positioning Technique
You’ll dramatically improve your jewelry photos by mastering reflector card positioning, which controls how light hits your pieces from every angle.
Start with your primary reflector at a 45-degree angle to your main light source—this creates ideal light diffusion while minimizing harsh shadows that can hide essential details.
Add a second reflector on the opposite side to eliminate remaining shadows and achieve balanced illumination that showcases your jewelry’s brilliance.
Optimal Reflector Angles
When positioning reflector cards for jewelry photography, the 45-degree angle serves as your foundational starting point for achieving balanced illumination. This angle effectively bounces light to fill shadows while maintaining natural-looking results.
| Reflector Distance | Light Intensity | Best For |
|---|---|---|
| Close (6-12 inches) | Strong fill light | High contrast scenes |
| Medium (12-18 inches) | Moderate fill | General jewelry shots |
| Far (18+ inches) | Soft, subtle fill | Delicate pieces |
You’ll want to experiment with multiple reflectors positioned at different angles around your jewelry. White reflectors work best since they won’t alter your piece’s color balance. Keep your background neutral and uncluttered so the enhanced lighting draws attention to your jewelry’s details without distractions.
Shadow Elimination Methods
Strategic placement of reflector cards directly opposite your main light source creates the most effective shadow elimination for jewelry photography.
You’ll want to position white or silver reflector cards to bounce soft, diffused light back onto your pieces, filling harsh shadows without altering colors. Experiment with different angles and distances until you achieve balanced illumination from all sides.
The size of your reflector considerably impacts light quality in your lighting setups. Larger cards produce softer, more even light distribution, while smaller reflectors create focused highlights.
Start with your reflector close to the jewelry, then gradually move it away while observing how shadows change. For creative effects, try colored reflector cards to add artistic hues to highlights and shadows, transforming ordinary shots into compelling images.
Light Direction Control
Building on effective shadow elimination techniques, proper reflector positioning gives you complete control over light direction and intensity in your jewelry shots.
Position your reflectors at a 45-degree angle to effectively bounce and diffuse light from your primary light source, minimizing harsh shadows while enhancing overall illumination.
Use silver cardboard reflectors to create bright highlights on shiny surfaces, especially for silver earrings.
Experiment with the distance between your reflector and jewelry to control reflected light intensity—closer placement creates stronger effects, while farther positioning produces softer illumination.
Adjust reflector height to target specific areas like gemstones or intricate details.
You’ll achieve better results by incorporating multiple reflectors in different positions, filling shadows and creating balanced lighting that enhances your jewelry’s depth and dimension.
Tripod and Camera Stabilization Setup
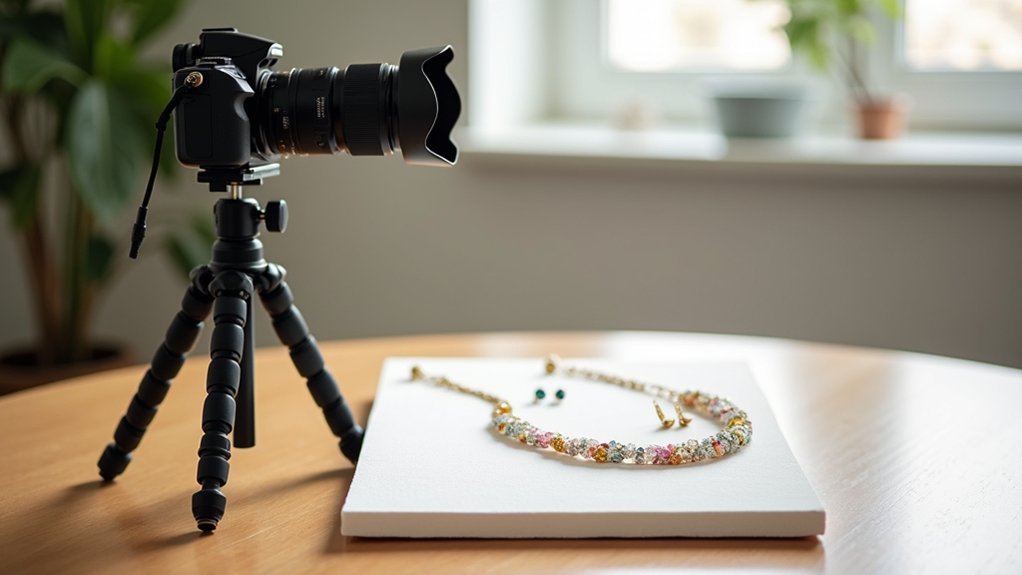
One fundamental element separates amateur jewelry photos from professional-looking shots: camera stability. You’ll need a tripod to eliminate camera shake and achieve sharp, detailed images. When shooting jewelry close-ups with slow shutter speeds or small apertures, even the slightest movement can blur your results.
Choose a fixed tripod that maintains consistent camera positioning throughout your session. This stability proves essential for focus stacking and maintaining consistent lighting across multiple shots. You don’t need expensive equipment—affordable tripods provide sufficient stability for excellent product photography.
Maximize your setup’s effectiveness by using self-timer mode or a remote shutter release to prevent vibrations when capturing images. This combination allows easier composition adjustments and lighting tweaks, making your tripod an indispensable tool for professional-quality jewelry photography.
Light Cone for Shiny Metal Photography
Shiny metal jewelry presents unique challenges that’ll frustrate even experienced photographers. Harsh direct light creates unwanted reflections that obscure intricate details you’re trying to capture. A DIY light cone solves this problem by diffusing light evenly across your jewelry pieces.
Create your cone using white cardboard or fabric shaped into a cone form. Position it close to your jewelry without blocking the light source itself. This setup provides soft, even illumination that reduces those problematic reflections.
Experiment with different angles and distances to find what works best for each piece. The cone’s position directly impacts how textures and details appear in your shots.
Combine this technique with your tripod and camera’s macro mode for sharp, professional-looking results that showcase every detail.
Rubbermaid Container Studio Box
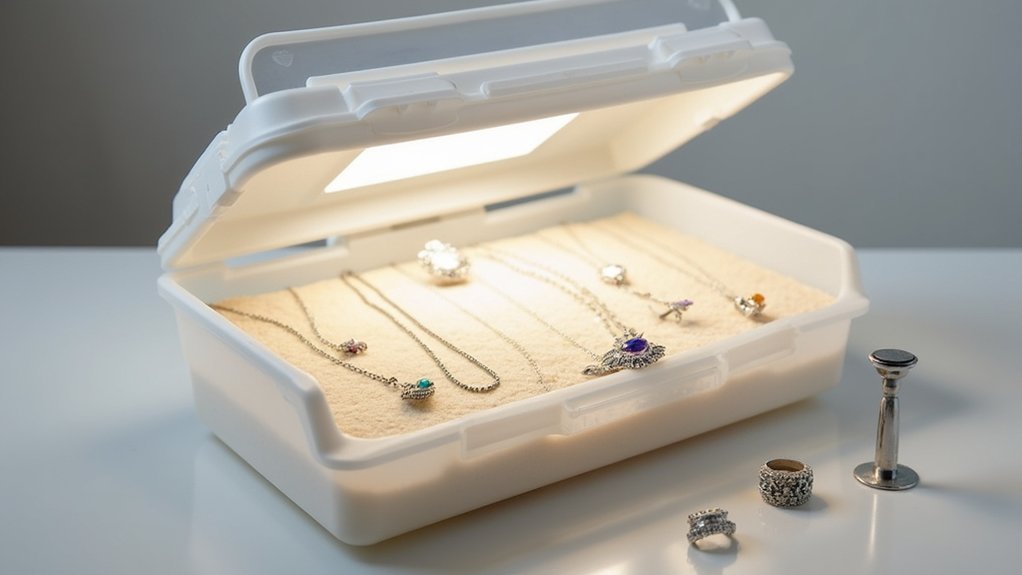
Budget constraints shouldn’t stop you from creating professional-looking jewelry photos. You can transform a simple Rubbermaid plastic file box into an effective photography studio for just $15. This affordable solution works perfectly for capturing your jewelry making creations with professional results.
Position your box on a table near a back patio sliding door to harness natural light’s power. The container’s walls minimize unwanted reflections and background distractions, ensuring your jewelry remains the star of each shot.
You’ll appreciate how quickly you can assemble and disassemble this setup, making it ideal for beginners who need flexibility.
This DIY approach gives you complete control over lighting and background without expensive equipment, while still capturing the intricate details that showcase your work’s quality.
Multiple Angle Shooting Station
When you’re ready to elevate your jewelry photography beyond basic shots, a multiple angle shooting station transforms how you capture your pieces. This setup lets you photograph the same piece from various perspectives without constantly repositioning your camera or losing your lighting setup.
A multiple angle shooting station revolutionizes jewelry photography by enabling consistent perspective changes without disrupting your carefully crafted lighting and camera setup.
- Create a rotating platform using a table with a lazy Susan or rotating base to easily adjust jewelry positioning while keeping your camera settings consistent.
- Mount your camera on a tripod to maintain stability and consistent framing across all angle shots, reducing camera shake for sharper images.
- Prepare interchangeable backgrounds using clothes pegs for quick switches between white, colored, or textured backdrops to enhance visual interest.
- Use soft, diffused lighting from multiple sources to minimize harsh shadows and reflections when photographing jewelry from different angles.
Focus Stacking Camera Position
After mastering multiple angles, focus stacking becomes your next essential technique for capturing every intricate detail of jewelry pieces with crystal-clear sharpness throughout.
You’ll need a rock-solid tripod to maintain consistent framing between shots. Set your camera to f11 for ideal depth of field while keeping your photography lighting constant throughout the entire sequence.
Lock down your camera position completely—any movement will ruin your focus stacking results. Start capturing from the jewelry’s front surface and systematically move your focus point backward through each section.
Take multiple images at varying focus distances to guarantee you’ve captured every sharp detail needed for post-production blending.
Consider using extension tubes as an affordable macro alternative for extreme close-ups. This positioning technique guarantees professional-quality results without expensive equipment.
Frequently Asked Questions
How Do You Set up Photography for Jewelry Products?
You’ll need proper lighting, a clean background, and stable camera support. Position your jewelry on a neutral surface, use diffused light to minimize harsh shadows, and shoot from multiple angles to showcase details and sparkle effectively.
What Is the Best Setting for Jewelry Photography?
You’ll want aperture priority mode with f/8-f/11 for sharp focus, ISO 100-400 to minimize noise, and manual focus for precision. Use macro mode if available, ensuring you’re capturing every detail clearly.
How to Do Jewellery Photography at Home?
You’ll need a foam core backdrop, natural window light, and a tripod. Clean your jewelry first, use reflectors for shine, experiment with colored backgrounds, and shoot in macro mode for detailed close-ups.
How to Professionally Photograph Jewellery?
You’ll need professional lighting equipment, controlled studio environment, high-end macro lenses, and advanced post-processing skills. Master focus stacking, color correction, and retouching techniques while using specialized jewelry photography tools for commercial-quality results.
In Summary
You’ve got everything you need to start photographing your jewelry like a pro. These nine setups won’t break the bank, and you can build most of them with household items. Start with the natural window light method if you’re completely new, then experiment with the foam core box as you gain confidence. Don’t overthink it—practice with different techniques until you find what works best for your style and jewelry pieces.
Leave a Reply