You’ll need professional-grade tools to achieve precision in handcrafted engraving artistry. The Lindsay Classic ArtistGraver Set ($1,469) offers versatile solutions, while PalmControl technology enhances intuitive operation through natural palm pressure. Essential equipment includes Glardon Vallorbe Swiss HSS gravers ($12), diamond bench stones for sharpening, and Leica microscopes with 40x magnification for detailed work. Don’t forget safety gear like particle masks and goggles. Mastering graver selection, cutting angles, and proper sharpening techniques will reveal advanced engraving possibilities.
Essential Hand Engraving Tools for Professional Artisans

When you’re serious about hand engraving, you’ll need tools that deliver both precision and control. The Lindsay Classic ArtistGraver Set stands out as a thorough solution for professional artisans, offering versatile accessories starting at $1,469.
Professional hand engraving demands tools that offer exceptional precision and control for serious artisans seeking thorough engraving solutions.
For detailed work, the Glardon Vallorbe Swiss HSS Flat Graver at $12.00 provides exceptional quality for intricate designs.
Advanced engravers should consider the PalmControl ArtisticGraver Set, ranging from $2,869 to $3,791, which features multiple handle options for maximum versatility.
These Hand Engraving Tools incorporate PalmControl design, allowing intuitive operation through natural palm pressure rather than traditional foot pedals. This innovation enhances learning speed and precision greatly.
Essential Tools for Jewelers also include proper maintenance equipment.
Diamond bench stones from Lindsay sets guarantee peak performance, with included sharpening fixtures for convenient tool care.
Lindsay AirGraver Systems and PalmControl Technology
Innovation drives the Lindsay AirGraver systems, which feature a revolutionary self-running air engine that operates simply by blowing into the handpiece. You’ll eliminate the need for springs or electricity while enjoying a quieter engraving experience.
The breakthrough PalmControl technology transforms how you control your tool’s power, responding intuitively to natural palm pressure rather than relying on traditional foot pedals.
You’ll discover increased learning speeds with PalmControl as it aligns your hand movements directly with tool output, reducing coordination challenges. This enhanced sensitivity and responsiveness delivers more precise engraving results.
Professional engravers consistently endorse the PalmControl system, praising its remarkable simplicity and versatility across various techniques. Whether you’re a beginner or seasoned artist, these AirGraver systems make hand engraving faster and more accessible.
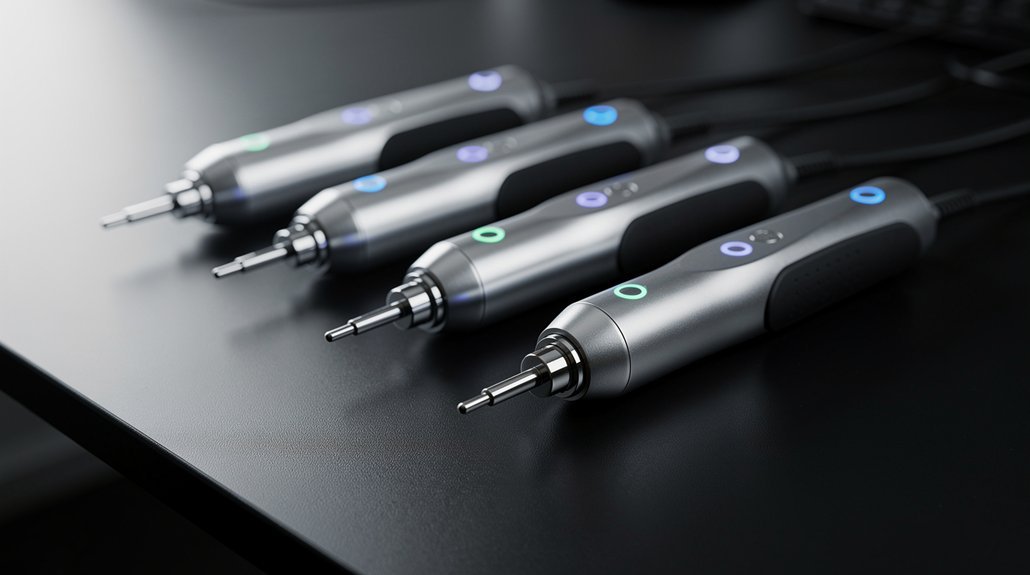
Specialized Handpieces for Enhanced Control and Comfort

Beyond the innovative air engine technology, Lindsay’s specialized handpieces elevate your engraving experience through carefully engineered designs that prioritize both control and comfort.
These tools designed and made for professional artisans transform how you hand engrave with enhanced precision and reduced fatigue.
Professional-grade handpieces engineered to revolutionize your engraving workflow with unmatched precision while minimizing hand strain and fatigue.
Each handpiece offers distinct advantages for different engraving techniques:
- SoftIdle Handle – Reduces vibration and recoil for improved comfort during extended sessions
- BankNote Mode Handle – Enhances low-end control for delicate shading and intricate line work
- Classic Handpiece – Starting at $349, provides intuitive operation with superior sensitivity
- Quick Change Extensions – Offers versatility across various engraving styles and applications
You’ll maintain peak performance with affordable replacement parts like rubber handles for $25, ensuring long-term comfort and functionality.
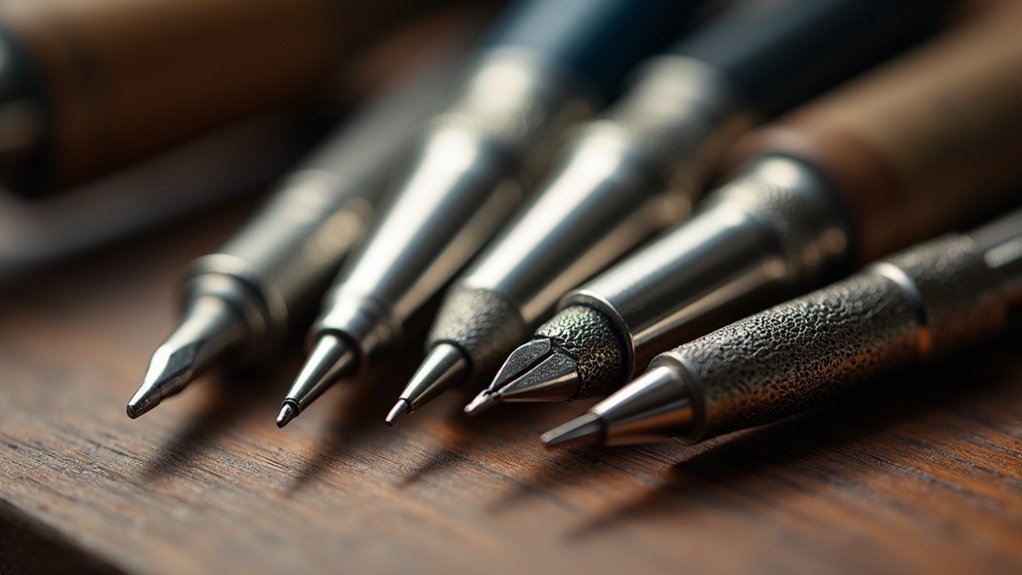
Graver Selection and Cutting Angle Fundamentals
While precision handpieces provide the foundation for exceptional engraving, your choice of graver and its cutting angle determines the character and quality of every line you create.
Graver selection depends on your intended design—flat gravers excel at broad cuts and textures, while pointed gravers deliver precise detail work and intricate patterns.
The cutting angle greatly influences your results, with common angles ranging from 30 to 60 degrees for different techniques.
You’ll need steeper angles when working with harder materials, making the relationship between cutting angle and metal hardness vital to understand.
A four-graver sharpening model set for $29.99 offers versatile angle options.
Practice with various graver angles on steel plates to refine your technique and achieve consistent, professional outcomes.
Microscope Systems for Precision Stone Setting

You’ll need a quality microscope system to achieve the precision required for professional stone setting work.
Leica microscopes offer exceptional optical clarity and ergonomic features that enhance your ability to see fine details during intricate engraving tasks.
A trinocular setup provides additional benefits by allowing simultaneous viewing and documentation, greatly improving your stone setting accuracy and overall craftsmanship quality.
Leica Microscope Features
Five critical features make the Leica A60-F Microscope an exceptional choice for precision stone setting and engraving work.
You’ll find this microscope delivers unmatched precision for your most demanding artisanal tasks.
The key features include:
- Flexible arm stand – You’ll achieve precise positioning and stability during intricate engraving operations.
- 40x magnification capability – You can examine exceptional detail on jewelry and small components with crystal clarity.
- Built-in LED illumination – You’ll enjoy ideal lighting that enhances visibility while reducing eye strain during extended sessions.
- Trinocular design – You can easily attach cameras for documenting your work progress.
The ergonomic design reduces fatigue through comfortable viewing angles and minimal vibration, ensuring you maintain steady hands throughout complex engraving procedures.
Trinocular Setup Benefits
Because trinocular microscope systems offer three optical paths instead of the standard two, they revolutionize how you approach precision stone setting and engraving work. You’ll gain enhanced depth perception and clarity for intricate details while simultaneously documenting your process through the third camera port.
| Feature | Benefit | Application |
|---|---|---|
| Dual eyepieces | Enhanced viewing comfort | Extended work sessions |
| Camera port | Real-time documentation | Client presentations |
| Adjustable magnification | Versatile stone sizes | Multiple techniques |
| High-quality optics | Reduced eye strain | Prolonged productivity |
| Three optical paths | Simultaneous viewing/recording | Process refinement |
You’ll capture high-resolution images and videos while maintaining focus on your trinocular microscope work. The adjustable magnification accommodates various stone sizes, ensuring your precision stone setting remains versatile across different projects.
Stone Setting Accuracy
Microscope systems transform stone setting from guesswork into precise craftsmanship, with models like the Leica A60-F delivering the magnification and clarity needed for flawless placement.
When you’re working with valuable stones, you can’t afford mistakes that compromise both quality and profit.
The Leica A60-F Microscope offers specific advantages for stone setting:
- Flexible arm stand – Adjust viewing angles for ideal precision and convenience
- Trinocular design – Maintain comfortable posture while viewing work in high definition
- Error reduction – Close inspection capabilities drastically minimize costly mistakes
- Comprehensive integration – Pairs with PulseGraver tools for complete engraving solutions
You’ll find that microscope-assisted stone setting elevates your craftsmanship, allowing intricate settings that would be impossible with traditional methods alone.
Sharpening Equipment and Maintenance Techniques

You’ll achieve razor-sharp graver edges by selecting the right diamond stone grit for your specific sharpening needs.
Start with coarser 260-grit stones to reshape damaged tools, then progress through 600 and 1200 grits before finishing with 2000-grit for mirror polish.
Your sharpening fixture setup determines the consistency of your results, so you’ll want to secure it properly and maintain steady angles throughout the process.
Diamond Stone Grits
Four distinct diamond stone grits form the foundation of professional engraving tool maintenance, each serving a specific purpose in achieving razor-sharp edges.
You’ll find these diamond stone grits essential for maintaining your engraving tools at peak performance throughout various stages of sharpening.
The complete grit progression includes:
- 260-grit – Perfect for initial shaping and aggressive sharpening of damaged or severely dulled tools.
- 600-grit – Ideal for intermediate sharpening and removing scratches from coarser stones.
- 1200-grit – Excellent for fine sharpening and preparing edges for final polishing.
- 2000-grit – Essential for achieving mirror-polished, razor-sharp edges on precision engraving tools.
You’ll achieve professional results by progressing through these grits systematically, ensuring each tool maintains its best cutting angle and performance for detailed artistry work.
Sharpening Fixture Setup
Proper sharpening fixture setup transforms your diamond stones into a precision sharpening system that’ll maintain consistent angles and deliver professional-quality results.
You’ll position your graver securely in the fixture, ensuring it’s locked at the correct angle for your specific engraving technique. The templates included with your sharpening set guide you through Universal, Detailing, and Flat & Knife Combo configurations.
Start with coarser diamond stones (260 grit) for initial shaping, then progress through finer grits up to 2000 for polishing.
Your sharpening fixture keeps the blade stable throughout this process, preventing wobbling that could ruin your edge geometry. Regular maintenance using this systematic approach extends your engraving tools’ lifespan greatly while ensuring each cut produces clean, precise lines in your handcrafted work.
Practice Materials and Skill Development Kits
Developing precision engraving skills requires consistent practice with the right materials, and specialized kits make this process both affordable and effective.
These practice materials and skill development kits provide everything you need to refine your technique without breaking the bank.
Essential practice materials for engraving skill development include:
- Steel Practice Plates (6-pack, $7.99) – Durable surfaces for engraving practice without costly materials
- Bezel Setting Practice Kit ($69.00) – Complete materials for mastering round and square stone setting techniques
- Graver Sharpening Models ($29.99) – Four-piece set for maintaining tool precision and performance
- Aero-Etch Precision Engraving Kit – Extensive etching tools with operations guide and abrasive materials
Complement these skill development kits with online classes and video tutorials from EngravingSchool.com for extensive learning.
Aero-Etch Technology for Multi-Surface Applications

When traditional engraving methods fall short for delicate or varied surfaces, Aero-Etch technology bridges the gap with its innovative air-powered etching system. You’ll activate, point, and spray without electricity, making this cordless tool perfect for indoor and outdoor projects. The system works seamlessly with pre-made, custom vinyl, or laser-cut stencils for professional results.
| Surface Type | Applications | Efficiency |
|---|---|---|
| Glass/Crystal | Engraving Jewelry, awards | 15-24 pieces per bottle |
| Metal | Custom designs, signage | High precision detail |
| Ceramics | Decorative art, personalization | Consistent depth control |
| Mixed Materials | Multi-surface projects | Versatile compatibility |
Your aero-etch technology eliminates traditional sandblasting limitations while delivering superior control. One 8 oz abrasive bottle provides extensive coverage, making it cost-effective for both hobbyists and professionals seeking portable precision engraving solutions.
Power Tools Vs Traditional Hand Engraving Methods
Although power tools like the Lindsay AirGraver and PulseGraver revolutionize engraving speed and precision, traditional hand methods still hold considerable value for artisans seeking ultimate creative control.
When choosing between power tools and traditional hand engraving, consider these key factors:
- Speed and Efficiency – Power tools complete detailed designs markedly faster than manual techniques.
- Physical Comfort – Pneumatic tools reduce hand strain and allow longer working sessions.
- Artistic Uniqueness – Traditional hand engraving creates one-of-a-kind pieces reflecting personal skill.
- Precision Control – PalmControl features in modern tools bridge the gap, offering sensitivity comparable to hand methods.
You’ll find power tools excel at consistent, repeatable results, while traditional hand engraving delivers unmatched artistic individuality and creative expression for your most distinctive projects.
Storage Solutions and Workshop Organization
Since precision engraving requires numerous specialized tools, you’ll need an organized storage system that keeps everything accessible while protecting your valuable equipment.
Invest in quality organizers and storage bins to maintain your gravers and handpieces properly. Tool racks and magnetic strips provide quick identification and retrieval of frequently used items, streamlining your workflow and eliminating time wasted searching for equipment.
Create designated storage areas for sharpening fixtures and grinding tools to preserve their integrity and guarantee they’re always ready when needed.
Store engraving blocks and practice plates carefully to prevent scratches and deformation that could hinder your skill development.
Implement a clear labeling system for all storage containers. This systematic approach transforms your workshop into an efficient environment where every tool has its place, promoting productivity and protecting your investment.
Safety Equipment and Proper Handling Procedures
When you’re working with precision engraving tools, your safety depends on wearing the right protective gear and handling equipment properly.
You’ll need particle masks, safety glasses, gloves, and sleeve protectors to shield yourself from dust, debris, and sharp edges that can cause serious injury.
Proper handling techniques aren’t just recommendations—they’re essential practices that’ll keep you safe while you create precise, professional results.
Essential Protective Gear
While precision engraving can produce stunning results, you’ll need proper protective gear to stay safe during the process. Hand engravers work with sharp tools and generate particles that can cause serious injuries without adequate protection.
Your essential protective gear includes:
- Particle mask and safety goggles – Shield your respiratory system and eyes from flying debris and dust particles generated during detailed engraving work.
- Heavy-duty gloves and sleeve protectors – Protect your hands and arms from sharp tools, debris, and potential cuts while maintaining dexterity.
- Well-ventilated workspace – Guarantee proper airflow to minimize inhalation of harmful particles and fumes.
- Organized tool storage system – Keep engraving equipment properly maintained and accessible to prevent accidents and equipment malfunctions.
Proper Tool Handling
Mastering proper tool handling forms the foundation of safe and effective engraving work.
You’ll need to familiarize yourself with specific operation procedures for each tool, as improper handling leads to mistakes and potential injuries. Learn to coordinate your grip and movements with gravers and handpieces, ensuring they’re properly maintained and sharpened for peak performance.
Establish a stable work surface and secure your workpieces to prevent movement that could cause accidents or affect precision.
Your continual inspection of tools for wear and tear prevents malfunctions during critical work moments. Replace damaged items immediately to maintain safety standards.
Proper tool handling isn’t just about technique—it’s about developing muscle memory and confidence that translate into exceptional engraving results while protecting yourself from harm.
Advanced Techniques for Complex Design Work
As you progress beyond basic engraving techniques, you’ll discover that complex design work demands both specialized tools and refined control methods. The Lindsay Classic ArtistGraver Set provides various gravers specifically designed for different styles and intricate applications like bulino engraving.
To master advanced techniques with your engraving tools, focus on these essential elements:
- PalmControl Feature – Utilize Lindsay AirGraver’s enhanced sensitivity for precise control during detailed work.
- Proper Sharpening – Maintain peak performance using diamond bench stones and sharpening fixtures.
- Cutting Angles – Employ specific graver angles to create diverse line weights and textures.
- Continuous Learning – Access workshops and online resources like EngravingSchool.com for professional development.
These refinements enable you to achieve sharper lines, finer details, and professional-grade finishes in your most challenging design projects.
Frequently Asked Questions
How Do You Engrave Professionally?
You’ll need high-quality tools like the Lindsay AirGraver, master techniques through online classes, practice on various materials, maintain sharp instruments with diamond stones, and join engraving communities for feedback.
Is Dremel Good for Engraving?
You’ll find Dremel tools decent for basic engraving tasks, but they can’t match dedicated engraving tools for precision work. The rotary vibrations limit intricate detail, making them better for hobbyists than professional engravers.
What Are the Sharp Tools Used in Engraving Called?
You’ll use sharp tools called “gravers” or “gravering tools” for engraving. They’re available in various shapes like flat, knife, and round gravers, each designed to create different cutting effects on your materials.
What Is the Difference Between Laser Engraving and Hand Engraving?
You’ll find laser engraving uses high-powered light beams for fast, uniform results, while hand engraving relies on manual tools for personalized, artisanal work with greater depth control and unique craftsmanship.
In Summary
You’ve now got the foundation to elevate your engraving artistry with precision tools and proven techniques. Whether you’re choosing between pneumatic systems or traditional gravers, don’t compromise on quality equipment that’ll serve your craft for years. Remember that proper storage, safety protocols, and microscope systems aren’t luxuries—they’re necessities for professional work. Start with essential tools, master the fundamentals, then gradually expand your collection as your skills and projects demand more specialized equipment.

Leave a Reply