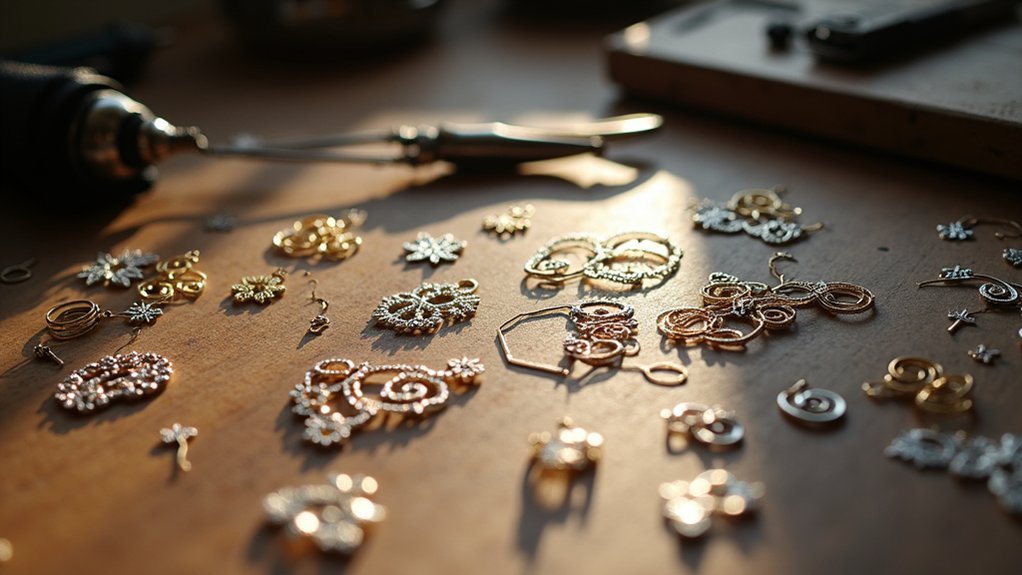
You’ve likely admired the intricate, lace-like patterns of filigree jewelry and wondered if you could create such delicate masterpieces yourself. The good news is that you can master this ancient art form without stepping foot in a traditional studio. With the right tools, materials, and techniques, your dining table can transform into a sophisticated jewelry workshop. But before you start twisting silver wire into elegant spirals, there’s something essential you need to know about wire selection that’ll determine whether your pieces survive or crumble.
Essential Tools and Materials for Filigree Wire Work

Success in filigree jewelry making depends on assembling the right tools and materials before you begin your first project.
Proper preparation with quality tools and materials forms the foundation of every successful filigree jewelry project.
You’ll need essential tools including a soldering tool, tweezers, torch, soldering block, pickle, and brass brush for completing the filigree process effectively.
Your silver wires should include fine silver and sterling silver varieties, with 18 gauge being ideal for most designs. A wire gauge helps you determine proper thickness for intricate patterns.
Consider investing in a $70 beginner kit that includes pre-rolled filigree wire and necessary tools, eliminating the need for a rolling mill.
For best learning, use a laptop or desktop for course content plus a secondary video device for hands-on practice during instruction.
Mastering Wire Preparation and Annealing Techniques
Before you can create intricate filigree patterns, you’ll need to master the fundamental process of preparing your wire through proper straightening, annealing, and rolling techniques.
Effective wire preparation forms the foundation of successful filigree technique. Start by straightening your wire completely before feeding it through the rolling mill—this guarantees consistent, even shaping throughout the process.
Your annealing workflow should follow these essential steps:
- Heat the wire until it glows softly to soften the metal for easier manipulation.
- Allow controlled cooling to maintain malleability without brittleness.
- Pickle the wire in acid solution to remove surface oxidation.
- Clean thoroughly with steel wool or abrasive pad for ideal finish.
Use an 18-gauge wire for structural integrity while maintaining workability.
When cutting pieces for assembly, verify edges touch precisely during soldering, and always apply flux to promote proper solder flow during heating.
Creating Your First Filigree Framework and Basic Shapes

With your wire properly prepared and annealed, you’ll now shape it into the foundational framework that supports your entire filigree piece. Measure and cut your wire to precise lengths, guaranteeing symmetrical proportions throughout your design.
When you make your own filigree, accuracy in these initial measurements determines your final piece’s quality. Use round nose pliers to create loops and curves, forming the intricate shapes that define filigree artistry.
As you construct each joint, apply flux before soldering to guarantee proper flow and strong bonds. Making filigree wire work requires patience during this essential assembly phase.
After completing your soldering, clean and pickle the framework thoroughly. This removes oxidation and creates a polished foundation for adding your detailed filigree elements.
Soldering Methods for Delicate Filigree Components
Although delicate filigree components require precise soldering techniques, you’ll achieve strong joints by heating each connection point until it glows red hot. This temperature guarantees proper metal fusion without compromising your intricate wire designs.
Here’s your essential approach for soldering filigree work:
- Apply flux generously to all joints before soldering to facilitate smooth solder flow and prevent oxidation.
- Use heavier wire beneath bezels to create structural support that won’t melt during the heating process.
- Control heat application carefully to avoid melting the fine wires that define your delicate filigree components.
- Cool pieces immediately in cold water after soldering to solidify joints and prevent warping.
Mastering these techniques guarantees your filigree work maintains its delicate beauty while achieving the structural integrity needed for lasting jewelry pieces.
Building Dimensional Filigree Flowers and Ornamental Elements

Creating dimensional filigree flowers transforms flat wirework into mesmerizing three-dimensional elements that add depth and visual interest to your jewelry designs.
You’ll make filigree petals by twisting and shaping uniform wire lengths, guaranteeing consistent size and shape throughout each flower. Focus on crafting each petal with precise measurements to achieve cohesive floral patterns.
Enhance your filigree designs by incorporating granulation techniques, adding tiny granular details to flower centers for increased ornamental appeal.
Apply specialized soldering methods, carefully placing pallions and controlling heat application to securely join components without damaging delicate wirework.
Complete your filigree jewellery by polishing and shaping flowers using mandrels or specialized tools. This final step guarantees smooth, visually striking results ready for incorporation into larger pieces, elevating your dimensional floral elements to professional quality.
Granulation Techniques to Enhance Your Filigree Designs
When you master granulation techniques, you’ll transform your filigree designs from beautiful to breathtaking by adding enchanting textural elements that catch and reflect light.
This ancient jewelry making technique creates small metal spheres that perfectly complement your intricate wirework.
As a filigree artist, you’ll need to develop precise heating skills to form granules without flux.
Here’s your granulation process:
- Melt small metal pieces into perfect spheres using controlled heat application
- Apply thin flux layers to designated areas where granules will attach
- Arrange granules strategically in patterns that enhance your filigree’s flow
- Solder carefully to fuse granules while maintaining their dimensional quality
Properly executed granulation showcases your craftsmanship while adding sophisticated texture that elevates traditional filigree work into contemporary artistry.
Finishing and Polishing Methods for Professional Results

Your exquisite granulation work deserves finishing techniques that showcase every detail with professional polish. Apply flux to all joints before soldering to guarantee smooth flow and prevent oxidation, achieving clean finishes throughout your filigree shapes.
After soldering, perform pickling to remove oxidation, creating brighter surfaces ready for polishing. Use various grits of sandpaper and silicon tips to reach every curve and corner of your intricate designs.
| Tool/Technique | Purpose |
|---|---|
| Flux Application | Prevents oxidation during soldering |
| Pickling Solution | Removes post-solder oxidation |
| Various Sandpaper Grits | Smooths surfaces progressively |
| Silicon Polishing Tips | Reaches detailed areas |
| Final Inspection | Guarantees scratch-free finish |
Use mandrels to reshape rings after polishing, maintaining proper sizing while preserving your professional finish. Perform thorough final inspections before stone setting.
Expanding Your Skills Beyond Basic Filigree Projects
Once you’ve mastered basic filigree fundamentals, you’re ready to tackle advanced wire manipulation techniques that’ll transform your jewelry into stunning dimensional artworks.
You can create complex sculptural pieces by learning to twist, flatten, and shape filigree wire in ways that build layers and depth throughout your designs.
These advanced methods let you construct intricate three-dimensional frameworks that support elaborate granulation work and metal-backed structures for truly professional results.
Advanced Wire Manipulation Techniques
As you progress beyond basic filigree techniques, mastering advanced wire manipulation becomes essential for creating sophisticated jewelry pieces that showcase true artisanal craftsmanship.
These advanced wire manipulation techniques transform simple silver and gold wire into intricate masterpieces reminiscent of traditional filigree artistry.
Here are four essential advanced manipulation methods:
- Hand-twisting wire – Create textured patterns by carefully rotating wire sections between your fingers for added visual depth.
- Flattening techniques – Use specialized tools to compress wire into ribbon-like strips that catch light beautifully.
- Precision shaping – Form complex curves and spirals using mandrels and forming blocks for consistent results.
- Framework construction – Build structural supports that enable three-dimensional designs and complex architectural elements.
These skills require patience and practice but elevate your work considerably.
Creating Complex Dimensional Pieces
With your advanced wire manipulation skills firmly in place, you’re ready to explore three-dimensional filigree construction that transforms flat designs into sculptural jewelry pieces. Master the twisting and shaping of square wire to create intricate patterns that enhance your work’s depth. Layer different elements, combining openwork with metal-supported techniques for striking contrasts.
| Technique | Application | Result |
|---|---|---|
| Wire Twisting | Square wire manipulation | Enhanced depth patterns |
| Element Layering | Openwork combinations | Visual contrast |
| Granulation | Decorative metal beads | Added dimension |
| Spot Soldering | Delicate component joining | Secure connections |
| Mandrel Shaping | Final contouring | Precise curves |
Incorporate granulation techniques to add decorative metal balls that enhance your dimensional filigree designs. Use spot and flow soldering to securely join components without compromising delicate structures, then utilize mandrels for achieving sophisticated curves.
Frequently Asked Questions
Why Is Filigree so Expensive?
You’re paying for intricate craftsmanship requiring hours of meticulous work, precious metals like gold and silver, rare skilled artisans, specialized tools, and often custom one-of-a-kind designs that can’t be mass-produced.
What Are the Two Types of Filigree?
You’ll encounter two main types of filigree: openwork filigree, which uses shaped wires without backing, and metal-supported filigree, where wires are soldered onto a metal base for stability.
What Is the Filigree Technique of Jewelry?
You’ll coil and intertwine fine gold or silver wires to create delicate, lace-like designs. This ancient technique requires precise soldering skills and lets you craft intricate jewelry pieces with ornamental, openwork patterns.
How to Create Filigree?
You’ll start by annealing your wire to soften it, then twist square wire into patterns. Shape curves with round nose pliers, apply flux, solder components together, and finish by polishing for shine.
In Summary
You’ve now got the foundation to create stunning filigree jewelry from your home studio. Don’t be afraid to experiment with different wire gauges and design variations as you build your skills. Remember that mastering filigree takes patience and practice, so embrace each mistake as a learning opportunity. Start with simple patterns and gradually work toward more complex dimensional pieces. Your unique artistic voice will emerge as you continue developing these timeless metalworking techniques.


Leave a Reply