You can create stunning jewelry textures using seven essential techniques: hammering with ball pein and cross pein hammers for varied surface patterns, rolling mills with fabrics like lace or burlap for intricate imprints, heat treatment for color variations, liver of sulphur patina application for enhanced depth, engraving and scribing for precise details, doming blocks for three-dimensional effects, and layering multiple textures following the three-texture rule. These methods transform plain metal into enchanting pieces that showcase your artistic vision and professional craftsmanship through strategic experimentation.
Hammering Methods for Creating Distinctive Surface Patterns

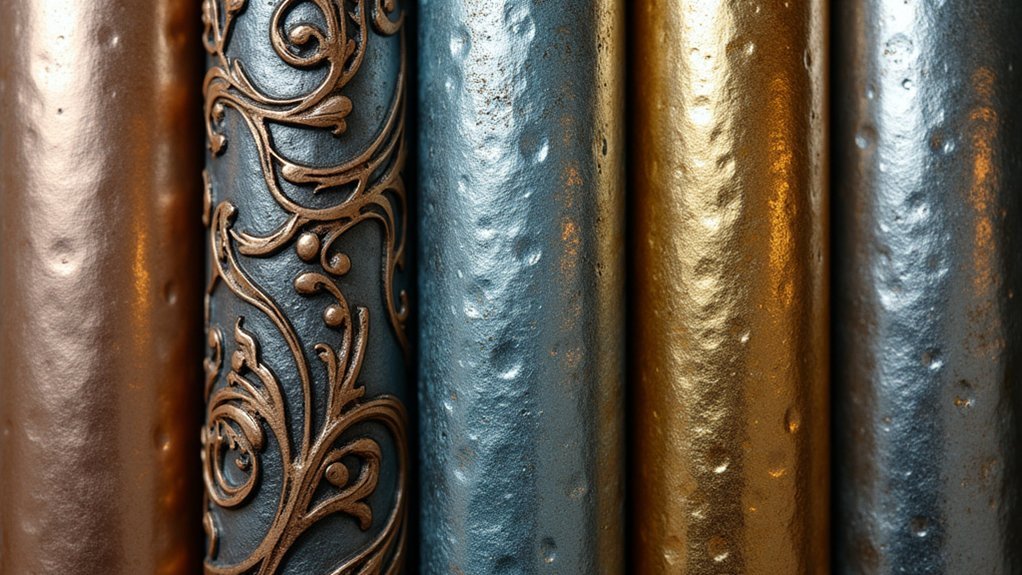
When you’re looking to transform smooth metal surfaces into enchanting textured masterpieces, hammering stands as your most fundamental and versatile technique.
This time-tested method allows you to create diverse surface patterns by varying your pressure and hammer selection. The ball pein hammer’s domed end produces classic hammered textures, while its flat side handles general shaping tasks.
For distinct bark-like patterns, you’ll want the cross pein hammer’s wedge-shaped end, which excels at creating intricate details in your metalwork. Heavy strikes yield deeper indentations, while lighter taps create subtle textures.
As jewelry makers experiment with different hammering techniques, they develop their personal style and achieve unique results that set their creations apart.
Rolling Mill Techniques With Fabrics and Materials
Rolling mills open up extraordinary texturing possibilities when you combine them with everyday fabrics and materials.
You’ll create unique designs by placing fabric between metal sheets and the rollers, transferring intricate textures directly onto your metal surface. Different fabrics produce distinct results – lace creates delicate patterns while burlap gives rugged textures.
Start with gentle rolling pressure to guarantee even imprinting without damaging your metal.
Begin with light pressure when rolling to ensure consistent texture transfer while protecting your metal from unnecessary damage.
You can experiment with various materials beyond traditional fabrics to discover unexpected patterns. Try layering multiple fabric pieces to achieve complex textures that are visually interesting and dimensional.
This technique transforms ordinary metal sheets into extraordinary surfaces with professional-looking results. The rolling mill becomes your creative partner, allowing you to explore endless texturing combinations for stunning jewelry pieces.
Heat Treatment for Color Variation and Texture Enhancement

Heat treatment transforms your metal jewelry from ordinary to extraordinary by introducing stunning color variations while enhancing existing textures.
You’ll achieve controlled heat application by adjusting your torch’s distance and flame movement, creating subtle to vibrant hues through metal reactions. Pre-texturing your metal before heat application produces unique color patterns that captivate viewers.
Liver of sulphur offers versatile texture enhancement options depending on metal type, dilution strength, and temperature control.
You’ll discover that strong solutions create a rich black patina, perfect for textured or engraved designs. Polish these treated pieces to achieve stunning polished contrasts – the patina remains in recesses while raised surfaces gleam brilliantly.
Each metal responds differently to heat treatment, allowing you to develop your signature color variation techniques through experimentation and practice.
Patina Application Using Liver of Sulphur
You’ll need to prepare your liver of sulphur solution carefully, as the concentration directly affects the final color intensity on your metal surface.
Start with a weak solution and gradually increase strength until you achieve your desired patina depth.
Control the color outcome by adjusting factors like solution temperature, application time, and the metal’s surface preparation before treatment.
LOS Solution Preparation
One of the most versatile and affordable ways to create stunning patinas on metal surfaces starts with preparing a proper liver of sulphur solution. You’ll mix approximately one teaspoon of solid liver of sulphur per quart of warm water, though you can adjust the solution concentration based on your desired effect and metal type.
| Solution Strength | Water Temperature | Color Result | Application Time | Best Metal Type |
|---|---|---|---|---|
| Light (1/2 tsp/qt) | Warm | Subtle amber | 30-60 seconds | Silver, copper |
| Medium (1 tsp/qt) | Hot | Rich brown | 15-30 seconds | Brass, bronze |
| Strong (2 tsp/qt) | Very hot | Deep black | 5-15 seconds | All metals |
| Variable | Cold | Slow blues/purples | 2-5 minutes | Silver only |
| Custom blend | Room temp | Controlled tones | 1-3 minutes | Mixed metals |
Stir until fully dissolved, ensuring your metal is clean and dry before using immersion techniques. After achieving your desired patina, rinse the metal and consider polishing for contrast in textured areas.
Color Control Methods
After preparing your liver of sulphur solution, controlling the patina colors becomes a matter of manipulating temperature, timing, and application methods.
You’ll achieve ideal color control methods by adjusting your torch distance and flame movement while heating metal surfaces. Apply heat gradually to develop unique color patterns that range from golden yellows to deep blacks depending on temperature intensity.
Pre-texturing your metal creates distinctive visual effects, as textured metal holds patina differently than smooth surfaces.
Masking areas with tape or resist materials gives you controlled design elements, preventing unwanted patina application in specific zones.
Different metals react uniquely to LOS solutions, so experiment with copper, silver, and brass to understand their individual responses.
Strong solutions produce darker patinas perfect for highlighting contrast on engraved pieces.
Engraving and Scribing for Precise Detail Work
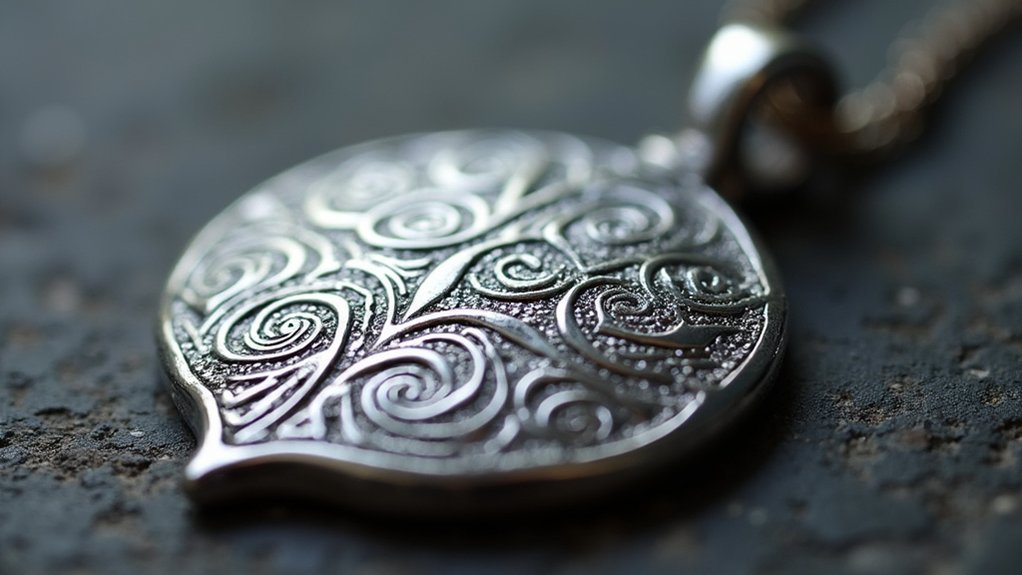
When you need to add precise, intricate details to your jewelry pieces, engraving and scribing techniques offer unmatched control and artistic expression. A wooden graver handle provides essential comfort during extended work sessions, giving you better precision when creating detailed patterns on metal surfaces.
Scribes excel at marking guidelines on sheet metal, establishing foundations for complex texturing methods.
- Gentle hammering of your graver creates distinctive dotted textures that add remarkable depth to designs.
- Various engraver shapes enable you to craft intricate patterns tailored to specific design requirements.
- Combining engraving with patinas produces dramatic contrasts that enhance visual impact.
These techniques deliver exceptional aesthetic effect, transforming plain metal into sophisticated jewelry with professional-quality detail and dimensional complexity.
Doming and Forming for Three-Dimensional Effects
While engraving excels at surface-level detail work, doming and forming techniques elevate your jewelry designs into true three-dimensional artistry.
You’ll use doming blocks and punches to shape metal into curved forms, creating depth that transforms flat pieces into dynamic sculptures. Different surface materials like leather or steel produce varying textures and dimensional effects in your finished jewelry.
Your punches enable precise spherical shapes perfect for pendants and earrings. Experiment with various punch sizes to achieve diverse dimensional results, making each piece uniquely yours.
You can combine these forming techniques with hammering to create intricate layered designs that showcase both sculptural form and rich surface textures. This approach adds visual interest and tactile appeal to your three-dimensional jewelry creations.
Layering Multiple Textures for Complex Designs
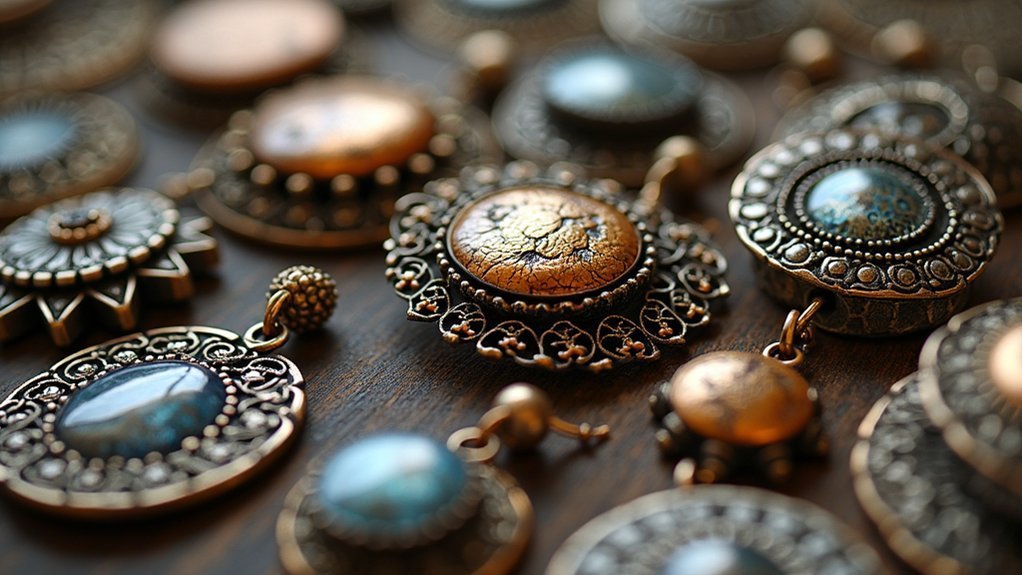
You’ll create more sophisticated jewelry designs by following the three texture rule, which involves layering at least three distinct textures on a single piece.
Start by combining different hammer types like ball pein and cross pein to establish contrasting surface patterns that complement each other.
Plan your texture placement strategically before you begin, considering how each textured area will interact with adjacent surfaces to maximize visual impact.
Three Texture Rule
Although many jewelry makers focus on perfecting single texturing techniques, the Three Texture Rule transforms ordinary pieces into enchanting works of art by combining at least three distinct textures within one design.
This approach creates remarkable visual interest through strategic layering of different metal surfaces. You’ll discover that experimentation with various techniques like hammering, rolling, and fabric imprinting enhances your creativity while adding depth to each piece.
The rule works by establishing contrast between light and heavy textures, allowing your design to tell a compelling story.
Consider these effective combinations:
- Smooth, hammered, and etched surfaces for classic elegance
- Brushed, stippled, and polished finishes for modern sophistication
- Rolled, stamped, and oxidized textures for vintage appeal
Each texture contributes meaning, making your jewelry emotionally resonant for wearers.
Combining Different Hammer Types
When you master the art of combining different hammer types, you’ll unlock the potential to create jewelry with extraordinary depth and visual complexity. You can achieve traditional hammered effects alongside intricate bark-like textures by pairing ball pein and cross pein hammers within a single design.
Layering textures creates stunning visual dynamics. Start with light hammer textures, then add heavier hammering around edges. Experimenting with various pressures yields unique results—softer taps produce subtle textures while harder strikes create pronounced effects.
| Hammer Combination | Texture Effect |
|---|---|
| Ball Pein + Cross Pein | Traditional + bark-like textures |
| Light + Heavy Pressure | Dynamic layered appearance |
| Domed Side of a Repousse Hammer + Flat Hammer | Enhanced depth and dimension |
| Three Different Types | Complex designs showcasing personal style and creativity |
Planning Texture Placement
Strategic planning transforms your textural combinations from random experiments into cohesive artistic statements.
You’ll achieve stunning depth by thoughtfully considering how different textures interact across your jewelry piece. Start by sketching placement ideas, determining which areas need visual weight and which should remain subtle.
Your tools—hammers, rolling mills, and fabric—each create distinct effects that require careful positioning. Test combinations on scrap metal first to refine your aesthetic vision before committing to the final piece.
Consider these essential planning elements:
- Scale hierarchy – Use lighter textures as backgrounds and heavier textures for focal points
- Flow patterns – Plan how textures shift between sections for visual continuity
- Balance points – Distribute textural weight evenly to avoid overwhelming specific areas
Experimentation during planning guarantees unique, professional results that showcase intentional design choices rather than random texture application.
Frequently Asked Questions
What Are the Techniques Used in Texturing Metal?
You’ll use hammering with different hammer types, rolling mills to imprint patterns, heat treating for color changes, layered combinations of multiple techniques, and engraving with gravers plus patinas for contrast.
How Do You Make Metal Look Textured?
You’ll create textured metal by hammering with different tools, rolling through textured mills, pressing fabrics into surfaces, layering multiple techniques, and using doming blocks. Each method produces unique patterns and three-dimensional effects.
How Do You Smooth Metal Edges on Jewelry?
You’ll start with coarse files to remove sharp edges, then progress to finer sandpaper grits. Use needle files for intricate areas, finish with buffing wheels for shine, and wear protective gear.
How to Get Hammered Effect on Metal?
You’ll use a ball pein hammer’s domed end on metal placed over a steel block. Vary your pressure – light taps create subtle textures while harder strikes produce pronounced hammered effects for stunning results.
In Summary
You’ve now discovered seven powerful metal texturing techniques that’ll transform your jewelry from ordinary to extraordinary. Don’t feel pressured to master them all at once—start with one method that excites you most. As you practice these techniques, you’ll develop your own unique style and discover which combinations work best for your vision. Remember, each piece you create becomes more distinctive when you’re willing to experiment with texture.


Leave a Reply