Successful gem spectroscopy requires proper technique and equipment. Use a strong, focusable light source in a dimly lit room. Position gems correctly to maximize light entry and keep your spectroscope steady. Regularly calibrate using known reference points like ruby’s distinctive lines. Document all observations with precise wavelengths. Practice with gems having strong absorption spectra first. Work in a clean, dust-free environment and handle equipment carefully. Master these fundamentals to reveal the hidden stories within each gemstone’s unique spectral fingerprint.
10 Essential Tips for Beginner Gem Spectroscopy
When you’re first diving into gem spectroscopy, mastering a few fundamental techniques will greatly improve your analysis skills. Begin with practice on gems that display strong absorption spectra, like ruby or apatite, to train your eye to recognize distinct patterns.
Proper illumination is critical—use a strong, focusable light source to maximize light penetration through your specimens. This guarantees clearer readings of absorption lines characteristic to specific gems.
Regularly calibrate your spectroscope using known reference points, such as ruby’s 475 nm and 692.8 nm lines. This builds accuracy when identifying unknown specimens.
When observing, maintain a steady position and utilize your peripheral vision to detect faint absorption lines that might otherwise go unnoticed. This technique enhances your ability to distinguish subtle spectral differences between similar gemstones.
Understanding the Basic Principles of Spectroscopy
Before identifying specific gemstones, you’ll need to grasp what spectroscopy actually measures. When light passes through a gem, certain wavelengths are absorbed based on the stone’s chemical composition and crystal structure, creating a unique absorption spectrum. This spectrum acts like a fingerprint that can help identify gemstones with remarkable accuracy.
Your direct-vision spectroscope separates light into its component colors, displaying a rectangular rainbow with dark lines where absorption occurs. For best results, position your gemstone properly between the light source and spectroscope—the path length through the stone directly affects how visible these absorption lines will be.
As you gain experience, you’ll recognize signature patterns, like ruby’s distinctive lines at 475 nm and 692.8 nm, making identification increasingly intuitive with practice.
Selecting the Right Spectroscope for Your Needs
Choosing the right spectroscope involves balancing your budget against functionality requirements, with options ranging from affordable desk models to advanced calibrated instruments.
You’ll need to decide between portable handheld units that sacrifice some clarity for convenience, or fixed direct-vision models that offer superior spectral resolution.
When making your selection, prioritize features like fixed slit diffraction-gratings and fiber-optic compatibility to guarantee your tool grows with your gemological expertise.
Types of Spectroscopes
Several spectroscope options exist for beginning gemologists, each with distinct advantages for gem identification. When choosing your first spectroscope, consider how you’ll use it and what features match your needs.
| Spectroscope Type | Features | Best For |
|---|---|---|
| Direct-Vision | No additional optics, pure spectrum view | Professional gem identification |
| Fixed-Slit Diffraction | Affordable, balanced color accuracy | Beginners learning absorption lines |
| OPL Teaching Model | User-friendly design, educational focus | Classroom settings |
The fixed-slit diffraction-grating models introduced in the mid-1980s offer an excellent entry point if you’re just starting. For clearer absorption lines, pair your spectroscope with a fiber-optic light source. Advanced models with calibration scales and adjustable focus will serve you well as your skills progress beyond the basics.
Budget Vs Functionality
As you compare spectroscope options, the balance between budget and functionality becomes particularly important. For beginners, a fixed slit diffraction-grating model offers an excellent entry point, combining affordability with effective gem testing capabilities.
Desk model OPL spectroscopes under $100 provide strong performance, successfully balancing absorption and transmission features essential for accurate analysis. Verify your chosen spectroscope accommodates fiber-optic light sources, which greatly enhance visibility during examinations.
While budget models serve basic needs, consider how your gemological skills might develop. Advanced spectroscopes with clear calibration scales enable more precise measurements as your expertise grows.
Though initially more expensive, higher-quality instruments often deliver superior accuracy and more detailed insights – an investment that pays dividends as you progress from novice to experienced gemologist.
Portable or Fixed
The decision between portable and fixed spectroscopes hinges on your testing environment and gemological goals. Portable models offer convenience for fieldwork with their lightweight design, while fixed spectroscopes provide superior stability and optical clarity for laboratory analysis.
| Feature | Portable Models | Fixed Models |
|---|---|---|
| Mobility | High – easy to carry | Limited – stationary |
| Optical Quality | Good | Excellent |
| Scale Features | Limited or none | Often include measurement scales |
| Gem Accommodation | May have size limitations | Better accommodation of various sizes |
| Stability | Less stable | More stable readings |
When choosing your spectroscope, consider whether you’ll primarily test gems in a fixed location or need flexibility to analyze specimens on-site. Fixed models with diffraction gratings offer the most precise absorption line readings, but quality portable units can still provide valuable spectral information when you’re away from your workspace.
Proper Lighting Techniques for Accurate Readings
When examining gemstones through a spectroscope, proper lighting makes the difference between seeing clear absorption lines and missing critical identification markers.
Your best choice is a strong, focused fiber-optic light source that maximizes light transmission through stones with different refractive index values.
Powerful fiber-optic illumination ensures optimal light transmission regardless of a gemstone’s refractive properties.
Position your gem at the ideal angle to the light source—this path length greatly affects absorption line intensity and clarity.
You’ll need to adjust the spectroscope’s entry opening to allow sufficient light through while minimizing external interference.
Always work in a dimly lit room to prevent ambient light from obscuring subtle spectral patterns.
Regular practice with focus calibration is essential, as visibility of absorption lines varies with different lighting conditions and gemstone types.
Positioning Gemstones Correctly for Optimal Results
Setting up your gemstone properly can make or break your spectroscopic analysis. Position your specimen directly in front of the light source, ensuring light passes through it and into the spectroscope. Use tweezers with a firm but gentle grip to hold the stone steady while you work.
Slightly adjust the gemstone’s angle to maximize light entry and enhance absorption lines clarity. For best results, experiment with different positioning techniques until you find the ideal setup.
| Positioning Tips | Results | Emotion |
|---|---|---|
| Perfect alignment | Clear absorption lines | Excitement |
| Slight angle | Enhanced spectrum | Satisfaction |
| Too far from light | Faint readings | Frustration |
| Unstable grip | Blurry spectrum | Disappointment |
Stones with strong absorption characteristics like ruby will provide the most distinct spectral patterns when properly positioned at the correct distance from your spectroscope.
Recognizing Common Absorption Patterns in Popular Gemstones
Successful gemstone identification hinges on your ability to recognize distinctive spectral patterns unique to each stone type.
When examining rubies, look for strong absorption lines at 475 nm and 692.8 nm that create their characteristic red color.
Sapphires reveal their identity through iron absorption lines around 450 nm in the blue spectrum region.
You’ll identify emeralds by their absorption lines near 430 nm and 570 nm, which produce their distinctive green hue.
For amethysts, watch for peaks at 450 nm and 580 nm that generate their violet appearance.
Green tourmalines display notable absorption around 430 nm and 580 nm, though patterns vary based on color variety.
Training your eye to recognize these specific absorption patterns will dramatically improve your ability to identify gems accurately, even when dealing with similar-looking stones.
Calibrating Your Spectroscope for Precision
To guarantee accurate readings, you’ll need to select known reference standards like ruby with its distinctive absorption lines at 475 nm and 692.8 nm.
You can prevent wavelength drift by regularly checking your instrument against these standards and adjusting the scale marker to match identified wavelengths precisely.
Don’t forget to document your calibration process, noting any adjustments made and the reference stones used, which will help maintain consistency across your gemstone identification sessions.
Choose Reference Standards
Proper calibration forms the foundation of reliable gem identification through spectroscopy. To achieve this, you’ll need high-quality reference gems with well-documented absorption lines. Ruby is an excellent starting standard, offering strong lines at 475 nm and 692.8 nm that provide clear calibration points across the visible spectrum.
When calibrating, make certain your spectroscope is perfectly focused to capture crisp, distinct absorption lines. Align your scale marker precisely with these known wavelengths before proceeding with spectral analysis of unknown specimens.
As you gain experience, build a collection of reference stones to enhance your calibration skills. Remember to recalibrate when switching between different reference gems, as each stone’s unique spectral pattern requires specific adjustments to maintain accuracy throughout your gemological investigations.
Eliminate Wavelength Drift
Wavelength drift can severely compromise your spectroscopic readings, making gem identification unreliable or even impossible. To combat this issue, focus your spectroscope until the scale appears crisp and absorption lines look sharp and distinct.
Calibrate your instrument using strong reference absorption lines at specific wavelengths, such as ruby’s distinctive lines at 475 nm and 692.8 nm. This establishes a reliable baseline for your measurements.
Maintain a consistent, bright light source throughout your analysis, as intensity variations can affect line visibility and contribute to drift.
After examining each gemstone, take time to check and recalibrate your spectroscope, adjusting the scale marker to align precisely with observed absorption lines.
This systematic approach guarantees your spectroscope delivers accurate, drift-free readings every time you analyze a specimen.
Document Calibration Process
Reliable spectroscopic analysis depends on meticulous documentation of your calibration process.
When setting up your spectroscope, record each step as you focus until the scale appears clear and sharp. Note the position of ruby’s distinct absorption lines at 475 nm and 692.8 nm, which serve as your primary reference points.
Document how you align the scale marker with ruby’s strong lines, and record any adjustments needed for proper calibration.
Keep a log of scale modifications required for different gemstones, as you’ll need to recalibrate when switching between specimens. Your documentation should include dates of calibration and any drift corrections made over time.
This record-keeping guarantees consistent results and helps you track your spectroscope’s performance, making troubleshooting much easier when discrepancies arise.
Documenting and Interpreting Your Spectral Observations
Once you’ve observed absorption lines through your spectroscope, meticulous documentation becomes your pathway to accurate gemstone identification. Record every absorption line with its precise wavelength, using reference stones like ruby (475 nm and 692.8 nm) for calibration.
Note how you’ve positioned the gem relative to the light source, as path length considerably affects line visibility.
When documenting spectral data, be sure to record any variations under different lighting conditions—this often reveals clues about treatment status. Organize your observations systematically, perhaps grouping absorption features by spectrum color regions for easier future reference.
Finally, don’t work in isolation. Cross-reference your documented findings with established resources like Liddicoat’s Handbook of Gem Identification to confirm your interpretations and build your expertise in spectral analysis.
Distinguishing Natural From Treated Gemstones Using Spectral Analysis
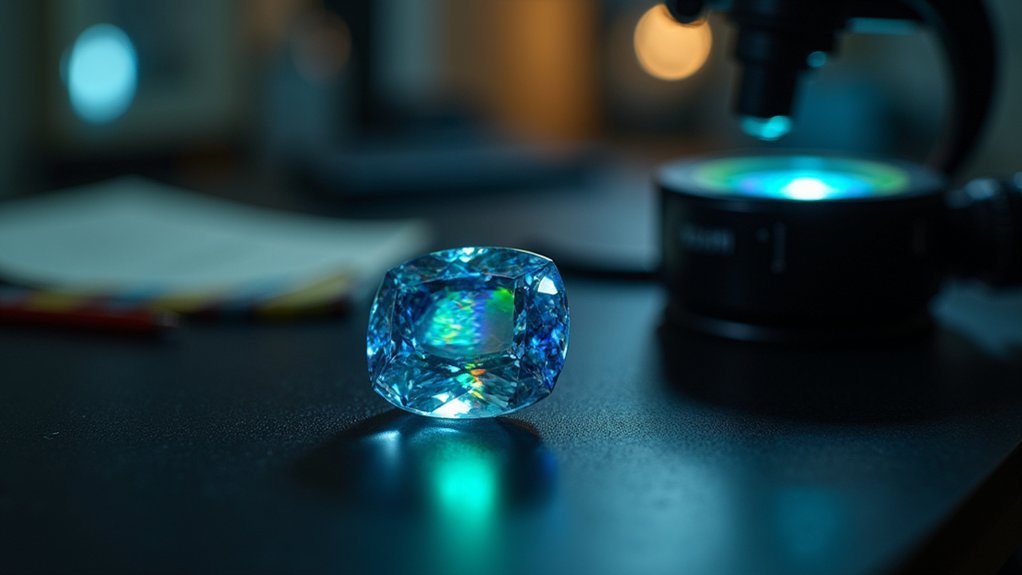
Although many gemstones appear identical to the naked eye, their spectral signatures often tell a different story. Your spectroscope reveals unique absorption patterns that expose a gem’s true identity and chemical properties.
Natural emeralds typically display characteristic absorption at 690 nm, while treated ones lack these signatures or show additional lines from dyes. When examining sapphires, look for specific iron absorption in the blue region that indicates natural origin, whereas heat treatments create unusual spectral patterns.
Skilled gemologists rely on spectral profiles to unmask treated gems that even the sharpest eyes can’t detect.
Synthetic gems often lack inclusions or show distinct growth patterns visible in their spectral profile.
To build your skills in identifying gemstones, practice with known specimens to recognize the subtle differences between natural and treated stones. You’ll soon develop an eye for authentic spectral fingerprints that treatments can’t perfectly mimic.
Troubleshooting Common Spectroscope Issues
If you’re struggling to see faint absorption lines, try using a more powerful light source like a fiber optic illuminator rather than standard desk lamps.
You’ll need to position your light at different angles to guarantee ideal illumination through the gemstone, as poor positioning is often the culprit behind weak spectral patterns.
When your light source flickers or dims unexpectedly, replace batteries immediately or check electrical connections, as inconsistent illumination will prevent accurate spectral readings.
Faint Absorption Lines
Five common challenges arise when dealing with faint absorption lines in gem spectroscopy. You’ll need to address these methodically to achieve accurate readings.
First, verify you’re using a strong fiber-optic light source, as faint absorption lines often remain invisible without proper illumination. Position your gemstone to maximize light passage through it, enhancing the visibility of subtle spectral features.
Don’t hesitate to experiment with different angles of both the gem and spectroscope to optimize your view.
For calibration purposes, consider using reference stones with strong absorption patterns like ruby or apatite. These help train your eye to recognize subtler spectral variations.
Regular practice with known reference stones builds proficiency, allowing you to detect increasingly faint absorption lines that might otherwise go unnoticed.
Light Source Problems
Troubleshooting light source problems forms the cornerstone of successful gem spectroscopy. Your light source must be intense and focused—preferably a fiber-optic light—to reveal clear absorption lines.
When these lines appear faint or invisible, check your light’s positioning and guarantee the gemstone sits directly in its path to maximize light entry into the spectroscope.
If you’re still experiencing interference in your readings, turn off overhead lights that might introduce unwanted light into your spectroscope.
Fine-tune results by adjusting the size of your spectroscope’s light opening, which can greatly improve the definition of absorption lines for particular gemstones.
Don’t overlook maintenance—regularly clean both your spectroscope and light source.
Dust and fingerprints obstruct light transmission and can considerably degrade your spectral readings.
Frequently Asked Questions
Can Spectroscopy Identify Lab-Grown Versus Mined Diamonds?
Yes, spectroscopy can identify lab-grown versus mined diamonds. You’ll notice distinctive spectral patterns that reveal growth methods, as lab diamonds often show different nitrogen aggregations and crystal structure indicators than natural ones.
How Long Does It Take to Become Proficient in Gem Spectroscopy?
You’ll need 6-12 months of regular practice to become proficient in gem spectroscopy. With dedicated study and hands-on experience with different gem types, you’ll develop the pattern recognition skills required for accurate analysis.
Are Portable Spectroscopes Accurate Enough for Professional Gemology?
Yes, you’ll find many portable spectroscopes are accurate enough for professional gemology. They’ve improved considerably in recent years, though lab-grade desktop models still offer superior resolution for challenging identification cases.
Does Temperature Affect Spectroscopic Readings of Certain Gemstones?
Yes, temperature considerably affects your spectroscopic readings. You’ll notice shifts in absorption bands of certain gemstones when they’re heated or cooled, especially with emeralds, rubies and alexandrite. Always control testing conditions.
Can Spectroscopy Determine a Gemstone’s Country of Origin?
Spectroscopy can help determine a gemstone’s origin, but it’s not definitive alone. You’ll need to combine it with other tests and trace element analysis for more accurate origin identification.
In Summary
You’ve now got the foundational knowledge to tackle gem spectroscopy with confidence. Remember, it’s a skill that improves with practice. Don’t hesitate to revisit these tips as you grow more comfortable with your equipment. Soon you’ll be identifying absorption lines and distinguishing gem treatments like a pro. Your spectroscope isn’t just a tool—it’s your window into the hidden properties of gemstones.



Leave a Reply