You’ll achieve professional hammered metal shine through controlled surface preparation, strategic metallic flake distribution, and proper light reflection techniques. Start with thorough cleaning, sanding, and priming, then apply multiple thin coats rather than thick layers. The key lies in maintaining ideal temperature between 70°F-85°F with low humidity during application. Quality metallic flakes create depth while varied surface angles from hammering scatter light dynamically. Master these fundamentals to reveal advanced finishing secrets.
Understanding the Science Behind Hammered Metal Reflectivity
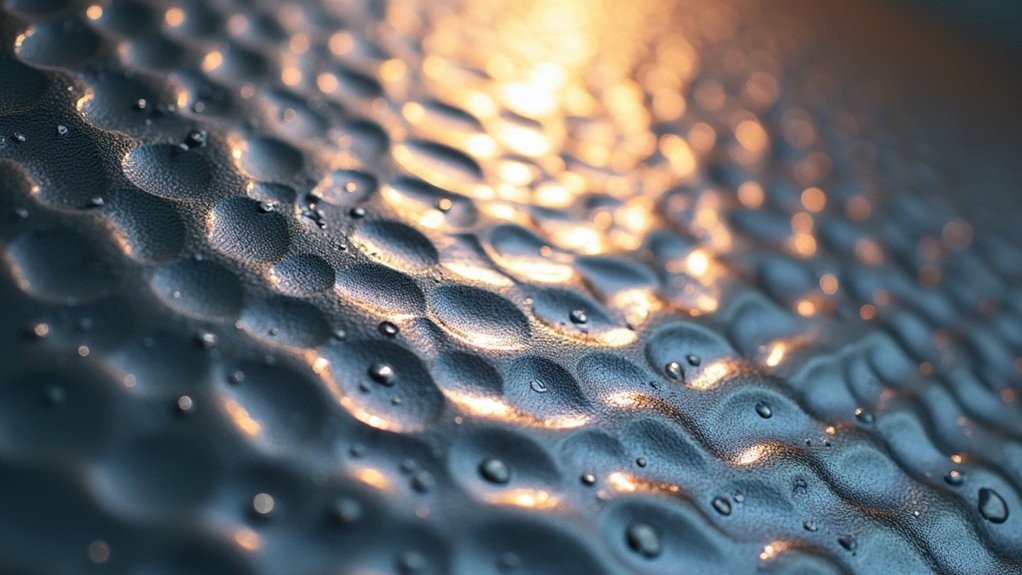
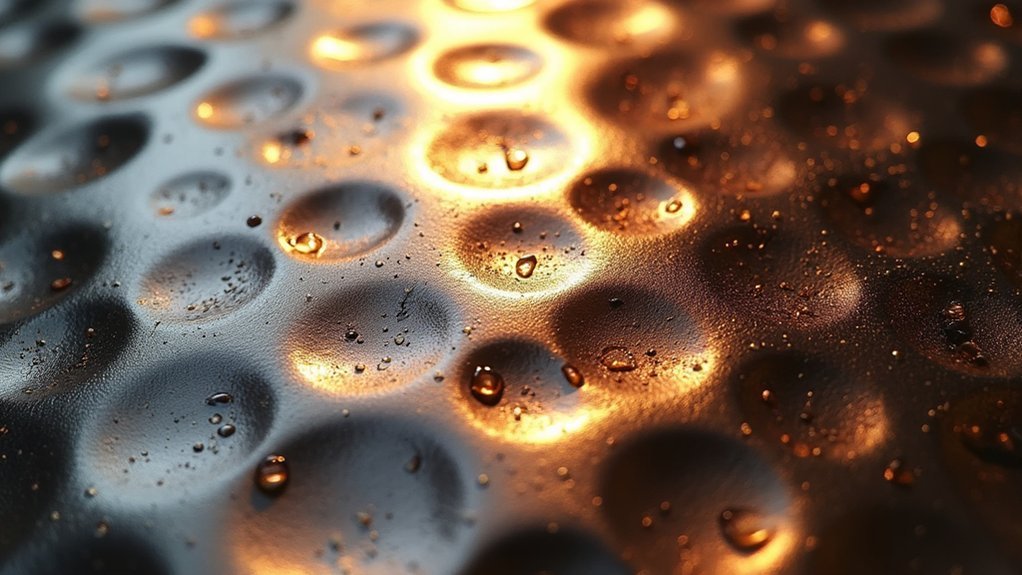
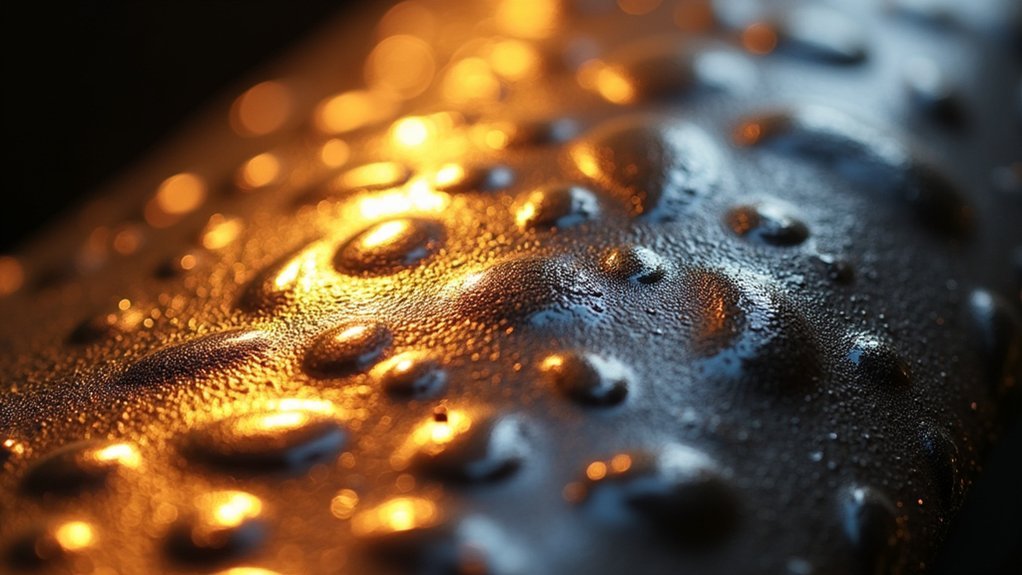
When light strikes a hammered metal surface, it encounters countless tiny peaks and valleys that scatter the rays in multiple directions, creating that distinctive shimmer you notice. This textured landscape transforms ordinary reflectivity into something extraordinary.
The hammering process compresses the metal, refining its surface structure and boosting its light-reflecting capabilities. You’ll see how this compression enhances the professional shine that makes hammered metal so appealing.
The varied angles created by hammering don’t just scatter light randomly—they create controlled reflection patterns that produce depth and visual interest.
When you add metallic flakes to hammered finishes, you’re amplifying this reflectivity even further. These flakes introduce additional dimensions that catch and redirect light.
The result is a surface that doesn’t just reflect—it actively engages with light to create dynamic, professional-quality shine.
Essential Tools for Achieving Professional Hammered Finishes
Before you can create that stunning hammered metal finish, you’ll need the right arsenal of tools to transform your vision into reality.
Start with a high-quality spray gun or brush for even paint application on stainless steel and other metal surfaces. You’ll require a good metal primer to enhance adhesion and create a smooth base.
Quality spray equipment and proper metal primer form the foundation for achieving professional-grade hammered metal finishes on any surface.
Sandpaper or fine-grit abrasive pads are essential for proper surface preparation, removing rust and dirt.
Master the texture application technique by applying multiple light coats instead of one heavy coat for a more defined hammered appearance.
Finally, apply a clear protective top coat to enhance durability and add shine to your paint finish, ensuring professional-quality results.
Surface Preparation Techniques for Maximum Shine
You’ll achieve the best hammered metal shine by starting with proper surface preparation that removes every trace of rust, dirt, and grease from your workpiece.
Clean metal surfaces create stronger paint adhesion and prevent future finish failures that can ruin your project’s appearance.
Apply multiple thin coats rather than one thick layer to build up depth and enhance the reflective quality of your hammered finish.
Remove Rust and Dirt
Three essential steps form the foundation of achieving that coveted hammered metal shine: thorough cleaning, rust removal, and proper drying.
Start by cleaning surface areas with wire brushes or sandpaper to remove rust, dirt, grease, and debris that hinder your final finish. You’ll want to meticulously scrub away all rust since it prevents corrosion and improves paint adhesion considerably.
After thoroughly cleaning, verify the surface is completely dry before proceeding. Moisture creates poor paint application and compromises finish quality.
Consider using a degreaser or solvent to wipe down the metal, eliminating any remaining contaminants. This extra step guarantees you’ll achieve that professional-looking shine you’re after.
Multiple Light Coat Application
Once your surface is properly prepared, applying multiple light coats becomes your pathway to achieving maximum hammered metal shine.
This technique works great because it allows better adhesion and creates a smoother, more even surface that enhances the metal’s overall appearance.
You’ll want to let each light coat dry completely before applying the next – typically about one day.
This patience guarantees the hammered texture develops properly without running or pooling.
Light coats minimize drip risks and uneven texture while letting the hammered effect shine through professionally.
Whether you’re using spray cans or brush-on methods, controlling coat thickness is essential.
The finish quality depends on this controlled application approach, delivering the professional results you’re seeking.
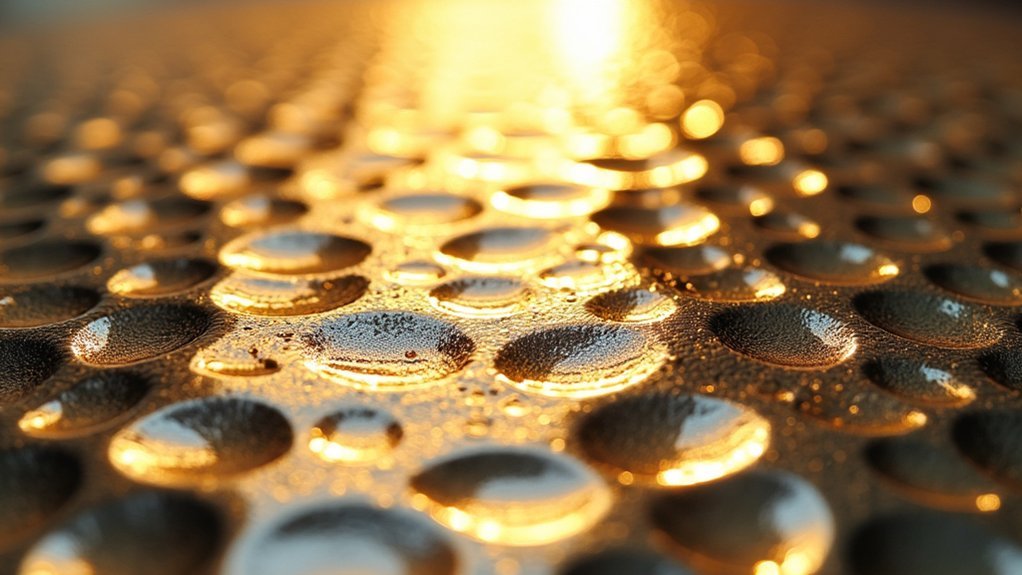
The Role of Metallic Flakes in Creating Depth and Luster
When metallic flakes embed themselves within hammered metal paint, they transform an ordinary textured surface into a mesmerizing display of depth and brilliance. These reflective particles catch light at various angles, creating dynamic sparkle that enhances the visual depth of your hammered finish.
| Flake Size | Appearance Effect |
|---|---|
| Large flakes | Pronounced shimmer with bold reflective points |
| Small flakes | Subtle sheen with refined elegance |
| Mixed sizes | Layered complexity with varied light play |
| Ultra-fine flakes | Smooth metallic glow with minimal texture |
As your finish dries, metallic flakes settle into the hammered texture’s unique pitting and contours. This interplay between surface irregularities and reflective properties masks minor imperfections while creating sophisticated contemporary appeal that’s both durable and functional.
Proper Application Methods for Even Texture Distribution
You’ll achieve the best hammered metal finish by starting with thorough surface preparation that removes all dirt and rust for ideal paint adhesion.
Clean surfaces allow the metallic texture to develop evenly, preventing patches or inconsistencies that compromise the final appearance.
Your success depends on applying multiple thin coats rather than one heavy application, as this builds up the characteristic hammered depth gradually.
Surface Preparation Techniques
Three essential steps form the foundation of achieving that coveted hammered metal finish: cleaning, sanding, and priming your surface. These surface preparation techniques directly impact your paint’s ideal adhesion and final appearance.
Start by thoroughly cleaning metal surfaces, removing all dirt, grease, and rust. A clean surface prevents contamination that’d compromise your finish. Next, lightly sand the area to create texture for better paint grip. This mechanical preparation enhances the hammered effect’s distribution.
| Preparation Step | Purpose | Time Required |
|---|---|---|
| Cleaning | Remove contaminants | 15-30 minutes |
| Sanding | Create adhesion texture | 20-45 minutes |
| Priming | Enhance paint bond | 30 minutes + dry time |
Finally, apply metal-specific primer before your hammered paint. This vital step maximizes durability and guarantees professional-quality results that’ll last.
Multiple Coat Strategy
Although single heavy coats might seem efficient, building your hammered metal finish through multiple coats creates superior texture distribution and prevents the uneven clumping that ruins the effect.
You’ll achieve better finish quality by applying three to four thin layers rather than one thick application. Allow each coat to dry for approximately one day before proceeding—this waiting period guarantees prime adhesion and prevents texture distortion.
Use a spray can for consistent distribution rather than brush methods. Work in a well-ventilated area to promote faster drying and even texture development.
Light application prevents drips and runs that compromise the hammered appearance. Each successive layer builds depth while maintaining the distinctive metallic texture that defines professional-grade hammered finishes.
Optimal Drying Conditions for Enhanced Reflective Properties
While achieving a stunning hammered metal finish requires proper application technique, the drying conditions you provide afterward determine whether your project develops that coveted reflective shine. Creating ideal drying conditions dramatically enhances your finish’s reflective properties and guarantees maximum vibrant shine.
| Factor | Recommendation | Result |
|---|---|---|
| Temperature | 70°F to 85°F (21°C to 29°C) | Enhanced reflective finish |
| Humidity | Keep levels low | Improved surface quality |
| Drying Time | Allow 24 hours minimum | Proper paint curing |
You’ll want to position your project in a well-ventilated area away from direct sunlight during initial drying. This prevents dust accumulation and uneven gloss formation. The controlled environment allows the paint to cure evenly, maximizing the hammered texture’s light-reflecting capabilities for professional results.
Multiple Coat Strategies for Professional Results
Building upon proper drying techniques, your coating strategy determines whether you achieve amateur-looking results or professional-grade finish quality.
Applying multiple coats of hammered finish paint creates superior texture development and enhanced color depth. You’ll want to use thin, light applications rather than heavy single coats to prevent drips and guarantee proper adhesion.
Wait a full day between coats for best results. This patience allows each layer to cure completely and helps the distinctive hammered texture fully develop.
Consider using spray cans instead of brushes to eliminate stroke marks that compromise your professional appearance.
Each additional thin coat builds upon the previous layer, intensifying the metallic effect and creating that coveted professional shine that distinguishes expert work from amateur attempts.
Light Interaction With Hammered Surface Textures
The hammered surface creates a complex landscape of peaks and valleys that transforms how light behaves across your painted metal. This textured surface generates varying angles and depths that reflect light differently, dramatically enhancing your finish’s shine and visual appeal.
When light hits these irregularities, it creates dynamic highlights and shadows that make your surface appear more vibrant and three-dimensional. The metallic flakes in hammered paint formulations scatter light throughout these contours, producing a distinctive shimmering effect that catches the eye from multiple angles.
This unique light interaction amplifies depth perception, making your metal look exceptionally polished. The textured surface also masks imperfections effectively, allowing the enhanced shine to dominate without distractions, creating that professional-quality finish you’re seeking.
Temperature Control During the Finishing Process
Achieving that stunning light-catching surface requires more than just technique—it demands precise temperature control throughout your finishing process.
You’ll need to maintain consistent heat between 300°F to 500°F during the hammered texture application. This range keeps your metal malleable without compromising its structural integrity.
Temperature fluctuations are your enemy here—they’ll create uneven surfaces and inconsistent patterns that ruin professional results.
Temperature fluctuations destroy professional finishes by creating uneven surfaces and inconsistent patterns that compromise your metal’s appearance.
Pre-heat your metal before applying finishes to enhance adhesion and achieve smoother textures. Monitor heat constantly using infrared thermometers or thermal sensors.
Don’t rush the cooling phase either. Slow cooling produces refined finishes, while rapid cooling creates stress marks and imperfections.
Control every thermal aspect of your finishing process to achieve that coveted professional shine.
Buffing and Polishing Techniques for Hammered Surfaces
Once your metal has cooled properly from the temperature-controlled finishing process, you’ll transform those hammered textures into brilliant, light-reflecting surfaces through strategic buffing and polishing.
Start with a soft cloth or buffing wheel to remove fine scratches from the textured surface. Apply metal-specific polishing compound to fill micro imperfections and enhance the shine. Work in small sections using circular motions for even coverage across the hammered finish.
| Step | Tool/Product | Technique |
|---|---|---|
| Initial buffing | Soft cloth/wheel | Circular motions |
| Polishing compound | Metal-specific formula | Small sections |
| Final protection | Wax/metal polish | Thin layer application |
For professional results, combine both techniques. Progress from coarser to finer compounds, then apply protective wax to maintain luster and prevent oxidation.
Environmental Factors That Enhance Shine Quality
While buffing techniques create the foundation for brilliant hammered metal, environmental conditions during application and curing ultimately determine whether you’ll achieve professional-grade shine quality.
Humidity levels play an essential role – excessive moisture causes oxidation while moderate humidity maintains luster. You’ll get best results when temperature variations stay between 65°F to 85°F during application and curing phases.
Proper surface preparation protects against environmental contaminants that dull shine quality. Clean and prime surfaces thoroughly before application.
Use natural sunlight during inspection to reveal true depth and texture brilliance.
Apply light, even coats and allow adequate drying time between layers. Environmental factors directly influence application techniques, so monitor conditions carefully.
When you control these variables, you’ll consistently achieve that coveted professional-grade hammered metal shine.
Common Mistakes That Diminish Professional Appearance
You’ll sabotage your hammered metal finish if you rush through surface preparation or apply the paint incorrectly.
Poor cleaning leaves dirt and rust trapped beneath your coating, while skipping primer on bare metal causes adhesion problems that lead to chipping.
These fundamental errors, combined with heavy single coats instead of multiple light applications, will destroy the professional appearance you’re working to achieve.
Poor Surface Preparation
Although hammered metal finishes can transform ordinary surfaces into stunning focal points, inadequate surface preparation will sabotage your project before you even open the paint can.
When you fail to clean off dirt, grease, or rust, poor surface preparation creates inadequate adhesion that results in a less professional appearance. You’ll compound these problems if you don’t sand rough edges, causing uneven textures that detract from your intended aesthetic.
Applying hammered paint over existing flaws without proper priming actually makes imperfections more visible rather than concealing them.
Skipping a suitable primer on bare metal surfaces leads to poor adhesion and premature chipping.
Incorrect Application Technique
Even perfect surface preparation can’t salvage a hammered metal finish when you use incorrect application technique. You’ll create problems that show up right away if you don’t follow proper methods.
| Mistake | Result |
|---|---|
| Applying thick coats | Drips and uneven texture |
| Holding spray can too close | Overly rough surface |
| Holding spray can too far | Dry spray finish |
| Rushing between coats | Muddled texture |
| Ignoring manufacturer instructions | Poor appearance and durability |
Your technique determines whether you’ll achieve that professional hammered look or end up with a finish that’s disappointing. Use light, even coats and maintain proper distance from the surface. Allow adequate drying time between applications. Following these guidelines guarantees you’ll create the distinct texture that makes hammered metal finishes so appealing.
Maintenance Practices for Long-Lasting Brilliance
While hammered metal’s textured surface creates stunning visual appeal, it requires specific care techniques to maintain its lustrous finish. Years ago, professionals discovered that regular cleaning with mild soap solution and soft cloths prevents tarnishing effectively.
You’ll want to apply thin layers of mineral oil or specialized metal polish to enhance luster and protect against oxidation.
After cleaning and polishing, gently buff surfaces using soft-bristle brushes or microfiber cloths to achieve brilliant shine without scratching the texture. I’m going to emphasize avoiding abrasive cleaners or tools, as they’ll scratch the hammered finish and diminish reflective qualities.
Store your hammered metal items in dry, cool places. Consider protective coatings to shield against moisture and environmental factors that affect shine over time.
Advanced Techniques for Superior Reflective Finishes
When you’re ready to elevate your hammered metal beyond basic maintenance, professional-grade techniques can transform ordinary pieces into mirror-like masterpieces.
Start by meticulously smoothing rough edges with fine-grit sandpaper, creating the perfect foundation for superior shine. You’ll want to invest in metal-specific polishing compounds that enhance reflective qualities while preserving the hammered texture’s character.
Your technique matters greatly. Use a buffing wheel or soft cloth in controlled circular motions, ensuring even distribution across the entire surface.
Don’t rush this process—patience yields professional results. Apply a clear protective coating immediately after polishing to lock in the brilliance and prevent tarnishing.
This sealing step separates amateur work from professional-grade finishes, creating lasting reflective quality that withstands time.
Frequently Asked Questions
How Do You Make Metal Look Hammered?
You’ll create a hammered metal look by physically texturing the surface with a hammer or textured tool, or you can apply specialized hammered-finish paint like Rustoleum Hammered for easier application.
Does Rustoleum Hammered Paint Need Primer?
You don’t need primer on clean, rust-free metal surfaces with Rustoleum hammered paint. However, you’ll get better adhesion and durability on porous or previously painted surfaces if you use primer first.
What Is Hammertone Finish?
You’ll get a textured coating that creates a dimpled, hand-hammered metal appearance. It contains metallic flakes that reflect light, providing shimmer while hiding surface imperfections and resisting scratches better than smooth finishes.
Is Rust Oleum Hammered Paint Oil Based?
Yes, Rust-Oleum Hammered Paint is oil-based. You’ll get better adhesion to metal surfaces and durability that prevents chipping. You’ll need mineral spirits for cleanup and can easily make touch-ups later.
In Summary
You’ve now mastered the essential techniques that separate amateur work from professional-grade hammered metal finishes. By combining proper surface preparation, quality metallic flakes, and precise application methods, you’ll achieve that coveted reflective brilliance. Don’t forget to control your environment and avoid common pitfalls that’ll diminish your results. With consistent maintenance and these advanced techniques, your hammered metal surfaces will maintain their stunning, professional shine for years to come.


Leave a Reply