You’ll master jewelry laser welding by understanding five critical components: laser source, power supply, optical system, microscope, and work chamber. Start with proper surface cleaning using ultrasonic methods, then configure power settings—30-50% for gold and silver, 70-80% for platinum. Always wear laser safety goggles and follow Class 4 safety protocols. Practice spot welding for prong repairs and fill welding for material buildup. This guide reveals advanced techniques for professional-quality results.
Understanding Laser Welder Components and Workspace Requirements

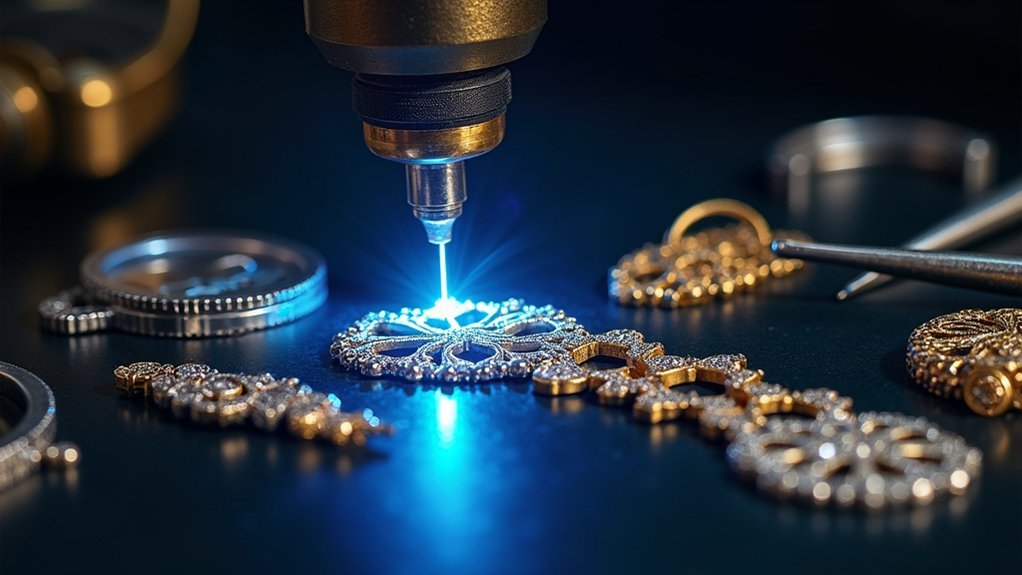
Precision defines successful jewelry laser welding, and it starts with understanding your equipment’s fundamental components.
Your laser welder consists of five critical elements: the laser source that generates the beam, the power supply controlling energy output, the optical system directing the beam, the microscope providing magnification, and the work chamber housing your pieces. Each component plays a crucial role in the welding process.
You’ll need a stable workspace with proper ventilation and thorough safety measures. Stability prevents vibrations that compromise weld quality, while adequate ventilation removes harmful fumes.
Install safety equipment including protective eyewear and emergency stops.
Before beginning any welding process, establish your workspace requirements first. This foundation guarantees consistent results and protects both you and your valuable jewelry pieces throughout every operation.
Preparing Jewelry Materials and Surface Cleaning Techniques
With your workspace properly established, you’ll now focus on preparing your jewelry materials for welding success. Proper surface cleaning forms the foundation of professional welding skills.
Start by removing dirt and oxidation using ultrasonic or steam cleaning methods to guarantee pristine surfaces.
Ultrasonic and steam cleaning methods effectively remove dirt and oxidation to achieve the pristine surfaces essential for professional jewelry welding.
Next, perform final surface preparation with a fiberglass brush or fine abrasive to create smooth surfaces that promote ideal adhesion.
Always inspect pieces under magnification to identify pre-existing damage or heat-sensitive areas that could cause problems during welding.
Understanding material properties of gold, silver, and platinum helps you select appropriate welding settings.
Prepare your filler wire by confirming it’s clean and properly sized.
Use argon gas shielding throughout the process to enhance weld quality and prevent oxidation that compromises joint integrity.
Configuring Power Settings and Pulse Parameters for Different Metals
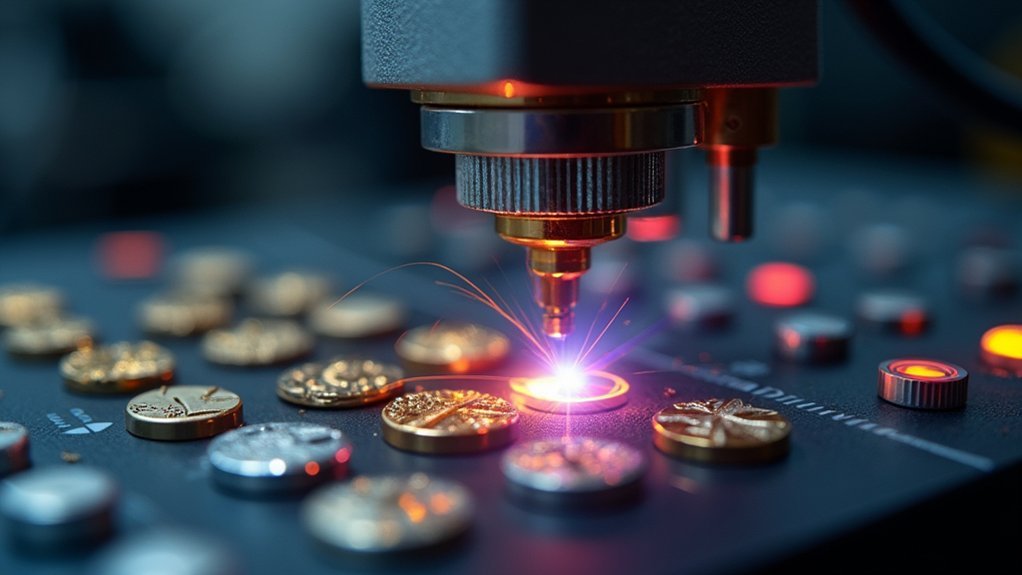
You’ll need to adjust your laser’s power settings based on the specific metal you’re working with, as each material responds differently to laser energy.
Softer metals like gold and silver require lower power levels around 30-50%, while harder metals such as platinum demand higher settings up to 70-80% for proper penetration.
Your pulse duration must also be optimized for the material’s thickness—shorter pulses of 5-10 ms work best for delicate pieces, while thicker sections need longer pulses of 20-50 ms to achieve adequate fusion without overheating.
Metal-Specific Power Requirements
Each metal presents unique challenges that demand specific power configurations to achieve ideal welding results. Understanding metal-specific power requirements is essential for optimizing your laser welding machine performance across different materials.
Gold typically requires 20-40 watts due to its relatively low melting point and excellent workability.
You’ll need to increase power settings for platinum, which demands 40-60 watts because of its considerably higher melting point and density.
Silver presents unique challenges despite requiring moderate power levels—its exceptional thermal conductivity means heat spreads rapidly, potentially causing distortion.
When setting parameters, consider each metal’s thermal properties carefully.
Start with conservative settings and gradually increase power while monitoring weld quality.
Remember that excessive power can damage delicate jewelry components, while insufficient power creates weak, incomplete welds that compromise structural integrity.
Pulse Duration Optimization
While power settings determine the energy intensity of your laser, pulse duration controls how long that energy is applied to the metal, making it equally vital for achieving ideal weld quality.
For gold and platinum work, you’ll want pulse durations between 100-200 milliseconds, which provide deeper penetration without damaging surrounding areas. Silver requires shorter durations of 10-30 milliseconds due to its reflective properties that can cause excessive heat buildup and warping.
Longer pulse duration creates larger weld pools suited for thicker materials, while shorter pulses work best for delicate applications with minimal heat input.
You must coordinate pulse duration with power settings to optimize laser energy utilization and prevent defects like porosity or cracking. Experimentation remains essential since different alloys respond uniquely to these variations.
Essential Safety Protocols and Personal Protective Equipment
You’ll need specific personal protective equipment before operating any jewelry laser welder, as these devices fall under Class 4 laser safety classifications that pose serious risks to your eyes and skin.
Your mandatory PPE must include laser safety goggles rated for your specific laser wavelength, protective gloves, and long-sleeved clothing to prevent burns from reflected beams or hot metal.
Before each welding session, you must perform operational safety checks on your equipment and workspace to guarantee all safety systems function properly and your work area remains free from hazards.
Mandatory PPE Requirements
Because laser welding involves Class 4 lasers that can cause permanent eye damage and severe burns, you must wear appropriate personal protective equipment at all times during operation.
These mandatory PPE requirements form the foundation of laser safety protocols in jewelry welding.
You’ll need Class 4 laser safety goggles to protect against laser radiation exposure. Heat-resistant gloves are essential to prevent burns from hot metal and equipment.
Wear long-sleeved clothing and protective aprons to shield your skin from laser reflections and welding sparks.
Depending on the materials you’re welding, respiratory protection like masks or respirators may be necessary to prevent fume inhalation.
Proper PPE usage dramatically reduces accident risks and creates a safer working environment for your jewelry laser welding operations.
Laser Safety Classifications
Laser safety classifications provide the framework for understanding your equipment’s hazard level and determining appropriate protective measures.
You’ll encounter classifications ranging from Class 1, which is safe under all conditions, to Class 4, representing highly hazardous lasers requiring stringent safety protocols to prevent eye and skin damage.
Most jewelry laser welders fall into Class 4 category, demanding thorough Personal Protective Equipment (PPE) and strict operational procedures.
You must understand your specific laser’s classification to implement proper safety measures effectively.
Class 4 lasers pose significant risks including direct beam exposure, diffuse reflections, and fire hazards.
These classifications aren’t arbitrary—they’re based on scientific assessment of potential injury thresholds.
Your safety protocols, training requirements, and PPE selection should align directly with your laser’s classification level to guarantee maximum protection.
Operational Safety Checks
Before powering up your jewelry laser welder, establishing a systematic pre-operation routine safeguards both you and your equipment from potential hazards. Your operational safety checks must include verifying all electrical connections are secure and examining the power supply for stability.
Inspect the machine thoroughly for visible damage before activation. Monitor your cooling system’s water temperature and pressure levels continuously. Maintain ideal temperatures around 20°C for efficient performance while preventing overheating. Check that water flow remains consistent throughout operation.
Always conduct internal component inspections during maintenance periods. Securely close the machine cabinet afterward to prevent accidental laser exposure.
These operational safety checks for laser welders aren’t optional—they’re essential protocols that protect you from Class 4 laser hazards and guarantee reliable equipment performance.
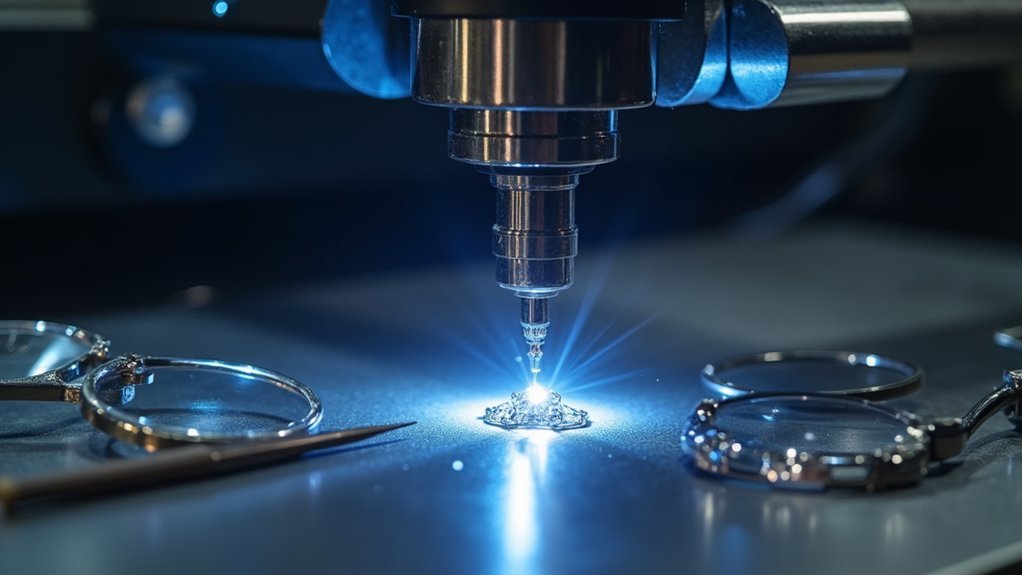
Spot Welding Techniques for Prong Repairs and Tacking
Precision becomes paramount when you’re working with delicate prong repairs and component tacking, where a single misstep can damage an entire piece. You’ll achieve superior results by using short pulse durations that provide precise control while minimizing heat input to surrounding materials. Adjusting your laser’s spot size focuses energy exactly where you need it, ensuring strong adhesion without distortion.
| Parameter | Prong Repair Setting | Tacking Setting |
|---|---|---|
| Pulse Duration | 1-3ms | 2-4ms |
| Power Level | 60-80% | 70-85% |
| Spot Size | 0.2-0.4mm | 0.3-0.6mm |
| Gas Flow | Low argon | Medium argon |
| Repetition Rate | Single pulse | 1-2 Hz |
Always inspect components under magnification before and after welding. Implement argon gas shielding throughout the process to prevent oxidation and achieve cleaner, more robust welds.
Seam Welding Methods for Ring Sizing and Crack Repairs
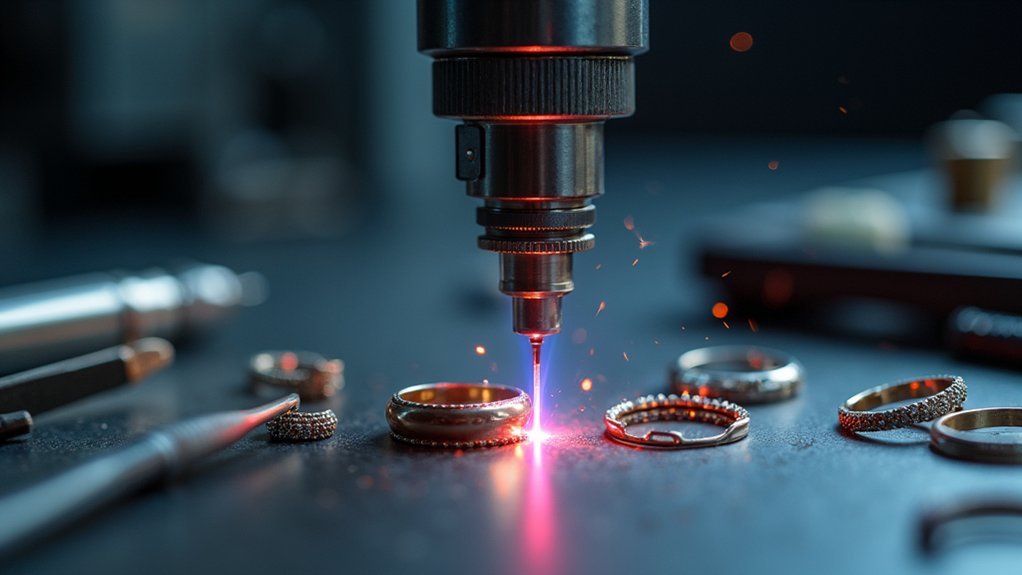
When you’re resizing rings or fixing hairline cracks, seam welding creates continuous linear joints that outperform traditional soldering methods.
You’ll achieve stronger, more uniform bonds by overlapping laser pulses along the repair line while maintaining precise control over heat input.
This technique lets you address common structural issues without compromising the ring’s integrity or requiring extensive finishing work.
Ring Sizing Techniques
As you tackle ring sizing projects, seam welding emerges as your most reliable technique for creating continuous linear joints that won’t compromise the ring’s structural integrity.
This laser welding approach delivers exceptional results when you master the essential ring sizing techniques.
Follow these critical steps for professional results:
- Maintain consistent speed – Move your workpiece steadily to create overlapping pulses that guarantee solid fusion between metal edges.
- Adjust power settings – Use lower power for soft metals like gold, higher settings for harder alloys based on material requirements.
- Apply argon gas shielding – Prevent oxidation during welding to achieve clean, high-quality welds that enhance appearance.
- Conduct thorough inspection – Check for complete fusion and smooth surfaces post-weld to ensure both strength and aesthetic quality.
Crack Repair Methods
Cracks in jewelry present unique challenges that demand a methodical approach to seam welding repair. When you’re performing crack repair, you’ll need to adjust your laser welding settings precisely to match the metal type.
Focus on pulse duration and frequency to achieve deep penetration without damaging surrounding areas. You’ll create continuous linear joints by overlapping laser pulses along the crack line.
Maintain consistent workpiece movement – either move the jewelry piece steadily or use closely spaced overlapping spots for even welds. Always use argon gas shielding to prevent oxidation and contamination, ensuring cleaner, stronger joints.
After completion, inspect your work under magnification. Look for complete fusion and check for defects like porosity or remaining cracks that could compromise structural integrity.
Fill Welding Applications Using Filler Wire for Material Buildup
Although traditional welding methods often fall short when repairing delicate jewelry, fill welding with filler wire offers you precise control over material addition and heat input. This technique allows you to build up worn sections and fill larger gaps while protecting sensitive gemstones from excessive heat damage.
When implementing fill welding applications, you’ll need to focus on these critical elements:
- Select appropriate filler wire – Match the wire material to your jewelry’s base metal and guarantee proper diameter.
- Maintain argon gas shielding – Protect the weld area from oxidation throughout the process.
- Adjust laser parameters – Control pulse duration and power to optimize molten pool size.
- Keep materials clean – Ensure both filler wire and workpiece surfaces are contaminant-free.
You’ll achieve stronger, more reliable repairs while preserving the jewelry’s structural integrity.
Post-Weld Inspection and Quality Assessment Procedures
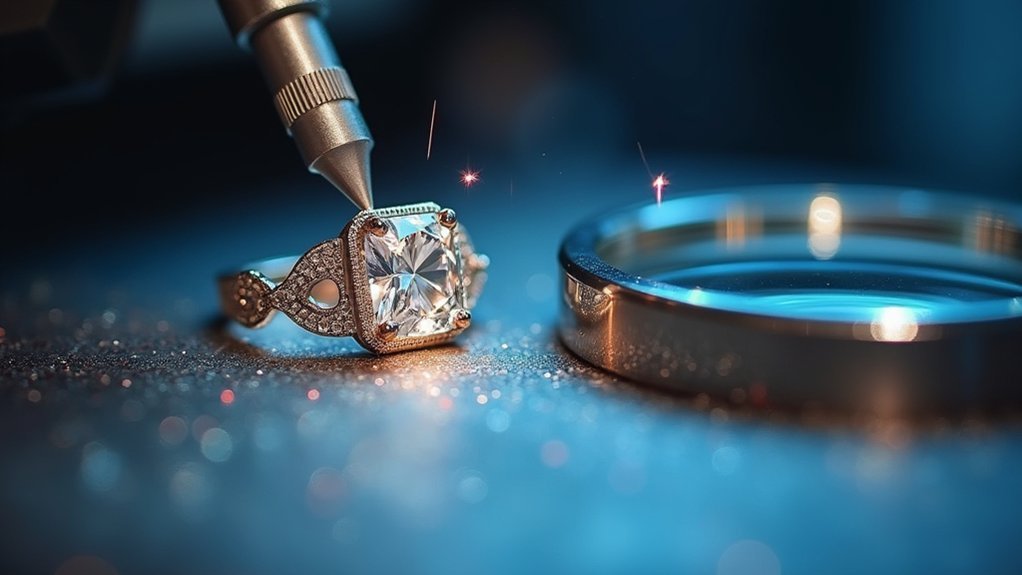
Precision in post-weld inspection determines the success of your jewelry laser welding project.
You’ll need to conduct visual inspections under magnification immediately after the weld cools, checking for incomplete fusion, porosity, or cracks. Use gentle probing techniques to evaluate weld strength, guaranteeing robust adhesion especially for critical joints in high-value pieces.
Clean weld areas with fiberglass brushes or ultrasonic cleaners to remove debris and discoloration, maintaining aesthetic quality.
Document any defects you observe during quality assessment to inform future welding practices and parameter adjustments.
Don’t forget to regularly inspect your laser welder’s functionality, monitoring lens clarity and alignment settings to guarantee consistent weld quality across all projects.
Finishing Techniques and Discoloration Removal Methods
After completing your quality assessment, you’ll need to address any surface imperfections and discoloration that occurred during the welding process.
These finishing techniques and discoloration removal methods will restore your jewelry’s professional appearance.
Your post-weld finishing process should follow these essential steps:
- Level the welds using fiberglass brushes or fine abrasives to create a smooth surface foundation.
- Remove discoloration with ultrasonic cleaners or steam cleaners to eliminate debris and restore metal luster.
- Inspect under magnification to identify areas requiring additional finishing or discoloration treatment.
- Polish systematically starting with coarser abrasives and progressing to finer ones for ideal shine.
Advanced Applications for Mixed Metal Joining and Antique Restoration
When you’re ready to tackle the most challenging aspects of jewelry laser welding, mixed metal joining and antique restoration represent the pinnacle of technical expertise.
You’ll need to master precise parameter adjustments for mixed metal welding, carefully matching power settings and pulse durations to each material’s melting point. Understanding gold, silver, and platinum’s unique properties becomes essential for selecting appropriate filler wires and techniques.
In antique restoration, you’ll preserve original metal and patina while rebuilding worn details with minimal heat input. This prevents damage to delicate features while maintaining historical value.
Your laser welder’s precision allows intricate work on vintage jewelry designs, ensuring strong connections without compromising aesthetic quality. Success requires balancing technical skill with artistic sensitivity to preserve each piece’s authenticity.
Frequently Asked Questions
What Is the Typical Duration and Cost of Professional Laser Welding Training?
You’ll typically spend 2-5 days in professional laser welding training, costing $1,500-$4,000. Advanced courses can extend to weeks and cost more. You’re investing in specialized equipment training, safety protocols, and hands-on practice sessions.
Do I Need Prior Welding Experience to Enroll in the Course?
You don’t need prior welding experience to enroll in most jewelry laser welding courses. They’re designed for beginners and will teach you fundamental techniques from scratch, making them accessible to newcomers.
Are Certification or Continuing Education Credits Provided Upon Course Completion?
You’ll receive a professional certification upon completing the course, and it qualifies for continuing education credits with most jewelry trade organizations and professional associations for maintaining certifications.
What Equipment Brands and Models Are Covered During the Training Program?
You’ll work with industry-standard laser welders including Leica, Rofin, Sisma, and LaserStar models. Training covers different power ranges, pulse systems, and microscope configurations you’ll encounter in professional jewelry workshops and manufacturing environments.
Is Ongoing Technical Support Available After Completing the Training Course?
You’ll receive thorough ongoing technical support after completing your training. We provide phone consultations, email assistance, troubleshooting guidance, and access to updated techniques to guarantee you’re successful with your laser welding projects.
In Summary
You’ve now gained extensive knowledge of laser welding fundamentals, from equipment setup to advanced restoration techniques. You’ll confidently handle power configurations, safety protocols, and material preparation for any jewelry project. You’ve mastered spot welding for repairs and fill welding for buildups, plus finishing methods that’ll eliminate discoloration. With these skills, you’re ready to tackle complex mixed-metal joins and delicate antique restorations with professional precision and consistency.


Leave a Reply