A perfect matte metal finish requires thorough surface preparation, progressive sanding with 80-320 grit sandpaper, and consistent directional strokes to eliminate reflective properties. You’ll need high-quality base material like stainless steel, proper cleaning between steps, and even pressure application to achieve uniform texture. Scotch-Brite pads refine the surface intensity, while quality control through visual inspection guarantees no scratches or irregularities remain. Master these techniques and you’ll discover advanced methods that elevate your finishing results.
Understanding Matte Metal Finish Characteristics
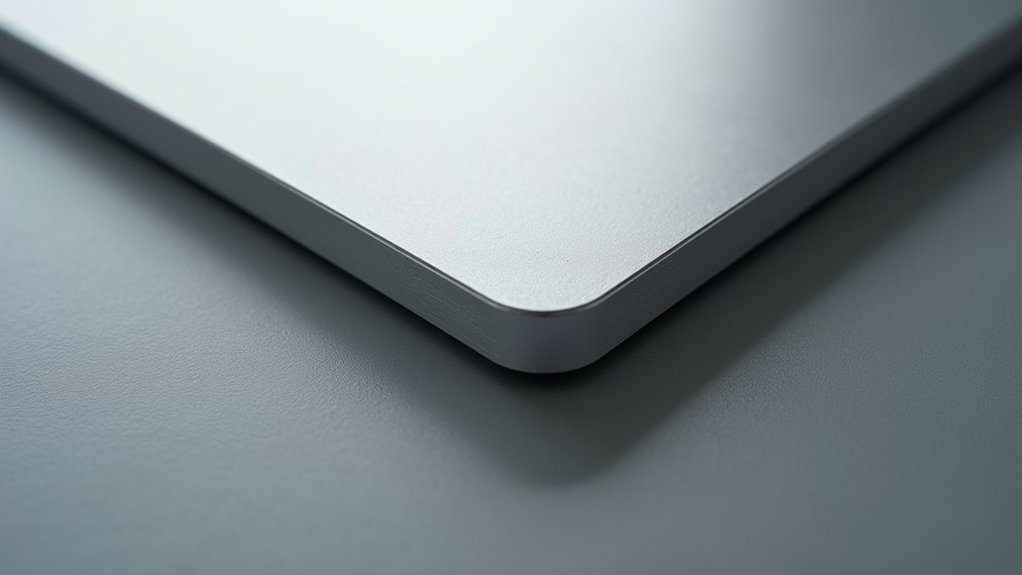
While glossy metal surfaces grab attention with their mirror-like shine, matte metal finishes offer a completely different aesthetic that’s gained popularity in contemporary design.
Matte metal finishes have surged ahead of glossy surfaces as the preferred choice for today’s minimalist aesthetic sensibilities.
You’ll notice that a matte surface creates a smooth, non-reflective appearance that eliminates glare and unwanted reflections. This characteristic makes it perfect for modern applications where subtlety matters more than flashiness.
When you examine a quality matte finish, you’re seeing lower color saturation compared to glossy alternatives. This reduced vibrancy creates a sophisticated, understated look that complements minimalist design principles.
The matte surface texture provides visual depth without distraction, making it ideal for architectural elements, appliances, and furniture where you want the form to speak louder than the finish itself.
Essential Tools and Materials for Matte Finishing
Before you can achieve that perfect matte metal finish, you’ll need to gather the right tools and materials for the job.
Start with high-quality stainless steel as your base material—it’s essential for durability and corrosion resistance that’ll make your matte finishes last.
You’ll need sandpaper ranging from 80 to 320 grit. Begin with coarse 80-grit to remove imperfections, then progress through finer grits for smoothness.
Scotch-Brite pads are essential tools for surface refinement—white pads work for light polishing while maroon handles general tasks.
Don’t skip safety gear: safety glasses, dust masks, and gloves protect you during the process.
For chemical approaches, consider acid etching supplies, though they require careful handling and proper neutralization afterward.
Surface Preparation Techniques for Jewelry Metals
Three critical steps form the foundation of exceptional matte finishes on jewelry metals: thorough cleaning, systematic sanding, and meticulous contamination control.
Start your surface preparation by completely removing oils and contaminants from the metal. You’ll need to sand progressively using finer grits from 80 to 320, maintaining consistent directional strokes for uniform texture.
Progressive sanding from 80 to 320 grit with consistent directional strokes ensures uniform matte texture after thorough contamination removal.
After sanding, you can refine the surface with Scotch-Brite pads, selecting abrasion levels based on your desired matte finish intensity.
Consider acid etching as an alternative technique that selectively removes thin metal layers, though it requires strict safety protocols.
Clean thoroughly between each preparation step to prevent contamination that creates uneven surfaces or imperfections. Proper surface preparation directly determines your final matte finish quality.
Sanding Methods for Achieving Consistent Texture
You’ll need to master three fundamental sanding techniques to achieve that perfect matte finish on your jewelry metals.
Your success depends on selecting the right grit progression, maintaining consistent directional patterns, and properly preparing each surface before you move to the next stage.
These methods work together to eliminate imperfections while creating the uniform texture that defines professional-quality matte finishes.
Progressive Grit Selection Strategy
Since achieving a perfect matte metal finish depends heavily on your sanding technique, implementing a progressive grit selection strategy becomes crucial for consistent results.
You’ll start with coarse grit sandpaper (80-120) to eliminate surface imperfections and establish a uniform base for your matte finish. Next, shift to medium grit (150-240) to refine the surface texture and remove deep scratches from initial sanding.
Complete your grit selection strategy by finishing with fine sandpaper (320-400), which creates a smooth surface that enhances the matte appearance while maintaining texture consistency.
Always sand in the same direction to preserve grain uniformity and prevent cross-grain scratches that compromise the finish quality. Clean thoroughly between each grit stage to prevent contamination and guarantee proper adhesion.
Directional Sanding Techniques
Building on the proper grit progression, directional sanding techniques determine whether your matte finish achieves professional uniformity or displays obvious surface inconsistencies.
You’ll need to move your sandpaper consistently along the metal’s grain, maintaining straight lines throughout the process. This directional sanding approach prevents cross-grain scratches that create visible imperfections in your final surface.
Apply even pressure while sanding to avoid texture variations that’ll compromise your matte finish quality. Keep your movements steady and parallel, never switching directions mid-stroke.
Clean the surface thoroughly between each grit stage to remove debris that could cause scratches.
Match your sanding technique intensity to your desired matte finish level—some finishes require lighter pressure while others need more aggressive directional sanding for proper texture development.
Surface Preparation Methods
Although directional technique forms the foundation, proper surface preparation methods require a systematic sanding approach that transforms rough metal into a uniformly textured matte surface.
You’ll start with coarse grit sandpaper (80-120) to eliminate surface imperfections, then progress through finer grits (150-400) for refinement. This sequential surface treatment prevents deep scratches while maintaining even texture throughout your project.
Between each sanding stage, you must clean thoroughly to remove dust and debris that could contaminate your finish. Each progressive grit smooths out marks from the previous stage, creating consistency across the entire surface.
Once you’ve completed the sanding sequence, employ Scotch-Brite pads for final refinement. This additional step delivers the perfect matte look without introducing unwanted scratches to your carefully prepared surface.
Abrasive Selection and Grit Progression
The foundation of any exceptional matte metal finish lies in choosing the right abrasive materials and following a systematic grit progression.
You’ll want to select aluminum oxide sandpaper for stainless steel, as it prevents surface damage while delivering consistent results. Your grit progression should be methodical and deliberate.
- Start coarse (80-120 grit) to eliminate surface imperfections and major scratches
- Progress to medium (150-240 grit) for refinement and smoothing the surface texture
- Finish with fine grit (320-400) to achieve your desired smooth matte appearance
Always sand in one direction along the grain to maintain consistent texture and avoid cross-grain scratches.
Clean the surface thoroughly between each grit stage to prevent contamination.
Consider finishing with Scotch-Brite pads for additional refinement.
Chemical Etching Processes for Matte Effects
While mechanical abrasion offers excellent control over surface texture, chemical etching provides an alternative approach that creates distinctive matte finishes through controlled surface dissolution.
You’ll need to pre-clean your stainless steel thoroughly, removing all contaminants to guarantee even etching results. Apply protective etch resist to areas you don’t want affected, giving you precision control over your design.
The acidic solution removes a thin metal layer through controlled corrosion, creating the desired matte finish. After etching, you must neutralize the acid immediately using baking soda to stop the chemical action.
Clean the surface completely afterward. Chemical etching produces unique texture and depth that differs considerably from mechanical methods like sanding or blasting.
Mechanical Finishing Techniques and Equipment
Since chemical etching creates texture through controlled dissolution, mechanical finishing techniques achieve matte effects by physically altering the metal’s surface structure.
You’ll use sanding, polishing, and abrasive blasting to transform glossy surfaces into smooth matte finishes.
Start with coarse grit sandpaper (80-120) to remove imperfections, then progress to fine grits (320-400) for consistent texture.
Scotch-Brite pads in different colors provide varying abrasiveness levels, letting you refine surfaces without deep scratches.
Essential equipment includes:
- Orbital sanders for uniform pressure and consistent results
- Wet metal finishing machines for enhanced efficiency
- Automated finishing machines for complex pieces and non-directional finishes
These mechanical finishing methods prepare surfaces perfectly for matte coating applications while reducing labor time and maintaining quality standards.
Quality Control and Surface Inspection Methods
After achieving your desired matte finish through mechanical techniques, you’ll need systematic quality control measures to guarantee consistent results across all surfaces.
Visual surface inspection forms your first defense against imperfections like scratches or uneven texture that compromise appearance and performance.
You’ll want to use gloss meters to quantify reflectivity levels, ensuring your matte finish meets exact specifications consistently.
Tactile inspection helps trained inspectors detect irregularities invisible to the naked eye by feeling surface smoothness variations.
Advanced imaging technologies like optical coherence tomography provide detailed surface profile insights for precise quality control.
Regular production audits and testing maintain standards, ensuring each batch meets durability and aesthetic criteria.
These thorough inspection methods guarantee your matte finishes deliver the professional quality your customers expect.
Comparing Matte to Other Metal Finish Types
Understanding the distinctions between matte finishes and other metal surface treatments helps you select the ideal finish for your specific application.
You’ll find that matte surfaces offer a smooth, non-reflective appearance that eliminates glare, making them perfect for industrial settings. Satin finishes provide subtle sheen with fine-grain texture, while brushed finishes feature parallel lines that hide fingerprints and scratches effectively.
When choosing between options, consider these key differences:
- Maintenance requirements – You’ll need regular cleaning for matte surfaces to prevent residue buildup, while satin finishes resist wear better.
- Aesthetic appeal – Matte delivers understated modern elegance versus high-polish mirror-like vibrancy.
- Practical applications – Matte excels in glare-sensitive environments, while brushed works well for appliances and automotive components.
Common Mistakes and How to Avoid Them
When pursuing that perfect matte metal finish, you’ll likely encounter two critical pitfalls that can derail your project from the start.
Improper sanding techniques often create more problems than they solve, leaving you with uneven surfaces and unwanted scratch patterns that compromise your final result.
Inadequate surface preparation sets the foundation for failure, as contaminants and poor cleaning practices will show through even the most expertly applied finish.
Improper Sanding Techniques
Many metalworkers sabotage their matte finish before they even realize what’s gone wrong. Poor sanding techniques can transform your stainless steel products from professional-grade to amateur in seconds.
You’ll create visible scratches when sanding against the grain instead of following the metal’s natural direction. Starting with grits that are too coarse leaves deep scratches you can’t easily fix later.
Key sanding mistakes to avoid:
- Skipping surface cleaning – Always wipe down between grits to prevent contamination
- Applying uneven pressure – Maintain consistent force across the entire surface
- Dry sanding with Scotch-Brite pads – Use light lubrication like motor oil to reduce friction
Progress systematically from coarser grits (80-120) to finer ones (320-400) while maintaining steady, grain-aligned strokes for ideal results.
Inadequate Surface Preparation
Even perfect sanding techniques won’t save your project if you’ve skipped essential surface preparation steps. Inadequate preparation creates imperfections like scratches and uneven texture that compromise your final matte finish quality.
You must thoroughly clean the stainless steel before any sanding begins. Contamination from oils, dirt, or residue affects adhesion and creates surface uniformity problems that’ll haunt your project later.
Don’t rush the cleaning process between sanding stages either. Skipping this critical step causes contamination buildup, resulting in patchy or inconsistent results.
Each surface preparation stage builds the foundation for your next step.
Protective Coatings for Matte Metal Surfaces
Although achieving that perfect matte metal finish requires careful preparation and technique, you’ll need protective coatings to maintain its appearance over time.
Protective coatings are essential for preserving matte metal finishes, preventing deterioration and maintaining that carefully crafted non-reflective appearance long-term.
Anti-fingerprint sprays remarkably reduce smudge visibility while preserving your finish’s aesthetic appeal. Specialized products like Macoat_GC work exceptionally well for sandblasted surfaces, enhancing durability against environmental factors without compromising the non-reflective quality.
Regular application prevents staining and scratching, extending your matte finish’s lifespan greatly. Some protective coatings resist harsh chemicals, making them ideal for industrial environments with corrosive substance exposure.
- Enhanced durability – Protective coatings shield against environmental damage and wear
- Chemical resistance – Special formulations withstand harsh industrial chemicals and corrosive substances
- Easy application – Straightforward process in clean, well-ventilated workspaces maintains finish integrity
Application remains straightforward in clean, well-ventilated workspaces, ensuring your finish stays visually pleasing.
Maintenance and Long-Term Care Strategies
Once you’ve applied protective coatings, proper maintenance becomes your next priority for preserving that flawless matte appearance. Finishes are often compromised by improper care techniques, so establishing the right routine is essential.
| Do | Don’t |
|---|---|
| Use mild detergents with soft cloths | Apply abrasive materials or harsh chemicals |
| Dry immediately with microfiber cloth | Leave water spots to air dry |
| Apply anti-fingerprint sprays regularly | Scrub aggressively against the surface texture |
| Clean residues before they build up | Ignore environmental damage over time |
Regular maintenance prevents residue buildup that can damage your matte surface permanently. You’ll want to dry surfaces immediately after cleaning to avoid water spots. Anti-fingerprint sprays greatly reduce smudges while maintaining surface integrity, ensuring your matte metal finish stays pristine for years.
Frequently Asked Questions
How to Get Matte Metal Finish?
You’ll clean the metal thoroughly, then sand progressively from coarse to fine grits. Use Scotch-Brite pads for texture refinement. Alternatively, try acid etching with proper protection. Maintain it gently with mild detergents.
What Makes a Matte Finish?
You’ll create a matte finish by roughening the surface through controlled scratching or texturing methods. This disrupts smooth light reflection, scattering it instead to produce that characteristic non-reflective, dull appearance you’re seeking.
How to Make Metal Not Shiny?
You’ll sand the metal surface with coarse-grit sandpaper first, then progress to finer grits. Use Scotch-Brite pads for texture refinement. Consider acid etching for deeper dulling effects on reflective surfaces.
How to Make Glossy Metal Matte?
You’ll sand the glossy surface using 80-320 grit sandpaper, moving consistently along the metal’s grain. Follow with Scotch-Brite pads in the same direction, or use acid etching for chemical removal.
In Summary
You’ve learned that achieving a perfect matte metal finish requires attention to detail at every step. Don’t rush the surface preparation or skip grits in your progression. You’ll get the best results when you maintain consistent pressure and use proper techniques. Remember that protecting your finish with appropriate coatings and following regular maintenance routines will keep your matte metal looking professional for years to come.


Leave a Reply