
You’ll need a jeweler’s saw, mandrel, rawhide hammer, and high-quality turquoise stones to master this ancient art. Start by crushing turquoise in paper towels, then mix with brass filings for decorative contrast. Cut your silver precisely using calipers, anneal if needed, and solder bands with medium-grade solder. Apply crushed turquoise with super glue, fill gaps with brass filings, then wet-sand from 220 to 1000 grit for a polished finish. These foundational techniques reveal deeper Mesoamerican jewelry-making secrets.
Essential Tools and Materials for Turquoise Inlay Work
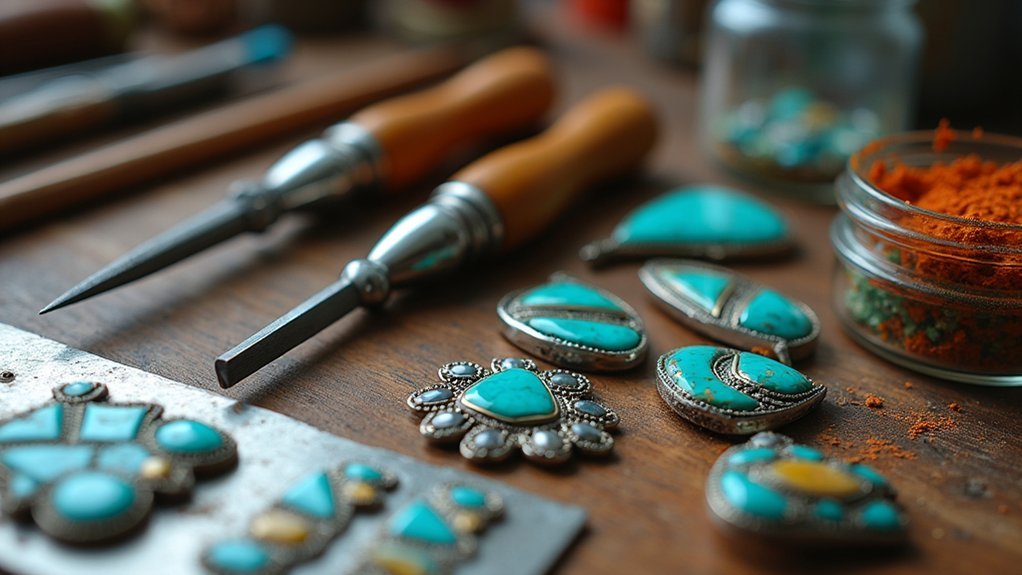
Before you begin your turquoise inlay project, you’ll need to gather the right tools and materials to guarantee professional results.
Essential tools include a jeweler saw for precise cutting, a mandrel for shaping rings, and a rawhide hammer to avoid damaging metal while forming.
Professional turquoise inlay requires precise tools: a jeweler’s saw for cutting, mandrel for ring shaping, and rawhide hammer for gentle metal forming.
Your materials list should feature high-quality turquoise stones, super glue for secure adhesion, and brass filings to fill gaps and create decorative patterns.
For finishing, you’ll need various grits of sandpaper up to 1000, plus polishing compounds and felt wheels for achieving that coveted high shine.
Don’t forget proper safety gear—gloves and goggles are vital when handling sharp tools and protecting against dust during the inlay process.
Ring Sizing and Metal Preparation Techniques
Once you’ve assembled your tools and materials, accurate ring sizing becomes your foundation for success. Use a ring sizer or measure a well-fitting ring’s inner diameter to determine the correct size.
Calculate metal thickness using equations specific to your ring design dimensions.
Mark precise cutting lines on your silver sheet with calipers, ensuring accurate height and width for the ring blank. When cutting, start with the shortest line first to maintain structural integrity – this technique was used earlier by Mesoamerican artisans who understood metal behavior. Lubricate your saw blade for smoother operation.
Before shaping around the mandrel, anneal the metal if it isn’t dead soft. This preparation will give us easier manipulation and perfect fit, especially important when planning for the hole cut during turquoise inlay work.
Cutting and Shaping Silver for Mesoamerican Designs
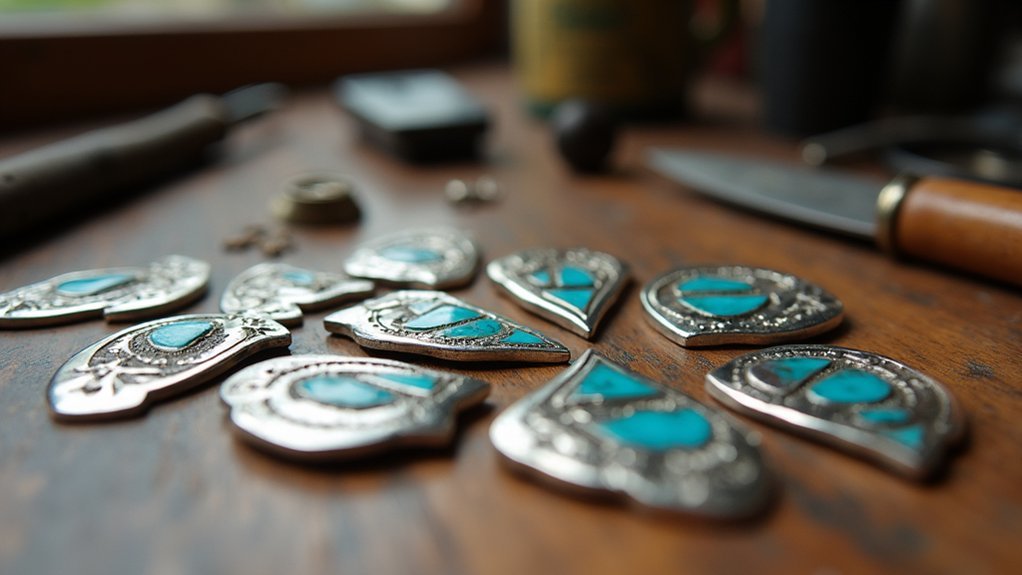
You’ll need precise cutting techniques to create clean, professional edges for your Mesoamerican-inspired silver work.
Start by cutting along the shortest lines first using your jeweler’s saw with a lubricated blade to maintain structural integrity throughout the process.
Once you’ve achieved smooth, filed edges, you can begin shaping the metal around a mandrel using controlled hammer strikes to form your ring blank.
Precise Silver Cutting Techniques
Mastering precise silver cutting techniques forms the foundation of creating authentic Mesoamerican-inspired turquoise inlay jewelry.
You’ll need to measure the inner diameter of your ring before cutting to guarantee accurate sizing. Use calipers to mark precise lines for cutting, then employ a jeweler saw for cutting silver.
Essential cutting techniques include:
- Cut the shortest line first to maintain structural integrity throughout the process
- Lubricate the blade regularly to facilitate smoother cuts and prevent binding
- File the edges of cut pieces to achieve a uniform finish for seamless joints
- Anneal the metal before shaping to make it malleable and prevent cracking
Remember to maintain tight, flat alignment of pieces before soldering.
Apply flux to joints to promote effective solder flow during heating, guaranteeing professional-quality results.
Mandrel Shaping Methods
After cutting your silver pieces with precision, shaping them around a mandrel transforms flat metal into the curved forms vital for Mesoamerican-inspired jewelry.
Before you begin shaping, anneal your metal to achieve a dead soft state. This prevents cracking and makes manipulation considerably easier.
Position your silver blank on the mandrel at your desired ring size. You’ll need a rawhide hammer for this process—it’s essential for preventing excessive stretching or unwanted bending that could distort your carefully planned dimensions.
Work gradually around the mandrel, applying gentle, consistent pressure with the rawhide hammer. The soft metal will conform to the mandrel’s shape without resistance.
Take your time during this step, as rushing can create uneven curves that’ll compromise your turquoise inlay’s final appearance and structural integrity.
Soldering Methods for Multi-Band Ring Construction
Success in multi-band ring construction hinges on precise soldering techniques that create strong, seamless joints between components.
You’ll achieve professional results by following these essential steps for your turquoise inlay project.
Start by flexing both outer and center bands slightly before joining to guarantee perfect alignment. This prevents gaps that could weaken your ring’s structure.
- Use medium solder for initial band attachment, applying directly to joints.
- Heat evenly to prevent solder movement during the process.
- Confirm outer bands fit snugly against the center band for seamless joints.
- Check for gaps after quenching and fill if necessary.
For additional bands, you’ll want to switch to easy solder. This prevents overheating and protects your previously soldered joints from damage.
Turquoise Stone Preparation and Crushing Techniques
While your ring bands now form a solid foundation, preparing turquoise stones properly will determine the quality and beauty of your finished inlay.
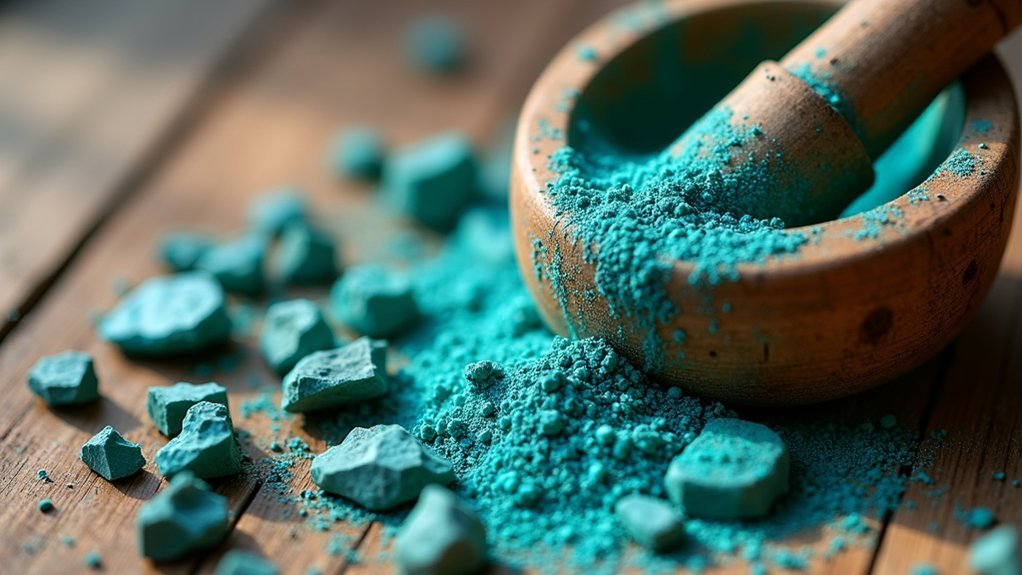
Begin by placing turquoise stones inside a paper towel, then crush them using a hammer. This technique contains fragments and prevents scattering throughout your workspace.
After crushing, sift the turquoise to obtain uniform-sized pieces for even application. You’ll want consistent fragment sizes to create a professional-looking inlay that enhances your ring’s overall aesthetic.
For decorative effects, mix your crushed turquoise with brass filings. This combination fills gaps effectively and creates intricate patterns within the inlay design.
Once you’ve applied the crushed stones and fillings, use a hand file to smooth the surface until it’s flush with the silver, achieving that polished finish you’re after.
Inlay Application and Gap-Filling Methods
You’ll start by crushing your turquoise stones into various sizes to fill different gap widths in your inlay work.
Next, you’ll apply super glue sparingly to avoid messy overflow while securing the stones in place.
Finally, you’ll mix crushed turquoise with brass filings to create an attractive solution for filling any remaining voids between stones.
Stone Crushing Preparation Techniques
Once you’ve selected your turquoise pieces, proper crushing technique becomes essential for achieving professional-looking inlay results. The hammer and paper towel method offers the most control while minimizing dust and preventing stone scatter.
Follow these key preparation steps:
- Wrap turquoise pieces in paper towels before crushing to contain fragments and reduce airborne particles.
- Strike with controlled force to achieve uniform stone sizes that’ll create consistent visual patterns.
- Sort crushed pieces by size to guarantee even distribution across your inlay channels.
- Prepare brass filings as complementary material for gap-filling and decorative accent work.
You’ll want consistency in your crushed stone sizes for the best appearance. Uniform pieces pack together better and create smoother surfaces when you file them flush with the silver after application.
Super Glue Application Process
When your crushed turquoise pieces are properly sorted and ready, super glue becomes your precision bonding agent for creating seamless inlay work.
You’ll need gloves to prevent skin contact and maintain a clean finish throughout the process.
Use a toothpick or fine applicator to place small amounts of super glue into designated gaps with complete control. This prevents waste and guarantees precise placement.
Position your turquoise stones carefully, then press them gently into the adhesive for proper bonding without excess oozing.
For enhanced visual appeal, mix brass filings with super glue when filling spaces between stones. This creates striking patterns that complement turquoise beautifully.
Allow complete curing before sanding or polishing to guarantee your stones remain securely embedded in your finished jewelry piece.
Brass Filing Gap Solutions
Since even the most carefully placed turquoise pieces leave inevitable gaps, brass filings offer an elegant solution that transforms these spaces into stunning design elements.
The crushed brass creates a visually appealing contrast against the turquoise while seamlessly blending the colors together.
You’ll need fine brass filings that fit into small gaps without leaving noticeable spaces. Follow this process for professional results:
- Apply super glue directly to gaps before sprinkling brass filings to guarantee proper adhesion and prevent shifting
- Use only fine enough filings to avoid creating uneven surfaces or protruding materials
- File down the filled areas with a hand file until flush with surrounding metal
- Check thoroughly for remaining gaps and repeat the filling process as needed
This technique enhances your piece’s overall finish and achieves that coveted polished look.
Finishing and Polishing Your Handcrafted Jewelry
After completing your turquoise inlay work, you’ll transform your rough creation into a polished masterpiece through careful finishing techniques.
Begin by wet-sanding the entire piece with 220 grit sandpaper to smooth rough edges and prepare the surface. Progress through increasingly fine sanding discs up to 1000 grit, guaranteeing uniform consistency across your jewelry.
Next, polish the surface using a felt wheel with polishing compound to enhance shine and overall appearance.
Don’t neglect the interior—clean inside rings thoroughly with rubber and diamond bits to remove residue and assure comfortable wearing.
Complete the process by using a smaller felt wheel on inner surfaces, achieving that coveted high-gloss finish that elevates both aesthetics and comfort of your handcrafted piece.
Frequently Asked Questions
How to Tell if Your Turquoise Jewelry Is Real?
You’ll spot real turquoise by checking its natural veining patterns and cool touch. Scratch it gently—authentic stones scratch easier than plastic. Look for tiny imperfections since genuine turquoise isn’t perfectly uniform like synthetic versions.
How to Attach Turquoise to Silver?
You’ll need to clean both surfaces, apply super glue evenly to the silver, position turquoise stones carefully, fill gaps with brass filings, then file everything flush once cured.
What Is Inlaid Turquoise?
You’ll create inlaid turquoise by cutting small turquoise pieces and fitting them into pre-carved grooves in metal or wood. You’ll secure them with adhesive, creating striking patterns that highlight turquoise’s natural beauty.
How Do You Clean Vintage Turquoise Jewelry?
You’ll want to gently wipe vintage turquoise jewelry with a soft, damp cloth. Don’t use harsh chemicals or ultrasonic cleaners. For deeper cleaning, use mild soapy water and dry completely afterward.
In Summary
You’ve now mastered the ancient art of turquoise inlay jewelry making. Your handcrafted pieces showcase the timeless beauty of Mesoamerican design traditions. Don’t rush the finishing process—proper polishing will make your jewelry shine. Keep practicing these techniques to develop your skills further. Each ring you create connects you to thousands of years of indigenous craftsmanship. Wear your creations proudly, knowing you’ve preserved this cultural art form through your own hands.


Leave a Reply