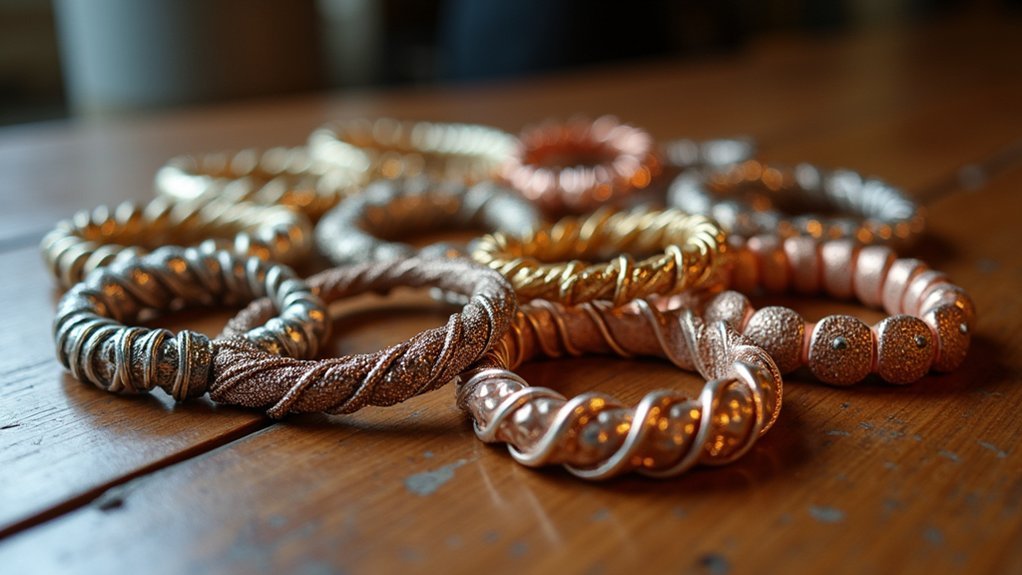
You can create stunning textured bracelets using ten proven corrugation methods that transform ordinary metal strips into artistic masterpieces. Start with microfold brake techniques for precise patterns, then explore random hammering with ball-peen or sharp-edged hammers for varied textures. Combine annealing and crimping for unique designs, while choosing appropriate metal gauges for ideal results. Use wing mandrels for proper shaping and hot metal processes for enhanced pliability. These techniques’ll open up endless creative possibilities for your jewelry designs.
Microfold Brake Corrugation Technique

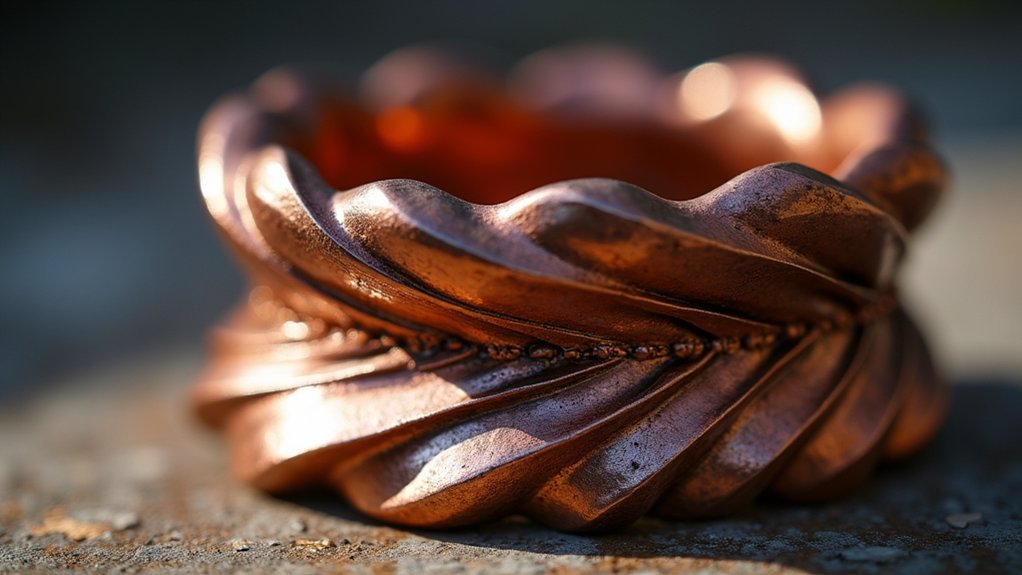
One specialized tool that’s revolutionizing bracelet corrugation is the Microfold Brake, which enables jewellers to create precise textures and intricate patterns with remarkable consistency.
You’ll achieve repeatable results that enhance your jewelry design’s overall aesthetic and visual impact.
This versatile technique lets you experiment with both organic flowing patterns and sharp geometric designs, adapting to various bracelet styles.
You’ll find that thin gauge metals like copper and sterling silver work exceptionally well, as they readily adapt to the corrugation process without resistance.
The Microfold Brake delivers immediate results, facilitating quick creative exploration that leads to unique designs.
You can rapidly test different pattern combinations and textures, making it an invaluable tool for developing stunning corrugated bracelets efficiently.
Random Hammering Pattern Method
You’ll create stunning textural effects on your bracelet by selecting the right hammers for your random hammering pattern method.
Ball-peen hammers produce smooth, dimpled textures, while sharp-edged hammers create dramatic serrated or corrugated surfaces that catch light beautifully.
Your hammer choice directly determines the final texture pattern, so experiment with different types to achieve the unique visual appeal you’re seeking.
Hammer Selection and Types
Several hammer types can dramatically transform your metal bracelet’s texture and appearance through random patterning techniques. You’ll find that each hammer creates distinct effects on your metal surface. A ball-peen hammer works perfectly for basic shaping and smooth impressions, while sharp-edged hammers produce striking serrated or corrugated textures.
| Hammer Type | Effect | Best For |
|---|---|---|
| Ball-Peen | Smooth dimples | Basic shaping |
| Cross-Peen | Linear marks | Directional texture |
| Chasing | Fine details | Intricate patterns |
| Planishing | Smooth finish | Final smoothing |
You can combine different hammer types within the same random pattern to create intricate, multi-layered textures. Monitor your bracelet’s shape closely during hammering to maintain evenness. This variety in hammer selection allows you to develop unique designs that elevate your bracelet’s overall aesthetic appeal.
Creating Texture Patterns
Random hammering transforms your bracelet’s surface into a fascinating landscape of varied textures and depths.
You’ll vary the angle and intensity of your hammer strikes to create unique patterns that can’t be replicated. Using a ball-peen hammer, you’ll produce both subtle dimples and pronounced textures by adjusting the force of each strike.
When you want a serrated or corrugated appearance, switch to a sharp-edged hammer to enhance your piece’s visual interest.
You must continuously monitor your bracelet’s shape and texture during hammering to guarantee an even, consistent surface throughout.
Once you’ve achieved your desired texture, polish the surface with sandpaper to remove oxidation and create that shiny, professional finish your bracelet deserves.
Ball-Peen Hammer Texturing Approach
A ball-peen hammer transforms smooth metal into richly textured surfaces through controlled impact patterns that breathe life into bracelet designs.
You’ll discover this versatile tool creates unique textures that enhance your bracelet’s visual appeal while allowing for random hammering patterns that produce organic, dynamic surfaces.
Adjust your hammer’s pressure and angle to create varying depths and impressions, adding complexity to your design. This technique encourages experimentation—you can blend different textures by layering various hammering approaches.
Experiment boldly with hammer pressure and angles to layer distinctive textures that transform simple metal into complex, visually captivating bracelet surfaces.
Start with light taps and gradually increase intensity as you develop your rhythm.
Monitor your bracelet’s shape regularly while hammering to maintain an even surface and prevent unwanted distortion.
The ball-peen’s rounded head naturally creates dimpled patterns that catch light beautifully, transforming ordinary metal into stunning decorative elements.
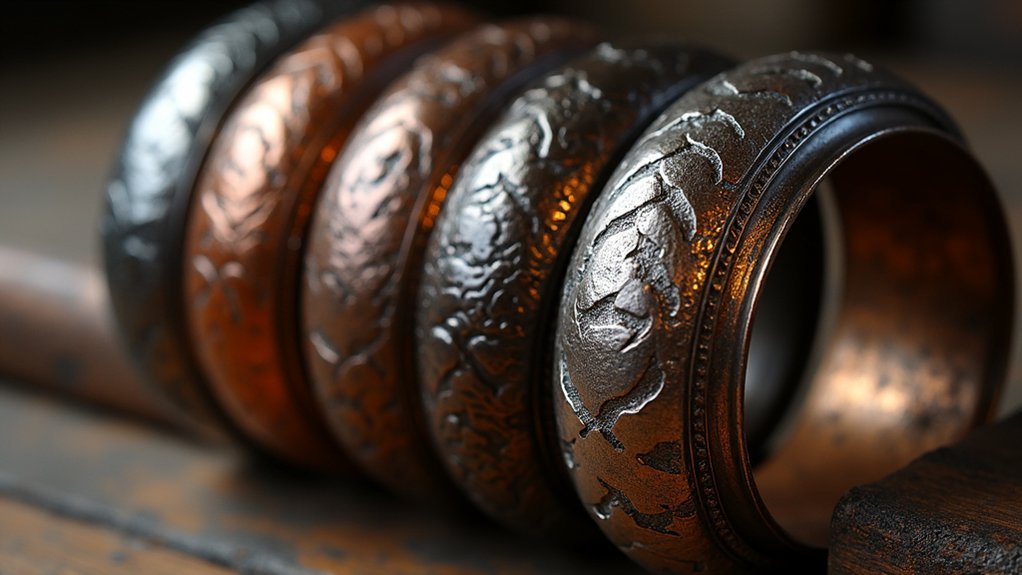
Sharp-Edged Hammer Serration Process
Sharp-edged hammers carve precise serrated patterns into metal surfaces, creating bold geometric textures that define contemporary bracelet aesthetics. You’ll achieve distinctive corrugated designs by controlling your hammer’s force and angle with each strike.
Key techniques for successful serration include:
- Monitor your bracelet’s shape continuously – Watch for unwanted deformation while maintaining consistent texture patterns.
- Vary strike force and angles – Create unique design elements by adjusting your hammering intensity and approach direction.
- Combine with flattening techniques – Use wooden or metal blocks alongside hammering for harmonious finishes.
- Focus on structural benefits – Remember that serration enhances both decorative appeal and bracelet integrity.
This process transforms ordinary metal into visually striking pieces while strengthening the overall structure through controlled deformation.
Annealing and Crimping Combination
After completing your sharp-edged hammer serration, you’ll need to combine annealing with crimping techniques to achieve professional results.
The heat treatment process restores your metal’s workability, while proper metal softening techniques guarantee you can create precise crimps without cracking or splitting.
You can then experiment with various crimping pattern variations to develop unique textures that complement your corrugated bracelet design.
Heat Treatment Process
When working with metal corrugation for bracelets, you’ll find that combining annealing with strategic crimping creates the most versatile and workable material for complex designs.
The heat treatment process requires careful attention to temperature control. You’ll need to heat your metal with a small flame until it glows, indicating proper softening temperature. This annealing step makes the metal pliable for subsequent manipulation.
Follow these essential steps for best results:
- Heat the metal until it glows using controlled flame application
- Pickle the silver after corrugating to remove oxides and restore shine
- Apply crimping to corrugated hills using chain nose pliers for texture variation
- Reanneal after crimping to maintain softness for final adjustments
This systematic approach guarantees your bracelet maintains workability throughout the design process while achieving professional-quality texture and finish.
Metal Softening Techniques
The annealing and crimping combination forms the foundation of professional metal corrugation work, giving you complete control over your bracelet’s texture and flexibility.
You’ll heat your metal to a specific temperature, softening it for easier manipulation during the initial corrugation process. This prevents cracking and guarantees smooth shaping.
After corrugating, you must reanneal the metal to restore its workability. This second heating prevents brittleness that could cause damage during subsequent manipulation.
Once softened, you’ll use chain nose pliers to crimp decorative hills and valleys, creating the signature texture that makes your bracelet visually striking.
This dual approach provides both structural integrity and artistic possibilities.
Mastering proper annealing and crimping techniques guarantees consistent, professional results with enhanced texture throughout your finished piece.
Crimping Pattern Variations
Once you’ve mastered basic annealing and crimping techniques, varying your crimping patterns transforms ordinary bracelet designs into distinctive artistic statements.
After corrugating your metal, you’ll need to reanneal it to restore softness for easier manipulation. This combination opens unlimited creative possibilities for unique textures.
- Adjust hill size and spacing – Create rhythmic patterns by varying the distance between crimped sections and changing their dimensions.
- Experiment with crimp depth – Shallow crimps offer subtle texture while deeper ones create dramatic shadows and visual interest.
- Use proper chain nose pliers – Guarantee even, secure crimping without damaging your metal through appropriate tool sizing.
- Practice with copper first – Refine your pattern variations on less expensive materials before investing in sterling silver for final pieces.
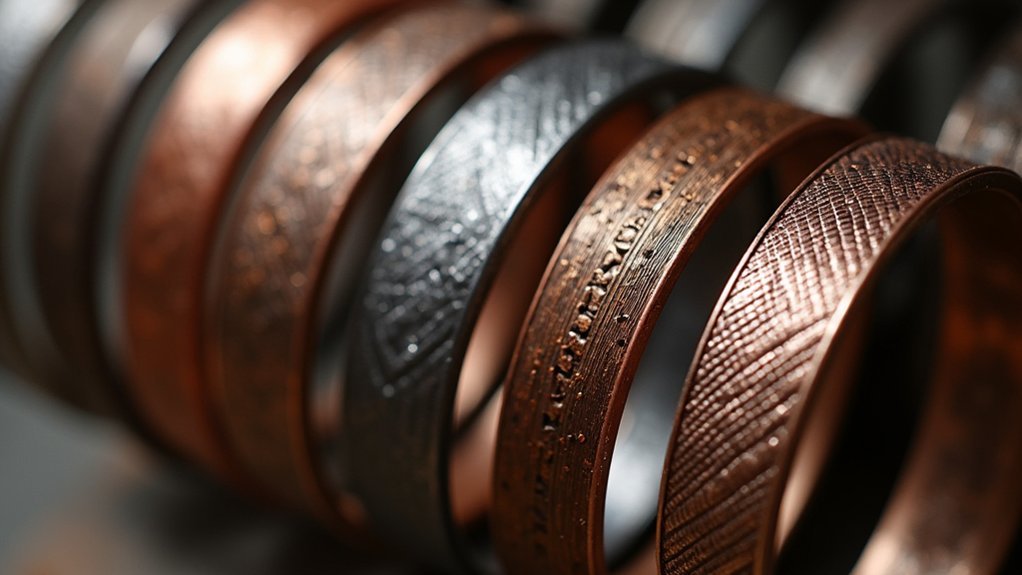
T-Fold and Line-Fold Applications
Because T-Folds and Line-Folds form the backbone of metal corrugation techniques, you’ll discover these methods transform flat metal sheets into dynamic, textured bracelet components with remarkable ease.
T-Folds create pronounced ridges and valleys by folding metal into “T” shapes, adding visual interest while strengthening your bracelet’s structure. Line-Folds produce parallel, linear patterns that you can manipulate for varying heights and widths, generating unique geometric forms.
You’ll find both techniques work exceptionally well with thinner 24 and 26 gauge metals, ensuring your finished bracelets remain lightweight and comfortable.
Gauge-Specific Metal Manipulation
While these foundational techniques provide the framework for corrugation, your choice of metal gauge determines how successfully you’ll execute these folds and what final results you’ll achieve.
Understanding the gauge system helps you select appropriate materials for your project’s requirements.
Higher gauge numbers mean thinner metals that offer greater manipulation flexibility. For bracelet corrugation, you’ll want to focus on specific gauges:
- 24 gauge – Ideal for intricate patterns requiring detailed work
- 26 gauge – Perfect for complex shapes without excessive force
- Heat application – Enhances pliability for defined textures
- Angle variation – Creates unique surface textures during manipulation
Thinner metals respond better to corrugation techniques, allowing you to create sophisticated designs while maintaining structural integrity for wearable jewelry pieces.
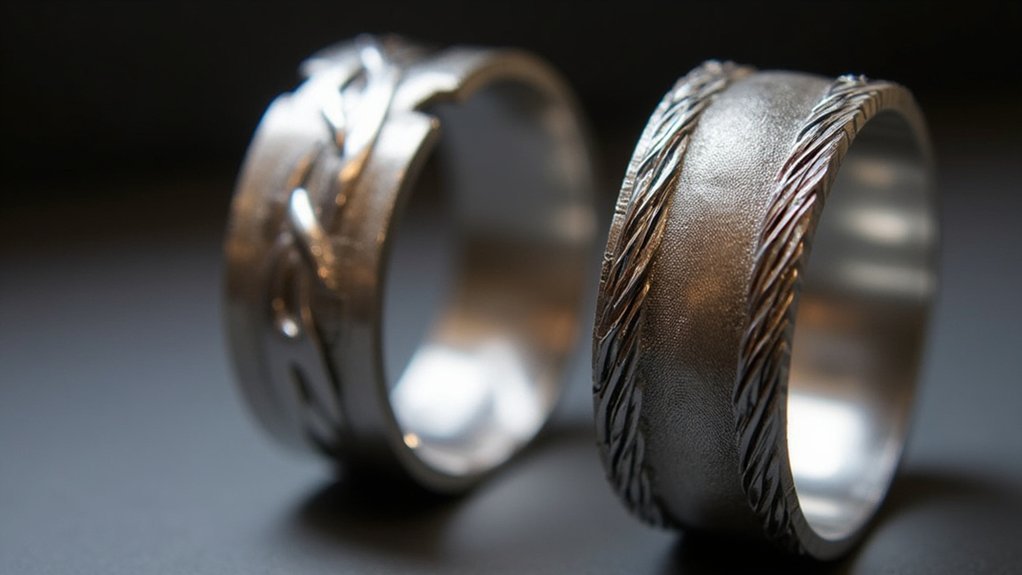
Wing Mandrel Shaping Technique
After selecting your appropriate gauge metal, you’ll need a Wing Mandrel to transform your corrugated strips into properly shaped bracelets. This essential tool’s tapered design allows you to create various bracelet sizes and styles by carefully manipulating the metal around its surface.
As you shape, continuously monitor your metal’s position to maintain even surfaces and preserve your desired corrugated texture throughout the forming process.
You can combine the Wing Mandrel with strategic hammering techniques to blend seams seamlessly and add unique textural elements to your design. The mandrel’s precise curves guarantee consistent results while giving you control over the final bracelet dimensions.
Remember to regularly polish your shaped piece directly on the Wing Mandrel—this final step enhances the visual appeal and gives your corrugated bracelet a professional, finished appearance.
Hot Metal Corrugation Process
When you’re working with thinner gauge metals like 24 and 26 gauge, the hot metal corrugation process opens up exciting possibilities for creating distinctive bracelet textures.
Hot metal corrugation transforms thin gauge metals into textured masterpieces, unlocking creative possibilities for distinctive bracelet designs.
By heating the metal before shaping it through a corrugation brake, you’ll enhance its pliability and achieve deformation much more easily.
This technique requires careful attention to several key factors:
- Temperature control – Monitor heat levels to prevent overheating and unwanted oxidation
- Timing – Allow proper cooling before additional shaping and finishing work
- Metal selection – Focus on thinner gauges for ideal results
- Creative exploration – Experiment with different patterns and textures
You’ll discover that this method produces innovative designs with unique surfaces that dramatically elevate your bracelets’ aesthetics and craftsmanship, setting them apart from conventional pieces.
Multi-Run Brake Texturing Method
As you advance beyond single-pass corrugation, the multi-run brake texturing method transforms your metalwork by creating exceptionally complex surface patterns through successive passes. You’ll achieve deeper, more intricate textures by adjusting angle and pressure settings between each run, producing unique visual effects that enhance your bracelet’s appeal.
| Run Number | Angle Adjustment | Pressure Setting |
|---|---|---|
| 1st Pass | 45° | Light |
| 2nd Pass | 90° | Medium |
| 3rd Pass | 135° | Heavy |
| 4th Pass | 180° | Variable |
This technique works best with 24 and 26 gauge metals, which handle repeated corrugation without losing structural integrity. You can create everything from subtle waves to pronounced ridges by varying your approach. Experimentation leads to innovative design concepts as resulting textures inspire new forms.
Frequently Asked Questions
What Safety Equipment Is Essential When Performing Metal Corrugation Techniques?
You’ll need safety glasses to protect your eyes from metal shards, work gloves to prevent cuts, and a dust mask when filing. Don’t forget proper ventilation and secure clamps for stability.
How Do You Determine the Correct Metal Thickness for Bracelet Corrugation?
You’ll want to contemplate your bracelet’s intended wear and flexibility. Choose 18-20 gauge for delicate pieces, 16-18 gauge for everyday wear, and 14-16 gauge for bold statement bracelets requiring structural integrity.
What’s the Average Time Needed to Complete a Corrugated Bracelet Project?
You’ll typically need 4-6 hours for a basic corrugated bracelet, though complex patterns can take 8-12 hours. Your skill level, design intricacy, and metal thickness directly affect completion time.
Which Metals Work Best for Beginners Learning Corrugation Methods?
You’ll find copper and brass are perfect starting metals since they’re soft, forgiving, and affordable. Silver’s also excellent once you’ve practiced basic techniques. Avoid harder metals like steel until you’ve mastered fundamental corrugation skills.
How Do You Repair Mistakes Made During the Corrugation Process?
You can’t fully reverse corrugation mistakes, but you’ll minimize damage by gently hammering raised areas flat, annealing the metal to restore workability, then re-corrugating carefully with lighter pressure.
In Summary
You’ve now mastered ten powerful corrugation techniques that’ll transform your metal bracelet crafting. Whether you’re using microfold brake methods or hot metal processes, each approach offers unique texturing possibilities. Don’t hesitate to combine techniques like annealing with crimping for exceptional results. Practice with different gauges and hammering patterns until you’ve developed your signature style. These methods will elevate your metalworking skills and create truly stunning, professional-quality bracelets that stand out.


Leave a Reply