
Metal stamping lets you create personalized jewelry by striking metal blanks with specialized stamps and a hammer to leave permanent impressions of letters, numbers, or designs. You’ll need basic tools—a hammer, bench block, and quality stamps—plus metal blanks in your preferred shape and material. Secure your blank, mark your design, and strike with controlled force for professional results. This accessible craft transforms simple metal into meaningful keepsakes that tell personal stories for years to come.
The Fundamentals of Metal Stamping Techniques
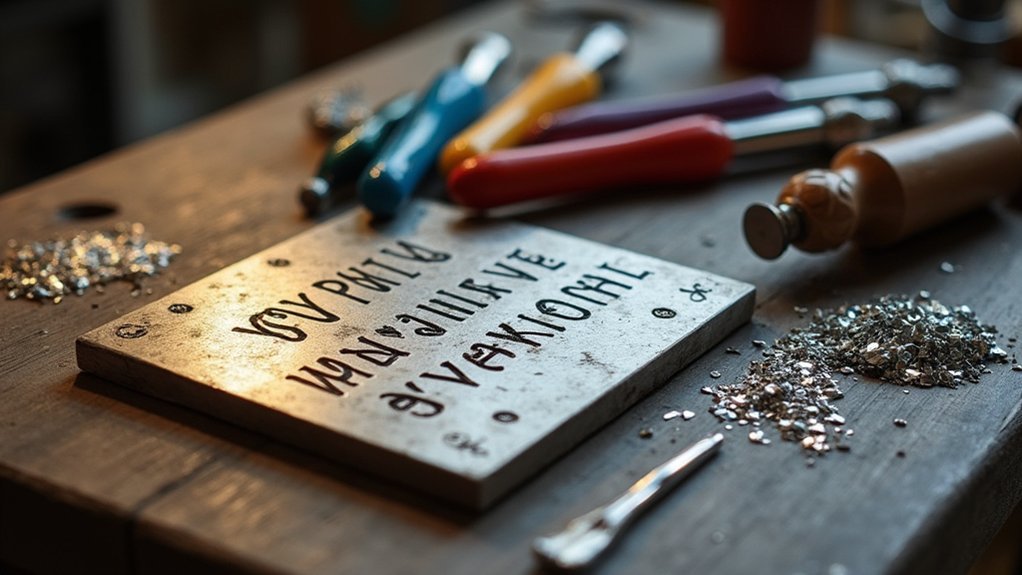
The art of metal stamping transforms ordinary metal pieces into personalized treasures with just a few strategic strikes. To begin your journey, you’ll need essential metal stamping supplies: an 8oz Ball Pein Jeweler’s Hammer, a steel bench block, and quality metal stamps available in various fonts and sizes.
Metal stamping elevates simple metal into meaningful keepsakes through precision, skill, and the right tools.
Start by securing your stamping blank enamel to the steel block using tape to prevent movement. Mark your design with pencil for proper alignment. When striking, hold your stamp firmly and hit it once with confident force—this creates clearer impressions than multiple light taps.
For beginners, using practice blanks made of aluminum is ideal before progressing to pewter or silver. The softer metal allows you to develop proper technique without wasting precious materials.
With practice, you’ll soon create professionally stamped jewelry pieces.
Essential Tools and Materials for Jewelry Stamping
You’ll need several key tools to begin creating personalized stamped jewelry, including a quality stamping hammer like a 1 lb Brass Head Mallet, metal stamps in various sizes from 3-12 mm, and a sturdy steel bench block for stability.
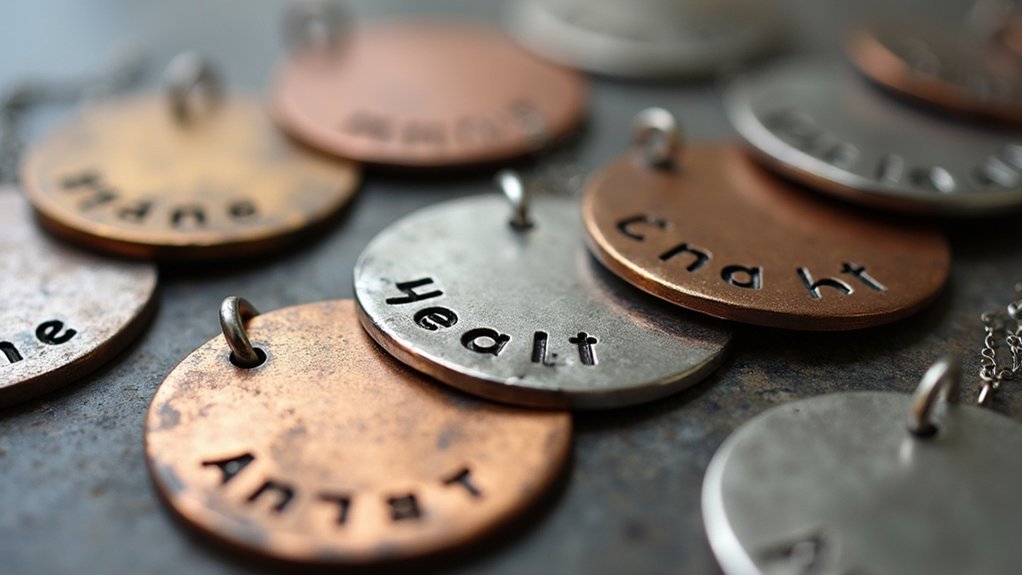
Metal blanks serve as your canvas and come in diverse styles such as flat tags, crest tags, and hammered designs that offer numerous creative possibilities.
Supplementary materials like stamping tape to secure your workpiece and hole-punching pliers for attachment points will elevate your stamping projects to professional quality.
Essential Stamping Tools
Launching your metal stamping journey requires five fundamental tools that create the foundation for beautiful personalized jewelry.
You’ll need a stamping hammer—specifically, a 1 lb Brass Head Mallet offers the perfect balance of force and control for clear impressions.
Metal stamps come in various fonts and sizes, with 6 mm stamps being most popular as they accommodate up to 7 characters on jewelry tags.
A steel bench block (4″ x 4″) provides the solid surface necessary for transferring designs, while metal tags or blanks serve as your canvas.
Pewter stamping blanks from Nunn Design are particularly beginner-friendly due to their softness.
Finally, stamping tape helps secure your blanks during the process, preventing slippage.
Consider investing in a starter kit that bundles these essentials for an affordable entry into this creative craft.
Quality Metal Blanks
Choosing the right foundation transforms your metal stamping projects from amateur attempts to professional keepsakes. Quality metal blanks, particularly those made from lead-free pewter, provide the durability and resilience needed for crisp, long-lasting impressions in your jewelry making endeavors.
Nunn Design’s USA-made cast pewter blanks come in various shapes and textures, offering excellent options for custom metal work. If you’re new to stamping, start with flat tags—they’re easier to work with while still allowing for personalization across different styles.
Look for blanks with pre-drilled holes to simplify attachment and save valuable crafting time.
Hammers and Blocks
The foundation of successful metal stamping rests on two critical tools: a proper hammer and a sturdy block. For best results, you’ll want an 8oz Ball Pein Jeweler’s Hammer, which provides the perfect balance of weight and control for precision strikes on your metal pieces.
Your steel block serves as the anvil for your creative work—a 4″ x 4″ version offers ample space while ensuring stability for clear impressions.
Don’t forget stamping tape to secure your tags firmly to the block, preventing unwanted movement during stamping.
Tools to prioritize:
- A lightweight (8oz) Ball Pein hammer for controlled stamping
- A 4″ x 4″ steel block for a solid foundation
- Quality stamping tape to secure your work
- Proper striking technique to maintain consistent impression depth
Investing in quality tools enhances your stamping results and extends equipment lifespan.
Selecting the Right Metal Blanks for Your Projects
When choosing metal blanks for your stamping projects, you’ll find that different metals like pewter and aluminum offer unique qualities that affect both workability and the final appearance of your jewelry.
Consider selecting blanks in various shapes and sizes to accommodate your design plans, with smaller pieces perfect for initials and larger ones giving space for more elaborate patterns.
The thickness of your metal blank directly impacts your stamping experience—thicker blanks provide durability but require more force, while thinner options stamp more easily but may bend during the process.
Metal Qualities Matter
Successful metal stamping begins with selecting the appropriate material for your project. Different metals offer unique characteristics that directly impact your personalized jewelry creation. When choosing a metal stamping blank, consider that soft metals like aluminum and pewter produce clearer impressions and require less force than harder options like stainless steel.
For best results, evaluate these factors:
- Malleability – Lead-free pewter blanks hold detail exceptionally well, making intricate designs possible.
- Thickness – Thicker blanks provide durability and substantial feel while remaining stampable.
- Finish – Various textures (hammered, organic) enhance aesthetic appeal and uniqueness.
- Wearability – Consider weight and hypoallergenic properties (sterling silver, brass) for customer satisfaction.
The metal qualities matter greatly in determining your finished piece’s appearance, durability, and comfort—ultimately affecting how your personalized jewelry will be received.
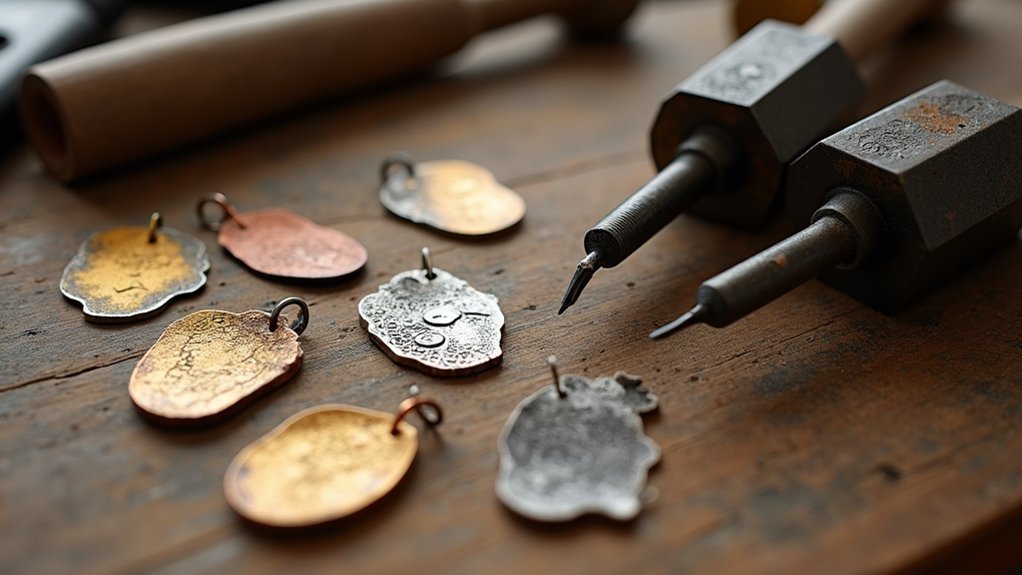
Shapes and Sizes
Variety defines the world of metal blanks available for your stamping projects. From flat tags to organic and decorative options, you’ll find shapes that complement any personalized jewelry vision.
Sizes typically range from small 3-4 mm tags perfect for minimalist designs to larger 9.5-12 mm blanks that accommodate intricate details and artwork.
When selecting metal blanks, consider thickness carefully—thicker materials offer durability but can be challenging to stamp, while thinner options prove more beginner-friendly.
Many blanks come with pre-made holes, saving you time and ensuring easy attachment to chains or cords.
For distinctive personalized jewelry, explore specialty shapes like crest or hammered flat tags. These unique forms can transform simple stamping projects into standout accessories that reflect your individual style preferences.
Thickness Considerations
Selecting the right thickness for your metal blanks represents one of the most essential decisions in jewelry stamping. The thickness directly impacts both the stamping process and the quality of your personalized jewelry. While 20 gauge (0.8 mm) is standard for most projects, consider your specific needs before committing.
- Material hardness matters – Softer metals like aluminum require less force to stamp than harder options like brass, making them ideal for beginners.
- Weight affects wearability – Lighter metals create delicate pieces, while heavier blanks provide a substantial, quality feel.
- Thicker blanks (18 gauge/1.0 mm) – Better for intricate designs and withstand hammering without warping.
- Size-thickness ratio – Ascertain your blank’s thickness works with your chosen findings and can endure daily wear.
Step-by-Step Guide to Perfect Metal Impressions
Achieving perfect metal impressions requires five essential preparatory steps before you ever swing your hammer. Start by cleaning your metal tags with a wet wipe. Then, secure them on a steel bench block using tape. Next, mark your design with pencil rather than permanent marker, which can interfere with the metal stamping process.
When you’re ready to stamp, grip your 8oz Ball Pein Jeweler’s Hammer close to the head for better control. Strike once firmly, then assess if a second stamp is needed for deeper impressions.
Always practice on larger blanks first to refine your technique and guarantee balanced hammer strikes. For a more professional finished product, consider investing in quality design stamps—higher-end options create sharper impressions that elevate your personalized jewelry pieces.
Design Ideas and Layout Planning for Stamped Jewelry

When planning your stamped jewelry designs, you’ll need to select fonts that remain legible at small sizes, typically 6 MM or larger for ideal clarity.
You can maximize your available space by sketching layouts on paper first, ensuring balanced spacing and proper alignment that complements your chosen blank’s dimensions.
Consider incorporating personal elements like initials or meaningful dates alongside decorative stamps to create pieces that are both visually appealing and emotionally significant.
Subheading Discussion Points
How will you transform a simple metal tag into a meaningful piece of wearable art? When planning your metal stamping projects, thoughtful design layouts elevate your jewelry from ordinary to extraordinary.
Consider the size constraints of your tags—6 MM stamps typically accommodate up to 7 characters, perfect for personalization with names or meaningful dates.
For standout design ideas that showcase your creativity:
- Sketch your layout on paper first, ensuring proper spacing and alignment before committing to metal.
- Experiment with mixed media by combining stamped words with symbols or icons.
- Play with different tag shapes and thicknesses to match your desired aesthetic.
- Incorporate texture variations like hammered finishes to add visual interest and depth.
These design considerations will help your personalized jewelry pieces tell a unique story that resonates with the wearer.
Font Selection Strategies
The perfect font transforms your metal-stamped jewelry from ordinary to extraordinary, serving as the visual voice of your personalized creations.
Consider using uppercase letters for bold, impactful statements, while lowercase creates softer, more delicate impressions. The standard 6mm stamp size accommodates about 7 characters, so plan accordingly.
Create visual interest by mixing font styles—pair flowing scripts for names with sturdy block letters for dates.
Pay careful attention to spacing between letters to maintain readability, especially with intricate fonts that might blur together when stamped.
Experiment with different alignments to complement your jewelry’s shape. Center text works beautifully on pendants, while left-alignment suits cuff bracelets.
For added dimension, incorporate design stamps alongside your text to create truly unique, personalized pieces.
Space Utilization Techniques
Five essential considerations govern effective space utilization on stamped jewelry pieces. When planning your designs, think strategically about how to maximize both aesthetics and functionality.
Flat tags offer superior space utilization techniques, providing more design flexibility while accommodating various text lengths and visual elements.
- Sketch your layout on paper first – visualize letter arrangements before committing to metal
- Select appropriate stamp sizes – use 3-4mm stamps for delicate pieces and 9.5-12mm for statement charms
- Balance negative space – allow breathing room around your stamped elements to create visual impact
- Incorporate design elements strategically – position loops, textures, and decorative features to enhance the overall composition
Finishing Techniques to Enhance Stamped Pieces
Numerous finishing techniques can transform your stamped metal jewelry from simple impressions to professional, eye-catching pieces.
After completing your stamping, use a fine Sharpie to fill in the indentations, creating bold contrast against the metal surface. For more durability, try enamel or paint pens instead of regular markers.
Don’t overlook the power of polishing—run a polishing cloth over your piece of metal to achieve a professional shine while smoothing any sharp edges.
For added dimension, experiment with chasing hammers to create unique textures around your stamped areas. If you’re seeking a vintage aesthetic, apply patina solutions to darken the impressions, giving your jewelry an aged, antique appearance.
These finishing touches elevate your work from ordinary to extraordinary with minimal effort.
Common Challenges and Troubleshooting Tips
Metal stamping may look straightforward, but many crafters encounter obstacles that can dampen their creative flow. Understanding common challenges before you begin will help you avoid frustration and achieve the professional results you’re seeking.
- Unclear impressions – Grip your hammer close to the head and strike with sufficient force. Don’t be timid, but avoid over-striking which can damage your stamps.
- Movement during stamping – Secure your metal pieces with stamping tape on a sturdy work surface to prevent shifting.
- Visible mistakes – Practice on softer metals like aluminum before working with precious materials to build confidence and reduce waste.
- Inconsistent finish – For a polished look, use a fine Sharpie to darken stamped letters or apply enamel for durability, transforming imperfections into design elements.
Advanced Stamping Methods for Experienced Crafters
Once you’ve mastered the basics of metal stamping, a world of creative possibilities opens up through advanced techniques that elevate your jewelry from simple impressions to professional-quality art pieces.
Try using chasing hammers to create textured surfaces with dimples and lines that add unique character to your designs.
Experiment with dapping blocks to transform flat metal blanks into curved, three-dimensional forms without compromising your stamped designs.
You’ll find that mastering your striking technique—balancing pressure and precision—becomes essential for achieving crisp, detailed impressions in complex patterns.
For truly distinctive pieces, incorporate specialty tools like hole punches alongside patina effects created with household items such as vinegar and ammonia.
These advanced metal stamping techniques create vintage looks and enhanced depth that will set your personalized jewelry apart.
Creating a Signature Style With Custom Stamp Designs
Artisans seeking to distinguish their work in today’s competitive jewelry market often turn to custom stamp designs as their secret weapon. Your personalization options expand dramatically when you incorporate unique stamps that transform simple metal blanks into distinctive creations reflecting your artistic vision.
To develop your signature style with custom stamps:
- Experiment with various fonts and sizes, considering 6 MM stamps for jewelry tags to achieve ideal visibility.
- Combine stamping with textural elements using chasing hammers to create multi-dimensional unique pieces.
- Submit artwork for enhancement that translates your intricate designs into clear, impactful impressions.
- Layer personalization elements – names, dates, phrases – that resonate with customers seeking meaningful jewelry.
This approach guarantees each piece becomes a true reflection of your craftsmanship while offering the personalized experience today’s consumers demand.
Building a Collection of Personalized Stamped Jewelry
When you’re ready to elevate your jewelry-making journey, developing a diverse collection of personalized stamped pieces becomes your next strategic step.
Start by gathering various metal tags—flat, organic, and hammered styles—that can be customized with meaningful phrases or dates.
Begin your collection with an assortment of metal tags—embrace flat, organic, and hammered varieties ready to capture personal sentiments and significant moments.
Invest in different stamp sizes (3-12mm) to accommodate various designs and detail levels for your metal stamping handmade projects. High-quality pewter blanks from Nunn Design, cast in the USA and plated with precious metal, guarantee durability and professional results.
Enhance your personalized stamped jewelry by using a dapping block to create dimensional curves.
Don’t forget finishing touches—darkening stamped letters with enamel or Sharpie makes text pop.
For continued inspiration, explore community resources like beaducation.com and the Nunn Design Blog to keep expanding your collection creatively.
Frequently Asked Questions
What Is Metal Stamping Jewelry?
Metal stamping jewelry is a technique where you’ll create personalized pieces by imprinting letters, designs, or numbers onto metal blanks using specialized stamps and a hammer, resulting in unique, handcrafted accessories.
What Is the Purpose of Metal Stamping?
Metal stamping lets you create personalized pieces by imprinting designs, words, or symbols onto metal. You’ll transform plain items into unique expressions while adding sentimental value that can’t be mass-produced elsewhere.
What Is Custom Metal Stamping?
Custom metal stamping is your way to create unique jewelry with personalized designs, words, or symbols. You’ll use specialized stamps and a hammer to imprint your distinctive marks onto metal surfaces for one-of-a-kind pieces.
What Is the Difference Between Engraving and Stamping Jewelry?
Stamping creates raised impressions by striking metal, while engraving carves into the surface. You’ll find stamping offers a rustic look with simpler designs, whereas engraving provides deeper, more intricate detailing for your jewelry.
In Summary
Metal stamping is your gateway to creating truly personal jewelry that tells your story. You’ll find endless creative possibilities once you’ve mastered the basics and built your toolkit. Whether you’re crafting gifts or starting a business, your unique stamped pieces will capture meaningful moments and messages. Don’t be discouraged by initial challenges—with practice, your technique will improve, and your distinctive stamped jewelry collection will continue to grow.


Leave a Reply