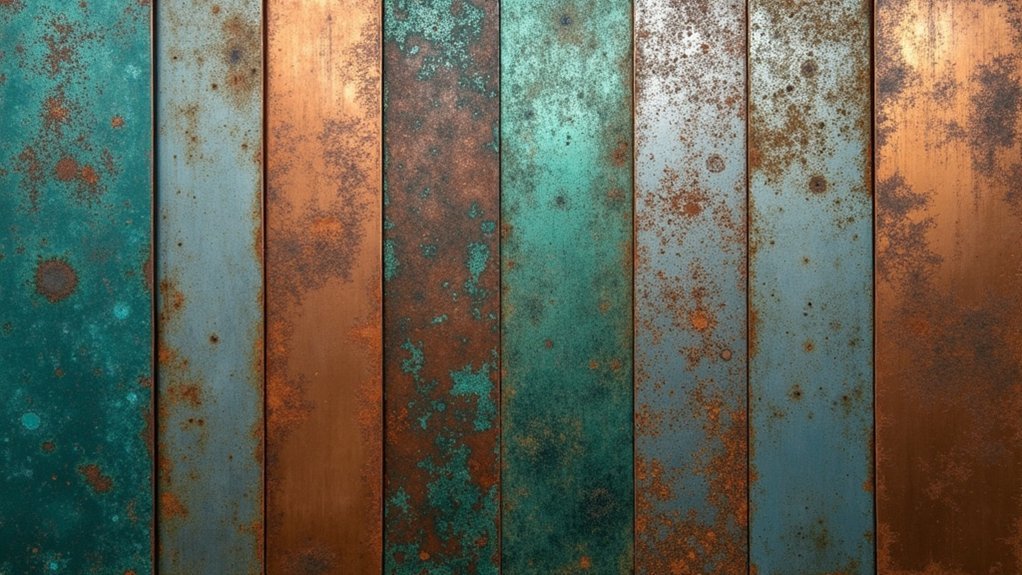
You can create stunning metal finishes using seven proven techniques: chemical patina with liver of sulfur for vibrant blues and greens on copper, heat-induced oxidation for colorful displays on silver alloys, liver of sulfur applications for controlled results, cold ferric chloride methods for copper and brass, ammonia fuming for deep blue-green tones, resist techniques with wax or masking for selective placement, and proper sealing with clear lacquer for protection. These methods transform ordinary metals into enchanting artistic pieces with the right approach.
Chemical Patina Applications for Copper and Bronze Jewelry
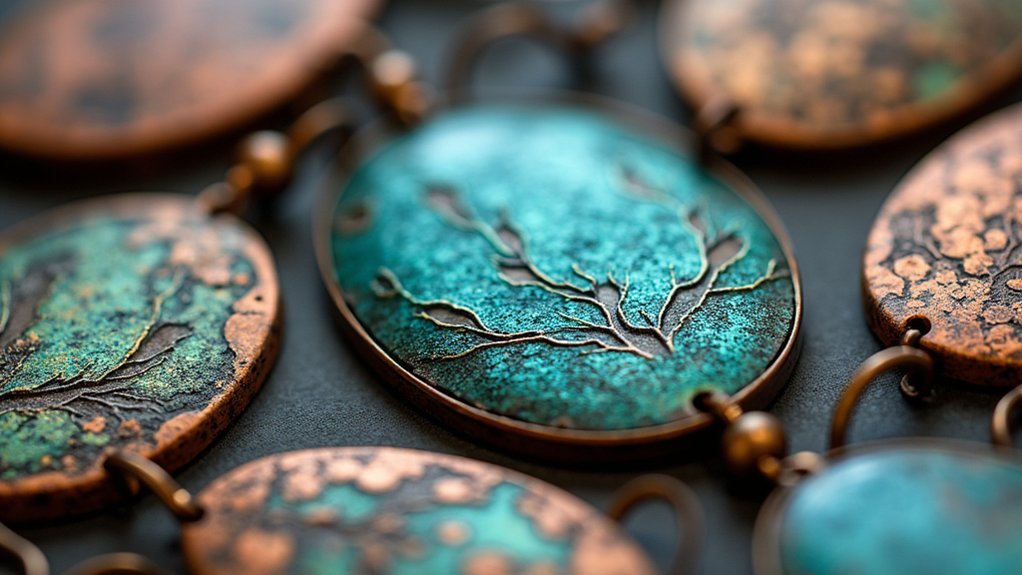
Chemical patina applications transform ordinary copper and bronze jewelry into striking pieces with rich, complex colorations.
Transform everyday copper and bronze into captivating jewelry pieces through the artistry of chemical patina applications and controlled oxidation techniques.
You’ll achieve stunning results using solutions like liver of sulfur or ammonium sulfide, which trigger chemical reactions that produce vibrant blues, greens, and browns through controlled oxidation.
For your desired patina, immerse pieces in diluted solutions for minutes to hours, depending on concentration and temperature.
You can accelerate the process with torch heat, creating unique transient colors—just monitor carefully to prevent overheating damage.
Experiment with layering different chemical solutions to develop complex, artistic finishes that enhance visual appeal.
Once you’ve achieved your preferred look, always seal the surface with clear lacquer or wax to protect and maintain the vibrant colors you’ve created.
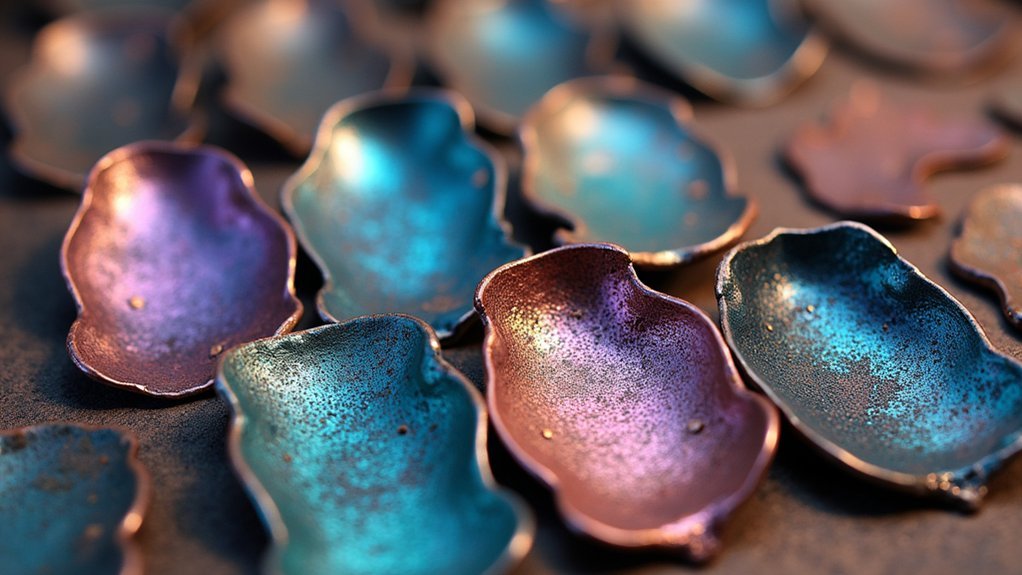
Heat-Induced Patina Effects on Silver and Metal Components
Heat-induced patina transforms silver and metal components into spectacular displays of color through controlled torch application. You’ll achieve stunning heat-induced patina effects by carefully managing temperature and exposure duration. Different alloys react uniquely – higher copper content produces vibrant greens and turquoises, while standard silver creates golden yellows to deep blues.
| Temperature Level | Color Result | Exposure Time | Metal Type | Safety Note |
|---|---|---|---|---|
| Low Heat | Golden Yellow | 10-15 seconds | Silver | Use ventilation |
| Medium Heat | Orange-Red | 20-30 seconds | Silver-Copper | Wear gloves |
| High Heat | Deep Blue | 30-45 seconds | Silver | Use goggles |
| Variable Heat | Green-Turquoise | 15-25 seconds | High Copper | Monitor closely |
| Controlled Heat | Purple-Violet | 25-35 seconds | Mixed Alloy | Practice first |
Always work in well-ventilated areas and seal finished metal finishes with protective lacquer to preserve your results.
Liver of Sulfur Techniques for Controlled Oxidation
You’ll need to mix your liver of sulfur solution carefully, starting with about 1/4 teaspoon dissolved in 1/2 cup of warm water for maximum results.
Choose your application method based on the effect you want—immersion creates uniform coverage, while brushing or spraying gives you precise control over specific areas.
Watch the oxidation process closely since timing determines whether you’ll achieve golden, reddish, or blue hues before the reaction goes too far.
Mixing Chemical Solutions Safely
When working with liver of sulfur, proper preparation guarantees both your safety and ideal results for controlled metal oxidation.
When mixing chemical solutions safely, dissolve 1/4 teaspoon of liver of sulfur in 1/2 cup of warm water to create an effective oxidizing solution. Make sure you’re wearing protective gloves and goggles before handling any chemicals to prevent skin irritation and eye damage.
Apply the solution using an acid brush or spray bottle for even coverage across your metal surface.
Watch the oxidation process carefully since colors change rapidly from gold to reddish to blue, depending on your metal type and solution concentration.
Once you’ve achieved your desired patina color, remove any resist materials and let your piece dry completely in a well-ventilated area.
Application Methods and Timing
Three primary application methods will determine your patina’s final appearance and control the oxidation timing on your metal surface.
You’ll dissolve 1/4 teaspoon of Liver of Sulfur in 1/2 cup warm water for controlled oxidation.
Use an acid brush for precise application or soak smaller pieces completely. For intricate patterns, place crinkled tissue paper or cheesecloth on your metal before applying solution—capillary action creates unique designs as patina develops.
Surface preparation affects how evenly colors develop, ranging from light yellow to deep blue and black.
Monitor reactions closely since desired colors change rapidly. Remove resist materials once you’ve achieved preferred hues, then move pieces indoors to halt oxidation.
Thoroughly dry your metal before sealing with lacquer to preserve vibrant colors.
Cold Patina Methods Using Ferric Chloride Solutions
Ferric chloride solutions offer one of the most versatile cold patina methods for achieving stunning color variations on copper and brass surfaces.
You’ll create custom designs by controlling how the chemical reacts with your metal, producing beautiful greens to rich browns depending on concentration and technique.
Start by thoroughly cleaning your metal surface, then apply heat before immersion or brushing on the solution.
Proper surface preparation and controlled heating are essential first steps before applying ferric chloride for optimal patina results.
You can submerge pieces completely or use brushes for targeted applications. Reaction times vary from minutes to hours based on your desired effect and environmental conditions.
Always wear gloves and goggles when handling ferric chloride—it’s corrosive and can cause serious burns.
The controlled oxidation process lets you develop unique finishes that’d be impossible with other methods.
Ammonia Fuming for Deep Blue-Green Finishes
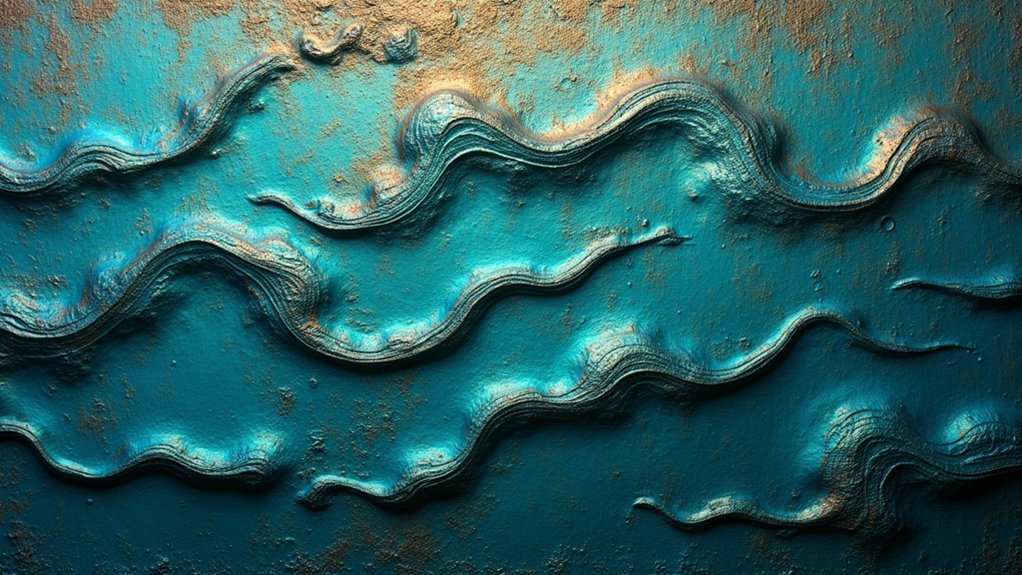
Ammonia fuming creates some of the most striking blue-green patinas you’ll find in metalworking, transforming copper and brass into surfaces that rival natural verdigris.
You’ll place metal pieces in a sealed container with ammonia, letting vapors react with the surface over several hours to days. The exposure duration, temperature, and moisture levels control your finish’s depth and intensity.
Always work in well-ventilated areas since ammonia fumes pose health risks. You can experiment with different ammonia concentrations and metals to discover unique shades.
The process produces rich, even coloring that’s difficult to achieve through other methods. Start with shorter exposure times and gradually increase until you achieve your desired blue-green patinas intensity.
Resist Techniques and Selective Patina Placement
You can create stunning selective patina effects by strategically blocking certain areas from chemical exposure.
Masking tape offers precise control for geometric patterns, while natural materials like leaves or fabric produce organic textures with irregular edges.
Wax protection methods allow you to build layered effects by selectively exposing different sections during multiple patina applications.
Masking Tape Applications
Masking tape opens up endless creative possibilities when you want to control exactly where patina develops on your metal surface. You’ll create stunning resist patterns by covering areas where you don’t want patina to form. Apply the masking tape firmly, eliminating air pockets that could allow solution seepage underneath. This guarantees crisp, defined edges in your final patina finish.
| Step | Action | Key Point | Result |
|---|---|---|---|
| 1 | Apply tape firmly | No air pockets | Clean edges |
| 2 | Apply patina carefully | Avoid bleeding | Even coverage |
| 3 | Let patina develop | Monitor progress | Desired effect |
| 4 | Remove tape carefully | Gentle pulling | Sharp contrast |
Experiment with geometric shapes or organic patterns to achieve unique visual effects that showcase the contrast between patinated and pristine metal areas.
Natural Material Resists
Natural materials offer an exciting alternative to traditional masking techniques, bringing organic textures and unexpected patterns to your metal patina work.
Natural material resists like vegetable net bags, tissue paper, and cheesecloth create selective patina placement by preventing solution adhesion in covered areas. You’ll achieve a finish that enhances your metal’s character while maintaining original color in protected zones.
Key techniques for natural resistance include:
- Crinkled tissue paper – Creates flowing, organic patterns with varied texture depth
- Vegetable netting – Produces geometric honeycomb effects with consistent spacing
- Cheesecloth layers – Generates subtle, flowing shifts between patinated and natural areas
- Material combinations – Layering different resists yields complex, multi-dimensional designs
Monitor application time carefully, as humidity and temperature affect reaction speed.
Experiment with overlapping materials for sophisticated visual effects.
Wax Protection Methods
While natural materials provide organic textures, wax protection methods deliver unmatched precision and control for selective patina placement. You’ll achieve superior results by melting wax completely and applying it evenly across targeted areas before patina application. These protected zones remain uncolored while surrounding metal develops your desired finish.
| Wax Type | Application Method | Removal Temperature | Pattern Capability | Durability |
|---|---|---|---|---|
| Paraffin | Brush/Heat Gun | 120-140°F | Basic Shapes | Medium |
| Beeswax | Brush/Palette Knife | 140-160°F | Detailed Lines | High |
| Microcrystalline | Spray/Roller | 160-180°F | Large Areas | Very High |
| Carnauba | Fine Brush | 180-200°F | Intricate Designs | Medium |
| Synthetic Blend | Various Tools | 100-120°F | Mixed Techniques | High |
Layer different wax types or create brush patterns for intricate designs. After achieving your patina effect, gently heat the metal to remove wax, then apply clear sealer for enhanced protection.
Sealing and Protecting Patinated Jewelry Surfaces
Three essential steps determine whether your carefully crafted patina will maintain its stunning appearance or deteriorate over time.
First, you’ll need to seal your patinated jewelry with a specialized product like Modern Masters Patina Sealer. This non-reactive formula prevents further oxidation while preserving your finish’s vibrancy.
Apply two to three lighter coats rather than one heavy application to avoid cloudiness and drips.
Essential sealing guidelines include:
- Allow 1-2 hours drying time between each coat for proper adhesion
- Consider adding a final wax coating for enhanced protection against moisture
- Use gentle cleaning with soft cloths for regular maintenance
- Reapply sealer as needed to maintain ideal protection
Following these steps guarantees your patinated jewelry retains its stunning appearance for years to come.
Frequently Asked Questions
What Is the Best Way to Patina Metal?
You’ll achieve best results by cleaning your metal thoroughly, then applying controlled oxidation using chemicals like Potash Sulfurated or heat-based techniques. Don’t forget to seal your finished patina with clear lacquer for longevity.
How to Achieve Patina Finish?
Clean your metal thoroughly, apply Metal Effects Primer, then brush on Oxidizing Copper Paint in two coats. While wet, apply Green Patina Aging Solution experimentally. Seal with multiple light coats.
How to Create Patina Effect on Metal?
You’ll clean the metal surface thoroughly, apply primer for better adhesion, then brush on patina solution while the base coat’s still wet. Experiment with different application methods for varied textures and seal when finished.
What’s the Difference Between Tarnish and Patina?
You’ll find tarnish is unwanted corrosion that dulls silver and copper, while patina’s a desirable oxidation creating beautiful green-brown colors on metals that’s often sought after for artistic value.
In Summary
You’ve mastered seven powerful patina techniques that’ll transform your metalwork into stunning pieces. Whether you’re using chemical applications, heat treatments, or ammonia fuming, you’ll create unique finishes that set your jewelry apart. Remember to always work in ventilated areas and wear protective gear when handling chemicals. Don’t forget that final sealing step—it’ll preserve your beautiful patina work for years to come.


Leave a Reply