To set small diamonds with pavé, you’ll need specialized tools like setting burs, beading tools, and quality tweezers. Start by measuring your metal surface and using beeswax to temporarily position stones for layout planning. Create precise pilot holes with a ball bur, then drill and perfect the seats with setting burs. Carefully position each diamond and use a graver to raise metal beads around the perimeter. The techniques below will transform your jewelry crafting skills.
Essential Tools and Materials for Pavé Diamond Setting
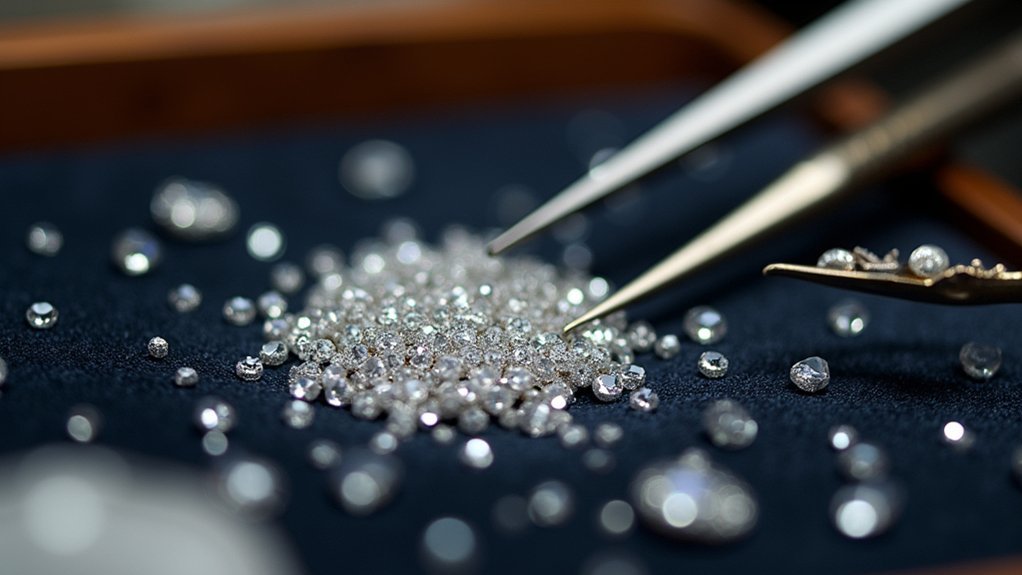
Before you can begin setting small diamonds in a pavé pattern, you’ll need specific tools that make precision work possible.
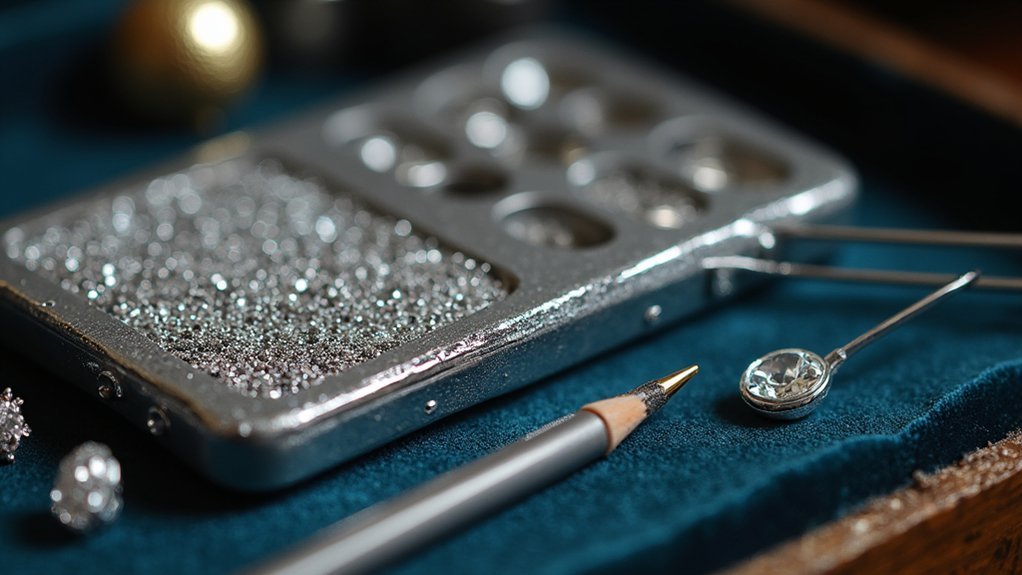
Start with a small ball bur for creating initial divots and a setting bur for drilling to the correct depth. You’ll also need a knife graver or onglette for making bright cuts around each stone.
Beeswax is vital for holding small diamonds set during layout, providing stability while you mark positions.
Quality tweezers like the EURO TOOL TWZ-700.12 are essential for handling tiny stones precisely. A beading tool creates raised beads that secure each diamond tightly in pavé setting.
Various burs, including Krause/Cone and heart burs, open holes and shape seats ensuring diamonds are set with snug fits and polished finishes.
Preparing the Metal Surface and Stone Layout
Measure your metal strip to guarantee it’s slightly wider than your diamonds, leaving at least 0.5 mm extra space on each side for bright cuts.
When preparing the metal surface for pavé settings, apply beeswax evenly using a beeswax stick to create a temporary adhesive layer that’ll hold the stones securely during layout planning.
Arrange the stones upside down along the strip, maintaining proper spacing between smaller stones to accommodate your intended design. The beeswax will hold the stones in position while you visualize the final arrangement.
Before drilling, use tweezers to carefully remove each diamond, then mark the metal surface with a magic marker or metal punch where you spotted each stone. These marks guide precise pilot hole placement, ensuring accurate diamond placements when you’re ready to set stones permanently in your pavé setting.
Creating Precise Pilot Holes and Seats
Once you’ve removed each diamond with tweezers, create small divots at your marked locations using a ball bur. These initial impressions will guide your drilling process and prevent the drill bit from wandering across the metal surface.
Ball bur divots at marked locations guide drilling and prevent drill bit wandering across the metal surface.
Follow this systematic approach for creating precise pilot holes:
- Create guide divots – Use a small ball bur to mark each stone location with shallow impressions.
- Drill pilot holes – Insert a 0.5mm drill bit into each divot to establish initial depth.
- Open hole tops – Employ a Krause bur or cone bur to widen the entrance appropriately.
- Perfect the seats – Use a setting bur to achieve proper depth for secure stone placement.
This methodical process guarantees your diamonds will set securely in their pavé arrangement, creating professional-quality results with consistent depth throughout.
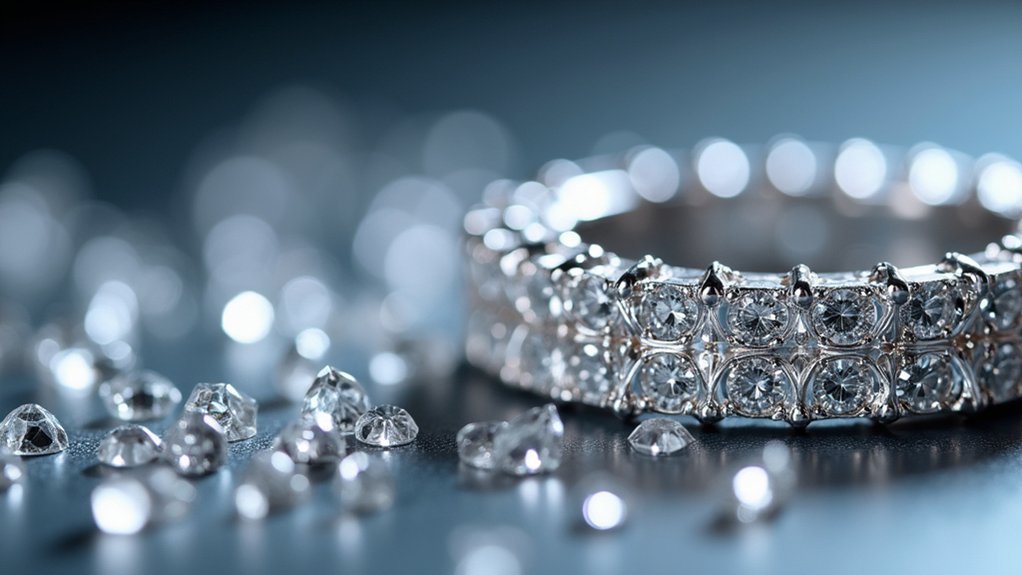
Setting the Diamonds and Forming Metal Beads
With your pilot holes perfectly prepared, you’ll begin the delicate process of positioning each diamond into its designated seat. This pavé setting method requires careful attention as small diamonds are placed into their holes.
Once positioned, use a graver to raise small metal beads around each stone’s perimeter. These beads must be formed at a 90-degree angle to create effective prongs that’ll hold your diamonds securely.
Shape each bead with a beading tool, ensuring they snugly embrace the stones while maintaining their visibility. The centerline relief cut you created earlier aids in proper stone placement and securing.
Regularly check that all prongs maintain proper tension – diamonds should be securely held without movement. Refine any loose beads immediately to prevent stone loss and achieve that polished, professional pavé finish.
Finishing Techniques for Professional Results

After securing your diamonds with properly formed beads, you’ll need to refine every detail to achieve that coveted professional finish.
Whether working with a pave setting or bezel setting, these finishing techniques guarantee your smaller diamonds remain held in place while displaying maximum brilliance.
- Round off bead tops using a beading tool after each stone is secured, creating polished surfaces that enhance light reflection.
- Check prong tightness systematically to verify all stones are properly secured, regardless of the size of the stones.
- Clean rough edges around drilled holes with a flat graver for smooth, professional appearances.
- Apply ultrasonic cleaning as your final step to remove debris and maximize shine.
Regular practice with different metals helps you set diamonds consistently across various prong or bezel configurations.
Frequently Asked Questions
How Do Jewelers Set Tiny Diamonds?
You’ll drill tiny holes into metal, position each diamond carefully with beeswax, create bright cuts around stones using a graver, then tighten prongs with a beading tool for secure placement.
How Do You Keep Small Diamonds From Falling Out?
You’ll secure small diamonds by tightening prongs with beading tools, maintaining proper spacing and depth during setting, using high-quality materials, and regularly inspecting pavé settings for wear or looseness.
How to Set Small Gems?
You’ll prepare a metal strip wider than your gems, apply beeswax to hold them, drill pilot holes, create bright cuts with a knife graver, then secure using prongs rounded with a beading tool.
How Do You Reset a Small Diamond?
You’ll carefully remove the existing setting using pliers, clean the diamond thoroughly, prepare a new setting with proper holes, place the stone, and secure it by rounding prongs with a beading tool.
In Summary
You’ve mastered the fundamental techniques of pavé diamond setting, from tool selection through final polishing. Your success depends on precise hole drilling, consistent bead formation, and steady hand control. Don’t rush the process—take your time with each stone placement and metal manipulation. With practice, you’ll develop the muscle memory needed for professional-quality pavé work. Keep refining your technique, and you’ll soon create stunning, secure diamond settings.


Leave a Reply