
You’ll capture stunning textured gems by mastering five key techniques. Use softbox lighting with 45-degree angles to highlight surface details, while employing polarizing filters to reduce glare. Set your macro lens to f/16-f/22 with ISO 100-200 for peak sharpness and minimal noise. Choose contrasting backgrounds like black velvet for light gems or earth tones for natural stones. Position gems at eye level with slight tilts for dynamic shadows. These proven methods will transform your gem photography into professional-quality images that showcase every intricate detail.
Master Lighting Techniques for Enhanced Texture Definition

When photographing textured gems, your lighting setup determines whether surface details appear rich and defined or flat and lifeless. Professional photographers rely on softbox lighting to create balanced illumination that reveals depth and texture without harsh shadows.
You’ll want to experiment with different angles, positioning lights at various heights to accentuate the textures of the gemstone.
Enhance your gemstone photography by using a polarizing filter with your macro lens to eliminate glare and reflections. This allows intricate surface details to shine through clearly.
Incorporate backlighting techniques by placing light sources behind translucent gems to highlight transparency and surface characteristics.
Pay careful attention to your exposure settings, adjusting highlights to prevent overexposure while maintaining the natural appearance of textured surfaces.
Choose Optimal Camera Settings and Equipment Setup
Proper lighting creates the foundation, but your camera settings and equipment choices make the difference between amateur snapshots and professional gem photography.
You’ll need a macro lens with at least 100mm focal length to capture intricate details effectively. Set your camera to RAW format for high-quality details and extensive post-processing flexibility.
Keep your ISO setting between 100-200 to minimize noise while maintaining clarity. Adjust your f-stop to f/16-f/22 for greater depth of field, ensuring textured features stay sharp throughout.
Position your camera parallel to the gem’s surface to capture texture and reflectivity without distortion. These camera settings work together to preserve every facet and surface detail that makes textured gems visually compelling.
Select Contrasting Backgrounds That Highlight Gem Features
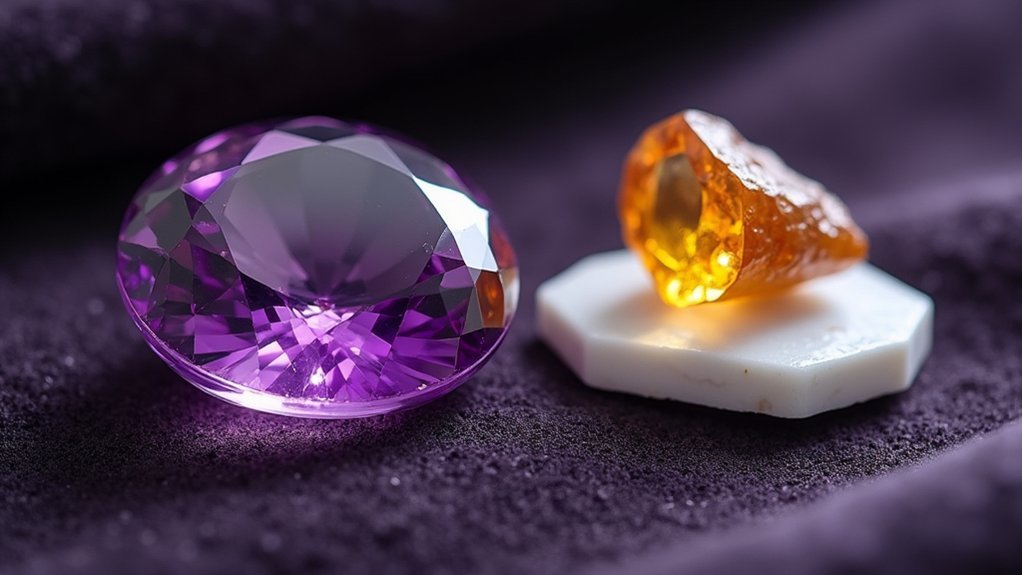
Your background choice can dramatically transform how viewers perceive your textured gem’s most striking features. A contrasting background like black or dark gray enhances visual appeal by emphasizing intricate details and surface characteristics of textured gems.
Light-colored backgrounds work exceptionally well for darker textured gems, allowing unique features to stand out without overwhelming your composition.
Consider backgrounds with subtle patterns such as velvet or silk to add depth while maintaining focus on the gem. Earth-tone backgrounds create harmonious looks that complement rough or natural stones’ organic feel.
Don’t hesitate to experiment with different colors and textures until you discover the ideal combination that highlights your gem’s features while achieving an aesthetically pleasing composition that captivates viewers.
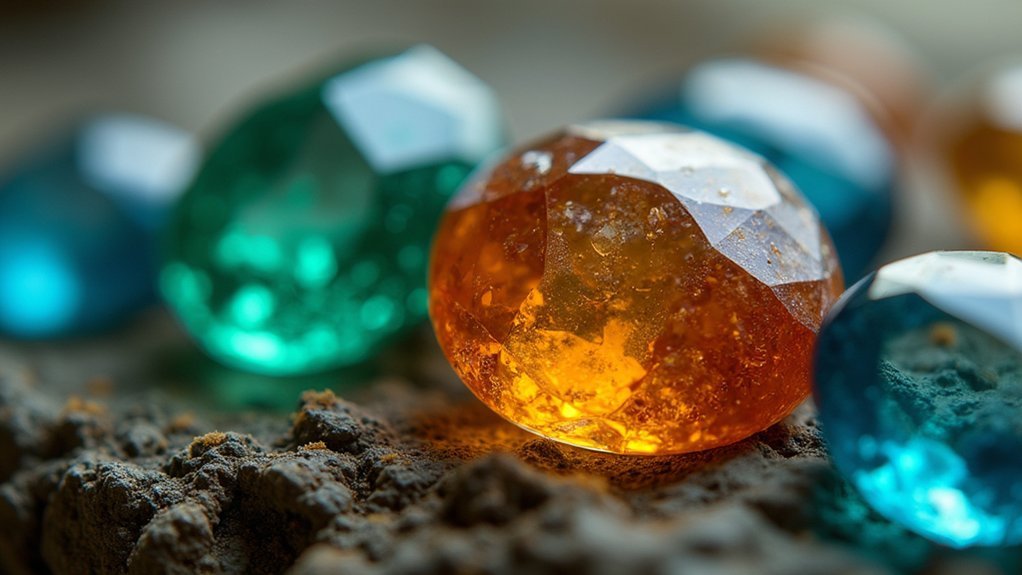
Position and Angle Your Gemstones for Maximum Impact
Once you’ve selected the perfect background that complements your gem’s natural beauty, positioning and angling become your next priorities for creating enchanting images.
Position your gemstone at eye level, parallel to your camera lens to maximize brilliance and highlight texture effectively. Experiment with slight tilts to capture unique patterns that create dynamic shadows and enhance visual interest.
Use a 45-degree angle to your light source to emphasize surface details, allowing light to create depth and showcase intricate textures.
Maintain proper distance between your camera and gemstone to achieve shallow depth of field, which blurs the background and draws attention to the gem’s texture. This photography technique guarantees your gemstone’s details stand out while adding compositional depth.
Apply Post-Processing Methods to Amplify Textural Details
While capturing textured gems requires careful attention to lighting and positioning, post-processing transforms good images into spectacular ones that showcase every intricate detail.
Adobe Lightroom’s Clarity and Texture sliders become your primary tools for enhancing textural features without sacrificing natural appearance.
Mastering Lightroom’s Clarity and Texture controls allows photographers to reveal stunning gem details while preserving their authentic, natural beauty.
- Limit Clarity adjustments to +10 maximum for subtle enhancement that preserves authenticity
- Apply sharpening techniques carefully to reveal intricate details while avoiding unwanted noise
- Reduce exposure levels and highlights to prevent overexposure on reflective surfaces
- Use local adjustment brushes to selectively enhance specific textural areas for precise control
- Balance contrast adjustments to amplify depth while maintaining natural shadow-highlight relationships
These targeted editing approaches guarantee your gems’ unique characteristics shine through while dramatically improving their visual impact and professional presentation quality.
Frequently Asked Questions
What Safety Precautions Should I Take When Handling Valuable or Fragile Gems?
You’ll want to wear cotton gloves to prevent oils from transferring. Work over soft surfaces like velvet pads. Handle gems gently, avoid sudden movements, and store them in padded compartments to prevent scratching or chipping.
How Do I Clean Gems Properly Before Photographing to Avoid Damage?
Use distilled water and a soft brush for most gems. You’ll want to avoid harsh chemicals or ultrasonic cleaners on softer stones. Don’t soak porous gems like pearls or opals—just gently wipe them clean.
What Insurance Considerations Exist When Photographing Expensive Gemstone Collections?
You’ll need specialized fine arts insurance covering theft, damage, and loss during shoots. Document each piece’s value, secure proper storage, use bonded handlers, and guarantee your homeowner’s or studio policy includes high-value personal property coverage.
Which Gems Photograph Better During Specific Seasons or Weather Conditions?
You’ll find opals photograph beautifully in overcast conditions since diffused light enhances their play-of-color. Diamonds and clear stones shine best during bright, sunny days when you can maximize light refraction and brilliance.
How Can I Prevent Theft While Transporting Gems to Photography Locations?
You’ll want to use a secure, padded case with locks and avoid displaying valuable items openly. Don’t travel alone, plan your route carefully, and consider using replicas for initial test shots.
In Summary
You’ve now got five powerful techniques to capture stunning textured gems. Don’t forget that lighting remains your most essential element—it’ll make or break your shots. Experiment with different angles and backgrounds until you find what works best for each stone. Your camera settings should complement the lighting, not compete with it. Finally, use post-processing sparingly to enhance what’s already there rather than creating artificial texture.


Leave a Reply