When riveting mixed metals, you’ll need to take into account galvanic compatibility to prevent corrosion. Choose rivets with a material that’s compatible with both metals being joined, or use insulating barriers like nylon washers. Cold riveting works best for dissimilar metals as it prevents thermal distortion. Select blind rivets when you can’t access both sides, and self-piercing rivets for eliminating pre-drilling. Proper material preparation and rivet length calculation guarantee your mixed metal connections remain strong and corrosion-free for years.
What Are Essential Riveting Methods For Mixed Metals?

When working with mixed metals, how you choose your riveting method can make the difference between a durable joint and premature failure. Material compatibility should be your primary concern—aluminum rivets work best with aluminum components, while steel rivets pair well with steel parts to prevent galvanic corrosion.
For efficient installation, blind rivets offer the advantage of one-sided access, eliminating the need to reach behind the workpiece. Self-piercing rivets provide another excellent option, as they can penetrate the top material without requiring pre-drilled holes, creating secure connections between dissimilar metals.
Always select the appropriate rivet size—typically 1.5 times larger than the hole diameter—to guarantee proper fit across different material thicknesses.
After installation, don’t skip the pull-out test to verify your mixed metal joint can withstand both shear and tensile forces.
Understanding Galvanic Compatibility in Mixed Metal Riveting
When joining dissimilar metals with rivets, you’ll need to evaluate their positions on the metal nobility scale to prevent accelerated corrosion where less noble metals will deteriorate first.
Environmental factors like humidity, temperature, and exposure to saltwater can greatly increase corrosion risks in mixed metal riveted joints.
You can effectively minimize galvanic reactions by implementing proper insulation techniques between materials, such as using nylon washers or specialized coatings that break the electrical pathway.
Corrosion Risk Factors
Understanding galvanic compatibility stands as the cornerstone of successful mixed metal riveting projects. When you’re working with dissimilar metals, galvanic corrosion becomes your primary concern, especially in environments where moisture serves as an electrolyte.
The galvanic series should guide your material selection, as metals farther apart on this scale will experience accelerated corrosion rates when connected.
To protect your assemblies, incorporate insulating materials like rubber or plastic washers between different metals to break the electrical pathway.
Apply protective coatings such as paint or zinc plating to enhance corrosion resistance in vulnerable components.
Don’t overlook the importance of regular inspections of riveted joints, particularly in humid or contaminated environments where corrosion accelerates.
Metal Nobility Scale
The Metal Nobility Scale forms the foundation of successful mixed metal riveting decisions, directly building on the corrosion risk factors we’ve just explored.
Also known as the galvanic series, this hierarchy ranks metals by their electrochemical potential, with noble metals like gold at the top and reactive metals like aluminum at the bottom.
When joining dissimilar metals, select options that sit close together on this scale. The further apart they are, the greater the risk of galvanic corrosion forming a destructive cell that accelerates deterioration of the more anodic metal.
You’ll find compatible metals like stainless steel and aluminum work reasonably well together, while combinations like copper and aluminum should be avoided.
For problematic pairings, use insulating materials such as nylon washers or protective coatings to interrupt the electrical connection that drives corrosion.
Insulation Between Materials
Galvanic isolation stands as your primary defense against corrosion when riveting dissimilar metals. When you join aluminum and copper without proper insulation between materials, you’re fundamentally creating an environment for galvanic corrosion to thrive, especially in moist conditions.
To effectively prevent this electrochemical reaction:
- Insert non-conductive materials like nylon, rubber, or plastic washers between the metals to break the electrical connection.
- Apply protective coatings such as paint or electroplating to both surfaces before riveting to create a moisture barrier.
- Implement regular inspection schedules to catch early signs of corrosion before structural integrity becomes compromised.
These simple yet effective techniques help maintain the longevity of mixed metal joints while ensuring your riveted connections remain strong and functional throughout their service life.
Cold vs. Hot Riveting Techniques for Dissimilar Metals
When joining dissimilar metals, selecting the appropriate riveting technique becomes essential for guaranteeing structural integrity and longevity.
Cold riveting typically offers superior results for mixed metals as it eliminates thermal distortion that could warp or crack temperature-sensitive materials. This method also requires less labor and enables faster assembly in limited-access applications, making it ideal for automotive components.
Hot riveting, while effective for thicker materials, demands careful temperature control to prevent damage to the lower-melting-point metal in your dissimilar metals joint. You’ll need to guarantee the heat applied stays below the melting point of the more vulnerable material to maintain joint strength.
Your choice between these techniques should ultimately depend on the specific properties of the metals you’re working with, including thickness, ductility, and heat sensitivity.
Selecting the Appropriate Rivet Material for Metal Combinations
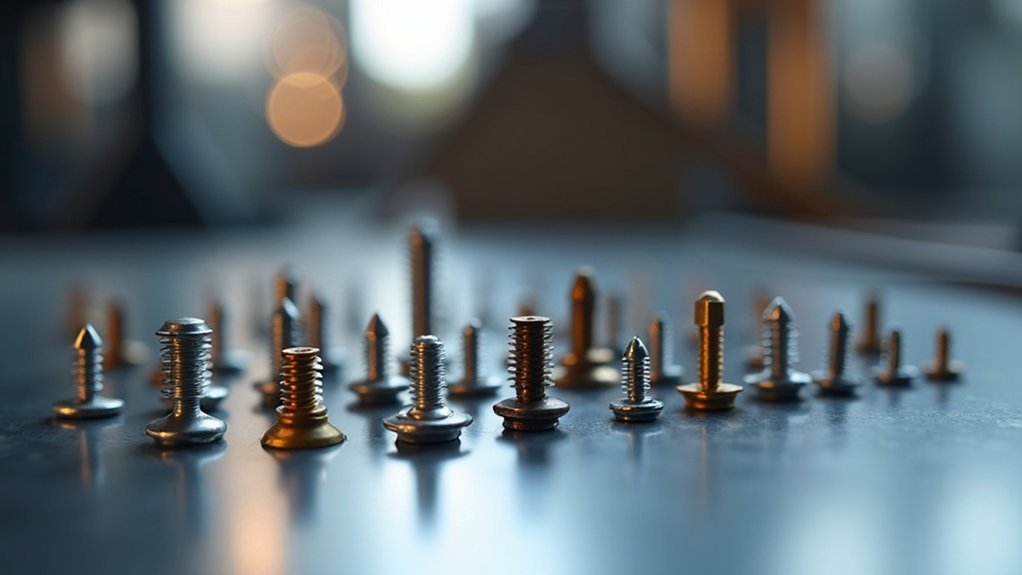
Selecting the proper rivet material stands as perhaps the most critical decision you’ll make when joining dissimilar metals, directly impacting both the structural integrity and longevity of your connection.
When working with mixed metals, you’ll need to take into account galvanic corrosion potential first and foremost.
- Aluminum rivets work excellently when connecting aluminum to steel components, effectively preventing the electrochemical reaction that leads to corrosion.
- Stainless steel rivets offer superior strength when joining copper or brass to other metals, providing corrosion resistance in harsh environments.
- Brass rivets shine in moisture-exposed applications, combining corrosion resistance with aesthetic appeal for decorative work.
Remember that thermal expansion compatibility between your rivet materials and joined metals is equally important—mismatched expansion rates can cause joint failure during temperature fluctuations.
Copper rivets are your go-to when electrical conductivity matters.
Surface Preparation Essentials for Mixed Metal Riveting
Proper surface preparation serves as the foundation for successful mixed metal riveting, directly determining whether your joint will last for years or fail prematurely. To prevent galvanic corrosion when joining dissimilar metals, you’ll need thorough cleaning and possibly corrosion inhibitors.
Start by removing all contaminants with degreasers or abrasive cleaners. Then mechanically abrade surfaces to improve bonding strength. Always verify surfaces remain flat and aligned during riveting.
| Preparation Step | Purpose | Best Practice |
|---|---|---|
| Cleaning | Remove contaminants | Use appropriate solvents for each metal type |
| Abrasion | Increase bonding area | Sand in cross-pattern with medium grit |
| Protection | Prevent corrosion | Apply primer or sealant before riveting |
Consider applying specialized primers designed for mixed metals to create an additional barrier against moisture and environmental factors.
Blind Riveting Methods for Hard-to-Reach Mixed Metal Joints
After thorough surface preparation, you’ll often face the challenge of joining metals in confined or inaccessible spaces.
Blind rivets provide an ideal solution for hard-to-reach mixed metal joints, allowing you to secure the connection from just one side without accessing the back of the assembly.
When installing blind rivets between dissimilar metals like steel and aluminum, you’ll appreciate these advantages:
- Minimized galvanic corrosion risk through proper rivet material selection (aluminum or steel variants)
- Straightforward installation process using a rivet gun that pulls the mandrel, expanding the rivet for a tight grip
- Flexibility in application with various rivet sizes and types (closed-end or open-end) to match your specific metal thickness
Remember to drill holes approximately 1.5mm larger than your rivet diameter for maximum expansion.
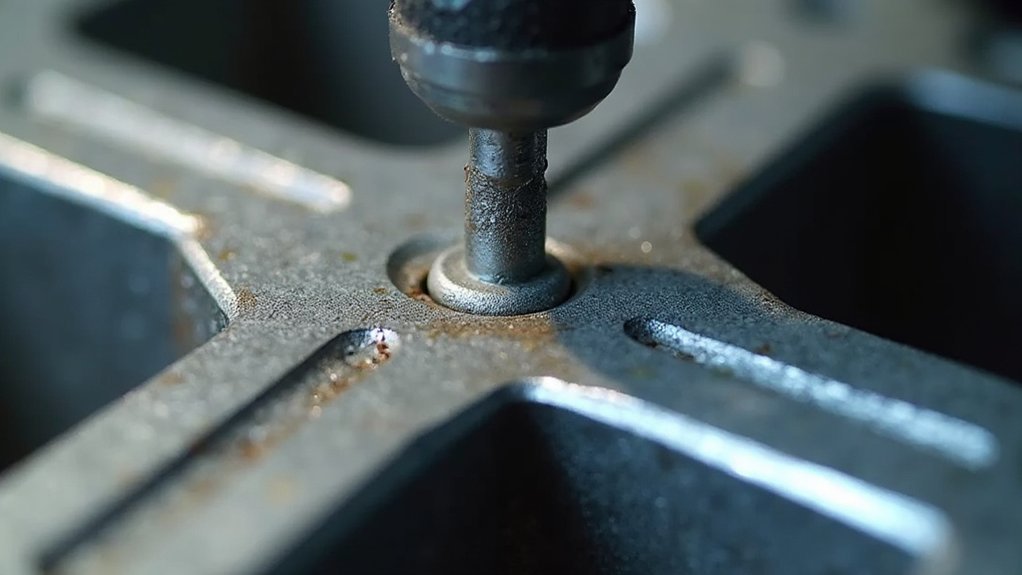
Setting Tubular Rivets in Precious and Base Metal Combinations
Craftsmen working with jewelry and fine metalwork face unique challenges when joining precious metals like gold or silver to base metals such as copper or brass.
When setting tubular rivets in these mixed metal applications, you’ll need to insert a washer or spacer between the metals to prevent galvanic corrosion that naturally occurs between dissimilar materials.
Always drill holes slightly larger than your rivet’s diameter to guarantee proper insertion and setting.
Using the correct rivet setting tool is essential—it compresses the tail efficiently without damaging surrounding metal. Apply consistent pressure throughout the process to achieve uniform deformation of the rivet, creating a secure bond.
For lasting durability, select tubular rivets made from compatible materials to the metals being joined.
This careful material selection prevents joint failure and guarantees structural integrity in your mixed metal creations.
Decorative Nail-Head Riveting for Mixed Metal Jewelry

When combining different metals in your jewelry pieces, you’ll need to contemplate how materials with varying hardness respond to riveting pressure.
Your specialty punch tools should include brass or nylon hammers that won’t mar decorative rivet heads while providing adequate force for proper setting.
Textured head patterns on your rivets can create striking visual contrasts between copper, silver, or brass components, adding depth to your mixed metal designs.
Material Compatibility Considerations
Selecting compatible metals forms the foundation of successful decorative nail-head riveting in mixed metal jewelry.
When you’re combining different metals, be aware of galvanic corrosion that occurs when dissimilar metals contact each other in the presence of moisture or electrolytes. This reaction can compromise both the aesthetic appeal and structural integrity of your piece.
For ideal material compatibility considerations during the riveting process:
- Choose decorative rivets with finishes that complement both metals in your design.
- Use washers or spacers when working with softer materials to guarantee a secure fit.
- Measure the combined thickness of your mixed metals before selecting rivet length.
Always practice your riveting technique on scrap materials first, allowing you to refine your skills without risking your valuable metals or decorative rivet components.
Specialty Punch Tools
Three essential specialty punch tools elevate decorative nail-head riveting for mixed metal jewelry from basic craft to refined artistry.
You’ll need a precision hole punch with adjustable sizing to accommodate varying metal thicknesses in mixed metal applications. This prevents materials distortion when joining harder metals with softer ones.
A dedicated alignment tool is your second necessity, ensuring proper alignment of decorative nail-head rivets across different metal layers. Without precise alignment, even the most beautiful motif-adorned rivets will appear unprofessional.
Finally, invest in a quality riveting hammer with interchangeable heads. You’ll use the flatter end for initial setting and the slightly rounded end for final shaping without damaging the decorative elements.
Remember to place wooden blocks or leather beneath your work to protect those finished designs during hammering.
Textured Head Patterns
Artistry in mixed metal jewelry comes alive through nail-head rivets with textured patterns. When incorporating these decorative elements into your work, you’ll find they not only secure components but also enhance the visual appeal of your mixed metal creations.
To achieve professional results with textured head patterns:
- Protect the decorative heads during setting by placing them against wooden blocks or leather scraps.
- Choose appropriate washers or spacers to prevent corrosion between different metal types.
- Cut rivets to precise lengths for a secure fit across varying material thicknesses.
Jewelry makers appreciate the efficiency of nail-head rivets, which require minimal labor compared to other methods.
The textured patterns remain pristine when proper setting techniques are employed, allowing you to create functional connections that double as design elements.
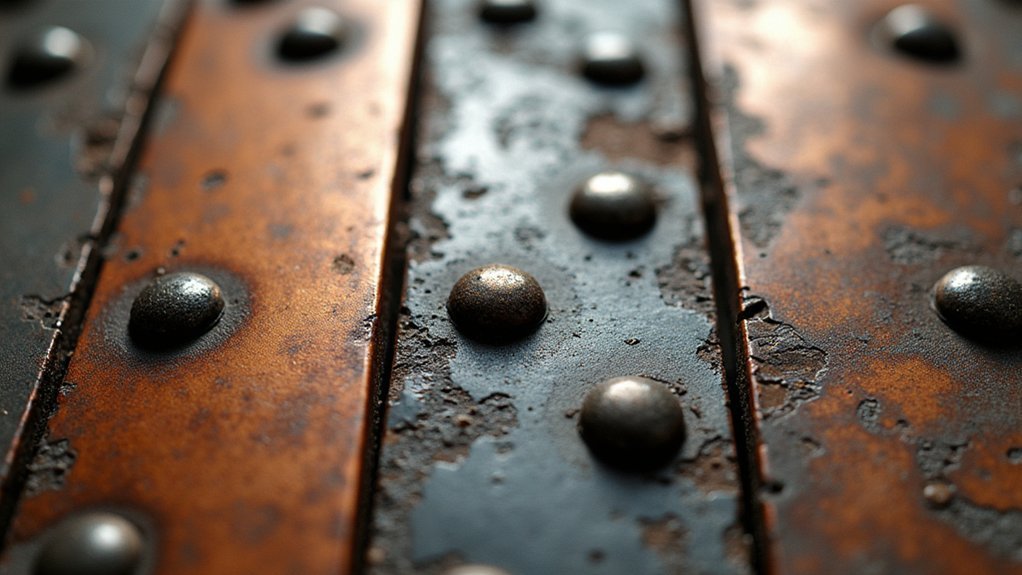
Preventing Corrosion Between Riveted Dissimilar Metals
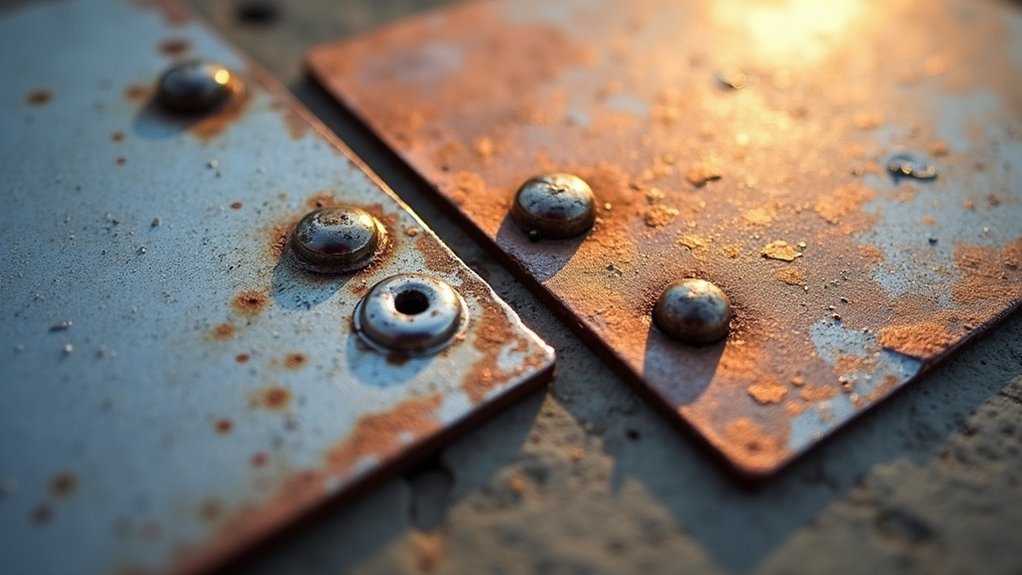
When two different metals come into contact in a riveted joint, they can create an electrochemical reaction that leads to galvanic corrosion—a serious threat to structural integrity.
To protect your riveted joints, always select compatible rivet materials. Stainless steel rivets work exceptionally well with aluminum because of their similar electrochemical properties.
You’ll need to create barriers between dissimilar materials by applying protective coatings or sealants where the metals meet. This isolation prevents moisture from triggering galvanic reactions.
Using thicker materials also helps by reducing the surface area exposed to corrosive elements.
Don’t overlook regular maintenance—inspect your mixed-metal assemblies frequently to catch early signs of corrosion.
Wire Rivet Applications for Delicate Mixed Metal Components
When working with wire rivets, you’ll need to select the appropriate gauge that complements both the structural requirements and the delicacy of your mixed metal components.
You can create custom lengths by cutting wire slightly longer than needed, allowing you to accommodate variations in material thickness without damaging softer metals.
Properly shaped wire ends will guarantee your rivet securely joins disparate metals while maintaining the aesthetic integrity of your piece.
Manipulating Wire Gauge
The selection of appropriate wire gauge stands as a critical first step when creating wire rivets for delicate mixed metal components. When you’re manipulating wire gauge, aim to match the thickness of your materials while ensuring strength without excess weight. This cold joining method prevents thermal damage to heat-sensitive mixed metals.
For successful wire gauge manipulation, follow these steps:
- Measure the combined thickness of your mixed metals and select wire that’s proportional—thicker materials require heavier gauge wire.
- Drill holes approximately 1.5 mm larger than your wire diameter to allow proper deformation during setting.
- Cut wire to specific lengths based on material thickness to achieve flush, aesthetically pleasing rivet heads.
Practice enhances your ability to achieve effective deformation, which is essential for creating a secure connection that maintains the integrity of delicate components.
Securing Disparate Metals
Joining metals with distinctly different properties presents unique challenges that wire rivets elegantly solve.
When working with delicate mixed metal components, you’ll find wire rivets provide the flexibility needed for customized applications while maintaining structural integrity.
To create secure joints, always drill holes matching the wire diameter precisely. This guarantees a snug fit without damaging your materials.
Before insertion, verify that rivet ends are smooth and flat to prevent component damage.
Precise thickness measurement is critical—calculate the total material depth and add appropriate allowance for setting. This attention to detail produces both strong and visually appealing connections.
With practice, you’ll develop the skill necessary to cut and set wire rivets efficiently.
Your patience during this skill development phase will greatly improve the quality of your mixed metal projects.
Eyelet Techniques for Creating Movable Mixed Metal Connections
Unlike traditional rivets that form rigid connections, eyelet techniques provide a versatile solution for creating movable joints between dissimilar metals.
When you’re working with mixed metals, proper eyelet installation guarantees flexibility while maintaining structural integrity.
To achieve ideal results:
- Drill or punch holes that closely match your eyelet size, creating a snug fit that prevents misalignment during installation.
- Calculate the perfect eyelet length by adding the thickness of components to the eyelet diameter, assuring a secure connection without excess protrusion.
- Use a specialized eyelet setter to flare the ends evenly, accommodating the different expansion rates of your mixed metals.
Regular inspection of your eyelet connections is essential, especially in applications where temperature fluctuations cause metals to expand and contract at different rates.
Tool Selection for Various Mixed Metal Riveting Applications
Selecting appropriate tools stands at the forefront of successful mixed metal riveting projects. When joining dissimilar materials, you’ll need to choose rivets that minimize galvanic corrosion—aluminum rivets work well for aluminum-steel combinations.
Proper rivet selection prevents galvanic corrosion when joining unlike metals—a critical first step in any mixed-metal project.
For applications where you can’t access both sides of your workpiece, opt for a rivet gun designed for blind rivets. This tool allows you to create secure connections even in confined spaces.
If you’re handling production work, a pneumatic rivet gun will dramatically increase your efficiency and reduce labor time.
Don’t overlook the importance of matching your drill bit to the exact rivet diameter. This precision guarantees proper hole creation without compromising material integrity.
For joints requiring exceptional strength, structural rivets provide superior tensile and shear strength across your mixed metal assemblies.
Calculating Proper Rivet Length for Different Metal Thicknesses
Three critical factors determine proper rivet length when joining mixed metals: combined material thickness, rivet diameter, and allowance for proper tail formation.
When calculating proper rivet length, you’ll need precise measurements to guarantee secure fastening without excessive protrusion.
When joining dissimilar metals, follow these steps:
- Measure the thickness of materials using a digital caliper for accuracy – even small measurement errors can compromise your bond.
- Add the total thickness of all layers, then add the rivet diameter to determine minimum length needed.
- Practice cutting rivets to proper length before final assembly – this guarantees the tail forms correctly to create a strong bond between different metal types.
Remember that proper rivet length directly affects both the structural integrity and appearance of your mixed metal projects.
Frequently Asked Questions
What Are the 4 Types of Rivets?
You’ll find four main rivet types: solid rivets for strength in critical applications, blind (pop) rivets for one-sided access, semi-tubular rivets for easier deformation, and drive rivets secured by hammering an internal pin.
What Is Riveting as a Method of Joining Metals?
Riveting is a permanent joining technique where you’ll insert a cylindrical fastener through pre-drilled holes in metals, then deform the end to create a second head that locks materials together without heat.
What Is the Method of Riveting?
To rivet materials, you’ll insert the rivet through pre-drilled holes, then use a rivet gun or hammer to deform the tail end, creating a second head that permanently joins the pieces together.
What Are the Essential Qualities of Rivet and Its Material?
You’ll need rivets with material compatibility to prevent galvanic corrosion, appropriate strength for your application, proper diameter, and material properties that match environmental conditions like corrosion resistance or conductivity requirements.
In Summary
When riveting mixed metals, you’ll need to contemplate galvanic compatibility, choose between cold or hot techniques, and select appropriate rivet materials. Don’t forget proper surface preparation, special techniques for delicate applications, and ensuring your rivet length matches your material thickness. With the right tools and knowledge of these essential methods, you’ll create strong, lasting connections between dissimilar metals in your projects.


Leave a Reply