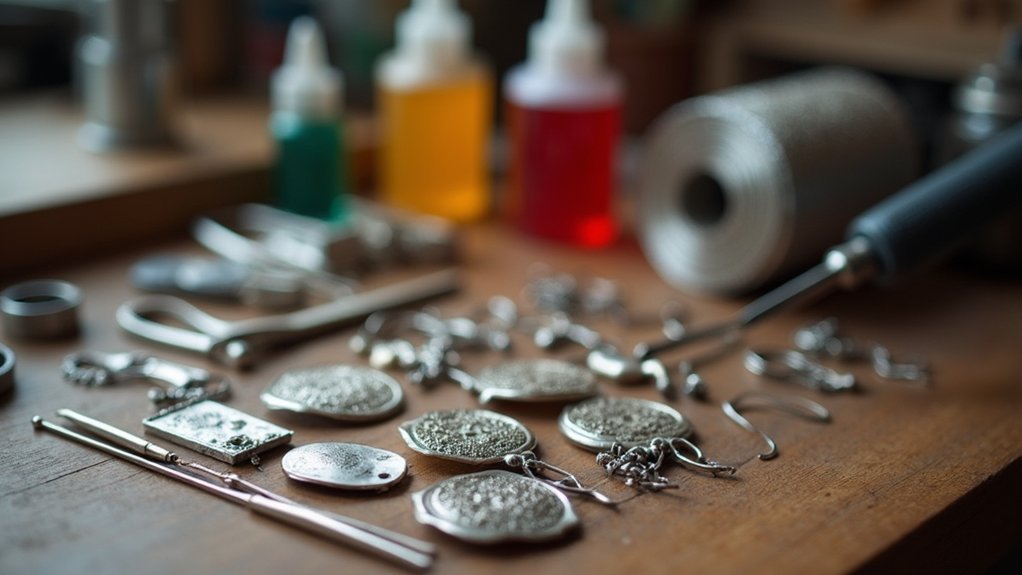
You’ll master silver soldering by choosing the right solder type for your project, maintaining 1-5 thousandths gap spacing, and applying white flux before heating. Clean metal surfaces thoroughly, heat until flux turns glassy, then apply solder within five minutes. Cool pieces naturally to prevent thermal shock, inspect joints with a magnifying glass for proper penetration, and pickle hot pieces immediately in citric acid. These foundational techniques will reveal advanced professional methods.
Choose the Right Silver Solder Type for Your Project

Success in silver soldering starts with selecting the appropriate solder type for your specific project. You’ll find several types of silver solder available, each suited for different applications.
For small, precise joins, choose pallion chips. They’re manageable and allow incremental application.
Silver solder wire offers versatility across various forms and lengths, making it easy to identify flow temperatures for different projects.
Silver solder wire provides exceptional versatility in multiple forms and lengths, enabling easy identification of optimal flow temperatures for diverse project requirements.
Consider silver solder paste for its portability and convenience, though keep in mind its limited shelf life during storage.
Sheet solder works best for larger projects requiring sweat soldering, but avoid using excess material that complicates joints.
For intricate detail work, opt for powdered solder combined with liquid flux. This combination guarantees thorough bonding in fine applications where precision matters most.
Master Proper Joint Preparation and Gap Spacing
Three critical factors determine whether your silver solder joint will hold strong: surface cleanliness, proper gap spacing, and stable assembly.
Proper joint preparation starts with cleaning metal surfaces thoroughly, removing all oxidation and contaminants that’ll weaken your bond.
For gap spacing, aim for 1 to 5 thousandths of an inch between components. This creates the perfect balance—tight enough for strong penetration but loose enough for silver solder to flow effectively.
Never exceed 6 thousandths, as larger gaps prevent adequate solder penetration and create weak joints. Use center punches to maintain consistent spacing during assembly.
Screw parts together for maximum stability while soldering. This prevents movement that disrupts joint clearance and alignment.
Always apply flux before heating to prevent oxidation and promote proper solder flow into the joint.
Select and Apply Flux Without Overheating

While proper joint preparation sets the foundation, selecting the right flux and applying it correctly prevents oxidation and guarantees your silver solder flows smoothly into the joint.
You’ll want to select and apply flux based on your experience level – choose white flux as a beginner since it’s easier to read and manage.
Reconstitute powdered or paste flux with water before use for peak performance.
Mix powdered or paste flux with water before application to ensure optimal flow and performance during silver soldering operations.
Maintain a clean work area and never touch flux with dirty tools or fingers, as contamination leads to poor joints.
To avoid overheating, monitor temperature closely and watch for the flux to become clear and glassy – that’s your signal to apply solder immediately.
Clean Metal Surfaces Through Effective Pickling
After you’ve completed your soldering work, you’ll need to remove the oxides and firescale that formed during heating through an effective pickling process.
This pickling process is essential for achieving chemically clean surfaces that guarantee proper solder adhesion.
Use Sparx number two for peak results, or choose citric acid as a safer alternative that works more slowly.
Maintain proper water levels in your solution to preserve cleaning effectiveness and avoid concentration changes.
Place a strainer in the pickling bath to prevent losing small parts, and store your acid in an airtight container to prevent evaporation.
For best results, immerse your parts in hot pickling solution immediately after soldering.
Timing matters considerably for preparing clean, professional solder joints that’ll hold strong.
Control Heat Application With the Correct Torch Technique

You’ll need to select the right flame size for your specific assembly, matching a smaller flame to delicate pieces and a larger one to bigger components.
Focus your torch on the base metal rather than directly on the solder, allowing heat to transfer through the metal naturally.
Move your torch in circular motions to distribute heat evenly and prevent localized overheating that can ruin your flux.
Proper Flame Size Selection
One critical factor that determines your soldering success is selecting the right flame size for your specific project. When working with silver solder’s lower melting point, you’ll want to adjust your propane torch flame to pencil-tip size for precision work. This proper flame size selection prevents overheating and flux spoilage while maintaining control.
For delicate joints, reduce gas pressure to create a softer torch flame that won’t overwhelm small components.
Larger assemblies require higher pressure and bigger flames to guarantee even heat distribution across the metal. Always direct your flame toward the base metal rather than the solder itself, allowing the metal to reach appropriate temperatures for smooth solder flow.
Practice manipulating the flame with a soldering pick to develop muscle memory and consistent results.
Heat Distribution Management
Getting your flame size right sets the foundation, but mastering heat distribution separates successful joints from frustrating failures. Your torch technique determines whether solder flows smoothly or creates weak spots. Always heat the base metal, not the solder itself—this guarantees proper flow as the metal reaches ideal temperature.
Direct your flame to create even heat distribution across the joint. Move the torch continuously in small circles to prevent hot spots that can damage your work. For larger pieces, position fire bricks around your assembly to reflect heat back and maintain consistent temperatures.
Watch your flux carefully during soldering. If it darkens or spoils, you’re applying too much heat. Adjust your torch angle and distance immediately to preserve the flux’s effectiveness and achieve strong, clean joints.
Position and Secure Parts With Smart Fixturing Methods
When silver soldering requires precision, smart fixturing becomes your foundation for success. You’ll want to use screws to secure components together, preventing movement while maintaining stability throughout the soldering process.
These fixturing methods guarantee consistent positioning and proper joint clearance for ideal solder flow during soldering. Target a joint clearance between 1 to 5,000 inches, but avoid gaps exceeding 6,000 inches since they’ll prevent effective solder penetration.
Center punches help you maintain desired spacing and alignment consistently. Be cautious with clamps or weights—they can compromise your joint clearance and hinder proper soldering results.
When you implement secure fixturing methods correctly, you’ll achieve cleaner, stronger connections with better joint integrity throughout your silver soldering projects.
Time Your Solder Flow for Optimal Results

You’ve got a narrow five-minute window once you start heating to apply your solder before the flux begins to spoil.
Watch for the flux to turn clear and glassy—that’s your signal to introduce the solder with your pick.
Miss this timing, and you’ll face poor adhesion as the overheated flux darkens and loses its effectiveness.
Five Minute Flow Window
Once you’ve heated your metal to the proper temperature, you’ll have roughly five minutes for the solder to flow before the flux begins to degrade.
This five-minute flow window is essential for achieving strong joints when soldering two pieces together. Watch your flux closely—it should become clear and glassy, signaling the perfect temperature for solder flow.
If your solder doesn’t flow within this timeframe, your joint likely wasn’t hot enough or the flux has deteriorated. You’ll need to reapply flux and reheat.
Use a timer to track this window effectively, especially when starting out. Practice timing with sample pieces to develop your instincts.
Once silver soldered correctly within this window, your joints will be durable and professionally finished.
Flux Spoilage Prevention
Since flux degradation is the most common cause of failed silver solder joints, you’ll need to master timing to prevent spoilage and achieve consistent results.
Watch for the flux to become clear and glassy within a few seconds to a minute, then apply your solder immediately.
Three critical timing techniques prevent flux spoilage:
- Apply solder within 5 minutes after heating the flux to avoid degradation
- Use a soldering pick to manipulate the solder precisely when it begins to flow
- Maintain proper torch distance to control heat without overheating the flux
Monitor solder flow closely during this window.
If you’re using paste flux, reconstitute it with water if it appears dried out before application.
Overheated flux creates poor joint quality.
Cool Your Work Properly to Prevent Joint Damage
After you’ve completed your soldering work, proper cooling becomes critical to preserving joint integrity and preventing costly failures.
Let your pieces cool naturally at room temperature rather than quenching in water immediately. This gradual cooling process prevents thermal shock that can crack joints or cause metal stress.
Move your work to a cold surface to facilitate steady temperature reduction. Verify water droplets can disperse without pooling on hot metal, which creates uneven cooling and potential warping.
Remember, you’ve got just five minutes for proper solder flow before flux spoils, so don’t let cooling interfere with bonding.
While cooling, inspect each joint carefully. You should see a thin solder layer between parts, confirming successful bonding rather than excess buildup.
Inspect Joints for Complete Solder Penetration

When your joints have cooled sufficiently, grab a magnifying glass or jeweler’s loupe to examine each connection closely.
You’ll need to inspect joints carefully to verify complete solder penetration and a strong bond. Look for these three key indicators:
- Thin solder layer between parts – This shows proper penetration and successful bonding with visible fillets along edges.
- Dark lines along joints – These indicate insufficient solder penetration requiring touch-ups for robust connections.
- Heavy excess fillets – This signals inadequate solder flow into the joint, needing additional reinforcement.
Remember that proper solder flow is critical.
If solder doesn’t fill joints within five minutes of heating, reapply as needed.
Check for gaps or inconsistencies that could compromise strength.
Clean and Finish Soldered Joints Like a Professional
Three essential steps transform rough soldered joints into professional-quality connections that rival factory work.
Start by applying the right amount of solder—you’ll want a thin layer between parts without bulging. Use your solder pick to remove any excess material before it hardens completely.
Next, begin your finishing process with coarse filing to eliminate visible protrusions, then switch to fine filing for smooth surfaces that blend seamlessly. Check for proper fillets along joint edges; dark lines indicate insufficient penetration requiring touch-ups.
File from coarse to fine for seamless joints, watching for dark lines that signal poor penetration needing correction.
Finally, immerse hot pieces in pickling acid within five minutes to remove firescale and oxidation.
Complete the professional appearance using Scotchbrite wheels and rotary tools to restore shine and achieve that polished, factory-quality finish every time.
Frequently Asked Questions
What Is the Easiest Way to Solder Silver?
You’ll find the easiest silver soldering method involves creating tight joints, applying flux, heating evenly until clear, then focusing flame on the joint while feeding solder wire gradually.
How to Improve in Silver Soldering?
You’ll improve by practicing regularly with different joint types, maintaining proper gaps, applying flux generously, controlling heat precisely, and analyzing your results after pickling to identify areas needing refinement.
Why Won’t My Silver Solder Flow?
Your silver solder won’t flow because you’re not heating enough, have gaps over 0.006 inches, dirty surfaces, wrong flux type, or you’re overheating the flux itself.
Do You Use Flux With Silver Solder?
Yes, you’ll always use flux with silver solder. It’s essential for preventing oxidation and ensuring proper solder flow. Apply flux before heating, and don’t overheat it or you’ll contaminate your joint.
In Summary
You’ve learned the fundamental techniques that’ll transform your silver soldering from frustrating guesswork into precise craftsmanship. Don’t expect perfection immediately—each project will teach you something new about heat control, timing, and joint preparation. Practice these tricks consistently, and you’ll develop the intuitive feel that separates skilled artisans from beginners. Start with simple projects, master one technique at a time, and soon you’ll be creating strong, beautiful joints confidently.


Leave a Reply