You’ll achieve professional small batch jewelry printing by optimizing your CAD design with 0.6-0.8mm wall thickness and including release holes for hollow pieces. Choose high-quality castable resins like W20 Green with SLA/DLP technology for precision details. Master post-processing by cleaning with 95% isopropyl alcohol and UV curing for strength. Implement thorough quality control checks throughout production. Scale efficiently using print-on-demand models while maintaining craftsmanship standards. These foundational techniques will reveal advanced strategies for maximizing your jewelry printing success.
Optimize Your CAD Design for Printing Success

When designing jewelry for 3D printing, you’ll need to follow specific technical requirements that guarantee your pieces print successfully and maintain their structural integrity.
Keep minimum wall thickness between 0.6 and 0.8 mm for metals like gold and silver. This verifies durability during printing jewelry processes and casting.
Metal jewelry requires 0.6-0.8 mm wall thickness minimum to ensure structural integrity throughout the 3D printing and casting process.
Design small decorative features with at least 0.35 mm diameter and 0.4 mm height to prevent breakage.
For hollow designs, include three or more release holes measuring minimum 1.5 mm to avoid casting complications.
Stay within the 88 x 88 x 125 mm size limit for standard printer compatibility.
Upload one object per file and use quantity counters for multiple prints to potentially receive bulk discounts while maintaining platform compliance.
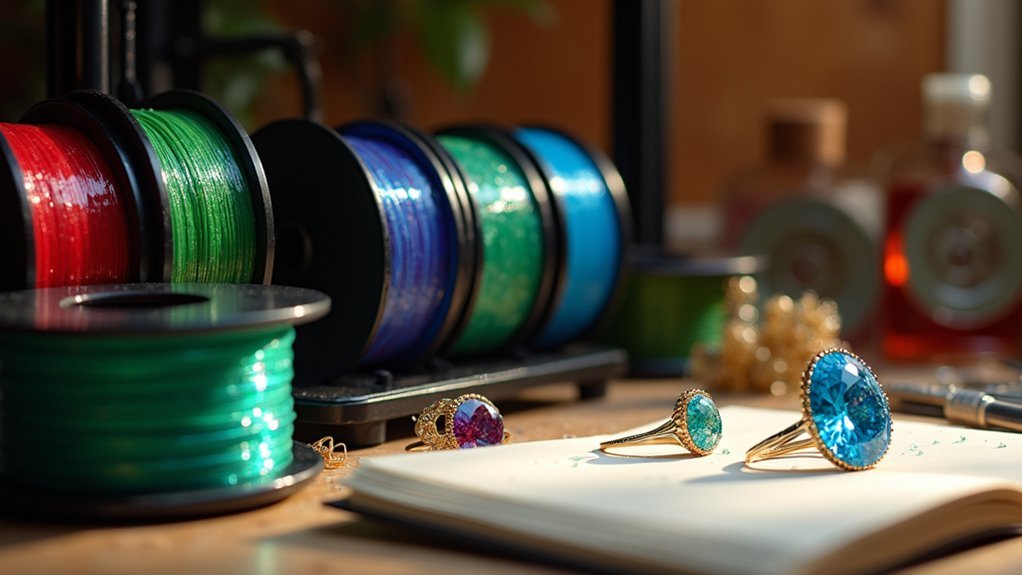
Choose the Right Materials and Printing Technology
Material selection forms the foundation of successful small batch jewelry printing, directly influencing both print quality and final piece durability.
You’ll want to invest in high-quality castable resins like W20 Green or W40 Orange for ideal results and intricate details.
For printing technology, SLA and DLP stand out as your best options. These methods deliver the precision you need for complex jewelry designs.
Make sure you’re using metals like gold, silver, bronze, or brass for structural integrity, maintaining minimum wall thicknesses of 0.6 to 0.8 mm.
- Transform your creative vision into stunning, professional-grade jewelry pieces
- Achieve breathtaking detail resolution that captures every intricate design element
- Create heirloom-quality pieces that’ll last generations with proper material choices
- Experience the satisfaction of flawless prints using premium castable resins
- Build confidence knowing your jewelry won’t break during the casting process
Master Post-Processing Techniques for Professional Results
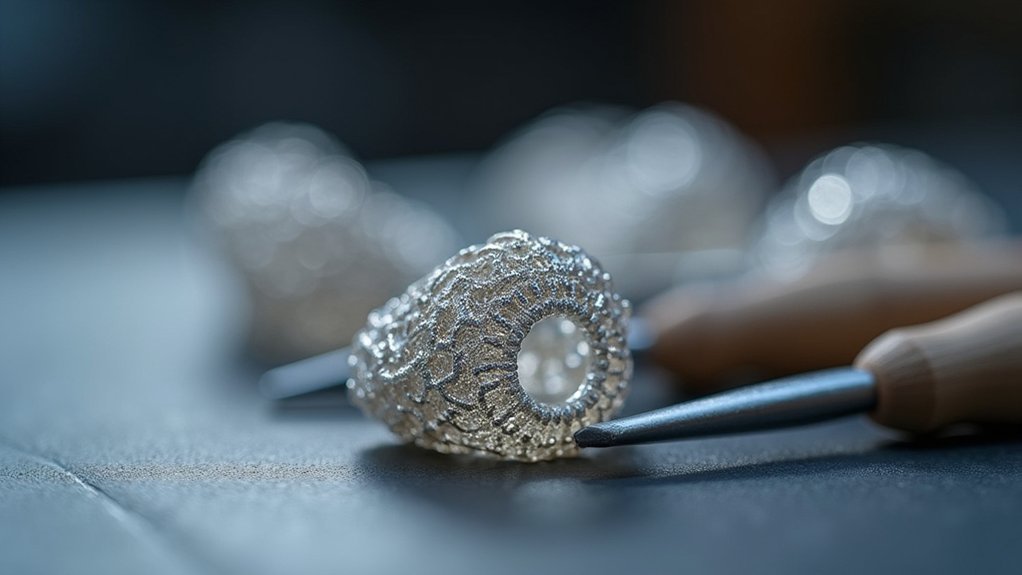
Although your printer delivers exceptional detail, the magic truly happens during post-processing where raw prints transform into professional-grade jewelry pieces.
Start by cleaning your models with 95% isopropyl alcohol to remove excess resin and achieve smooth surfaces. Next, perform post-curing using UV light exposure according to standard procedures—this enhances material strength and durability considerably.
| Step | Tool/Material | Purpose | Duration | Notes |
|---|---|---|---|---|
| Cleaning | 95% IPA | Remove excess resin | 2-3 minutes | Guarantees smooth finish |
| Post-curing | UV light | Strengthen material | Per specifications | Critical for durability |
| Support removal | Sonic Saber | Preserve details | Variable | Use precision tools |
| Drilling | Small drill bits | Wax stick attachment | As needed | For investment casting |
| Polishing | Sandpaper/rouge | High-gloss finish | 10-15 minutes | Professional appearance |
When drilling holes for investment casting, use precision techniques for secure wax stick attachment during burnout. Always review your Privacy Policy regarding customer data before finalizing orders.
Implement Quality Control Throughout Your Workflow
Professional post-processing techniques set the foundation for excellence, but consistent quality control throughout your entire workflow separates successful jewelry businesses from amateur operations.
You need to know that implementing systematic checks at every stage—from design validation to final inspection—ensures your pieces meet customer expectations consistently.
Start with thorough design validation, checking dimensions and specifications before printing. During production, use visual inspections and measurement tools to assess model accuracy.
Establish an extensive post-processing review process that evaluates surface finish quality and structural integrity.
- Document every quality control check to identify recurring issues
- Use customer feedback to continuously improve your designs
- Implement measurement tools for precise dimensional accuracy
- Create detailed inspection checklists for consistent evaluations
- Track patterns in quality issues for proactive solutions
Scale Your Production While Maintaining Craftsmanship

When properly executed, scaling your jewelry production doesn’t require sacrificing the artisanal quality that sets your pieces apart from mass-manufactured alternatives.
Smart scaling preserves the handcrafted essence that distinguishes your jewelry from factory-produced pieces flooding the market.
You’ll achieve this balance by leveraging 3D printing technology for small batches of unique pieces, maintaining intricate designs while minimizing costs. Implement a print-on-demand model that eliminates inventory concerns and enables immediate customization based on customer preferences.
Optimize your designs for 3D printing by maintaining minimum wall thicknesses of 0.6 to 0.8 mm for metals, ensuring structural integrity without compromising delicate aesthetics.
Create hollow models with at least three release holes around 1.5 mm each to reduce material usage. Use CAD software to refine designs and streamline production, enhancing efficiency while experimenting with new styles across your scaled batches.
Frequently Asked Questions
How Long Does It Take to 3D Print Jewelry?
You’ll spend 1 to 6 hours 3D printing jewelry, depending on complexity and size. Add 30 minutes to several hours for post-processing. Your total workflow takes 1 to 3 days for completion.
Is There Anything Illegal to 3D Print?
You can’t legally 3D print counterfeit items, trademarked designs without permission, or weapons in many jurisdictions. You’ll face legal action for patent infringement and must comply with material safety regulations.
What Metals Cannot Be 3D Printed?
You can’t 3D print toxic metals like lead or mercury, high-melting-point metals such as titanium without specialized equipment, or certain hard alloys that lack ductility and cause structural defects.
Is It Safe to Wear 3D Printed Jewelry?
You can safely wear 3D printed jewelry made from biocompatible materials like surgical stainless steel, titanium, gold, or silver. Avoid wearing castable resins long-term and guarantee proper cleaning for skin health.
In Summary
You’ve now got the essential strategies to elevate your small batch jewelry printing. Don’t rush the process—each step from CAD optimization to final quality checks matters. Start with one technique, master it, then gradually implement the others. Your attention to detail in design, material selection, and post-processing will set your pieces apart. Remember, consistency in your workflow creates the foundation for scaling without sacrificing the craftsmanship that makes your jewelry special.


Leave a Reply