You’ll capture stunning gemstone photos by mastering these seven smartphone tricks: shoot during golden hour for natural sparkle, use a tripod or steady-hand techniques for sharp images, choose white backgrounds for light gems and black for dramatic effects, clean stones with soft cloths to prevent fingerprints, align your camera with the phone’s grid for balanced composition, focus on the gemstone’s table to reveal internal brilliance, and edit with apps like Lightroom to enhance true colors. These professional techniques will transform your gem photography results.
Master Natural Lighting for Maximum Gemstone Brilliance
While artificial lighting can work for gemstone photography, natural light remains your most powerful tool for capturing authentic brilliance and color.
Harness the golden hour’s soft, diffused light shortly after sunrise or before sunset to enhance your gemstone’s sparkle. Position your stones near windows to utilize gentle indirect sunlight, which eliminates harsh shadows and glare while maintaining vibrant detail.
Experiment with your smartphone’s angle to find ideal light reflection—small adjustments dramatically impact brilliance. Use white backgrounds or light-colored paper as reflectors to bounce light onto darker areas, enhancing clarity in your jewelry photography.
Avoid direct sunlight that causes overexposure and detail loss. Instead, seek bright, shaded areas that maintain luminosity while preventing unwanted glare.
Stabilize Your Phone for Crystal-Clear Shots
You’ll capture sharper gemstone photos when you eliminate camera shake from your smartphone shots.
Phone tripods provide the most reliable stability, but you can also master steady-hand techniques when shooting handheld.
These stabilization methods guarantee your gemstone’s intricate details remain crystal-clear instead of blurred by unwanted movement.
Use Phone Tripods
Although smartphone cameras have improved dramatically, even the slightest hand movement can ruin your gemstone photos. A phone tripod eliminates camera shake, delivering sharp, detailed images that showcase your gems’ brilliance.
These compact, lightweight tools are perfect for macro photography, allowing you to capture intricate details that handheld shots often miss. Tripods enable longer exposure times without blurriness—essential when photographing reflective gemstone surfaces under controlled lighting conditions.
You’ll gain creative freedom to compose shots from multiple angles without holding your phone, ensuring consistent framing every time. Choose tripods with adjustable heights and angles to achieve the perfect perspective for each stone’s unique features.
This stability transforms amateur snapshots into professional-quality images that truly capture your gemstones’ beauty and craftsmanship.
Steady Hand Techniques
When tripods aren’t available, mastering steady hand techniques becomes your secret weapon for capturing razor-sharp gemstone photos. Grip your smartphone firmly with both hands to create a stable foundation that prevents camera shake.
Brace yourself against walls or solid surfaces to enhance your stability, especially when using a macro lens for detailed shots.
Activate your phone’s timer function to eliminate shutter-press vibrations that blur your images. Enable the grid feature to maintain proper alignment while keeping your device steady throughout the capture process.
These steady hand techniques prove invaluable when photographing delicate gemstone details.
For challenging lighting conditions, consider combining these methods with small phone holders to achieve professional-quality results without bulky equipment.
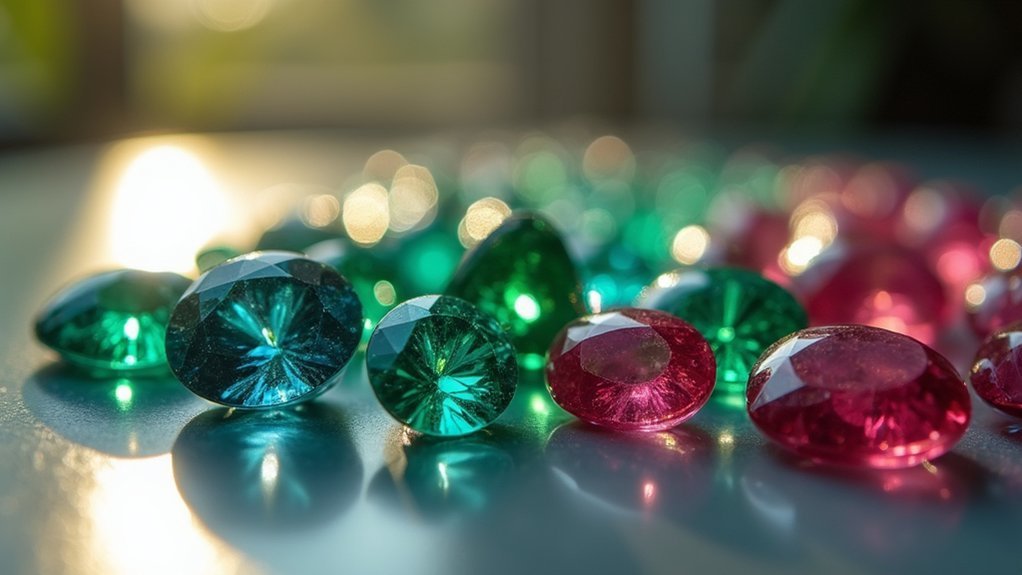
Choose the Perfect Background to Enhance Your Gems
Your background choice can make or break your gemstone photos, with white and black being your go-to options for different effects.
You’ll need to contemplate how color temperature affects your gem’s appearance under various lighting conditions.
Strategic integration of complementary elements in your background will elevate your shots from amateur snapshots to professional-looking images.
White Vs Black Backgrounds
Since the background you select dramatically affects how viewers perceive your gemstones, understanding the fundamental differences between white and black backgrounds becomes essential for creating stunning smartphone photos.
White backgrounds enhance clarity and brightness, making your gems’ colors pop while allowing intricate details of lighter stones to shine. A simple white tile works perfectly for this purpose. Black backgrounds create dramatic effects, emphasizing brilliance and sparkle, especially in darker gemstones or vibrant colored stones.
| Background Type | Best For | Visual Effect |
|---|---|---|
| White | Light gemstones, commercial shots | Clean, bright, detailed |
| Black | Dark stones, dramatic presentations | Bold, sparkling, mysterious |
| Textured | Artistic compositions | Depth, visual interest |
The color of the background you choose influences perceived value. Experiment with different textures using macro lenses to add depth while maintaining consistency across your collection.
Color Temperature Considerations
Beyond choosing between white and black backgrounds, you’ll need to master color temperature to guarantee your gemstones display their true colors and maximum appeal.
Color temperature affects how colors appear in your photos, and inconsistent temperatures can distort your gem’s natural hues. When shooting with a white background, make sure your lighting maintains the same color temperature throughout the session.
Mixed lighting sources create color casts that make gemstones appear unnatural. Use daylight-balanced LED lights or stick to one light source type. Your smartphone’s white balance setting should match your lighting conditions.
Test shots help you identify color shifts before capturing final images. Consistent color temperature assures accurate color representation, allowing your gemstones’ true beauty to shine through without unwanted color distortions.
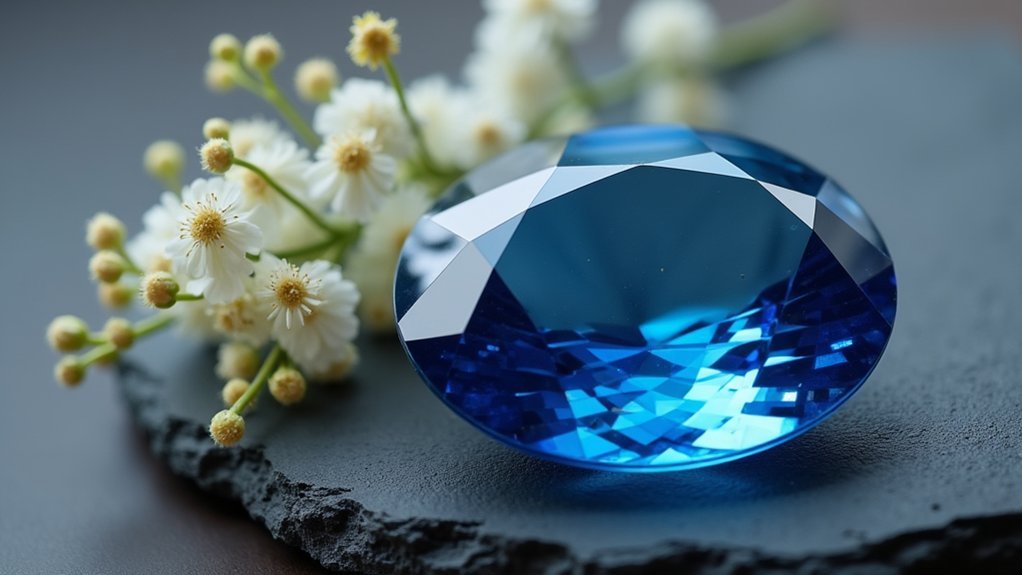
Complementary Element Integration
While mastering color temperature sets the foundation for accurate gem photography, selecting the right background elements takes your smartphone shots from ordinary to extraordinary.
You’ll want to choose complementary elements that enhance your gem’s natural beauty without overwhelming it. For light-colored stones, use lighter backgrounds to maintain harmony, while darker gems pop against contrasting darker surfaces.
Textured backgrounds like fabric or wood add visual depth and engagement to your compositions. However, don’t overlook the power of a clean and simple background – it keeps your gemstone as the undisputed focal point.
Experiment with materials like marble or glass to create stunning reflections that amplify your gem’s brilliance. Consider adding props that reflect your stone’s character, such as floral arrangements for delicate gems or metallic accents for vibrant specimens.
Clean and Handle Gemstones Like a Professional
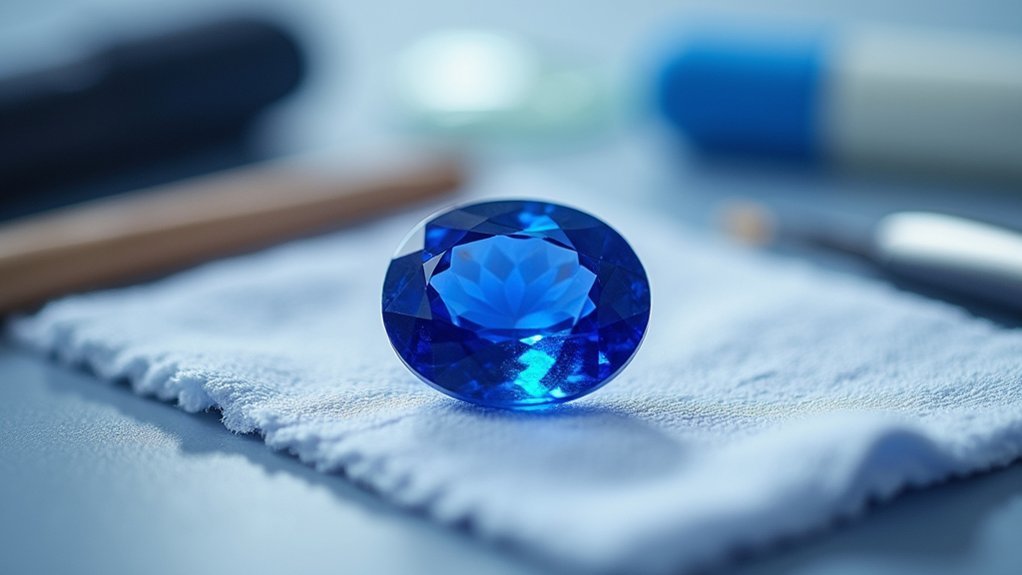
Before you even think about adjusting your camera settings, you’ll need to master the art of handling gemstones without leaving traces of your touch.
Always use clean, soft jewelry cloths or gloves when you handle gemstones to prevent fingerprints and smudges that’ll ruin your image quality. If your stone accidentally touches an unintended surface, clean it immediately to avoid contamination.
Use chamois leather to gently wipe your gemstones, applying light pressure to prevent scratching softer stones.
Make certain your placement surface is flat, clean, and dust-free to avoid imperfections in your final shot. These professional handling techniques will maintain your gemstone’s visual appeal and create the pristine foundation needed for stunning smartphone photographs.
Compose Stunning Images Using Your Phone’s Grid Feature
Once you’ve prepared your gemstone with professional handling techniques, activating your smartphone’s grid feature transforms your camera into a precision composition tool.
This photography essential divides your screen into nine equal sections, creating natural focal points for compelling macro compositions.
Position your gemstone at grid line intersections to harness the rule of thirds, instantly creating more dynamic product photography than simple center placement.
These intersection points naturally draw viewers’ eyes, enhancing your stone’s visual impact.
Adjust your camera angle to align perfectly within the grid, ensuring sharp macro focus on intricate details.
The grid guides you toward balanced compositions while maintaining the gemstone as your primary subject.
Experiment with different grid positions to discover unique angles that showcase your stone’s character, color variations, and brilliance through strategic placement.
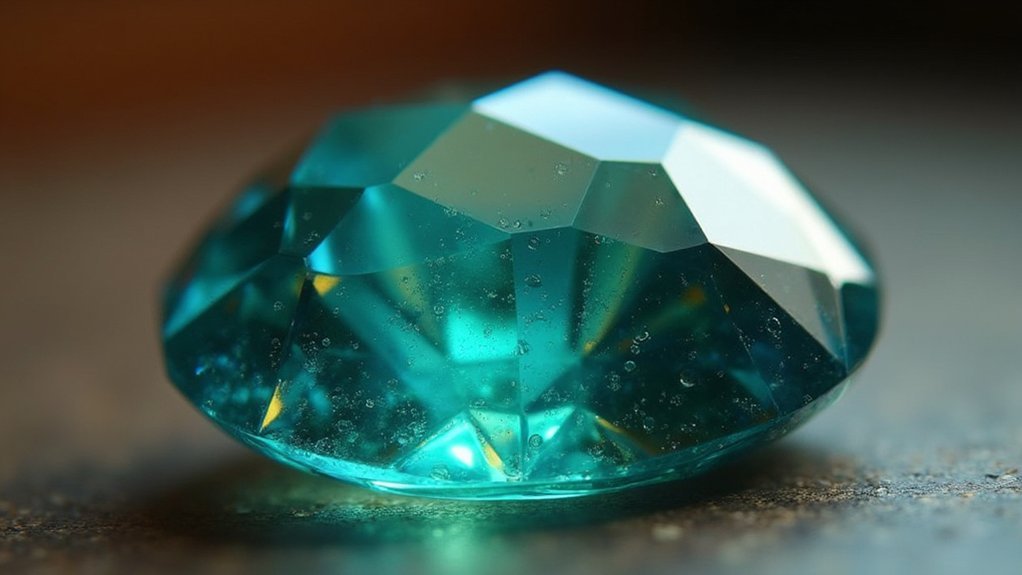
Focus on the Gemstone’s Table for Best Results

After mastering grid composition, direct your camera’s focus specifically toward the gemstone’s table—the flat, polished top surface that serves as your stone’s main showcase window.
The gemstone’s table acts as your primary target—this polished surface reveals the stone’s most captivating internal features and brilliant light play.
When photographing gems, this area displays internal features and brilliance most effectively. Switch to manual focus for precise control over your shot’s sharpness.
You’ll want to use 5x zoom or greater to capture crisp facet details surrounding the table. Position your gemstone at the frame’s center using your phone’s grid lines, then carefully adjust focus until the table appears razor-sharp.
This technique guarantees you’ll capture the stone’s unique characteristics while the table becomes your image’s primary focal point, creating professional-looking results that highlight your gemstone’s natural beauty and craftsmanship.
Edit Your Photos to Bring Out True Colors
Capturing a perfectly focused gemstone image represents only half the work—post-processing transforms your raw photo into a stunning showcase of your stone’s authentic beauty.
When you edit your photos to bring out true colors, start by shooting in RAW format for maximum flexibility. Use Lightroom or Snapseed to adjust white balance, correcting unwanted tones that mask your gemstone’s true hues.
Increase saturation selectively to enhance undertones without creating unnatural appearances that’d embarrass any jewelry shop. Adjust highlights to -100 and shadows between +20 and +30 for ideal depth and detail revelation.
Use luminance sliders to fine-tune specific color brightness, emphasizing dominant colors while reducing non-dominant ones. Finally, crop strategically with gemstone edges nearly touching frame boundaries for balanced composition.
Frequently Asked Questions
Which Phone Is Best for Gemstone Photography?
You’ll want the iPhone 14 Pro or Samsung Galaxy S23 Ultra for gemstone photography. They’ve got exceptional high-resolution cameras, advanced macro capabilities, and image stabilization that’ll capture your gems’ intricate details perfectly.
How Do You Take Clarity Pictures on Mobile?
You’ll achieve clarity by cleaning your gemstone first, using natural sunlight, enabling macro mode, keeping your phone steady with a tripod, and manually focusing on the table for sharp details.
How to Take Photos of Gemstones?
You’ll need to clean your gemstones first, then use natural sunlight with a contrasting background. Attach a macro lens for close-ups, and edit photos afterward to adjust white balance and enhance true colors.
What Camera Settings Are Best for Jewelry Photography?
You’ll want manual focus on your gemstone’s table, low ISO around 100-200, wider aperture for background blur, proper white balance for accurate colors, and RAW format for maximum editing flexibility.
In Summary
You’ve now got the essential techniques to capture stunning gemstone photos with just your smartphone. Remember to practice these seven pro tricks regularly – mastering natural lighting, stabilizing your shots, and perfecting your composition won’t happen overnight. Don’t get discouraged if your first attempts aren’t perfect. Keep experimenting with different angles, backgrounds, and editing techniques. With patience and persistence, you’ll soon be photographing gemstones like a true professional photographer.

Leave a Reply