You’ll master delicate wire soldering by focusing on three essential techniques. First, maintain precise temperature control at 260°C with a fine-tip iron and use copper alligator clips as heat sinks to protect vulnerable components. Second, prepare your wires properly by selecting 30 AWG stranded wire, stripping only 1/4 inch of insulation, and pre-tinning the ends for better heat transfer. Third, inspect each joint thoroughly using magnification tools to guarantee uniform solder coverage and identify any cold joints or excess solder that could create weak points in your connections.
Temperature Control and Heat Management for Fine Wire Connections

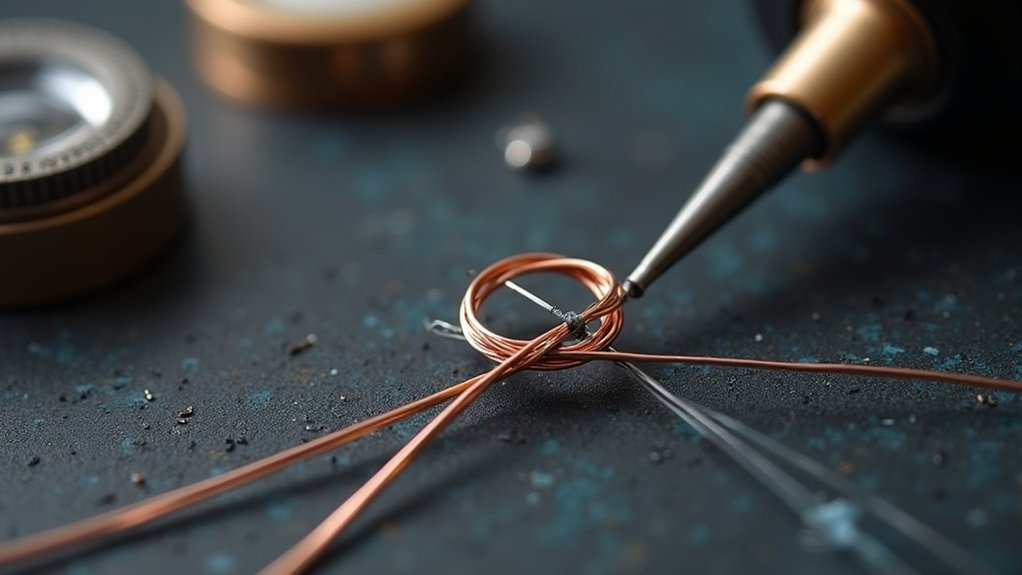
When working with delicate wire connections, you’ll need to maintain precise temperature control to prevent damage to insulation and nearby components. Set your soldering iron to approximately 260°C for lead-free solder, ensuring ideal melting without overheating sensitive materials.
Use a fine-tip iron for targeted heat application, focusing solely on the connection point. Pre-tin your wire ends before making connections to improve heat transfer and reduce soldering time. This technique minimizes exposure to excessive temperatures that could damage heat shrink tubing or wire insulation.
Deploy copper alligator clips as heat sinks to draw thermal energy away from vulnerable components. Keep your iron tip clean and well-tinned for efficient heat transfer. Poor tip maintenance leads to inadequate heating, resulting in a cold solder joint that compromises connection reliability and requires rework.
Wire Preparation and Handling Techniques for Jewelry Components
Since jewelry components require exceptional precision and delicate handling, you’ll need to select fine-gauge stranded wire like 30 AWG that maintains flexibility while preventing breakage during wear.
Your wire preparation begins with stripping only 1/4 inch of insulation to prevent excess exposure that leads to fraying. Twist the exposed strands tightly together before you solder, creating a strong mechanical bond that enhances conductivity and stability.
Strip only 1/4 inch of insulation and twist exposed strands tightly before soldering to create strong mechanical bonds that enhance conductivity.
Pre-load heat shrink tubing onto your wire before beginning any joint work to avoid reworking later.
When you apply heat, use low-temperature lead-free solder with a 217°C melting point to minimize thermal damage. This careful approach protects delicate components while ensuring reliable electrical connections that withstand jewelry’s constant movement and handling.
Joint Inspection and Finishing Methods for Professional Results

After completing your solder joint, you’ll need to conduct a thorough inspection to confirm professional-quality results that meet jewelry industry standards.
Examine each joint for uniform coverage, making sure solder wraps around and between wire strands, indicating proper heat from your soldering tip and reliable connections.
Watch for excess solder or cold joints that create weak points. If you’ve applied too much amount of solder, remelt and adjust for cleaner finishes.
Smooth protruding wire strands and verify joints sit flush with insulation to prevent failure points.
Use magnifying glasses or microscopes during joint inspection, especially on delicate wires, catching flaws invisible to naked eyes.
Finally, apply heat shrink tubing over finished joints, covering entire areas for environmental protection while using controlled heat for professional appearances.
Frequently Asked Questions
What Is the Proper Technique for Soldering Wire?
Strip wire ends and twist strands together. Heat the joint with your soldering iron, then feed solder onto the tip. Let it flow into strands evenly, creating a shiny connection without excess pooling.
What Is the Golden Rule of Soldering?
You must always heat both the wire and soldering iron adequately before applying solder. This guarantees proper heat transfer and creates strong, reliable connections by allowing solder to flow smoothly into the joint.
What Is the Best Soldering Technique?
You’ll achieve the best results by pre-tinning both wire ends and your iron tip, applying heat directly to the joint first, then introducing solder while maintaining a shallow angle for ideal contact.
What Is the Secret of Good Soldering?
You’ll achieve excellent soldering by maintaining consistent heat application, positioning your iron tip on and under connections. Keep your tip clean, tin wire ends first, and guarantee proper heat transfer for strong, reliable joints.
In Summary
You’ve now mastered the essential techniques for delicate wire soldering. By controlling your temperature precisely, you’ll prevent damage to fine components. When you prepare your wires properly and handle them with care, you’re setting yourself up for success. Don’t forget to inspect each joint thoroughly and finish your work professionally. These skills will elevate your jewelry-making projects and guarantee durable, beautiful connections every time you solder.


Leave a Reply