Sweat soldering is a metalworking technique where you pre-flow solder onto one component before joining it to another piece. You’ll heat the first metal surface with flux and apply solder until it flows evenly across the area, then reheat both components together to create the final bond. This method gives you superior control over solder placement, eliminates excess overflow, and produces seamless, professional-looking joints that are stronger than traditional soldering. Master this technique to elevate your metalworking projects.
Understanding the Sweat Soldering Process

While traditional soldering creates visible seams between metal pieces, sweat soldering offers a cleaner alternative by pre-flowing solder onto one component before joining it with another. This technique produces seamless connections that make it particularly valuable for jewelry making and decorative metalwork where aesthetics matter most.
The process starts with thorough surface cleaning and flux application. You’ll distribute small solder chips evenly across your first metal piece, then heat it until the solder melts and flows smoothly.
Once cooled, you place your second component on top, apply fresh flux to prevent oxidation, and reheat the assembly. The pre-flowed solder melts again, bonding the pieces together without visible solder lines.
Proper heat control prevents damage and keeps solder from creeping beyond intended areas.
Essential Tools and Materials for Sweat Soldering
Success in sweat soldering depends heavily on having the right equipment at your disposal.
Having quality tools makes the difference between frustrating failures and consistently strong, professional-looking solder joints every time.
You’ll need a propane torch to provide the necessary heat for melting your solder and creating strong joints between metal components. Flux is essential for preventing oxidation during the heating process, ensuring clean connections.
Choose solder that’s specifically designed for the metals you’re joining. A soldering pick or titanium pick helps you spread the molten material evenly across joint areas.
You’ll also need a solderite board or similar heat-resistant surface to support your workpieces safely.
Don’t forget safety glasses to protect your eyes from fumes and potential flare-ups.
Finally, keep pickle solution handy for post-soldering cleanup to remove oxidation and achieve polished finishes.
Preparing Metal Surfaces for Optimal Bonding
You’ll achieve strong, reliable solder joints by focusing on three critical preparation steps that directly impact your bonding success.
First, you must clean your metal surfaces thoroughly to remove oxidation, dirt, and grease that can prevent proper adhesion.
Next, you’ll need to master flux application techniques and guarantee your components fit together precisely before heating begins.
Clean Surface Requirements
Before you can create a strong, lasting bond through sweat soldering, you must prepare your metal surfaces with meticulous attention to cleanliness.
Clean surface requirements are absolutely critical for achieving professional results and ensuring your strong joint will withstand stress and time.
Follow these essential steps to meet clean surface requirements:
- Remove all oxidation, dirt, and grease using sandpaper or a brass brush to create smooth, receptive surfaces.
- Apply flux generously to the prepared areas to prevent oxidation during heating and promote ideal solder flow.
- Ensure complete dryness before soldering, as any moisture will interfere with proper solder adhesion.
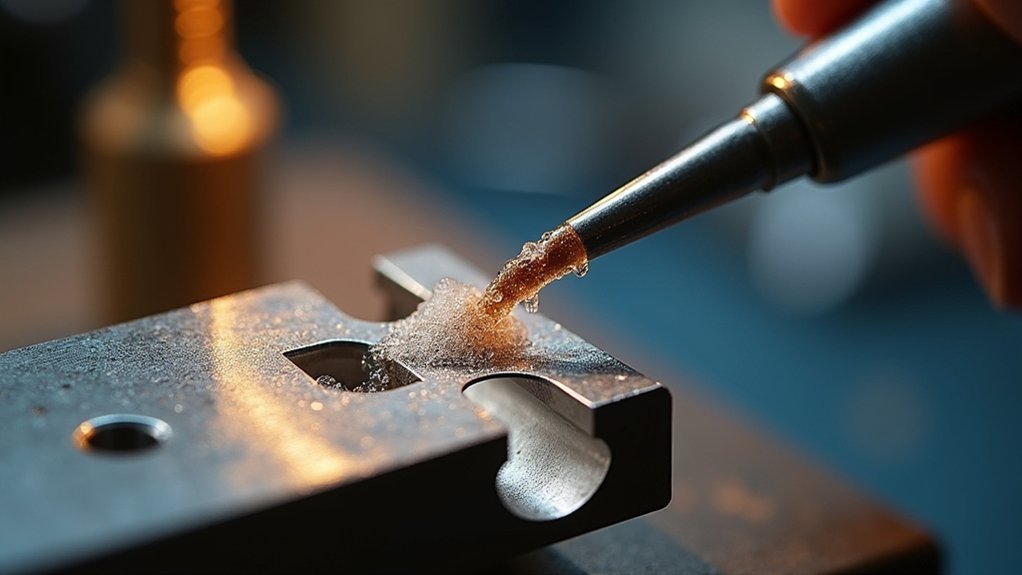
Flux Application Techniques
Three fundamental principles govern effective flux application: coverage, timing, and quantity control. You’ll achieve the finest results by applying flux generously but evenly across both metal surfaces before they’re joined together.
| Flux Type | Application Method | Best Use Case |
|---|---|---|
| Rosin-based | Brush or paste | General purpose soldering |
| Water-soluble | Liquid application | Easy cleanup projects |
| No-clean | Precise dispensing | Sensitive electronics |
| Acid-core | Direct application | Heavy-duty metal joints |
Your flux application techniques directly impact your soldering technique’s success. Apply flux immediately after cleaning surfaces with sandpaper or brass brush to prevent recontamination. Avoid excessive amounts that create messy joints requiring extensive cleanup. The right flux quantity guarantees ideal solder flow while maintaining a clean bond between components.
Proper Fit Assessment
Since successful sweat soldering depends entirely on how well your metal components fit together, you must evaluate each joint before applying any heat or solder. Proper fit assessment guarantees the solder flows smoothly between surfaces, creating strong, reliable bonds.
Follow these essential steps for ideal preparation:
- Clean and prepare surfaces – Use sandpaper or a brass brush to remove contaminants and create slight surface roughness for better adhesion.
- Check alignment and gaps – Confirm pieces fit together tightly without visible spaces that could weaken the joint.
- Perform a dry fit – Test component assembly without heat to verify proper interlocking and make necessary adjustments.
Taking time for thorough fit assessment prevents weak joints and guarantees even solder distribution throughout your connections.
Flux Application and Selection Guidelines
While flux might seem like a minor component in the sweat soldering process, it’s actually critical for achieving professional-quality joints between metal components.
Your flux application technique directly impacts joint quality, so you’ll want to apply a thin, even layer to both surfaces before heating. The type of flux you choose matters greatly – rosin-based flux works best for copper, while acid flux suits non-ferrous metals like silver and brass.
Since soldering is a technique that requires precision, proper flux selection prevents oxidation and promotes smooth solder flow. Remember to work in well-ventilated areas, especially with acid-based fluxes, and always clean away residual flux afterward to prevent corrosion or discoloration that could compromise your finished work.
Heat Control and Torch Techniques
You’ll need to master three critical aspects of heat control to achieve consistent sweat soldering results.
First, select the right torch and configure it properly for your specific metal components and workspace requirements.
Then focus on managing temperature precisely while controlling flame direction to guarantee even heat distribution without damaging your materials.
Torch Selection and Setup
Although torch selection might seem straightforward, choosing the right equipment makes the difference between clean, professional joints and damaged components.
For sweat soldering, you’ll want an air/acetylene torch with a small tip, which provides superior heat control compared to larger alternatives. This setup allows precise temperature management on delicate metal components.
Follow these essential setup steps:
- Connect securely – Attach the burner head firmly to a cool propane canister.
- Inspect thoroughly – Check all connections and equipment for damage before operation.
- Light properly – Slowly open the valve while using a match to create an even flame.
Proper torch selection and setup guarantee consistent heat distribution during soldering.
Focus the flame directly on the metal piece, allowing solder to flow evenly without overheating surrounding areas.
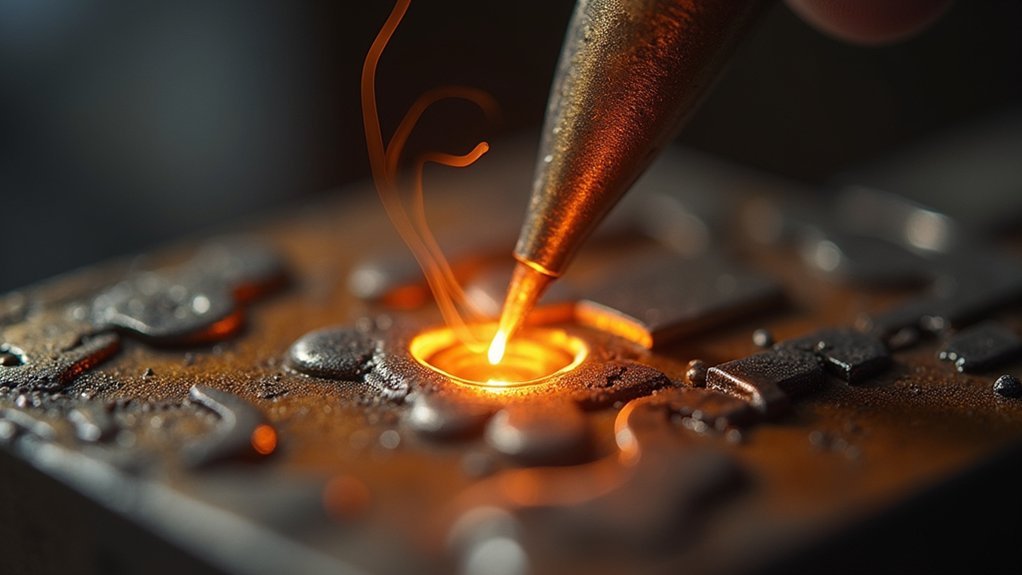
Temperature Management Techniques
Since heat control separates amateur work from professional results, mastering temperature management becomes your most critical skill in sweat soldering.
You’ll need a torch with a smaller tip for precise control, allowing focused heat application without damaging surrounding materials. Apply heat evenly from below to encourage proper solder flow throughout the joint.
Watch your metal’s color change carefully – when it reaches a bright red hue, the solder melts and flows effectively. Control your flame intensity and distance from the workpiece to prevent overheating.
Too much heat damages components, while insufficient heat prevents adequate solder flow. Practice regulating how heat is applied until you develop an intuitive feel for proper temperature management during the entire soldering process.
Flame Direction Control
Beyond managing temperature levels, directing your flame precisely determines whether heat distributes evenly across your joint or creates damaging hot spots.
Proper flame direction control guarantees successful solder flow while protecting surrounding components from thermal damage.
Position your torch at approximately 45 degrees to focus heat on the joint area effectively.
Here’s how to optimize your technique:
- Adjust flame size by regulating the gas valve for small, controlled flames on delicate work
- Target the backsheet of your joint, allowing heat to transfer naturally to pre-placed solder
- Move in circles or sweeping motions to heat the entire joint area evenly
Practice these movements to prevent localized overheating.
You’ll find that consistent flame direction control, combined with a soldering pick for solder placement, creates stronger, cleaner joints every time.
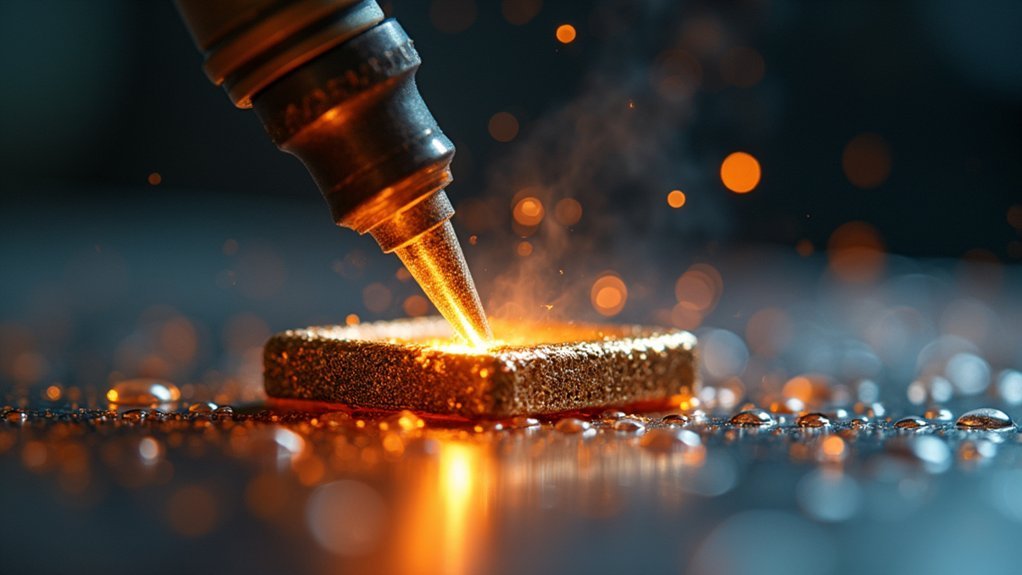
Pre-Flowing Solder Onto Components
Pre-flowing solder onto components creates one of the most refined joining techniques in metalwork, allowing you to achieve nearly invisible seam lines that enhance your finished piece’s professional appearance.
This sweat soldering method involves melting solder onto one component before joining it with another, creating seamless connections that minimize visible solder lines.
Start by thoroughly cleaning and fluxing both metal surfaces to prevent oxidation and guarantee proper adhesion.
Place tiny solder snippets strategically on your pre-fluxed first component, then apply heat to melt them completely.
Once the pre-flowing solder solidifies, position your second piece on top and add fresh flux.
Apply concentrated heat from below to reflow the solder, bonding the two pieces without compromising their structural integrity or creating unsightly joints.
Assembly and Joint Positioning Methods
When you’re ready to assemble your pre-flowed components, positioning becomes critical for achieving professional results. Proper assembly and joint positioning directly impact your solder flow quality and bond strength.
Follow these essential steps for ideal joint positioning:
- Clean all surfaces – Confirm both metal pieces have smooth, debris-free contact areas to eliminate gaps that weaken bonds.
- Secure with clamps – Hold components firmly in place to prevent movement during heating, which causes misalignment and compromised joints.
- Position correctly – Place your pre-fluxed smaller piece with solder snippets onto the larger component for best coverage.
During final heating, focus your torch on the backsheet or larger piece. This technique allows proper solder flow while maintaining consistent, even heat distribution across the entire joint area.
Temperature Management During Joining
Three critical temperature factors determine your sweat soldering success: precise heat application, controlled flame intensity, and gradual cooling. Proper temperature management prevents component damage and guarantees strong joints.
Mastering temperature control through precise heat application, controlled flame intensity, and gradual cooling ensures professional sweat soldering results every time.
You’ll need to heat your solder to its melting temperature, which ranges from 180°C to 450°C depending on the alloy you’re using.
Focus on achieving even heat distribution across both metal pieces. This prevents oxidation and guarantees the solder flows smoothly throughout the joint area. Use a controllable torch to direct heat precisely where needed while protecting surrounding materials from excessive temperatures.
After completing the joint, allow natural cooling. Rapid cooling creates thermal shock that weakens the bond and can cause warping or cracking in your metal components.
Safety Protocols and Protective Equipment

Since sweat soldering involves open flames and molten metal, you’ll need thorough safety protocols to protect yourself from burns, fires, and toxic fumes. Proper protective equipment forms your first line of defense against potential hazards.
Essential safety measures include:
- Eye and respiratory protection – Always wear safety glasses to shield your eyes from flying debris and harmful fumes that can cause serious injury during the soldering process.
- Clothing and fire hazards – Avoid loose clothing that could ignite and tie back long hair to minimize fire hazards when operating your torch around open flames.
- Equipment inspection – Check your propane canister for damage before each use and store it in cool locations to prevent dangerous accidents.
Keep fire extinguishers nearby and maintain a clean, flammable-free workspace.
Common Applications in Jewelry Making
Beyond basic metalworking repairs, sweat soldering becomes an invaluable technique when you’re crafting jewelry that demands seamless, professional-grade connections.
You’ll find this method particularly effective for attaching embellishments to flat metal sheets without visible solder seams, creating that polished finish customers expect.
When you’re designing intricate pieces like cufflinks and pendants, sweat soldering delivers the clean lines essential for professional jewelry making.
You can layer components to create dimensional designs that enhance visual appeal while minimizing excess solder overflow, which simplifies your cleanup process.
The technique works exceptionally well with gold and sterling silver, allowing you to experiment with mixed metal designs.
This versatility increases your pieces’ perceived value and uniqueness, setting your work apart in competitive markets.
Troubleshooting Sweat Soldering Problems
While sweat soldering produces beautiful results in jewelry making, you’ll inevitably encounter challenges that can frustrate even experienced metalworkers.
Even seasoned jewelry makers face frustrating obstacles when mastering the precise art of sweat soldering techniques.
When solder doesn’t flow properly, you’re likely dealing with contaminated surfaces that need thorough cleaning to remove oxidation.
Here are three common troubleshooting solutions:
- Poor solder flow – Clean all pieces of metal thoroughly and reapply flux to guarantee proper adhesion.
- Solder creeping away – Check that components fit tightly together without gaps, then add fresh flux.
- Weak joints after cooling – Apply consistent, moderate heat and confirm you’re using adequate solder coverage with evenly distributed chips.
Post-Soldering Finishing and Cleanup
Three critical steps transform your freshly soldered piece from a rough, oxidized state into a polished, professional-quality component.
First, immerse your work in a pickle solution to remove oxidation and flux residues that accumulated during heating. This chemical bath cleans the metal surface thoroughly, preparing it for finishing. After pickling, rinse the piece completely with water to neutralize any remaining solution.
Next, begin polishing using sandpaper, steel wool, or a polishing wheel to achieve a smooth, shiny finish on soldered areas. Work progressively through finer grits for best results.
Finally, inspect your piece carefully for excess solder or imperfections. Use fine files or sandpaper to remove unwanted material.
Clean your workspace thoroughly, removing flux residues and metal shavings for safety.
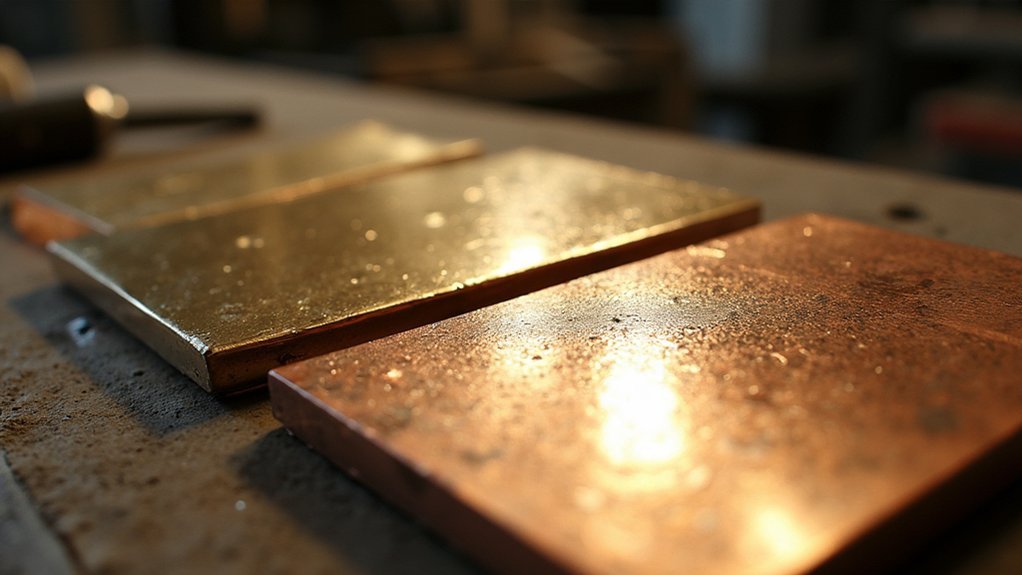
Advantages Over Traditional Soldering Methods
You’ll achieve markedly cleaner joints with sweat soldering since the pre-flowed solder creates seamless bonds with minimal visible solder lines.
This technique drastically reduces material waste because you’re controlling solder flow more precisely, eliminating the excess overflow common in traditional methods.
You’ll spend less time on cleanup and achieve a more professional finish that enhances both the aesthetic and structural quality of your work.
Clean, Seamless Joints
Precision defines sweat soldering’s greatest advantage: the ability to create clean, seamless joints that surpass traditional soldering methods in both appearance and functionality.
When you pre-flow solder onto one piece before joining, you’ll eliminate the visible seams that traditional methods often leave behind.
This technique delivers three key benefits for your metalwork:
- Invisible connections – You’ll achieve joints where solder flows smoothly without obvious attachment points
- Reduced cleanup – The controlled application minimizes excess overflow that requires extensive finishing work
- Professional appearance – Your finished pieces maintain clean lines without bulky solder buildup
You’ll find this method particularly valuable for decorative work where aesthetics matter most.
The precision control lets you create strong, durable bonds while maintaining the seamless appearance that defines quality craftsmanship.
Reduced Material Waste
While traditional soldering methods often result in significant material waste through excess overflow and cleanup requirements, sweat soldering transforms your approach to solder management by allowing precise pre-application that uses only what’s necessary for a strong joint.
| Traditional Soldering | Sweat Soldering |
|---|---|
| Excess solder overflow | Controlled pre-application |
| Material cleanup required | Minimal waste production |
| Higher solder consumption | Efficient material usage |
This controlled technique delivers reduced material waste while maintaining joint strength. You’ll find sweat soldering is ideal when working on intricate projects where precision matters most. Whether you need to join an embellishment to a base piece or create invisible seams, the pre-measured solder application eliminates guesswork. This skill development approach reduces future project errors, creating long-term cost savings for your metalworking endeavors.
Frequently Asked Questions
What Is Sweat Soldering?
You’ll pre-flow solder onto one metal piece before joining it to another. This technique creates strong, nearly invisible bonds by heating the metals until solder “sweats” between them, perfect for clean, professional-looking joints.
What Is the Major Difference Between Soldering and Sweat Soldering?
You’ll apply solder directly at the joint during regular soldering, but with sweat soldering, you’ll pre-flow solder onto one piece first, then join the components together for seamless bonding.
How Does Seam Soldering Differ From Sweat Soldering?
You’ll apply solder directly to the joint in seam soldering, while sweat soldering requires you to pre-melt solder onto one piece first, then join the components together.
What Is the Difference Between Sweat and Solder Connection?
You’ll pre-flow solder onto one piece before joining in sweat soldering, creating seamless bonds. Regular solder connections apply solder directly at the joint, often leaving visible excess material that requires cleanup.
In Summary
You’ve mastered sweat soldering’s precision and control, giving you stronger joints than traditional methods. You’ll find it’s perfect for jewelry work where clean, invisible seams matter most. Don’t forget proper surface prep and flux application – they’re essential for success. With practice, you’ll appreciate how this technique eliminates excess solder and creates professional results. Remember to control your heat carefully and clean thoroughly afterward for the best finish.


Leave a Reply