
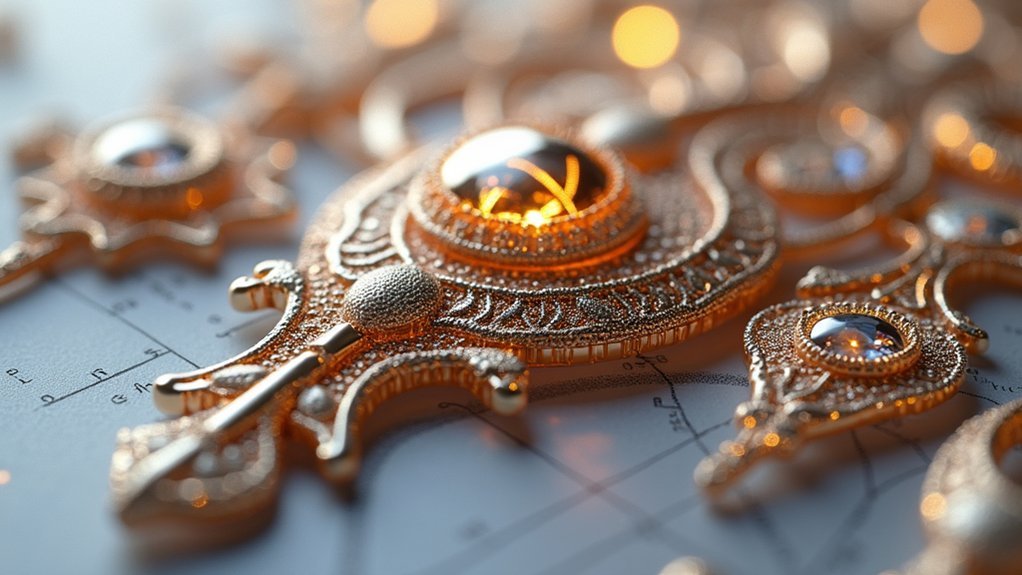
You’ll achieve stunning textured jewelry surfaces in CAD by mastering three core elements: precise displacement mapping that creates authentic geometric depth, strategic light source placement that accentuates surface irregularities, and accurate material property settings for reflectivity and roughness. Use bump mapping and normal maps to simulate traditional metalworking techniques while maintaining efficient polygon counts. Real-time rendering previews let you fine-tune texture scale, depth, and pattern density for maximum visual impact that mimics precious metal behavior perfectly.
Understanding Light Interaction With Digital Textures
When you apply digital textures to jewelry surfaces in CAD, you’re fundamentally controlling how light behaves across each facet and curve of your design. Different surface treatments create varying levels of reflection and absorption, dramatically affecting your piece’s visual impact.
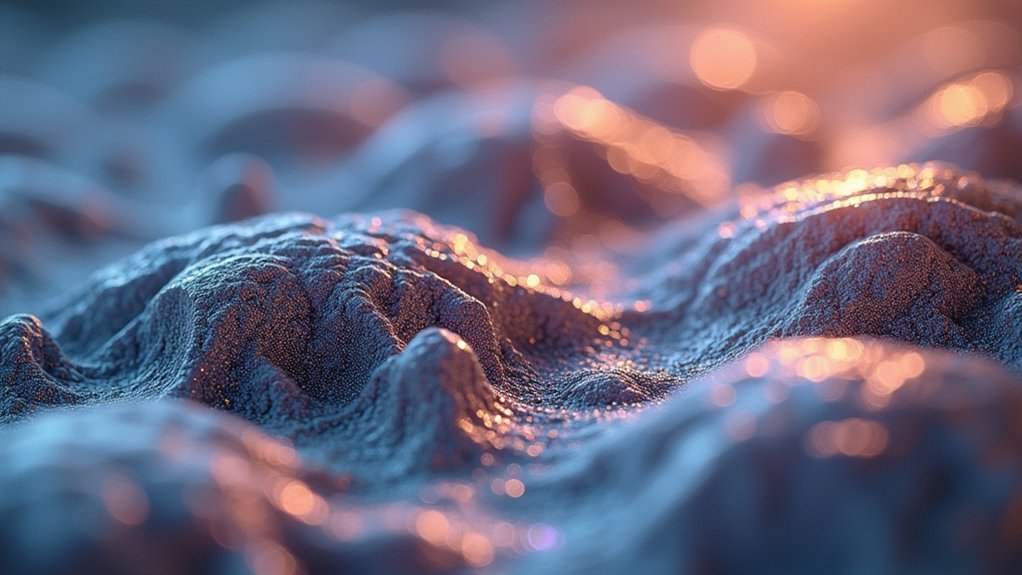
Smooth surfaces reflect light uniformly, while textured areas scatter it in multiple directions, creating depth and visual interest.
Your CAD software lets you simulate realistic lighting conditions, showing exactly how each texture will perform under various angles and intensities. This capability is essential when working with metals in jewelry, as different finishes—from brushed to hammered—interact with light uniquely.
You can adjust texture scale and depth to create intricate patterns that generate compelling shadows and highlights, ensuring your digital design translates perfectly into stunning physical jewelry.
Essential CAD Tools for Surface Texture Creation
You’ll need to master three core areas when creating textured jewelry surfaces in CAD software.
Advanced rendering algorithms give you the computational power to visualize how light interacts with your surface designs in real-time.
Pattern generation features and surface mapping controls work together to let you craft intricate textures that translate seamlessly from digital design to physical jewelry.
Advanced Rendering Algorithms
Since realistic visualization forms the cornerstone of successful jewelry design, advanced rendering algorithms have become indispensable tools that transform flat CAD models into stunning, lifelike representations.
You’ll find that ray tracing and global illumination techniques simulate authentic light interactions on your textured surfaces, creating compelling visual appeal. These algorithms accurately represent complex surface properties including reflection, refraction, and texture mapping, letting you visualize how different textures respond to light.
You can leverage displacement mapping to craft intricate surface details, achieving three-dimensional texture appearance without inflating polygon counts.
Seamless texture library integration enables quick application of hammered or reticulated finishes. Adjust rendering settings like anti-aliasing and shadow quality to guarantee your textured jewelry designs display with exceptional clarity and depth.
Pattern Generation Features
Pattern generation features serve as the creative engine that transforms your design concepts into tangible surface textures with mathematical precision and artistic flair.
These sophisticated pattern generation tools empower you to craft intricate textures that would be impossible to achieve through traditional methods. You’ll find Surface Pattern and Texture Mapping functions essential for applying complex designs directly onto your 3D jewelry models.
Key advantages of modern pattern generation tools include:
- Displacement Mapping capabilities that simulate realistic depth and relief effects on surface textures
- Extensive texture libraries with pre-defined patterns you can customize to match your creative vision
- Real-time editing functionality that lets you experiment with different textures and make instant adjustments
You’ll discover these tools dramatically reduce design time while expanding your creative possibilities exponentially.
Surface Mapping Controls
While pattern generation creates the foundation for textured surfaces, surface mapping controls give you the precision tools needed to manipulate how those textures interact with your jewelry’s geometry.
These controls let you apply intricate textures and patterns that enhance visual appeal without altering your model’s underlying structure. You’ll work with bump mapping to simulate texture appearance while maintaining geometric integrity.
Your CAD software provides various surface finishes—matte, glossy, and textured effects—with real-time preview capabilities for precise adjustments.
Displacement maps become essential when you need realistic textures that translate into physical attributes during CAD/CAM production.
Surface mapping controls ultimately enable personalized textures that reflect individual style preferences, making each piece uniquely distinctive in the final manufactured jewelry.
Mapping Techniques for Realistic Metal Finishes
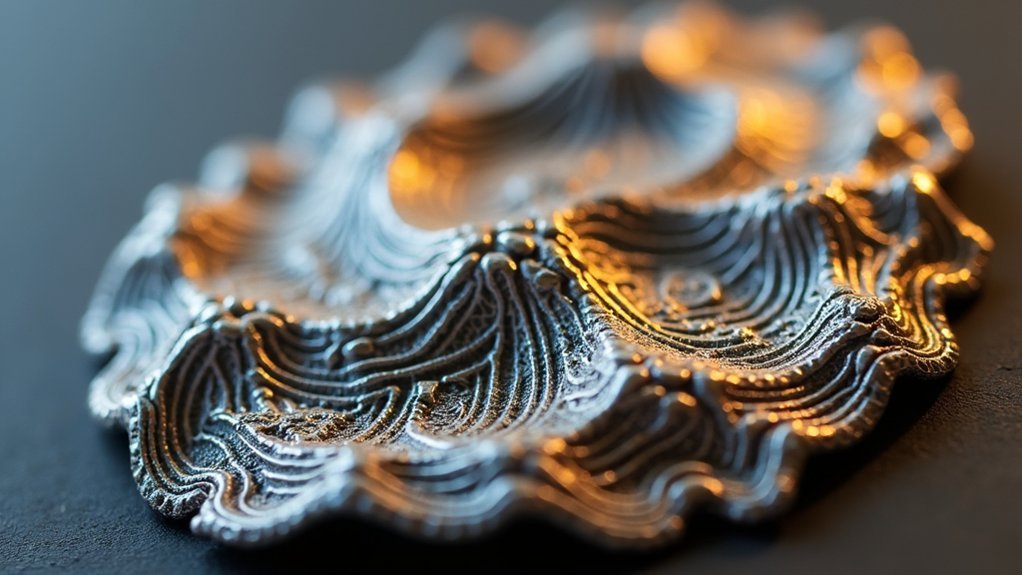
You’ll achieve convincing metal finishes by mastering displacement map creation, which adds actual geometric depth to your jewelry surfaces rather than just visual illusion.
Your surface material properties must accurately reflect real-world metals through careful adjustment of reflectance, roughness, and specular values.
These two techniques work together to transform flat CAD surfaces into textured metal that responds authentically to lighting conditions.
Displacement Map Creation
Because displacement maps translate physical surface variations into digital height data, they serve as the foundation for creating convincing metal textures in jewelry CAD.
You’ll convert textured surfaces into 2D grayscale representations where lighter areas indicate raised surfaces and darker areas show recesses. This technique transforms complex surface details into manageable digital guides.
When you’re creating displacement maps, you’ll greatly reduce modeling time while achieving intricate details that mimic real metalworking techniques:
- Hammering effects – Capture the organic irregularities of hand-forged surfaces
- Stamping patterns – Reproduce precise commercial texturing processes
- Reticulation textures – Simulate the unique melted surface characteristics
High-resolution displacement maps enable you to focus on overall jewelry form while the maps handle surface complexity.
You’ll achieve professional results when you pair these maps with proper lighting and shading techniques in your CAD environment.
Surface Material Properties
Once you’ve established displacement data, translating those surface variations into convincing metal finishes requires careful attention to material property mapping.
Surface material properties determine how your textured jewelry appears under different lighting conditions. You’ll need to configure reflectivity and specularity settings that match your chosen metal’s characteristics – whether it’s the mirror-like finish of polished platinum or the subtle gleam of brushed gold.
High-resolution texture images become your foundation for authentic metal representation. These textures capture the unique qualities that distinguish one metal finish from another.
Displacement Methods in 3D Jewelry Modeling
When creating intricate surface details on jewelry designs, displacement methods offer you a powerful way to transform smooth meshes into richly textured pieces without rebuilding the underlying geometry.
You can apply bump mapping and normal mapping to simulate complex surface details that mimic traditional metalworking techniques like hammering or stamping.
These displacement methods provide several key advantages:
- Performance optimization – You’ll achieve realistic textures without compromising rendering speed
- Design flexibility – You can experiment with intensity and scale settings to perfect your desired effect
- Workflow efficiency – You’ll reduce time-consuming post-processing and enable faster design iterations
High-resolution displacement maps let you create unique textures that enhance visual appeal while maintaining the original mesh structure, making your CAD workflow more efficient.
Procedural Texture Generation for Precious Metals
While displacement methods excel at applying existing textures to your jewelry models, procedural texture generation takes surface customization to an entirely new level by creating unique patterns through mathematical algorithms.
You’ll gain precise control over parameters like depth, scale, and randomness, resulting in completely customizable finishes that enhance your jewelry’s visual appeal.
Your CAD software can incorporate various texturing methodologies, including hammering, reticulation, and stamping effects.
You’ll see realistic previews in real-time, allowing quick iterations without material waste.
Procedural texture generation enables you to map these algorithmic patterns directly onto your 3D models, creating realistic renderings before manufacturing.
This guarantees your final precious metal pieces align perfectly with your vision while streamlining the prototyping process.
Normal Maps and Bump Mapping Applications
Normal maps and bump mapping represent powerful visualization techniques that’ll transform how you approach surface detailing in jewelry CAD.
These methods create stunning texture illusions without adding complex geometry to your models.
Normal maps use RGB data to modify surface normals, enabling realistic light interactions on flat surfaces. Meanwhile, bump mapping employs grayscale images to simulate surface irregularities by affecting pixel displacement during rendering.
You’ll find these techniques particularly valuable for:
- Creating hammered metal effects that maintain efficient file sizes
- Developing reticulated textures with authentic visual depth
- Achieving intricate surface patterns while preserving fast rendering times
Parametric Texture Controls for Custom Surfaces
You’ll find that parametric texture controls give you precise command over Variable Pattern Density Settings, allowing you to adjust how tightly or loosely patterns repeat across your jewelry’s surface.
Surface Relief Depth Control lets you define exactly how pronounced your textures appear, from subtle whispers to bold statements that catch light dramatically.
Algorithmic Texture Generation Methods enable you to create entirely unique surfaces through mathematical formulas, producing organic patterns that can’t be achieved through traditional texturing techniques.
Variable Pattern Density Settings
Because jewelry design demands both artistic expression and technical precision, variable pattern density settings serve as your gateway to creating sophisticated textured surfaces that respond to your creative vision.
These settings let you manipulate spacing and frequency of textures, transforming simple patterns into intricate designs that range from whisper-subtle to dramatically bold.
You’ll find parametric texture controls enable real-time visualization as you adjust density parameters, making iteration seamless during your design process.
This creates unique surface finishes that enhance both visual appeal and tactile quality.
- Personalized client experience – Density customization allows clients to influence their jewelry’s final appearance
- Manufacturing optimization – Different textures can be tailored for specific production methods like 3D printing or casting
- Enhanced surface quality – Variable settings create sophisticated finishes that elevate your jewelry’s overall aesthetic impact
Surface Relief Depth Control
When surface relief depth control becomes your primary tool for texture manipulation, you’re wielding the power to transform flat jewelry surfaces into dimensional landscapes that captivate both eye and touch.
Through parametric controls, you’ll adjust relief depths with surgical precision, customizing every texture to match your artistic vision and functional requirements.
Your CAD software becomes a testing ground where you’ll simulate various surface relief depth combinations, previewing realistic results before committing to production. This capability proves invaluable when designing everyday wear pieces, as you can optimize texture durability without sacrificing aesthetic appeal.
Advanced CAD tools expand your creative horizons, letting you explore complex surface relief depth variations that create truly unique textures. You’ll craft dimensional surfaces that tell stories through touch and sight.
Algorithmic Texture Generation Methods
Algorithmic texture generation methods revolutionize how you approach surface design by replacing manual texture creation with mathematical precision and infinite variability.
You’ll gain access to parametric controls that let you adjust scale, depth, and frequency parameters to craft intricate surface patterns tailored to your specific aesthetic vision. These mathematical algorithms enable you to produce complex textures that authentically mimic natural surfaces like wood grain or stone.
Key advantages of algorithmic texture generation methods in jewelry design include:
- Real-time visualization – You can see texture alterations instantly and make informed design decisions
- Preset efficiency – Save and reuse algorithmic texture presets across different jewelry pieces
- Natural mimicry – Utilize noise functions and procedural algorithms to recreate organic surface characteristics
Rendering Settings That Enhance Textured Elements
Although you’ve mastered creating intricate textured surfaces in your CAD jewelry designs, the true magic happens when you configure your rendering settings to showcase these details effectively.
Start by adjusting your rendering settings to use higher quality textures, which greatly enhances visual depth and realism. Implement bump mapping techniques to create texture illusions without increasing polygon count, ensuring efficient rendering while maintaining detail.
Proper light source placement and shadow configuration will accentuate your textures, making them appear more dynamic and three-dimensional.
Apply appropriate material properties like reflectivity and roughness to control how light interacts with textured surfaces. Experiment with different rendering engines, particularly ray tracing, to achieve lifelike representations by simulating realistic light behavior on your jewelry’s textured elements.
Converting Physical Textures to Digital Assets
Your beautifully rendered textured surfaces start with capturing real-world materials and transforming them into digital assets that CAD software can manipulate. High-resolution scanning techniques capture intricate surface patterns from physical jewelry pieces, preserving every detail for digital reproduction.
Once you’ve captured these textures, CAD software becomes your playground for refinement. You can adjust scale, depth, and orientation to achieve perfect visual effects while ensuring compatibility with other design elements.
Consider these digital texture creation approaches:
- Bump maps – Simulate surface irregularities without complex geometry
- Displacement maps – Create actual geometric variations for realistic depth
- Layered files with annotations – Maintain clear communication of texture details throughout the design process
You’ll enhance realism by applying appropriate lighting and rendering techniques, helping visualize how your final piece will appear in various environments.
Optimizing File Sizes While Maintaining Detail Quality
When creating textured jewelry surfaces in CAD, balancing file size with detail quality becomes critical for maintaining workflow efficiency without compromising your design’s visual impact.
You’ll want to optimize resolution settings for your texture files, finding the sweet spot between detail preservation and manageable file sizes. Switch to vector graphics whenever possible, as they maintain quality at any scale while keeping files lean. CAD-specific compression tools help reduce file sizes without sacrificing critical texture details.
| Optimization Method | Benefits | Best For |
|---|---|---|
| Vector Graphics | Scalable, smaller files | Pattern textures |
| Polygon Reduction | Faster rendering | Complex 3D surfaces |
| Layer Cleanup | Improved performance | All projects |
Simplify complex surfaces by reducing polygon counts, and regularly clean up unused layers or components to streamline your projects effectively.
Common Texture Pitfalls and How to Avoid Them
Even experienced CAD designers fall into predictable texture traps that can derail an otherwise perfect jewelry piece.
Whether you’re creating a silver bracelet or working with other precious metals, these common mistakes can compromise your final design.
The most frequent texturing errors include inconsistent application across surfaces, over-texturing that masks your design’s elegance, and structural distortion that weakens the piece.
You’ll also encounter visibility issues where textures don’t render properly under different lighting conditions.
To avoid these pitfalls:
- Test all techniques on scrap metal before applying to your final piece
- Calibrate your CAD model carefully for material thickness and properties
- Maintain clean tools and workspace to prevent unwanted surface marks
Smart preparation prevents these issues from sabotaging your textured designs.
Export Considerations for Manufacturing Textured Pieces
Because textured jewelry pieces demand precision during manufacturing, selecting the right export format becomes critical to your design’s success. Choose STL or OBJ formats for ideal compatibility with 3D printing and CNC machining processes.
Confirm your texture details are finely defined within the CAD model, as this directly impacts the final quality and depth. Pay careful attention to resolution settings during export. Higher resolutions capture intricate textures better but increase file size and processing time.
When working with silver sheet applications, include clear annotations specifying texture depth and style to help manufacturers accurately reproduce your intended design.
Test your exported file through software simulation or prototyping before mass production. This verification step allows you to make necessary adjustments and confirms textures appear exactly as envisioned.
Frequently Asked Questions
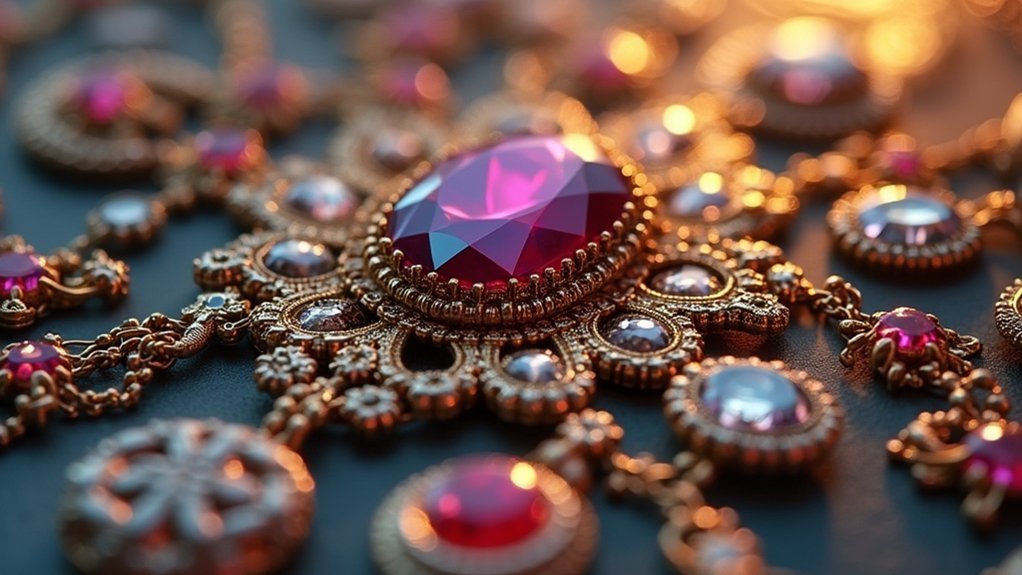
What Is Texture in Jewelry?
You’ll find texture in jewelry refers to your piece’s surface quality and visual patterns. You can create it through hammering, stamping, or reticulation techniques, allowing you to express emotions and add dimensional depth.
What Is CAD in Jewelry?
You’ll use CAD as Computer-Aided Design technology to create precise 3D jewelry models before physical production. It lets you experiment with materials, visualize textures, guarantee accurate fits, and communicate designs effectively with clients.
In Summary
You’ve learned that successful textured jewelry surfaces in CAD depend on mastering light interaction, choosing the right mapping techniques, and balancing detail with file efficiency. Don’t let common pitfalls like over-tessellation or improper UV mapping derail your designs. Remember that your digital textures must translate effectively to physical manufacturing processes. Focus on procedural generation for metals, optimize displacement methods, and always test your exports before sending files to production for best results.


Leave a Reply