Viking wire weaving methods are ancient metalworking techniques where Norse craftsmen transformed melted coins into fine wire and used the distinctive loop-in-loop technique to create intricate jewelry. You’ll find these sophisticated methods involved forming foundation loops in a four-leaf clover pattern, then weaving wire through previous loops to build durable chains. The Vikings employed various knitting techniques, including single and double knit patterns, that you can still adapt for contemporary jewelry designs today.
Historical Origins and Archaeological Evidence
When archaeologists excavated Viking burial sites across Scandinavia, they uncovered intricate wire-woven jewelry that revealed sophisticated metalworking techniques dating back over a thousand years.
These archaeological findings showcase the remarkable skill Vikings possessed in ancient craftsmanship, particularly in jewelry making.
You’ll discover that many artifacts feature the distinctive loop-in-loop technique, where artisans created complex chains by interlocking individual wire loops.
This wire weaving method demonstrates how Vikings transformed melted coins into fine wire, then crafted elaborate decorative pieces.
The evidence shows that Viking Age metalworkers didn’t simply create functional items—they developed an art form that combined technical precision with aesthetic beauty, establishing a legacy that continues to influence modern jewelry-making techniques.
Essential Tools and Materials for Wire Weaving
Before you begin your Viking wire weaving journey, you’ll need to gather the essential tools that make this ancient craft possible. Your essential toolkit includes a Lazee Daizee tool for creating consistent loops, flatnose pliers for pulling wire through tight spaces, and sharp wire cutters for clean trimming.
You’ll also need a drawplate to adjust your chain’s diameter and a round mandrel for shaping initial loops.
For materials, choose dead soft copper wire in gauges ranging from 24g to 32g, with 26g being ideal for beginners. This gauge wire offers perfect balance between durability and workability.
- Feel the ancient connection as you knit wire into timeless patterns
- Experience satisfaction watching simple loops transform into elegant chains
- Discover meditative rhythm in repetitive weaving motions
- Create heirloom pieces connecting past and present
Creating the Foundation Loops and Starting Techniques
You’ll start your Viking wire weaving journey by mastering the foundation loops, which form the structural base for all subsequent weaving patterns.
The four-leaf clover setup provides an ideal starting configuration that’s both stable and versatile for beginners.
Proper mandrel loop formation guarantees your foundation maintains consistent tension and spacing throughout the weaving process.
Four-Leaf Clover Setup
Since Viking wire weaving requires a stable foundation to achieve proper tension and structure, you’ll start by creating a four-leaf clover setup that forms the essential base loops.
Cut approximately 300mm of wire and bend it into a four-leaf clover shape. This configuration creates the framework for your starting loops. Secure the ends by wrapping them together tightly, establishing a solid anchor point for your weave.
Next, place your four-leaf clover shape over a 10mm mandrel or drill bit. Carefully bend each leaf of wire around the mandrel to form your initial loops. These loops provide the essential structure for your Viking knit pattern.
- Feel the satisfaction of creating ancient jewelry techniques with your own hands
- Experience the meditative rhythm of traditional craftsmanship
- Discover the joy of transforming simple wire into intricate designs
- Connect with centuries-old metalworking traditions
Mandrel Loop Formation
Once you’ve prepared your four-leaf clover foundation, it’s time to transform those bent sections into proper working loops around your mandrel.
Wrap your wire around the mandrel six times to create your initial foundation loops. You can use a 10mm drill bit or similar tool as your mandrel. Secure these loops with a longer piece of wire to maintain their position.
Use tools like a Lazee Daizee or allen wrench to hold loops in place while working. Don’t worry if your loops appear uneven initially—they’ll straighten out as you progress through subsequent rows.
Secure the foundation loops onto your mandrel with tape or fingers, spacing them evenly. This proper spacing makes it easier when you begin to weave through each next loop, maintaining consistent tension throughout the process.
Mastering the Weaving Process and Pattern Variations
Once you’ve established your foundation loops, you’ll progress through basic weaving techniques that involve consistently threading wire behind previous loops to build your chain.
You can experiment with loop formation methods by varying wire tension and strand count to create different textures and densities in your work.
As you gain confidence, you’ll tackle more complex pattern variations like continuous waves and intricate looping sequences that transform simple chains into sophisticated jewelry pieces.
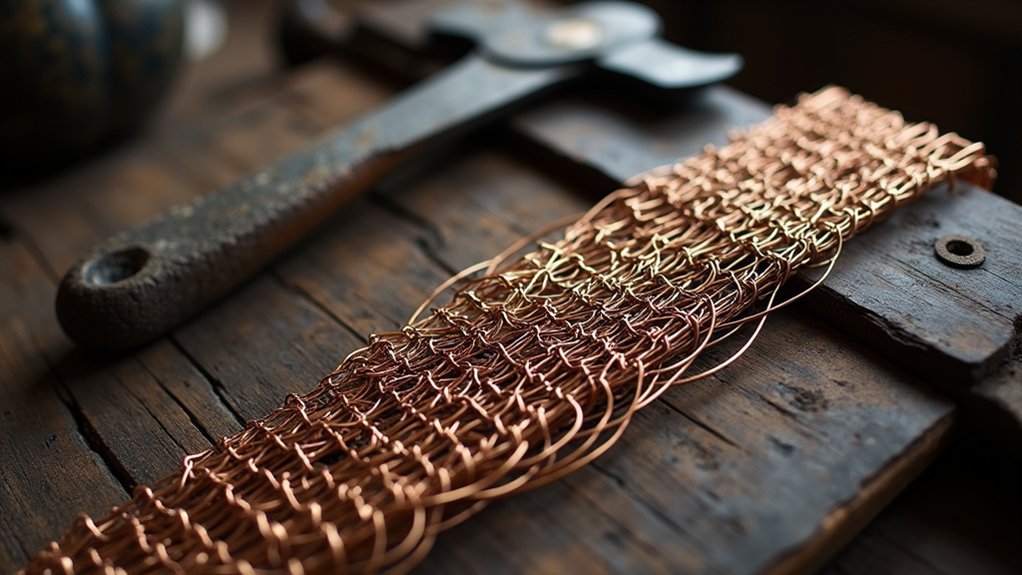
Basic Weaving Techniques
When beginning your Viking wire weaving journey, you’ll start with creating a flower bundle of loops that serves as the foundation for your entire chain.
You’ll weave viking knit by wrapping wire around these initial loops together to form a continuous pattern. The key is maintaining parallel tension along your mandrel while keeping consistent spacing throughout each row.
You can modify your technique depending on what you need to make. Choose single knit for delicate, lightweight pieces or double knit for sturdier chain work with increased density.
- Feel the satisfaction of creating ancient jewelry techniques with your own hands
- Experience the meditative rhythm of repetitive loop formation
- Watch your wire transform into beautiful, flexible chains before your eyes
- Discover the pride that comes from mastering this timeless craft
Loop Formation Methods
Now that you understand the basic weaving principles, you’ll need to master the specific loop formation methods that create the distinctive Viking knit pattern. Start by creating a flower-like structure with multiple loops secured together. Thread your wire behind each loop to form tiny connecting links. Remember, you’ll make two sacrificial rounds to establish your pattern properly.
| Step | Action | Key Point |
|---|---|---|
| 1 | Create flower base | Multiple loops secured |
| 2 | Thread wire behind the loop | Forms tiny chains |
| 3 | Connect to last loop you made | Maintains continuity |
| 4 | Manage spare wire | Keep tension consistent |
| 5 | Use tool to make adjustments | Guarantee equal spacing |
Maintain consistent tension and spacing throughout. Pattern variations emerge through different threading techniques, creating wave patterns or crossover effects.
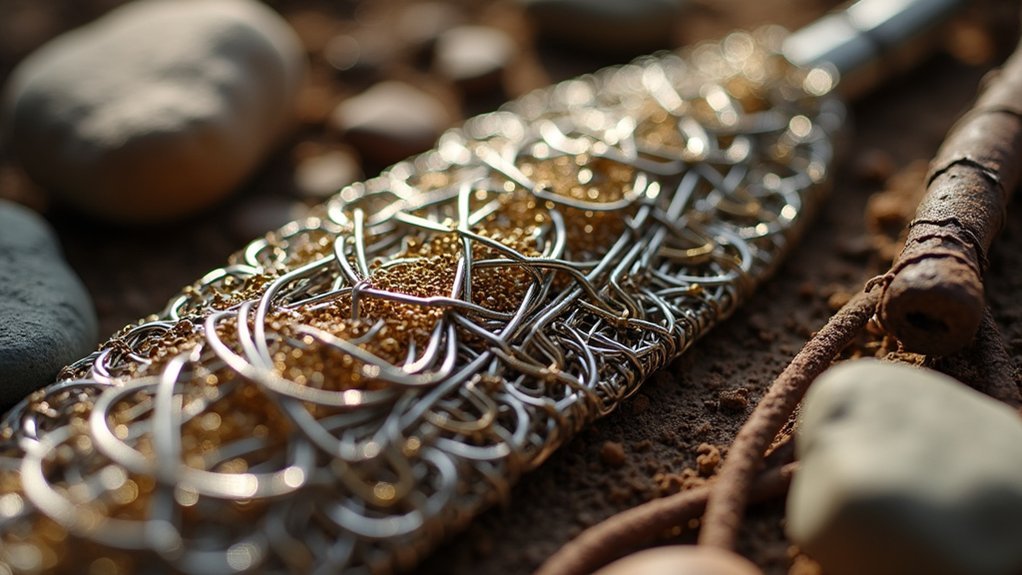
Pattern Complexity Levels
As you progress beyond the foundational flower base, you’ll encounter three distinct complexity levels that transform your Viking knit from simple chains into sophisticated jewelry pieces.
Beginner level focuses on mastering the continuous wave pattern, where loops don’t twist or crossover. You’ll practice with a manageable length of wire around 2.5 feet to perfect your technique before attempting longer projects.
Intermediate complexity introduces pattern variations through bead incorporation and different wire gauges. These modifications affect density and flexibility, requiring you to make a wrapped loop connection between each next piece of wire.
Advanced examples of Viking weaving feature intricate crossings and elaborate twists. At this level, you’ll end each section with sophisticated finishing techniques that showcase true craftsmanship.
- Gentle satisfaction flows through your hands as smooth loops form effortlessly
- Pride swells when friends admire your intricate handcrafted jewelry
- Peaceful meditation emerges during repetitive weaving motions
- Creative fulfillment blooms as unique patterns take shape
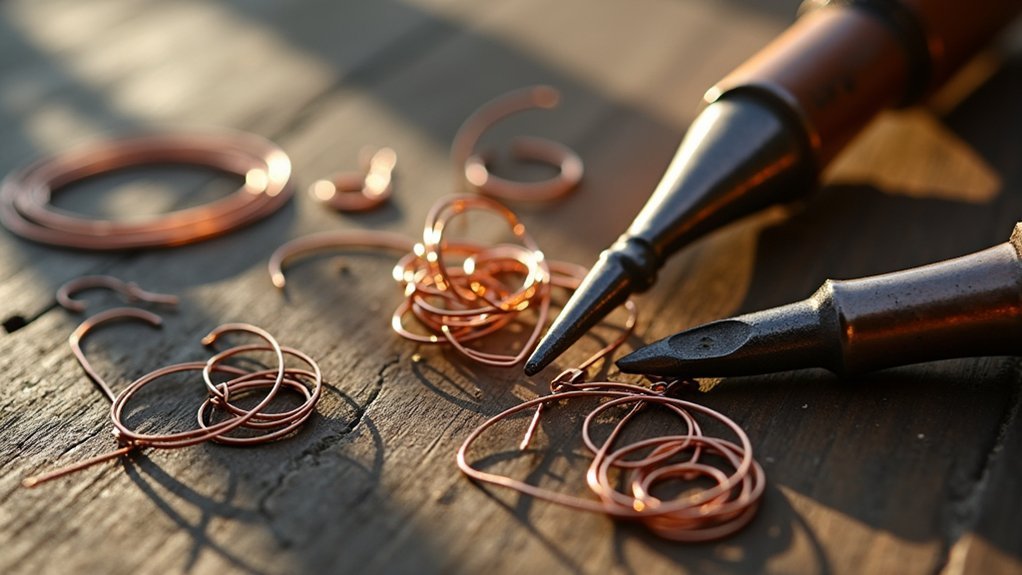
Drawing and Finishing Methods for Professional Results
After completing your Viking wire weave, you’ll transform the loose, accordion-like chain into a refined jewelry piece through the drawing process.
Start with your draw plate’s largest hole and progressively move to smaller ones, ensuring each wire crosses smoothly through without binding. This gradual approach creates an even, flexible chain with professional results.
Plan for approximately 40 feet of 26-gauge wire per 18-inch necklace, following the 2.22-feet-per-inch ratio. Make sure only one wire end remains after finishing—this simplifies clasp attachment and maintains clean aesthetics.
Trim excess length as needed, saving leftover woven sections for future projects.
For secure clasp attachment, use thicker 22 or 20-gauge wire to gather your chain’s end loops before threading through bead caps or cone beads.
Applications in Modern Jewelry Design and Assembly
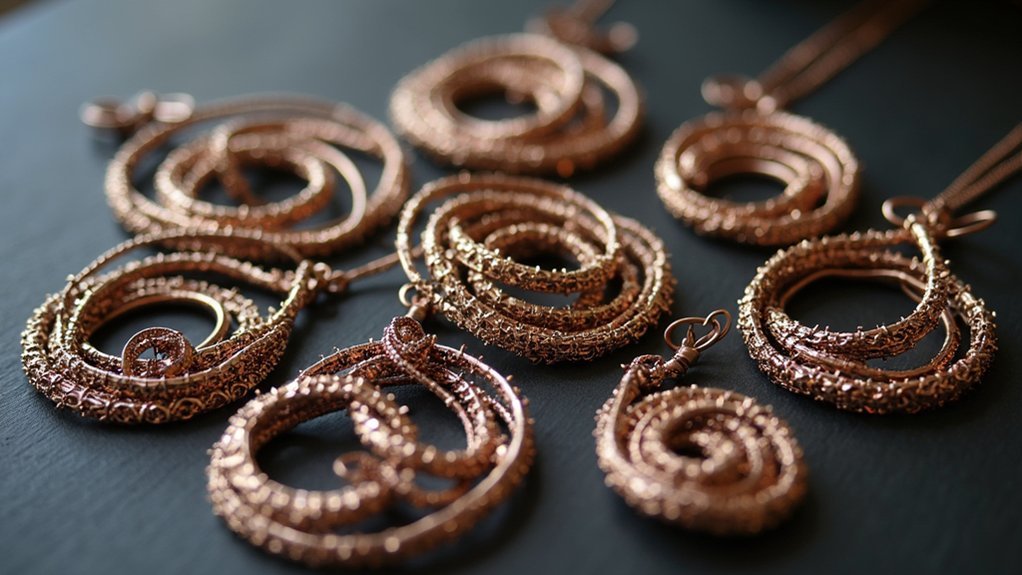
Viking wire weaving techniques have evolved far beyond their historical origins to become versatile foundations for contemporary jewelry design.
Ancient Norse craftsmanship meets modern creativity, transforming traditional wire weaving into timeless jewelry that bridges centuries of artistic expression.
You can create stunning statement necklaces or delicate accent pieces using Viking knit and Trichinopoly methods with copper or sterling silver wire. Start with one mandrel or use knitting needles to form your initial loops, then select the largest hole on your Lazee Daizee tool. Secure your work to a piece of wood for stability during the weaving process.
Next, you’ll draw and finish your creation before adding clasps with wrapped loops.
These applications create emotional connections:
- Heirloom pieces that carry ancient warrior spirit into modern wardrobes
- Personalized gifts featuring integrated beads reflecting cherished memories
- Versatile accessories adapting from casual to elegant occasions
- Handcrafted treasures showcasing your artistic dedication and skill
Frequently Asked Questions
What Is Viking Wire Weaving History?
You’ll find Viking wire weaving originated during the Viking Age in Scandinavia. Archaeological evidence shows craftsmen created flexible chains using loop-in-loop techniques, often melting coins into wire for jewelry that displayed wealth and status.
What Gauge Wire Is Used in Viking Knit?
You’ll typically use 24-32 gauge wire for Viking knit, with 26 gauge being most popular. It balances flexibility and strength perfectly. Avoid thinner 30 gauge for single knit—it’s too delicate and works better for double knit applications.
What Is a Wire Weaving?
Wire weaving’s an ancient technique where you’ll interlace metal strands to create decorative patterns and jewelry structures. You’re fundamentally braiding or interweaving wire to form intricate designs, textures, and shapes for bracelets, necklaces, and ornamental pieces.
What Is Viking Knitting?
Viking knitting’s an ancient wire weaving technique where you’ll loop wire around a mandrel to create flexible chains. You’ll start with flower-like loops, then pull them through a draw plate for even, durable jewelry pieces.
In Summary
You’ve now mastered the ancient craft that Vikings perfected over a millennium ago. Whether you’re creating intricate chains for historical reproductions or incorporating these techniques into contemporary jewelry designs, you’ll find that Viking wire weaving offers endless creative possibilities. Practice these methods regularly, and you’ll develop the muscle memory needed to produce consistent, professional results. Your handcrafted pieces will carry forward this remarkable Nordic tradition.


Leave a Reply