You’ll achieve brilliant shine on your wax carvings by progressing through systematic sanding from 100 to 800 grit, then using specialized wax files to round edges and eliminate rough spots. Apply flame polishing with a controlled butane torch, passing your piece quickly through the cool flame to smooth imperfections. Finish with polishing compounds like rouge or tripoli on cotton wheels, then buff with soft cloth for mirror-bright results. Master these professional techniques to elevate your craftsmanship.
Essential Tools for Achieving Professional Wax Finishes
When creating professional-quality jewelry, you’ll need specific tools to transform rough wax carvings into polished masterpieces ready for casting.
Essential wax sculpting tools include fine grit sandpaper up to 800# for smoothing surfaces and refining intricate details. A wax file helps round off edges and eliminates rough spots effectively.
Fine-grit sandpaper and quality wax files are indispensable for achieving smooth surfaces and eliminating imperfections in detailed wax sculptures.
For superior polishing and finishing, invest in a polishing wheel with compound to enhance surface shine. Buffing becomes effortless with old tights or soft cloths, helping you achieve that coveted high-gloss finish.
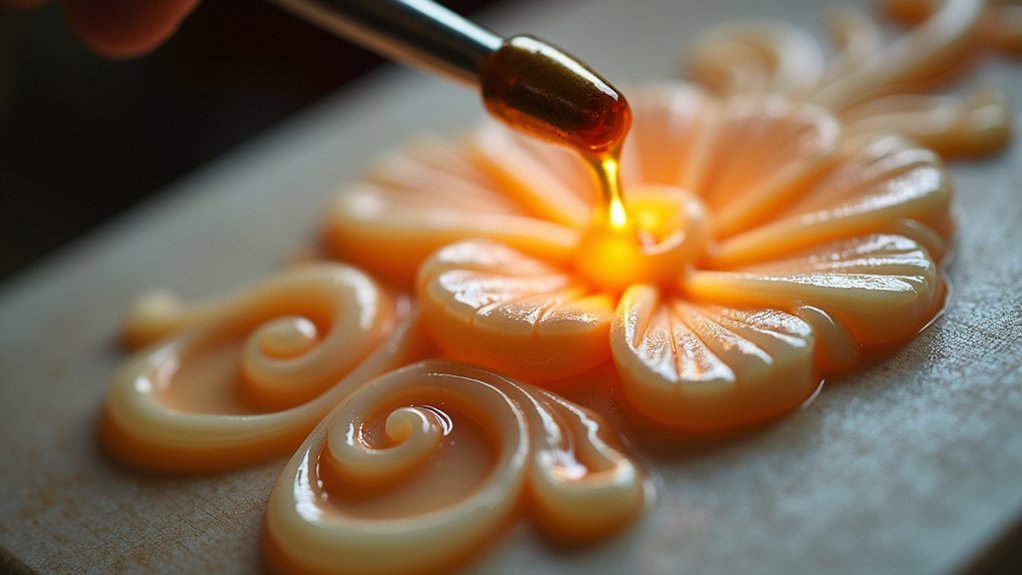
To create a seamless finish, carefully pass your design through a cool flame, removing any residual rough edges and imperfections.
These fundamental tools guarantee your wax carvings display professional-quality results every time.
Flame Polishing Techniques for Smooth Edge Creation
Building on these fundamental finishing tools, flame polishing offers an advanced technique that transforms your wax carvings from good to exceptional.
This method eliminates rough edges while creating a smooth, glossy surface that gives your piece a professional polished look.
You’ll need a butane torch or alcohol lamp with a controlled flame. Pass your carving quickly through the cool flame, maintaining a steady hand throughout the process.
Control the distance carefully—staying too close causes excessive melting, while being too far won’t achieve the desired effect. Avoid high temperatures that can damage intricate details or distort your design.
After flame polishing, verify complete cooling before handling. This sets the surface finish and prevents warping, preserving your carved details perfectly.
File Work Methods for Precise Shape Refinement
After achieving the initial surface refinement through flame polishing, you’ll need precise file work to perfect your wax carving’s shape and details. File work methods for precise shape refinement require systematic tool selection and technique application.
| Tool Type | Grit/Size | Application |
|---|---|---|
| Needle files | Fine cut | Detail shaping |
| Sanding paper | 100# coarse | Initial smoothing |
| Sanding paper | 400# medium | Surface refinement |
| Sanding paper | 800# fine | Final preparation |
| Wax files | Various | Specialized shaping |
Start with coarse grits and progress systematically to finer options for smooth surfaces. Maintain gentle pressure with steady hands to preserve intricate features. Clean tools regularly, removing wax shavings that interfere with your finish quality. Complete the process by using soft cloth to polish the wax model, enhancing its shine before casting.
Sandpaper Grading Systems for Surface Preparation
Understanding sandpaper grading systems empowers you to select the right abrasive for each stage of surface preparation.
Master your craft by choosing the correct sandpaper grit for every surface preparation stage.
These systems categorize abrasive particles by size, guiding your progression from rough shaping to mirror-like finishes.
Sandpaper grading systems break down into four essential categories:
- Coarser grits (60-120) – Remove major imperfections and shape your wax carving initially.
- Medium grits (180-320) – Refine surfaces and eliminate rough edges for smoother textures.
- Fine grits (400-600) – Perfect for final sanding, creating smooth finishes that enhance wax shine.
- Extra fine grits (800-1200) – Achieve ultra-smooth surfaces requiring minimal post-casting polishing.
You’ll achieve professional results by progressing gradually through each grit level.
Skipping grades creates visible scratches and uneven surfaces that’ll compromise your final piece’s quality and appearance.
Heat Application Strategies for Seamless Wax Integration
When seamless wax integration becomes your priority, controlled heat application transforms rough repairs into invisible connections. You’ll need a spirit lamp or wax heater to properly warm both your original piece and repair wax before joining them. This heat application guarantees superior adhesion by eliminating air pockets that weaken your design.
| Heat Source | Application Method |
|---|---|
| Spirit Lamp | Direct flame control for precise heating |
| Wax Heater | Consistent temperature for larger repairs |
| Heat Gun | Broad coverage for extensive work |
Apply molten wax with steady hands, maintaining consistent temperature throughout the process. The bond strengthens when both surfaces reach ideal heat levels simultaneously. After completing your repairs, let sections cool completely before refining. This patience guarantees your seamless integration maintains structural integrity and professional appearance.
Polishing Compounds and Materials for Mirror-Like Surfaces
Since achieving a flawless mirror-like surface requires the right combination of polishing compounds and application techniques, you’ll want to select from three primary options: rouge, tripoli, and diamond paste.
These compounds work together with proper tools to deliver exceptional results on your jewelry piece.
Use these essential techniques for ideal finishing:
- Apply compounds in circular motions with a polishing wheel featuring 600 to 1200 grits for enhanced surface smoothness
- Select cotton or felt wheels for effective buffing that removes wax residue
- Build shine gradually through even coverage and consistent pressure
- Clean tools regularly to prevent contamination and maintain quality
Complete the process using a soft cloth for final buffing.
This systematic approach guarantees your high-gloss shine meets professional standards.
Repair Techniques Using Molten Wax Application
Three fundamental steps form the foundation of successful wax repair work on your jewelry pieces. First, prepare your base by heating the original wax before applying scrap repair material. This guarantees ideal adhesion between surfaces. Second, focus on seamless integration by maintaining steady hands during molten wax application, creating smooth shifts between old and new materials.
| Repair Stage | Tool Required | Temperature |
|---|---|---|
| Surface Prep | Heat Source | Medium |
| Wax Addition | Sculpting Tool | High |
| Edge Smoothing | Heated Implement | Low |
| Final Polish | Cool Flame | Minimal |
| Quality Check | Visual Inspection | Room Temp |
After cooling completely, use heated implements for smoothing out rough edges. These repair techniques create a polished appearance. Finally, pass your piece through a cool flame to enhance overall finish before casting.
Surface Texture Enhancement Through Controlled Carving
While basic wax modeling creates the foundation of your jewelry piece, controlled carving techniques transform ordinary surfaces into enchanting textural landscapes that’ll improve your final cast metal work.
You’ll achieve distinctive surface textures by using finer tools and varying pressure throughout your carving process. These controlled carving techniques create light-catching facets that add visual depth to your wax carvings.
Essential methods for intricate detailing include:
- Experimenting with wax burs and rotary tools for unique textures reflecting your artistic styles
- Incorporating different carving angles and patterns for dynamic light reflection
- Combining coarse and fine grit sanding during the finishing process
- Applying heat before the polishing process to smooth imperfections and enhance sheen
This systematic approach guarantees your textured details survive the casting while maintaining professional quality.
Final Quality Control Checks Before Casting Process
Before you proceed to casting, you’ll need to conduct thorough quality control checks on your wax piece.
Start by evaluating the surface smoothness and inspecting for any imperfections that could transfer to your final metal piece.
You must also verify that all edges are properly refined and examine every design detail to guarantee they’re clearly defined and debris-free.
Surface Smoothness Assessment
How can you guarantee your jewelry piece achieves the flawless finish required for successful casting? Surface smoothness assessment is your critical final checkpoint before the casting process begins.
Start by visually inspecting your piece under excellent lighting, identifying any rough edges, scratches, or imperfections that could compromise your cast quality.
Here’s your systematic approach:
- Progressive sanding: Use sandpaper from coarse (100#) to fine (800#) grits, eliminating all rough areas systematically.
- Edge refinement: Employ a wax file to round sharp edges, preventing mold damage during casting.
- Final polish: Apply polishing compound with soft cloth or old tights for lustrous results.
- Flame finishing: Pass a cool flame over the surface, melting inconsistencies for uniform smoothness.
This thorough assessment guarantees your casting achieves professional-grade results.
Edge Refinement Verification
Apply fine grit emery paper to address any uneven areas, guaranteeing uniform surface quality throughout your piece.
Verify that all design details remain crisp and well-defined, as these elements determine your final piece’s appearance.
Conduct your final inspection under bright lighting to catch remaining rough spots or air bubbles.
This thorough quality check guarantees your refined edges will produce a superior metal casting.
Design Detail Inspection
The magnifying glass becomes your most valuable tool during this critical inspection phase, revealing imperfections that’ll compromise your casting’s success.
Design detail inspection requires methodical examination of every surface and feature in your wax carving.
- Visual examination – Inspect under bright light to identify air bubbles, uneven surfaces, and undefined intricate details.
- Edge assessment – Check for sharp edges requiring smoothing to prevent stress points during the casting process.
- Tactile inspection – Run your fingers across surfaces to detect rough patches needing refinement for ideal polishing finish.
- Sprue verification – Confirm attachment points are securely integrated for proper metal flow.
This thorough inspection guarantees your wax model meets quality standards before proceeding to casting, preventing costly defects in your final jewelry piece.
Professional Finishing Standards for Commercial Quality Results
You’ll need to establish rigorous surface preparation standards using fine grit emery paper up to 800# to eliminate all imperfections and create the smooth foundation required for professional casting.
Your quality control measures must include systematically rounding all edges with a wax file, passing a cool flame over rough changes, and polishing with soft cloth to achieve commercial-grade shine.
These finishing protocols guarantee your wax model meets industry standards and translates into a flawless final cast.
Surface Preparation Standards
When commercial-quality results are your goal, surface preparation becomes the foundation that separates amateur work from professional jewelry. Meticulous attention to smoothing out rough edges with files and sandpaper creates the high-quality finish clients expect.
Your surface preparation process should follow these essential steps:
- Start with coarse 100# grit and progress systematically to 800# for polishing perfection
- Use wax files to round edges and eliminate structural imperfections
- Pass your design through a cool flame to burn off minor surface flaws
- Buff with old tights fabric to achieve brilliant commercial-grade shine
You can’t afford visible tool marks or rough spots that’ll compromise your casting quality.
Every imperfection you leave behind will show in the final piece, so invest time in proper surface preparation techniques.
Quality Control Measures
Although surface preparation lays the groundwork, implementing rigorous quality control measures guarantees your finished pieces consistently meet commercial standards.
You’ll need to establish a thorough checklist that systematically evaluates each wax carving for critical imperfections. Check thoroughly for air pockets, uneven surfaces, and adherence to your design specifications—these elements directly impact your final surface finish quality.
Don’t overlook the importance of using appropriate polishing compounds for intricate details while maintaining consistency across all pieces.
Regularly inspect your work using proper lighting to identify subtle flaws that could compromise professional results.
Your quality control process should include multiple checkpoints throughout the finishing sequence, ensuring each piece meets your established standards before proceeding to casting for optimal commercial-grade outcomes.
Frequently Asked Questions
How Does Wax Turn Into Silver?
You’ll create a plaster mold around your wax carving, then heat it until the wax melts away. You’ll pour molten silver into that empty cavity, creating a solid metal replica of your original design.
What Is the Difference Between Blue and Green Carving Wax?
Blue carving wax is softer and more flexible, making it perfect for beginners and rounded designs. Green wax is harder and rigid, allowing you to create sharp edges and intricate details with greater precision.
What Is Wax Setting in Jewellery?
You’ll embed stones directly into your wax model before casting. You’re carving precise spaces for each gemstone, allowing you to create intricate designs where traditional setting methods can’t achieve the same level of detail and complexity.
What Is the Lost Wax Method of Jewelry?
You’ll create a wax model of your jewelry piece, then encase it in investment material. Once heated, the wax melts away, leaving a cavity you’ll fill with molten metal.
In Summary
You’ll achieve stunning wax carvings by mastering these essential finishing techniques. Don’t rush through flame polishing or skip proper file work—they’re vital for professional results. Remember to progress systematically through sandpaper grits and apply heat strategically for seamless repairs. Focus on controlled texture enhancement and thorough quality checks before casting. When you combine these methods with consistent practice, you’ll consistently produce commercial-quality pieces that’ll impress clients and elevate your jewelry craftsmanship to professional standards.


Leave a Reply