
PMC torch firing works because controlled heat triggers a precise chemical transformation in your metal clay. You’re burning away organic binders that comprise 30% of the clay while simultaneously fusing fine silver particles through sintering at 1,350°F to 1,560°F. The peachy-red glow you’ll see indicates proper temperature for particle fusion, creating solid silver that shrinks to 70% original size while preserving intricate details. Understanding these temperature markers and timing will reveal consistent professional results.
The Science Behind Metal Clay Transformation
When you apply heat to PMC, you’re triggering a fascinating transformation that turns a malleable clay-like material into solid metal. The clay consists of recycled silver particles suspended in an organic binder with water.
During the firing process, heat causes the water to evaporate first, followed by the organic binder burning away. What remains are pure silver particles that begin sintering together.
This sintering occurs when working with Silver Clay reaches that vital “peachy glow” temperature. The metal particles fuse at their contact points, creating a continuous metallic structure.
Your piece shrinks to approximately 70% of its original size as the binder disappears, but maintains all surface textures and details. The result is a solid silver object with increased density and strength from the particle fusion.
Understanding Organic Binder Burn-Off
As the temperature rises during torch firing, you’ll witness one of the most critical phases of the PMC process: the organic binder burn-off.
This binder, comprising roughly 30% of your clay’s original composition, must completely disappear for successful transformation. You’ll see smoke and small flames emerge as the binder ignites—this visual cue confirms the burn-off is happening.
During this phase, maintain your piece at a peachy glow for 5-7 minutes to guarantee complete removal. If you don’t achieve proper burn-off, your finished piece will remain weak and fragile.
Critical timing: that peachy glow must hold for 5-7 minutes or your piece will crack under pressure.
The organic binder removal, along with water loss, causes that characteristic 30% shrinkage, ultimately creating your solid, durable metal object.
How Metal Particles Sinter Together
When you apply torch heat to your PMC piece, you’re activating a chain reaction that transforms loose metal particles into solid silver.
The heat burns away the organic binders that once held everything together, clearing the path for direct particle-to-particle contact.
As temperatures reach the critical threshold, your silver particles begin fusing together through sintering, creating permanent metallic bonds that form your finished piece.
Heat Activates Particle Bonds
Heat transforms your metal clay piece through a precise chemical process that burns away organic binders and fuses metal particles into solid silver. When you apply heat through torch firing, temperatures starting around 600°F begin activating the sintering process.
The metal particles don’t actually melt during this transformation. Instead, they bond together through atomic diffusion, creating stronger connections as temperatures climb toward the ideal range of 1,650°F to 1,750°F.
You’ll notice your piece shrinks to about 70% of its original size as particles move closer together, eliminating spaces previously occupied by burned-away binders.
This densification process strengthens the molecular structure, transforming fragile clay into durable fine silver that’s suitable for jewelry applications while preserving intricate details and textures.
Organic Binders Burn Away
Once temperatures reach approximately 1112°F, the organic binders in your PMC piece begin their essential combustion process, producing visible smoke and flames that signal the change is underway.
These binders, which previously held your clay together during shaping, must burn away completely to allow metal particles direct contact with each other. During torch firing, this combustion accounts for roughly 30% of your piece’s original mass, causing noticeable shrinkage as the structure becomes denser.
As the organic binders disappear, your metal particles can finally begin sintering—bonding at contact points without actually melting. This process creates the solid, durable structure you’re after.
The visible flames and smoke aren’t just dramatic; they’re confirmation that your PMC is evolving from clay to metal.
Silver Particles Fuse Together
Your silver particles transform from loose neighbors into a unified metal structure through sintering, a fascinating process that builds strength without melting. When you torch fire PMC at around 650°C (1200°F), the silver particles bond together without actually liquefying, creating a solid metal mass that maintains your piece’s original details.
- Silver particles migrate toward each other as temperature increases
- Contact points between particles gradually expand and strengthen
- Density increases considerably as particles compress together
- Original shape remains intact while internal structure solidifies
- Bright peachy glow indicates successful particle bonding
You’ll notice your piece shrinks 8-10% during this transformation as the silver particles pack tighter together, eliminating gaps previously occupied by organic materials.
Temperature Requirements for Successful Firing

You’ll need to reach approximately 1650°F (900°C) to achieve successful PMC sintering with your torch.
Maintaining this ideal heat range for 5-10 minutes guarantees the silver particles bond properly while organic binders burn off completely.
You can monitor the correct temperature by watching for a distinctive “peachy glow” that indicates your piece has reached the necessary firing temperature.
Optimal Heat Range
The success of your PMC torch firing hinges on achieving and maintaining the perfect temperature range of 1,350°F to 1,560°F (732°C to 850°C).
This ideal heat range guarantees proper sintering of metal particles while preventing damage to your piece. You’ll need to sustain this temperature for at least 5-10 minutes to allow complete burnout of organic binders and achieve full density.
Key indicators for successful firing include:
- Watch for bright cherry red glow indicating proper temperature
- Monitor color consistently throughout the firing process
- Maintain steady heat within the recommended range
- Allow sufficient time for organic binder elimination
- Avoid exceeding temperature limits to prevent melting
Temperatures below this range result in weak, incompletely sintered pieces, while excessive heat risks melting your carefully crafted work.
Temperature Monitoring Methods
While precise temperature control remains essential for PMC torch firing success, monitoring that heat requires specific techniques and tools to guarantee you’re hitting the ideal range.
Visual observation becomes your primary method—watch for that distinctive bright cherry red glow indicating your piece has reached approximately 1650°F. This color signals the organic binders are burning off and metal particles are beginning to sinter properly.
Once you achieve this cherry red appearance, immediately start your timer. Maintain this temperature monitoring for 5-10 minutes depending on your piece’s density.
Though pyrometers offer precise readings, they’re often impractical during torch firing due to flame interference. Instead, rely on visual cues to fire metal successfully. Trust that consistent cherry red glow—it’s your most reliable indicator for proper temperature monitoring throughout the entire firing process.
Why Fine Silver Works Best for Torch Firing
When you’re torch firing metal clay, fine silver’s 99.9% purity makes it the only viable option because it reaches the necessary sintering temperatures without melting completely.
Other metals require higher temperatures or controlled environments that a torch can’t provide consistently.
During torch firing, fine silver’s organic binders burn away completely, allowing silver particles to fuse together into solid metal.
You’ll achieve superior results because fine silver responds predictably to the heat levels your torch produces.
- Fine silver sinters at temperatures achievable with standard torches
- Organic binders burn away cleanly during the firing process
- Silver particles fuse together creating durable finished pieces
- Shrinkage remains consistent at approximately 70% of original size
- Even heating for 5-7 minutes guarantees complete sintering and strength
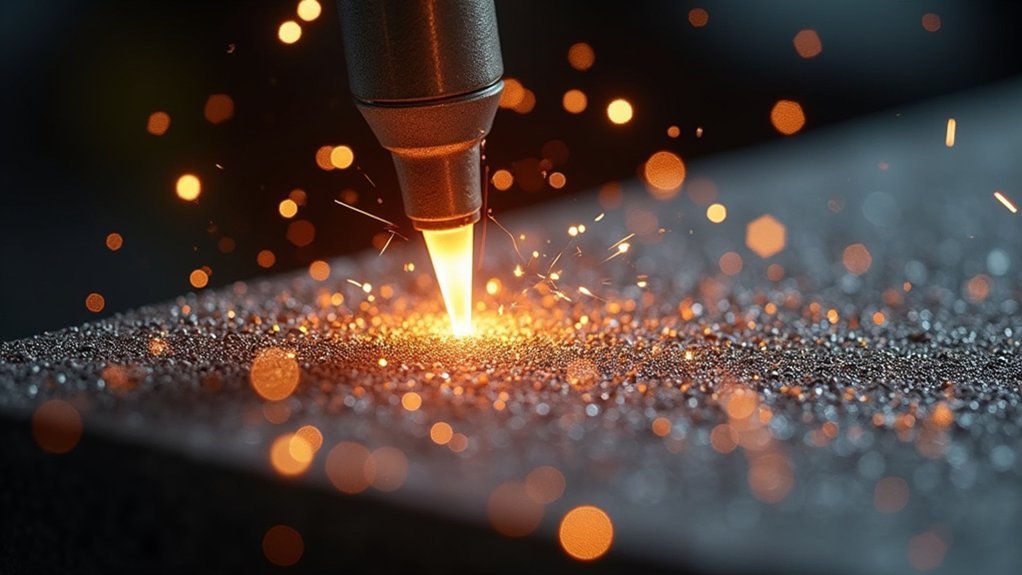
Essential Safety Protocols and Workspace Setup

Before you light that torch, proper safety measures and workspace setup will determine whether your firing session succeeds or becomes dangerous.
Start by securing your hair back and putting on safety glasses to protect against flames and flying sparks. Your workspace setup requires positioning yourself at least 12 inches from any flammable materials to prevent accidental fires.
Safety first: tie back hair, wear protective eyewear, and maintain proper distance from flammable materials before beginning any torch work.
Ensure adequate ventilation to disperse toxic fumes released when organic binders burn off during firing.
Place your metal clay piece on a heat-proof surface like a soldering block or fire brick that can withstand high temperatures without cracking.
Keep your butane torch and quenching water within arm’s reach for efficient workflow. This organized approach eliminates dangerous fumbling while handling hot materials and maintains focus on proper firing technique.
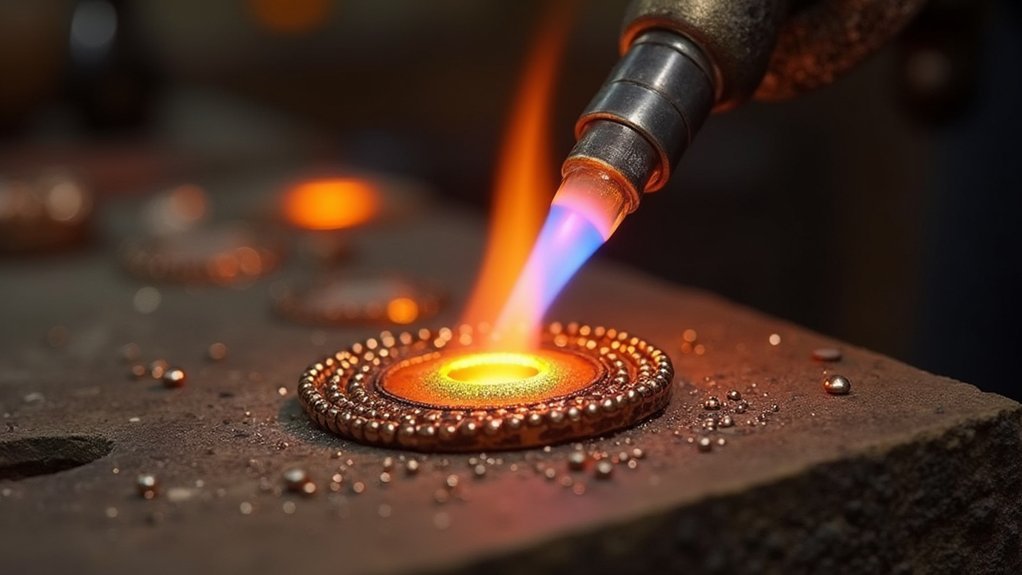
Identifying Proper Torch Flame Characteristics
You’ll need to adjust your torch to produce a clean blue flame before starting any PMC firing project.
This blue flame indicates ideal combustion and provides the consistent heat output necessary for proper sintering.
The flame’s color and intensity directly affect how heat distributes across your piece, making proper setup essential for successful results.
Blue Flame Setup
Three key visual indicators signal a properly adjusted torch flame for PMC firing.
You’ll want to achieve a blue flame that burns consistently without flickering or yellow streaks. This blue flame indicates complete combustion, reaching the 1,300 to 1,600 degrees Fahrenheit needed for effective binder burn-off.
Position your torch approximately 2 inches from the metal clay piece to guarantee even heating distribution.
Key blue flame characteristics to monitor:
- Consistent blue color throughout the flame cone without yellow tips
- Stable flame size that doesn’t fluctuate or sputter during firing
- Clean burning with no visible soot production that could contaminate surfaces
- Proper distance maintained at 2 inches from the PMC piece
- Even heat distribution across the entire clay surface without hotspots
You’ll fire more successfully when these visual cues align perfectly.
Heat Distribution Patterns
Once your blue flame is properly adjusted, achieving uniform heat distribution becomes critical for successful PMC firing.
You’ll need to maintain your torch approximately 2 inches from the piece, moving it in circular motions around the perimeter. This technique prevents hot spots and guarantees even heating throughout your work.
Watch for visual cues that indicate proper heat distribution. Your piece should shift from dull to bright cherry red as effective binder burn-off occurs.
You’ll notice darkening, smoke, and small flames during this process—these are normal signs of the binders burning away.
Once you achieve that characteristic “peachy glow,” maintain it for 5-7 minutes.
This sustained temperature guarantees complete sintering and transforms your clay into solid metal.
Recognizing the Critical Peachy Glow Phase
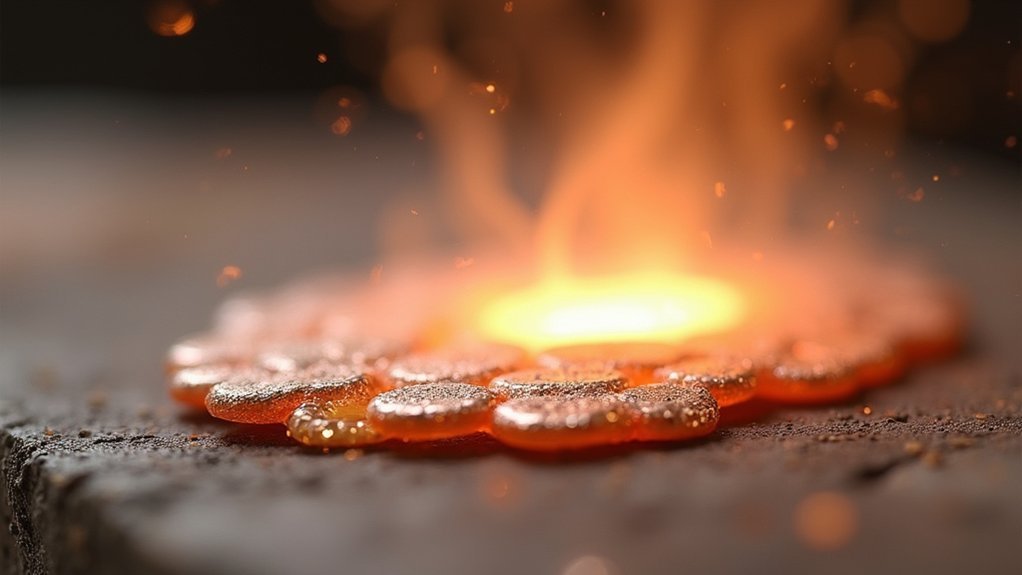
When firing PMC with a torch, the most essential indicator of success isn’t the flames or smoke you’ll initially see—it’s the distinctive peachy glow that emerges as your piece reaches the proper sintering temperature.
This critical phase occurs between 1,600°F to 1,700°F as organic binders burn off, signaling that your firing silver is properly sintering.
- Dim your workspace lights to clearly observe the peachy glow change
- Watch for the color shift as flames and smoke give way to the characteristic glow
- Maintain the peachy glow consistently for 5-7 minutes to guarantee complete sintering
- Monitor temperature range of 870°C to 925°C during this critical phase
- Recognize that insufficient peachy glow indicates incomplete firing and potential structural weakness
Timing Your Firing Process Correctly
Precision in timing transforms a successful peachy glow into a properly sintered piece of fine silver. You’ll need to set a timer and maintain that consistent peachy glow for a minimum of five minutes.
For Fine Silver Metal Clay, aim for 5-7 minutes of firing duration, extending up to 10 minutes for denser pieces.
Watch for smoke and darkening during initial heating—these signals indicate organic binders burning off before sintering begins.
Don’t rush this critical phase. Insufficient heating time creates weak metal that’ll crumble, while excessive time risks melting your piece entirely.
Once you’ve completed the firing cycle, quench immediately in water.
This rapid cooling preserves the metal’s strength and integrity, completing your transformation from Clay to solid fine silver.
Calculating and Managing Clay Shrinkage
You’ll need to measure your PMC piece before firing to predict how it’ll look after the clay shrinks to about 70% of its original size.
Take careful measurements of your greenware’s dimensions and multiply each by 0.7 to calculate the final fired size.
This calculation works like a photocopier’s reduction function, shrinking everything proportionally while preserving your piece’s details and textures.
Predicting Size Changes
Since PMC shrinks to approximately 70% of its original size during firing, you’ll need to calculate these dimensional changes before you begin your project.
Measure your greenware dimensions and apply the 30% shrinkage factor to predict final sizes accurately. This proportionate Clay Shrink affects your entire piece uniformly, preserving detail relationships while reducing overall dimensions.
Understanding shrinkage patterns helps you plan sizing strategies effectively:
- Measure all critical dimensions of your greenware before firing
- Calculate 30% reduction from original measurements for final size predictions
- Account for uniform shrinkage that maintains proportional relationships between design elements
- Plan initial sizing to accommodate the predictable dimensional reduction during firing
- Consider thickness variations that may affect drying and shrinkage consistency
Measuring Before Firing
Accurate measurement forms the foundation of successful PMC torch firing projects. You’ll need to measure your greenware before firing to calculate the 30% shrinkage that occurs during the process. Record length, width, and height dimensions carefully, as these measurements help you predict your final piece’s size.
Use calipers or rulers for precise measurements, noting any thickness variations that might affect shrinkage patterns. Here’s a quick reference for calculating final dimensions:
| Initial Size | Shrinkage Factor | Final Size |
|---|---|---|
| 10mm | 70% | 7mm |
| 15mm | 70% | 10.5mm |
| 20mm | 70% | 14mm |
Document these measurements in your project notes. This measuring discipline guarantees you can replicate successful results and troubleshoot any unexpected shrinkage issues that arise during firing.
Signs of Properly Sintered Metal Clay
When your torch firing process reaches completion, you’ll need to identify several key indicators that confirm successful sintering.
These visual and physical signs will help you determine whether your silver metal clay has transformed into solid metal.
A properly sintered piece displays distinct characteristics that distinguish it from under-fired clay:
- Uniform dull silver appearance – indicating organic binders have completely burned away and metal particles have fused
- Dense, solid structure – lacking porous or fragile areas that suggest incomplete firing
- 30% size reduction – maintaining proportional textures and details from original greenware dimensions
- Metallic sound when tapped – producing a clear ring rather than a dull thud
- Durability under gentle pressure – withstanding handling without cracking or breaking
Common Firing Mistakes That Lead to Failure
Despite careful attention to the signs of proper sintering, even experienced artisans can encounter firing failures that compromise their metal clay projects.
You’ll face cracking or breaking if you don’t properly dry your pieces before firing, as trapped moisture creates destructive steam buildup. Miscalculating shrinkage rates leads to ill-fitting components and incorrectly sized finished pieces.
Proper drying prevents catastrophic cracking, while accurate shrinkage calculations ensure your components fit together perfectly in the finished piece.
When working with Fine Silver clay, holding your torch too close causes uneven heating that melts rather than sinters the material. Insufficient firing time—less than the required 5-7 minutes—produces weak, poorly fired pieces lacking structural integrity.
Finally, ignoring essential color changes during the firing process, especially missing that telltale peachy glow, results in under-fired or over-fired metal clay that won’t meet your quality standards.
Torch Firing Limitations and Size Constraints
Although torch firing offers convenience and accessibility for metal clay artists, this method comes with significant constraints that’ll determine what you can successfully create.
The most critical limitation involves size constraints – you’re restricted to pieces weighing around 10 grams maximum. Larger pieces won’t achieve proper sintering, resulting in weak, crumbly structures that’ll fall apart easily.
- Material restriction: Only fine silver (999) works effectively with torch firing
- Weight limit: Maximum 10 grams per piece for successful sintering
- Temperature challenges: No precise measurement relies on subjective visual cues
- Equipment requirements: High-quality torch needed for consistent 5-10 minute heating
- Overheating risks: Larger or thicker pieces melt more easily than delicate designs
These limitations mean torch firing works best for small, lightweight jewelry pieces rather than substantial sculptural works.
When to Consider Upgrading to Kiln Firing
Since torch firing’s constraints often become apparent after creating just a few pieces, recognizing the right time to invest in a kiln can transform your metal clay practice from hobby-level experimentation to professional-quality work.
You’ll know it’s time to upgrade when you’re consistently creating pieces and want predictable results. A kiln offers precise temperature control that eliminates guesswork, ensuring your silver pieces achieve maximum strength every time.
If you’re making larger items or want to fire multiple pieces simultaneously, torch firing becomes impractical.
Consider upgrading when you’re ready to explore advanced techniques or different metal clay types. The $400-$700 investment pays off quickly if you’re selling your work, as kiln-fired silver pieces command higher prices due to superior quality and consistency.
Frequently Asked Questions
Can You Torch Fire PMC?
Yes, you can torch fire PMC successfully. You’ll need to hold your torch about two inches away, moving it circularly to distribute heat evenly while watching for the red glow that indicates proper sintering.
Why Is PMC Being Discontinued?
You’re seeing PMC discontinued because alternative metal clays offer better properties at lower costs. Manufacturers face raw material sourcing challenges, while the industry’s shifting toward sustainable, recycled materials and innovative firing techniques.
How Does Sterling Silver Clay Work?
You’ll mold silver particles mixed with organic binders and water into your desired shape. When you fire it, the binders burn away and silver particles fuse together, creating solid sterling silver jewelry.
What Are the Disadvantages of Precious Metal Clay?
You’ll face limited metal options with torch firing, risk incomplete sintering if gas runs out, struggle with temperature control, encounter safety hazards from high heat, and spend considerably on materials while learning proper techniques.
In Summary
You’ve learned that PMC torch firing works through controlled heat that burns off organic binders and fuses metal particles through sintering. You’ll succeed when you maintain proper temperatures, use fine silver clay, and recognize the telltale signs of complete fusion. Remember, torch firing has size limitations, but it’s perfect for small pieces when you can’t access a kiln. Master these fundamentals, and you’ll consistently create strong, professional results.


Leave a Reply