
You’ll master bead setting by investing in quality flex shaft tools and sharp #52 round gravers first. Next, prepare your ring with a smooth 600-grit finish and mark the precise center using dividers. Start drilling with a 0.7mm ball bur, then enlarge to create proper seat depth at 70% of your stone size. Position your graver at 40-45 degrees when raising beads, and select beading tools slightly larger than the raised metal. These fundamental techniques will reveal advanced stone-setting mastery.
Choose the Right Tools and Equipment for Bead Setting

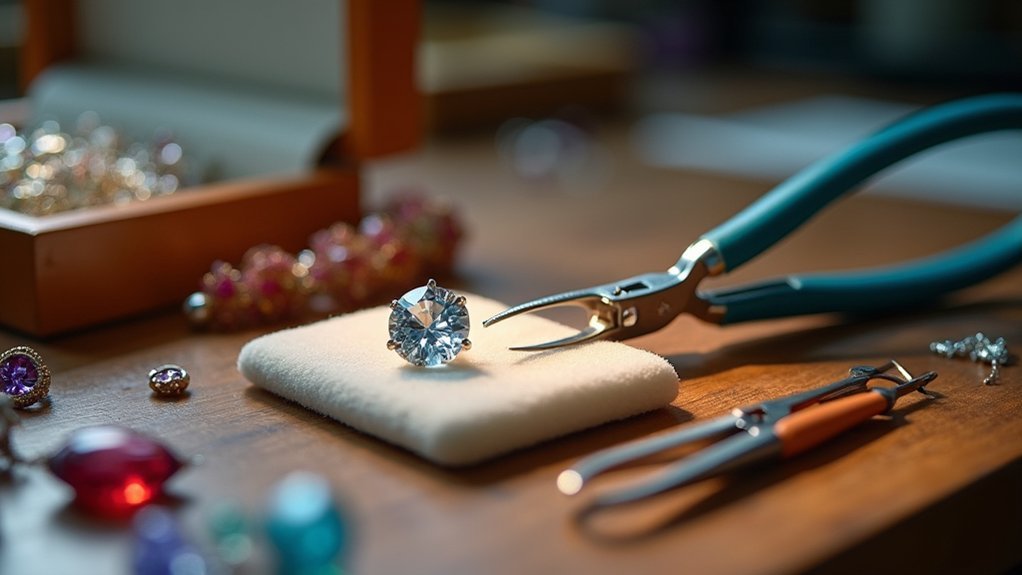
Before you begin any bead setting project, you’ll need to invest in the right tools to guarantee professional results. Start with a quality flex shaft and setting bur collection in various sizes including 0.7mm, 1.4mm, and 2.0mm to accommodate different stone dimensions.
You’ll also need a sharp #52 Round Graver for raising beads – keep it honed with an Arkansas stone for peak performance.
A GRS BenchMate System will secure your ring shafts while working, giving you better control.
Select your beading tool sizes carefully – #6-7 tools work best for stone using 2-3mm dimensions. Choose tools slightly larger than the metal you’re shaping to form prongs without damage.
Stock lubricating agents for efficient drilling and maintain multiple bur sizes for versatile jewelry making applications.
Properly Prepare Your Ring and Mark the Setting Location
Once you’ve assembled your tools, you’ll need to create a perfectly prepared surface on your ring for accurate stone placement.
Start with a flat-topped ring that’s been finished with 600 sandpaper to guarantee smoothness for your bead setting work.
To mark the setting location precisely, measure the total width of your ring and divide by two. Use dividers to lightly scribe marks from each side, locating the exact center.
Repeat this process for the height, creating a cross at center. Make sure your scribed cross is smaller than your stone for easy removal later.
Create a small divot at the marked center to guide your drill bit accurately when creating the pilot hole for your stone.
Master the Drilling and Seat Cutting Process

With your center point marked and ready, you’ll begin the drilling process that forms the foundation of your bead setting. Start by creating a small divot at your marked center to prevent the drill bit from slipping during initial contact.
Precise center marking and a small divot creation prevent drill bit slippage, establishing the critical foundation for professional bead setting work.
Your drilling sequence should follow these basic beading techniques:
- Use a Foredom tool with a 0.7mm ball bur to create your pilot hole
- Enlarge the hole with a 1.4mm ball bur to prepare for seat cutting
- Drill approximately 70% of the stone’s size to maximize light exposure
- Cut the seat using a 2.0mm setting bur for the final preparation
- Regularly check depth to maintain a slight metal edge over the girdle
This methodical seat cutting approach guarantees the entire girdle sits below the metal surface, creating a secure setting that’ll hold your stone properly.
Perfect Your Bead Raising and Graver Techniques
Position your #52 round graver at a 40-45 degree angle and push down the metal wall against the stone to begin raising your first bead. Move to the opposite side for balance, gradually pushing surrounding metal toward the stone to create secure prongs. There’s no right or wrong approach initially—practice helps you learn EVERYTHING about proper technique.
Use a beading tool slightly larger than your raised metal for shaping. Apply firm pressure while avoiding breakage, then employ sideways tremble movements to round each bead perfectly.
| Step | Tool | Technique |
|---|---|---|
| Raise beads | #52 Round Graver | 40-45° angle push |
| Shape prongs | Beading tool | Firm pressure application |
| Finish | Arkansas stones | Regular sharpening practice |
Remember to cut the seat properly first, then make consistent beading motions for professional results.
Secure Your Stone With Professional Beading Tools
After mastering your graver and beading techniques, you’ll need the right tools to transform those skills into secure, professional stone settings. Using different beading tools strategically guarantees your stones stay perfectly positioned while creating an aesthetically pleasing finish.
When you’re ready to start the beading process, make certain you’ve selected tools that complement your metalwork. Choose a beading tool slightly larger than the metal you’re shaping for adequate coverage. Once your seat is cut to the proper depth, maintain a slight metal edge over the girdle for security.
- Use a #52 Round Graver to raise beads effectively from surrounding metal
- Mark setting corners at 45-degree angles with a straight edge for symmetry
- Push excess metal towards the stone during beading for secure placement
- Check seat depth regularly while cutting and setting
- Store tools properly using Memory wire organization systems
Frequently Asked Questions
What Are Easy Beading Patterns for Beginners?
You’ll love starting with checkerboard patterns alternating two colors, simple strand bracelets using three-to-five bead sequences, or incorporating larger focal beads with smaller ones. Try barrel or spiral designs for creative challenges.
How to Start Beading on Fabric for Beginners?
Start by choosing sturdy cotton or denim fabric. Sketch your design first, then use strong thread matching your fabric color. Begin with simple running stitches, keeping them tight to secure beads properly.
What Graver to Use for Bead Setting?
You’ll want a #52 Round Graver for bead setting since it gives you precise control when raising beads from surrounding metal. Keep it sharp and use beveled angles at 40-45 degrees for best results.
What Is the Difference Between Bead Setting and Prong Setting?
You’ll find bead setting uses raised metal beads around stones for a flush, decorative finish, while prong setting employs metal claws that elevate stones above the band for maximum visibility.
In Summary
You’ve now got the foundation for successful bead setting. Don’t expect perfection on your first attempt—this technique requires patience and practice. Start with less expensive stones while you’re learning, and don’t rush the process. Take your time with each step, from tool selection to final polishing. With consistent practice, you’ll develop the muscle memory and confidence needed to create professional-quality bead settings that’ll secure your stones beautifully.


Leave a Reply