You’ll master crown setting by starting with precise metal framework construction using 0.5-1mm thick base plates and properly annealed prongs. Calculate stone height at one-third its diameter, position the girdle slightly below the setting edge, and use controlled soldering temperatures to prevent warping. Set stones with gentle pressure while adjusting prongs individually for secure contact. Polish systematically using appropriate compounds and regularly inspect for gaps or misalignment. These foundational techniques will reveal advanced crown setting mastery.
Understanding Crown Setting Fundamentals and Stone Selection

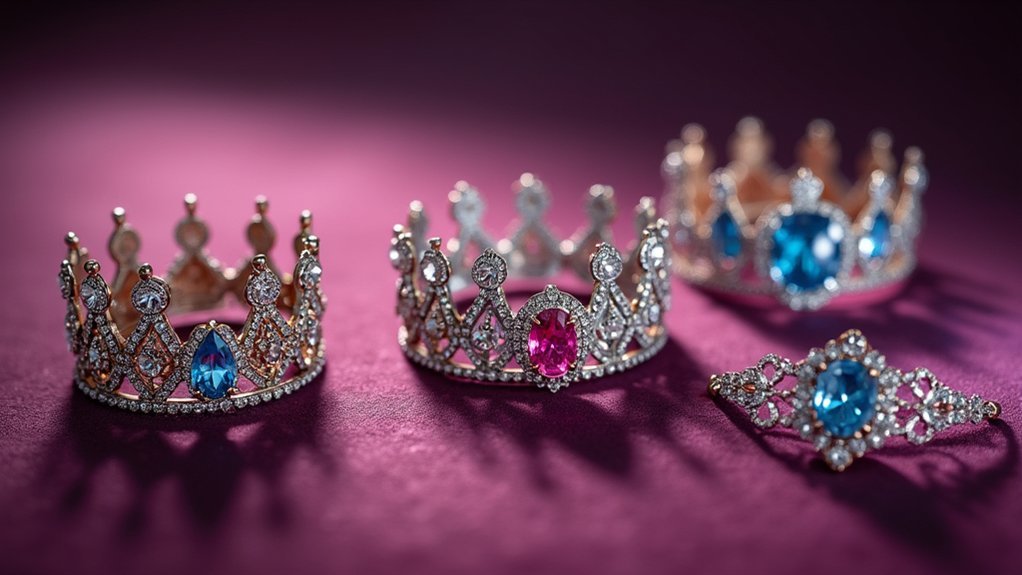
Crown settings offer jewelry makers a sophisticated alternative to traditional bezels, featuring distinctive scooped-out openings that maximize light exposure while maintaining excellent stone security.
You’ll find these prong settings particularly effective for engagement ring diamonds, where enhanced visibility creates dramatic visual impact.
When approaching stone selection, you must carefully evaluate each gem’s hardness and durability. Softer stones face increased vulnerability from prong pressure, potentially causing damage over time.
Your crown setting’s success depends on precise measurements that guarantee stones fit securely while allowing ideal light penetration from multiple angles.
You can accommodate various stone shapes and sizes, giving you design flexibility for customization.
Focus on proper craftsmanship to achieve maximum brilliance—your precise execution determines whether the setting enhances or diminishes the gemstone’s natural beauty while maintaining that essential secure hold.
Preparing the Metal Framework and Prong Structure
You’ll need to choose your metal type and gauge carefully, as silver and gold each offer distinct working properties that affect your crown setting’s durability and appearance.
Start by cutting your framework to precise dimensions, accounting for metal thickness in your calculations to guarantee proper stone seating.
Plan your prong placement strategically before any construction begins, as even spacing and ideal positioning determine both the stone’s security and the setting’s visual balance.
Metal Selection and Thickness
Before you begin crafting your crown setting, understanding the critical relationship between metal selection and thickness will determine both the structural integrity and aesthetic success of your finished piece.
For your main framework, you’ll want to select metals between 0.5mm to 1.0mm thick. This thickness guarantees adequate durability while allowing for intricate design work. Your choice between 14K gold or sterling silver affects both weight and structural performance.
Prong structures require thinner metal, approximately 0.35mm to 0.5mm. This thickness provides secure gemstone retention without blocking light transmission or brilliance.
Before shaping, always anneal your metal selection properly. This process enhances ductility, preventing cracks during manipulation.
Shape prong tips with precise tapers that fit snugly against your gemstone while maximizing visibility and light exposure.
Crown Framework Construction
Once your metal selection is complete, start constructing the framework by cutting a base plate from your chosen metal sheet. You’ll need metal sheets between 0.5mm to 1mm thickness for proper stability. Use a bezel or coning block at a 17-degree angle to create your prong structure.
| Component | Specification |
|---|---|
| Base plate thickness | 0.5mm – 1mm |
| Prong angle | 17 degrees |
| Prong taper | Enhanced for light exposure |
Shape your prongs with a jeweler’s saw, tapering them to maximize your gemstone’s brilliance while maintaining security. After cutting prongs to desired length, use a soldering torch to securely attach them to the base plate. Confirm even spacing and proper alignment for ideal aesthetic appeal and structural integrity of your crown framework.
Prong Placement Planning
Strategic prong placement determines both the security and visual appeal of your crown setting.
You’ll need to calculate prong height based on your stone’s thickness and desired visibility, typically ranging from 1.5 to 2.5 mm for standard four-prong settings. Use a precise layout tool to mark positions on your metal framework, ensuring consistent distances and angles for even placement around the gemstone.
Position prongs to cover approximately one-third of the stone’s girdle – this will secure the stone firmly without blocking its beauty.
Space prong tips evenly to provide balanced support and maximize light exposure, enhancing brilliance.
Before final soldering, test-fit your stone in the framework to verify proper positioning and make necessary adjustments for ideal security and aesthetics.
Calculating Proper Stone Height and Girdle Positioning
When you’re setting a stone in a crown mounting, achieving the correct height and girdle positioning determines whether your piece will showcase the stone’s beauty or compromise its security. Start by measuring your stone’s dimensions with calipers for precision. The stone height should be at least one-third of its diameter for ideal stability and visibility.
| Measurement Factor | Key Consideration |
|---|---|
| Crown Height | Minimum 1/3 of diameter |
| Girdle Position | Slightly below setting edge |
| Metal Thickness | Adjust for structural needs |
Position the girdle slightly below your setting’s top edge to secure the stone without excessive pressure. Calculate total depth, then subtract your desired above-setting height to determine proper girdle positioning. Remember that metal thickness affects your calculations, so adjust accordingly to maintain both aesthetic appeal and structural integrity.
Soldering Techniques for Secure Crown Assembly

You’ll need precise temperature control when soldering crown components to prevent metal warping and guarantee strong joints.
Start by thoroughly cleaning all surfaces where solder will flow, removing any oils, oxidation, or debris that could interfere with proper bonding.
Your joint preparation must include proper fitting of components and strategic placement of flux to direct solder flow exactly where it’s needed.
Temperature Control Methods
Although crown setting assembly requires multiple technical skills, mastering temperature control during soldering stands as the foundation for creating secure, professional-quality jewelry.
You’ll need a soldering torch with adjustable flame settings to achieve precise heat application without damaging gemstones or metal components.
Start by preheating your metal components to promote even heat distribution and prevent thermal shock that causes warping.
Use a heat sink like wet cloth or specialized tools to protect sensitive areas from excessive heat exposure.
Monitor your soldering flux color changes as a temperature guide—it shifts from clear to slightly darker when you’ve reached ideal soldering temperature.
This visual cue guarantees you’re applying the right amount of heat for secure fusion while maintaining component integrity throughout the crown setting process.
Joint Preparation Steps
Before attempting any crown assembly, proper joint preparation determines whether your soldered connections will hold under daily wear or fail prematurely. You’ll need clean surfaces free from oxidation to guarantee strong bonds during soldering. Start by removing any debris or tarnish from contact points.
| Preparation Step | Purpose |
|---|---|
| Surface cleaning | Removes oxidation for better adhesion |
| Binding wire application | Secures components during heating |
| Temperature setting | Prevents metal damage while melting solder |
Once you’ve established clean surfaces, use binding wire to hold crown components together securely. Heat your soldering torch to approximately 1,000°F, then apply solder sparingly at each joint. After cooling, immerse the assembly in pickle solution to remove flux residues, achieving that polished appearance essential for professional-quality jewelry.
Setting the Stone With Precision Prong Adjustment
When setting stones with precision prong adjustment, you’ll start by positioning the prong tips onto a flattened wire ring or sheet, maintaining even spacing that matches your stone’s dimensions.
Use precision tools to gently press your stone in place, checking that each prong makes proper contact for stability. Apply controlled pressure during the setting process to avoid damage.
Gentle pressure and precision tools ensure proper prong contact while preventing stone damage during the critical setting phase.
Once positioned, employ a burnisher to polish the metal holding surfaces, creating smooth contact points for a secured fit.
As an experienced stone setter knows, you’ll need to adjust each prong individually using pliers, bending them carefully inward without overtightening.
Throughout this prong adjustment phase, regularly inspect alignment and contact points to guarantee your stone remains stable and aesthetically positioned.
Finishing and Polishing Crown Settings for Professional Results

Once you’ve completed the prong adjustment phase, the finishing and polishing stage transforms your crown setting from a functional piece into a professional-quality result.
Start by using a burnisher on the bezel to polish and harden the metal surface, creating a smooth, reflective finish around your stone settings. Ascertain the bezel surface is completely flat and free of irregularities before proceeding.
Select polishing compounds that match your specific metal type, then employ various buffs to enhance both the metal and stone’s appearance.
A rotary tool with appropriate speed settings helps you reach intricate areas without damaging gemstones. Remember to regularly clean your tools for consistent results.
This careful attention to detail delivers the professional finish that distinguishes quality crown settings.
Troubleshooting Common Crown Setting Problems and Solutions
Even with meticulous attention to detail during the setting process, crown settings can present challenges that require quick identification and effective solutions. When stones wobble, inspect the prongs for gaps and adjust spacing to guarantee proper fit. You’ll need to evaluate stone security regularly by checking for bent or thinned prongs that require re-tipping.
| Problem | Cause | Solution |
|---|---|---|
| Wobbling stone | Gaps between prongs and stone | Adjust prongs or add adhesive |
| Excessive wear | Bent/thinned prongs | Re-tip or replace prongs |
| Poor visibility | High prong positioning | Lower prongs for light entry |
| Difficult setting | Improper seat fit | Use burr to create defined seat |
Maintain even spacing and secure tightening to prevent stone loss while enhancing visibility through proper prong height adjustment.
Frequently Asked Questions
What Is Gypsy Setting in Jewelry?
You’ll find gypsy setting involves drilling holes into metal where gemstones sit flush with the surface. You’re creating a sleek, low-profile design that’s durable, snag-resistant, and perfect for everyday wear jewelry pieces.
What Do Jewelers Use to Set Diamonds?
You’ll use prong settings, bezel settings, and pavé techniques to secure diamonds. You’ll need precision tools like burrs, gravers, and setting pliers, plus soldering equipment to create secure, brilliant mountings.
What Is a Crown Setting?
You’ll find a crown setting’s a bezel-like design with scooped openings that let light enter from multiple angles. It securely holds your gemstone while maximizing brilliance, typically featuring prongs or a protective rim around the stone.
What Is the Best Metal to Practice Jewelry?
You’ll want to start practicing with silver since it’s affordable and easy to manipulate. Copper’s also excellent for beginners because it’s inexpensive and lets you develop soldering skills without costly mistakes.
In Summary
You’ve now mastered the essential crown setting techniques that’ll elevate your jewelry making skills. Remember to always check your stone measurements twice before cutting prongs, and don’t rush the soldering process. Practice these methods on inexpensive stones first until you’re confident with each step. With patience and attention to detail, you’ll create stunning crown settings that showcase your gemstones beautifully and stand the test of time.


Leave a Reply