
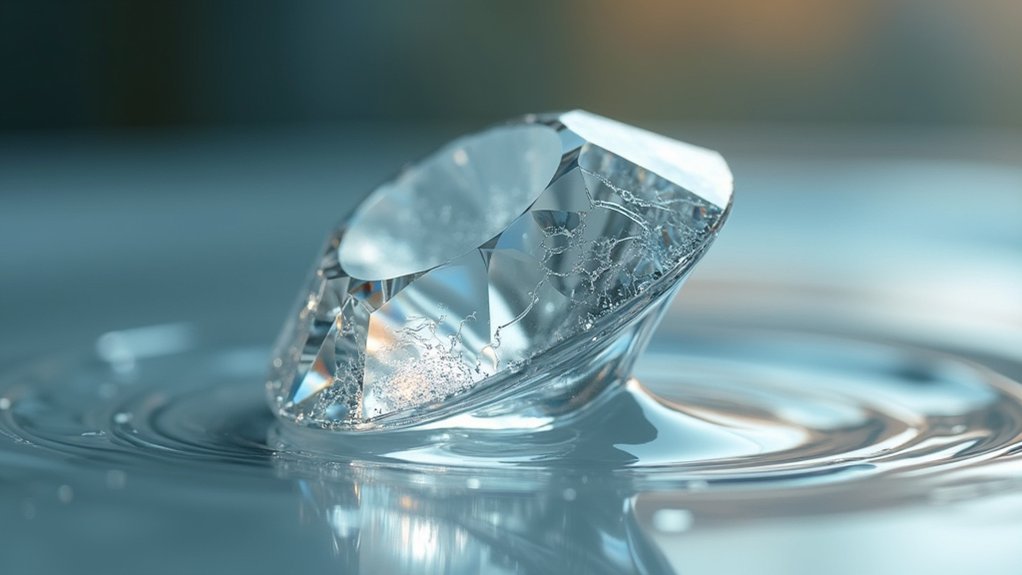
You can identify fracture-filled diamonds by looking for distinctive rainbow flashes that appear when you tilt the stone under light – this “flash effect” occurs only in treated areas where glass-like filler material has been injected into surface-reaching cracks. You’ll also notice a glassy appearance, flow structures resembling melted material, and tiny gas bubbles visible under magnification that don’t occur naturally. Professional certification and proper documentation will confirm any treatments for complete verification.
Understanding What Fracture Filling Is and Why It’s Used
When you’re shopping for diamonds, you’ll likely encounter stones that have undergone fracture filling—a treatment process that injects glass-like material into surface-reaching cracks to improve the diamond’s visual clarity.
This enhancement technique uses filler with a refractive index similar to diamond’s, making fractures nearly invisible to the naked eye.
Fracture filled diamonds can jump one or two clarity grades, transforming lower-quality stones into more appealing options.
Israeli diamantaire Zvi Yehuda refined this process in the mid-1980s, coining the term “clarity-enhanced diamonds.”
However, you should understand that this treatment isn’t permanent.
Fracture filling treatments can deteriorate over time, making these diamond enhancements temporary rather than permanent solutions.
Heat exposure or certain chemicals can damage the filler, potentially altering your diamond’s appearance.
That’s why knowing how to identify these enhanced stones is essential for making informed purchasing decisions.
The Flash Effect – Recognizing Rainbow Colors in Filled Areas
When you examine a fracture-filled diamond, you’ll notice a telltale rainbow light phenomenon that appears in the treated areas.
This colorful display occurs because light bends differently when it passes through the filler material compared to the natural diamond.
You can easily detect this flash effect by gently tilting the stone under proper lighting, which will cause the rainbow colors to shift and become more apparent.
Rainbow Light Phenomenon
The rainbow light phenomenon creates one of the most telltale signs you’ll encounter when examining fracture-filled diamonds.
As you tilt the stone under light, you’ll notice distinct color changes appearing specifically in treated areas. This happens because the filling material has a different refractive index than the diamond itself, causing light to bend and create visible spectrum colors.
You’ll see these rainbow flashes only where the fracture filler has been applied, making treated sections stand out dramatically from untreated parts.
Natural diamonds don’t exhibit such pronounced color variations in their clarity characteristics.
When you observe this flash effect through magnification, you’re witnessing the distinctive optical properties that reveal filling treatment, which can greatly impact the stone’s value and durability.
Tilting Detection Method
How do you master the tilting detection method to spot fracture-filled diamonds?
You’ll need to angle the diamond strategically while observing color changes that reveal treatment. This tilting detection method exploits the differing refractive indices between diamond and filler material.
When you tilt the stone, fracture-filled areas display distinctive rainbow colors as light bends differently through the glass-like filler.
You’ll notice these color variations are more pronounced than natural diamond clarity. The flash effect becomes your diagnostic tool – untreated diamonds won’t produce these telltale rainbow patterns.
Examine the diamond under various lighting conditions to enhance visibility of these colors.
You’ll find this technique particularly effective because each fracture responds differently when angled, creating unmistakable visual evidence of treatment that confirms filling presence.
Examining Surface-Reaching Fractures With a Jeweler’s Loupe
Since fracture-filled diamonds often contain telltale signs visible under magnification, you’ll need a jeweler’s loupe with at least 10x magnification to conduct a thorough examination.
Focus on surface-reaching fractures, which appear fracture less obvious when filled with glassy substances. Look carefully for unusual light refraction or rainbow effects around these areas, as fillers have different refractive indices than natural diamond.
Check for bubbles or gas pockets within the fractures—these’re common indicators of injected filler materials.
Pay attention to texture; filled areas often display a glassy, melted appearance with crackled patterns. If you notice cloudy fractures or residue buildup, this suggests either suboptimal treatment or deterioration of the filling material over time, confirming the diamond’s been treated.
Identifying the Telltale Glassy Appearance of Filler Material
Glassy appearances in filler material create one of the most distinctive visual signatures you’ll encounter when examining fracture-filled diamonds. This glass-like effect occurs because the filler material has a different refractive index than natural diamond, causing light to bend abnormally and often producing noticeable rainbow effects.
When you examine the diamond under magnification, look for flow structures that appear melted or glassy within the filled areas.
You’ll also notice a characteristic flash effect when tilting the stone – the filler creates sudden color changes that natural diamond won’t exhibit.
Additionally, search for bubbles or trapped gas aggregates visible through your loupe, as these confirm filler presence.
Cloudy areas or crackled surface textures also indicate treatment residues from the filling process.
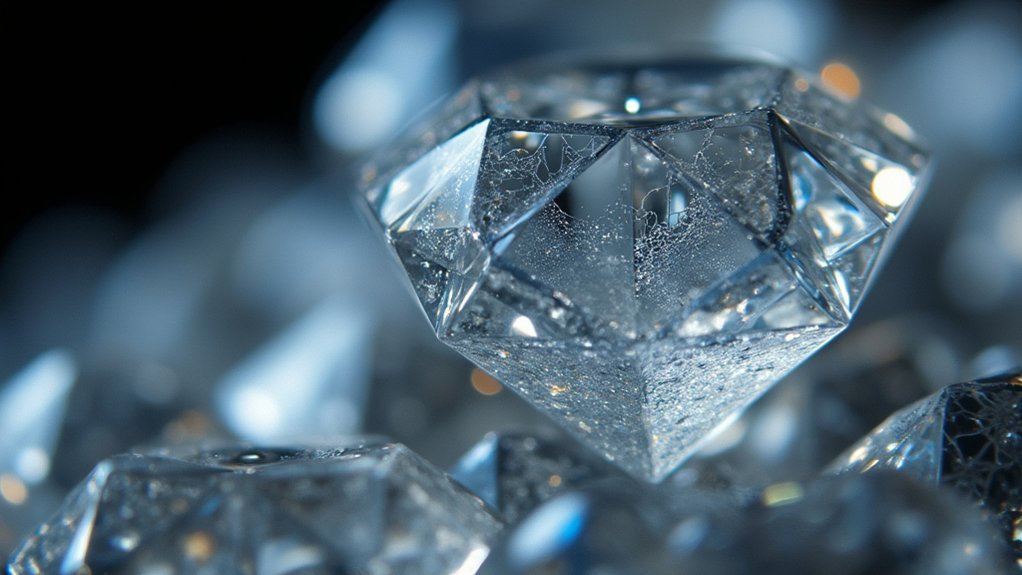
Spotting Bubbles and Gas Aggregates Under Magnification

You’ll notice trapped gas bubbles within fracture-filled diamonds when examining them under proper magnification – these tiny round inclusions don’t occur naturally in diamonds.
Use a 10x loupe or microscope to employ effective examination techniques that reveal these telltale signs of treatment.
Pay attention to how these bubbles form distinct patterns, typically clustering around the filled fractures where the glass-like material was injected.
Identifying Trapped Gas Bubbles
How can you distinguish between natural diamond inclusions and artificial bubbles created during fracture filling?
You’ll need to examine the diamond under 10x magnification to spot the telltale signs. Trapped gas bubbles appear as small, round inclusions specifically within the filler material, not throughout the diamond’s natural structure. These bubbles form when molten glass or resin gets injected into fractures during the filling process.
The key difference lies in their location and appearance. Natural inclusions exist randomly throughout the diamond, while artificial bubbles concentrate within filled areas.
You’ll notice these gas aggregates vary in size and distribution, but they consistently appear where fractures have been treated. Their presence serves as a reliable indicator that the diamond has undergone fracture filling treatment.
Microscopic Examination Techniques
When examining a diamond under proper magnification, trained gemologists can identify several distinctive features that reveal fracture filling treatment.
During microscopic examination, you’ll notice bubbles or gas aggregates within the filled areas that don’t occur naturally in diamonds. These bubbles indicate the presence of filler material used to mask fractures.
You’ll also observe the filler’s glassy, melted flow structure, which contrasts sharply with the diamond’s natural crystalline structure.
Look for crackled textures or web-like surface appearances that aren’t characteristic of untreated stones. Additionally, watch for the distinctive flash effect—color changes visible when you tilt the diamond, caused by light reflecting differently off the filler material.
These microscopic features require specific magnification techniques and trained expertise for accurate identification.
Bubble Formation Patterns
What distinguishes fracture-filled diamonds most clearly under magnification? It’s the distinctive bubbles trapped within the filler material during treatment.
You’ll notice these bubbles as small, round inclusions that contrast sharply with the diamond’s crystalline structure. They’re formed when gas gets trapped during the filler injection process.
When examining suspected fracture-filled diamonds, look for clustering patterns where bubbles tend to concentrate in specific areas. These aggregates help distinguish treated stones from natural diamonds.
The bubbles vary in size and shape, often appearing irregularly formed within the filling material.
For accurate identification, you’ll need proper magnification and lighting angles, as bubble visibility changes dramatically depending on your viewing conditions and equipment quality.
Detecting Flow Structures and Melted Textures in Treated Areas

Since fracture-filled diamonds undergo high-temperature treatment processes, they’ll often display distinctive flow structures and melted textures that you can identify under proper magnification.
When examining treated areas through a microscope, you’ll notice these flow structures resembling molten material that’s been frozen in place. The filler creates a glassy appearance with characteristic patterns that differ markedly from natural diamond formations.
You can spot a crackled texture or web-like surface appearance in filled regions, which indicates artificial treatment.
These melted textures result from the high-temperature injection process used during fracture filling. A trained gemologist will recognize these telltale signs immediately, as the flowing patterns are unmistakable evidence of treatment that wouldn’t occur naturally in diamonds.
Observing How Light Bends Differently Through Filled Channels
Beyond these surface irregularities, you’ll notice that light behaves dramatically differently when it passes through fracture-filled channels. The filler material’s refractive index differs markedly from the diamond’s natural properties, causing noticeable light bending anomalies.
As you examine the stone, you’ll observe a rainbow-like effect where light interacts with the filled areas, creating distinctive optical patterns. These fracture channels often appear brighter and more colorful than surrounding natural diamond material due to enhanced light reflection from the glass-like filler.
When you tilt the diamond, you’ll see flash effects where colors shift dramatically, indicating refraction changes caused by the treatment. Under magnification, these filled areas reveal telltale bubble patterns and flow structures that trained gemologists recognize as clear evidence of fracture filling treatment.
Recognizing Cloudy Residue From the Treatment Process

How can you distinguish between natural diamond clarity and the telltale signs of treatment residue?
You’ll notice cloudy residue as a hazy, milky appearance within fracture-filled diamonds, particularly concentrated around the filled areas. This cloudiness stems from leftover material from the filling process and creates a distinctly different look compared to the diamond’s natural clarity characteristics.
Under magnification, you can spot this cloudy residue more easily. It appears as foggy zones that stand out against clearer sections of the diamond.
If you’re examining a stone that shows significant cloudiness without visible natural inclusions, it’s likely indicating fracture filling treatment.
Trained professionals can differentiate between genuine inclusions and these treatment remnants, helping determine whether the diamond’s haziness results from natural formation or artificial enhancement processes.
Testing the Diamond’s Response to Temperature Changes
When you expose a fracture-filled diamond to temperature changes, the filler material responds differently than the natural diamond crystal, creating a reliable detection method. The filler has a considerably lower melting point than diamond, making it vulnerable to heat damage from standard jeweler’s tools.
If you heat fracture filled diamonds during resizing or repair work, you’ll notice the filler can leak, deteriorate, or even explode from thermal stress. This dramatic reaction occurs because the treatment material can’t withstand high temperatures like natural diamond.
However, approach temperature testing cautiously. Extreme heat exposure will irreversibly damage the stone’s appearance, potentially revealing original fractures and inclusions while destroying its enhanced clarity.
This test can drastically reduce the diamond’s value permanently.
Checking for Disclosure Documentation and Certification
Since fracture filling greatly impacts a diamond’s value and durability, you’ll need proper documentation to verify what you’re purchasing.
Always request disclosure documentation when buying a diamond, as it should detail any treatments including fracture filling. Look for certification from reputable gemological organizations like GIA, which provides assurance about the diamond’s quality and treatments.
Always demand proper certification from reputable gemological organizations like GIA when purchasing diamonds to ensure complete treatment disclosure.
Understand that fracture-filled diamonds typically come with identification reports rather than full grading reports, reflecting the temporary nature of this treatment.
Be cautious of diamonds sold without proper certification or disclosure, as this may indicate lack of transparency about treatment history.
Verify any appraisal specifically mentions fracture filling treatment to help assess the diamond’s value accurately.
Professional Gemological Testing Methods and Equipment
When you suspect a diamond might be fracture-filled, professional gemological testing provides definitive answers through specialized equipment and techniques.
You’ll need to examine the stone under magnification to detect the characteristic flash effect, where tilting the diamond reveals color changes in filled areas.
Professional-grade tools like refractometers can measure refractive index differences between the diamond and its fillers, while microscopes reveal telltale signs that confirm fracture filling treatment.
Microscopic Flash Effect Detection
How can you determine if that brilliant diamond contains hidden fracture filling? The microscopic flash effect detection method reveals telltale signs when you tilt a diamond under magnification.
You’ll notice distinct light patterns that differ from natural diamond behavior.
Professional gemologists rely on this technique because fracture-filled areas bend light differently than surrounding diamond material.
Here’s what specialists look for during microscopic flash effect detection:
- Unusual light reflections that create distinct flashing patterns when the stone moves
- Color variations within the flash that indicate foreign material presence
- Inconsistent brilliance across different areas of the diamond’s surface
- Sharp contrast between filled and unfilled sections under illumination
This detection method requires specialized equipment and trained expertise to identify the subtle optical differences that reveal fracture filling treatments.
Refractive Index Analysis
While visual inspection methods provide initial clues about fracture filling, refractive index analysis delivers definitive scientific proof through precise optical measurements.
You’ll need a refractometer to compare your diamond’s refractive index with the filler material’s properties. Since diamond has a refractive index close to 2.42, while glass or resin fillers measure considerably lower, this creates detectable discrepancies.
When you shine polarized light through the stone, you can observe how light behaves differently in filled areas versus natural diamond. Look for anomalies in refractive properties that reveal filler presence.
Professional gemologists use this technique alongside specialized equipment like GIA grading reports to confirm fracture-filling treatments with scientific accuracy.
Professional Grading Equipment
Three essential instruments form the foundation of professional fracture-filling detection in gemological laboratories.
You’ll find these sophisticated tools detect even the most expertly treated diamonds by analyzing their internal characteristics and optical properties.
Professional gemologists rely on four primary detection methods when examining diamonds for filling surface-reaching fractures:
- GIA Diamond Grading Machines – Generate thorough clarity reports that identify enhancement treatments and document filling evidence.
- Polarized Light Microscopy – Reveals distinctive bubble formations and glassy appearances characteristic of filler materials within fractures.
- Spectroscopy Analysis – Examines absorption spectrums to determine the chemical composition of suspected filler substances.
- 3-D Imaging Technology – Creates detailed internal maps showing fracture patterns and the precise extent of any filling treatments applied.
These instruments provide definitive identification of treated stones through scientific analysis rather than visual inspection alone.
Common Locations Where Fracture Filling Occurs on Diamonds
Where do jewelers typically target fracture filling treatments on diamonds? You’ll find fracture filling commonly occurs in surface-reaching fractures and inclusions that are most visible to your naked eye. The filled channels concentrate near the girdle, where the diamond’s widest part harbors more inclusions.
Small, dark inclusions or cracks on the pavilion and table facets become prime targets for this treatment. Multiple fractures can be filled simultaneously, creating networks of filled channels that you can’t identify without magnification.
| Location | Why It’s Targeted |
|---|---|
| Girdle area | Most inclusions concentrate here |
| Table facet | Highly visible surface cracks |
| Pavilion facets | Dark inclusions show prominently |
| Surface-reaching fractures | Naked eye visibility concerns |
The filling material’s refractive index creates rainbow effects when light passes through, distinguishing treated areas from untreated diamond sections.
When to Consult a Certified Gemologist for Verification
Although you might feel confident identifying fracture-filled diamonds yourself, certain situations demand professional expertise from a certified gemologist.
You should consult a certified gemologist when:
- The diamond appears too perfect – If a stone looks flawless despite having a lower clarity grade, professional verification can uncover hidden treatments.
- You’re making significant investments – Before purchasing expensive diamonds, get a professional appraisal to identify any fracture filling present.
- Planning repairs or modifications – Consult a certified gemologist before any work to avoid compromising filler materials.
- Detecting subtle differences – Gemologists use specialized equipment to spot refractive index variations, bubbles, and flow structures invisible to untrained eyes.
Their professional assessment guarantees you’re making informed decisions about treated diamonds.
Frequently Asked Questions
How to Tell if a Diamond Is Fracture Filled?
You’ll notice color flashes when tilting the diamond, indicating filler material. Look for trapped gas bubbles, glassy textures, and rainbow effects under magnification. Cloudy areas and crackled patterns also reveal fracture-filling treatments.
Should I Buy a Fracture-Filled Diamond?
You shouldn’t buy fracture-filled diamonds unless you’re comfortable with decreased resale value, potential treatment degradation, and ongoing maintenance risks. They’re temporarily enhanced but aren’t sound long-term investments compared to untreated stones.
Does GIA Grade Fracture Filled Diamonds?
GIA doesn’t issue full grading reports for fracture-filled diamonds. Instead, you’ll receive an identification report confirming it’s a diamond with filling noted, since the treatment’s temporary and can affect color grading.
Is Fracture Filling of a Diamond a Permanent Process?
No, fracture filling isn’t permanent. You’ll find the filler can deteriorate from heat, chemicals, or physical impact. High temperatures from jeweler’s torches or exposure to acids can compromise the filling, reversing clarity improvements.
In Summary
You’ll protect your investment by carefully examining diamonds before purchase. Look for rainbow flashes, glassy appearances, and surface fractures using a jeweler’s loupe. Don’t forget to check for proper disclosure documentation and certification. When you’re uncertain about a diamond’s treatment status, consult a certified gemologist who can perform professional testing. Remember, fracture-filled diamonds aren’t necessarily bad purchases if they’re properly disclosed and priced accordingly for their enhanced condition.


Leave a Reply